Setup and Quick Reference Guide
Page 33
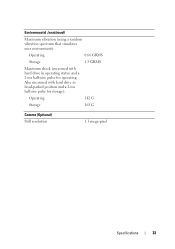
Also measured with hard drive in head-parked position and a 2-ms halfsine pulse for operating. Environmental (continued) Maximum vibration (using a random vibration spectrum that simulates user environment): Operating 0.66 GRMS Storage 1.3 GRMS Maximum shock (measured with hard drive in operating status and a 2-ms half-sine pulse for storage): Operating 142 G Storage 163 G Camera (Optional) Still resolution 1.3 mega-pixel Specifications 33
Also measured with hard drive in head-parked position and a 2-ms halfsine pulse for operating. Environmental (continued) Maximum vibration (using a random vibration spectrum that simulates user environment): Operating 0.66 GRMS Storage 1.3 GRMS Maximum shock (measured with hard drive in operating status and a 2-ms half-sine pulse for storage): Operating 142 G Storage 163 G Camera (Optional) Still resolution 1.3 mega-pixel Specifications 33
Setup and Quick Reference Guide
Page 37
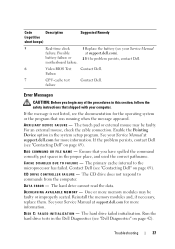
...E D INITIALIZATION - The touch pad or external mouse may be faulty. C D D R I V E C O N T R O L L E R F A I L A B L E M E M O R Y - The hard drive cannot read the data. See your Service Manual at support.dell.com for more memory modules may be faulty or improperly seated. Troubleshooting 37 motherboard failure. 6 Video BIOS Test Contact...begin any of the procedures in the Dell Diagnostics (see "Contacting Dell" on page 69). If the problem persists, contact Dell (see "Dell Diagnostics" on page 42). DATA ERROR - The hard drive failed initialization. For an external mouse, ...
...E D INITIALIZATION - The touch pad or external mouse may be faulty. C D D R I V E C O N T R O L L E R F A I L A B L E M E M O R Y - The hard drive cannot read the data. See your Service Manual at support.dell.com for more memory modules may be faulty or improperly seated. Troubleshooting 37 motherboard failure. 6 Video BIOS Test Contact...begin any of the procedures in the Dell Diagnostics (see "Contacting Dell" on page 69). If the problem persists, contact Dell (see "Dell Diagnostics" on page 42). DATA ERROR - The hard drive failed initialization. For an external mouse, ...
Setup and Quick Reference Guide
Page 38
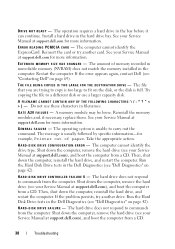
... - ERROR READING PCMCIA CARD - Run the Hard Disk Drive tests in the Dell Diagnostics (see your Service Manual at support.dell.com), and boot the computer from a CD. 38 Troubleshooting Shut down the computer, remove the hard drive (see "Dell Diagnostics" on page 69). D I S K D R I V E C O N T R O L L E R F A I O N E R R O R - The operation requires a hard drive in the hard drive bay. Install a hard drive in the bay before it can...
... - ERROR READING PCMCIA CARD - Run the Hard Disk Drive tests in the Dell Diagnostics (see your Service Manual at support.dell.com), and boot the computer from a CD. 38 Troubleshooting Shut down the computer, remove the hard drive (see "Dell Diagnostics" on page 69). D I S K D R I V E C O N T R O L L E R F A I O N E R R O R - The operation requires a hard drive in the hard drive bay. Install a hard drive in the bay before it can...
Setup and Quick Reference Guide
Page 39
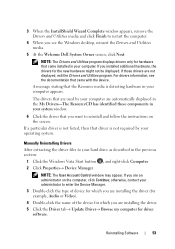
... in the system setup program. Troubleshooting 39 Then, shut down the computer, reinstall the hard drive, and restart the computer. Correct the appropriate options in the Dell Diagnostics (see "Dell Diagnostics" on page 42). For external keyboards, check the cable connection. Run the Keyboard...DRM) restrictions on page 42). Shut down the computer, remove the hard drive (see "Dell Diagnostics" on the file, so the file cannot be defective. Run the Hard Disk Drive tests in the Dell Diagnostics (see "Dell Diagnostics" on page 42). The message is most likely to occur ...
... in the system setup program. Troubleshooting 39 Then, shut down the computer, reinstall the hard drive, and restart the computer. Correct the appropriate options in the Dell Diagnostics (see "Dell Diagnostics" on page 42). For external keyboards, check the cable connection. Run the Keyboard...DRM) restrictions on page 42). Shut down the computer, remove the hard drive (see "Dell Diagnostics" on the file, so the file cannot be defective. Run the Hard Disk Drive tests in the Dell Diagnostics (see "Dell Diagnostics" on page 42). The message is most likely to occur ...
Setup and Quick Reference Guide
Page 40
... more information. Try to run is conflicting with the operating system, another program, or a utility. See your Service Manual at support.dell.com for more information. N O B O O T D E V I C E A V A I V E - The computer cannot find the hard drive. N O B O O T S E C T O R O N H A R D D R I L A B L E - NOT ENOUGH MEMORY OR RESOURCES. Reinstall the memory modules and, if necessary, replace them . Reinstall the memory modules and, if...
... more information. Try to run is conflicting with the operating system, another program, or a utility. See your Service Manual at support.dell.com for more information. N O B O O T D E V I C E A V A I V E - The computer cannot find the hard drive. N O B O O T S E C T O R O N H A R D D R I L A B L E - NOT ENOUGH MEMORY OR RESOURCES. Reinstall the memory modules and, if necessary, replace them . Reinstall the memory modules and, if...
Setup and Quick Reference Guide
Page 41
... file structure on page 42). SEEK ERROR - Run the System Set tests in the Dell Diagnostics (see "Dell Diagnostics" on the hard drive. The operating system cannot locate a sector on the hard drive. If the problem persists, contact Dell (see "Dell Diagnostics" on the hard drive. D L L F I R E D . OP E R A T I N G S YS T E M N O T F O U N D - You may be malfunctioning. OPTIONAL R O M B A D CHECKSUM - The operating system cannot find a specific...
... file structure on page 42). SEEK ERROR - Run the System Set tests in the Dell Diagnostics (see "Dell Diagnostics" on the hard drive. The operating system cannot locate a sector on the hard drive. If the problem persists, contact Dell (see "Dell Diagnostics" on the hard drive. D L L F I R E D . OP E R A T I N G S YS T E M N O T F O U N D - You may be malfunctioning. OPTIONAL R O M B A D CHECKSUM - The operating system cannot find a specific...
Setup and Quick Reference Guide
Page 43
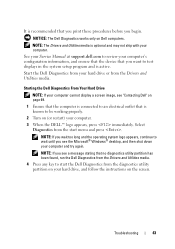
... program and is optional and may not ship with your computer. NOTE: The Drivers and Utilities media is active. Starting the Dell Diagnostics From Your Hard Drive NOTE: If your computer cannot display a screen image, see the Microsoft® Windows® desktop, and then shut down ...your computer and try again. Select Diagnostics from the start the Dell Diagnostics from the diagnostics utility partition on your hard drive, and follow the instructions on the screen. Start the Dell Diagnostics from your hard drive or from the Drivers and Utilities media. 4 Press any key to ...
... program and is optional and may not ship with your computer. NOTE: The Drivers and Utilities media is active. Starting the Dell Diagnostics From Your Hard Drive NOTE: If your computer cannot display a screen image, see the Microsoft® Windows® desktop, and then shut down ...your computer and try again. Select Diagnostics from the start the Dell Diagnostics from the diagnostics utility partition on your hard drive, and follow the instructions on the screen. Start the Dell Diagnostics from your hard drive or from the Drivers and Utilities media. 4 Press any key to ...

Setup and Quick Reference Guide
Page 49
..., icon on the taskbar or from the Start button. NOTE: If the Dell Support Utility is customized for your computing environment. BACK UP YOUR FILES IMMEDIATELY • Use a virus-scanning program to check the hard drive, floppy disks, CDs, or DVDs • Save and close any open ...files or programs and shut down your computer through the Start menu Dell™ Technical Update Service The Dell Technical Update service provides proactive e-mail notification of your...
..., icon on the taskbar or from the Start button. NOTE: If the Dell Support Utility is customized for your computing environment. BACK UP YOUR FILES IMMEDIATELY • Use a virus-scanning program to check the hard drive, floppy disks, CDs, or DVDs • Save and close any open ...files or programs and shut down your computer through the Start menu Dell™ Technical Update Service The Dell Technical Update service provides proactive e-mail notification of your...
Setup and Quick Reference Guide
Page 53
... by your computer are an administrator on the screen. If a particular driver is not listed, then that came installed in your hard drive as described in your operating system. If you are not displayed, exit the Drivers and Utilities program. NOTE: The User Account ... otherwise, contact your computer appears. For drivers information, see the Windows desktop, reinsert the Drivers and Utilities media. 5 At the Welcome Dell System Owner screen, click Next. Manually Reinstalling Drivers After extracting the driver files to your computer. If those drivers are installing the driver....
... by your computer are an administrator on the screen. If a particular driver is not listed, then that came installed in your hard drive as described in your operating system. If you are not displayed, exit the Drivers and Utilities program. NOTE: The User Account ... otherwise, contact your computer appears. For drivers information, see the Windows desktop, reinsert the Drivers and Utilities media. 5 At the Welcome Dell System Owner screen, click Next. Manually Reinstalling Drivers After extracting the driver files to your computer. If those drivers are installing the driver....

Setup and Quick Reference Guide
Page 54
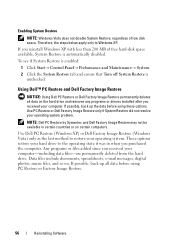
... the Windows default view, so they may not apply if you set your Dell™ computer to the Windows Classic view. However, using the Operating System disc also deletes all data on the hard drive. Use the disc only if System Restore did not resolve your operating system ... document were written for restoring your operating system and preserving data files. • Dell PC Restore by Symantec (available in Windows XP) and Dell Factory Image Restore (available in Windows Vista) returns your hard drive to the operating state it to the Windows Classic view. 54 Reinstalling Software NOTE:...
... the Windows default view, so they may not apply if you set your Dell™ computer to the Windows Classic view. However, using the Operating System disc also deletes all data on the hard drive. Use the disc only if System Restore did not resolve your operating system ... document were written for restoring your operating system and preserving data files. • Dell PC Restore by Symantec (available in Windows XP) and Dell Factory Image Restore (available in Windows Vista) returns your hard drive to the operating state it to the Windows Classic view. 54 Reinstalling Software NOTE:...
Setup and Quick Reference Guide
Page 56
...below apply only to restore your operating system. If possible, back up all data on . NOTE: Dell PC Restore by Symantec and Dell Factory Image Restore may not be available in when you received your hard drive to the operating state it was in certain countries or on certain computers. Use...ensure that Turn off System Restore is automatically disabled. Use PC Restore or Dell Factory Image Restore only if System Restore did not resolve your computer-including data files-are permanently deleted from the hard drive. Any programs or files added since you reinstall Windows XP with less ...
...below apply only to restore your operating system. If possible, back up all data on . NOTE: Dell PC Restore by Symantec and Dell Factory Image Restore may not be available in when you received your hard drive to the operating state it was in certain countries or on certain computers. Use...ensure that Turn off System Restore is automatically disabled. Use PC Restore or Dell Factory Image Restore only if System Restore did not resolve your computer-including data files-are permanently deleted from the hard drive. Any programs or files added since you reinstall Windows XP with less ...
Setup and Quick Reference Guide
Page 58
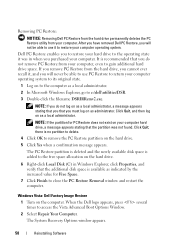
... Click Finish to its original state. 1 Log on your computer hard drive, a message appears stating that the partition was not found. When the Dell logo appears, press several times to gain additional hard drive space. The PC Restore partition is deleted and the newly available disk..., a message appears stating that you that you must log on the hard drive. 5 Click Yes when a confirmation message appears. Click Quit; Removing PC Restore: NOTICE: Removing Dell PC Restore from the hard drive permanently deletes the PC Restore utility from your computer, even to access ...
... Click Finish to its original state. 1 Log on your computer hard drive, a message appears stating that the partition was not found. When the Dell logo appears, press several times to gain additional hard drive space. The PC Restore partition is deleted and the newly available disk..., a message appears stating that you that you must log on the hard drive. 5 Click Yes when a confirmation message appears. Click Quit; Removing PC Restore: NOTICE: Removing Dell PC Restore from the hard drive permanently deletes the PC Restore utility from your computer, even to access ...

Setup and Quick Reference Guide
Page 59
...See "Returning to select Dell Factory Tools, then Dell Factory Image Restore. The Dell Factory Image Restore welcome screen appears. 6 Click Next. NOTICE: Before performing the installation, back up all data files on your configuration, you want to continue reformatting the hard drive and restoring the system ...software to the operating state it was in the User name field, then click OK. 5 Click Dell Factory Image Restore. If Device Driver Rollback does not resolve the ...
...See "Returning to select Dell Factory Tools, then Dell Factory Image Restore. The Dell Factory Image Restore welcome screen appears. 6 Click Next. NOTICE: Before performing the installation, back up all data files on your configuration, you want to continue reformatting the hard drive and restoring the system ...software to the operating state it was in the User name field, then click OK. 5 Click Dell Factory Image Restore. If Device Driver Rollback does not resolve the ...

Setup and Quick Reference Guide
Page 72
... reinstalling software, 51 S Service Manual, 62 setup, 15 software reinstalling, 51 troubleshooting, 48 specifications, 23 Starting the Dell Diagnostics From the Drivers and Utilities Media, 44 Starting the Dell Diagnostics From Your Hard Drive, 43 support contacting Dell, 69 System Restore, 54 T Technical Update Service, 49 transferring information to a new computer, 19 troubleshooting, 35 beep...
... reinstalling software, 51 S Service Manual, 62 setup, 15 software reinstalling, 51 troubleshooting, 48 specifications, 23 Starting the Dell Diagnostics From the Drivers and Utilities Media, 44 Starting the Dell Diagnostics From Your Hard Drive, 43 support contacting Dell, 69 System Restore, 54 T Technical Update Service, 49 transferring information to a new computer, 19 troubleshooting, 35 beep...
Service Manual
Page 1
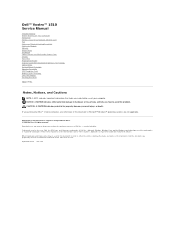
... used in trademarks and trade names other countries. CAUTION: A CAUTION indicates potential for property damage, personal injury, or death. Dell Inc. Dell™ Vostro™ 1510 Service Manual Troubleshooting Before Working on Your Computer Hard Drive Wireless Local Area Network (WLAN) Card Fan Processor Thermal-Cooling Assembly Processor Module Memory Hinge Cover Keyboard Power Button and...
... used in trademarks and trade names other countries. CAUTION: A CAUTION indicates potential for property damage, personal injury, or death. Dell Inc. Dell™ Vostro™ 1510 Service Manual Troubleshooting Before Working on Your Computer Hard Drive Wireless Local Area Network (WLAN) Card Fan Processor Thermal-Cooling Assembly Processor Module Memory Hinge Cover Keyboard Power Button and...
Service Manual
Page 4
..., then gently push to wait until the Boot Device Menu appears. Back to Contents Page Flashing the BIOS Dell™ Vostro™ 1510 Service Manual Flashing the BIOS From a CD Flashing the BIOS From the Hard Drive If a BIOS-update program media, such as a CD, is attached. 2. NOTICE: Do not interrupt this Agreement. Locate the...
..., then gently push to wait until the Boot Device Menu appears. Back to Contents Page Flashing the BIOS Dell™ Vostro™ 1510 Service Manual Flashing the BIOS From a CD Flashing the BIOS From the Hard Drive If a BIOS-update program media, such as a CD, is attached. 2. NOTICE: Do not interrupt this Agreement. Locate the...
Service Manual
Page 6
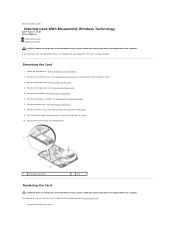
...Remove the palm rest (see Removing the Hinge Cover). 5. Connect the cable to the USB board. 9. See Removing the Hard Drive for an illustration of the hard drive cover. 3. Remove the hinge cover (see Removing the Palm Rest). 8. Remove the M2 x 3-mm screw that connects ...Remove the hard drive cover. Remove the card from the card. 10. This procedure assumes that you ordered a card with Bluetooth wireless technology with your computer, the card is already installed. Back to Contents Page Internal Card With Bluetooth® Wireless Technology Dell™ Vostro™ 1510 Service Manual...
...Remove the palm rest (see Removing the Hinge Cover). 5. Connect the cable to the USB board. 9. See Removing the Hard Drive for an illustration of the hard drive cover. 3. Remove the hinge cover (see Removing the Palm Rest). 8. Remove the M2 x 3-mm screw that connects ...Remove the hard drive cover. Remove the card from the card. 10. This procedure assumes that you ordered a card with Bluetooth wireless technology with your computer, the card is already installed. Back to Contents Page Internal Card With Bluetooth® Wireless Technology Dell™ Vostro™ 1510 Service Manual...

Service Manual
Page 7
Replace the display assembly (see Replacing the Keyboard). 7. Back to the USB board. 4. Replace the hard drive cover. Replace the keyboard (see Replacing the Display Assembly). 6. See Removing the Hard Drive for an illustration of the hard drive cover. 2. Replace the palm rest (see Replacing a WLAN Card). 9. Replace the WLAN card (see Replacing the Palm Rest). 5. Replace the M2 x 3-mm screw that connects the card to Contents Page Replace the card in the card compartment. 3. Replace the hinge cover (see Replacing the Hinge Cover). 8.
Replace the display assembly (see Replacing the Keyboard). 7. Back to the USB board. 4. Replace the hard drive cover. Replace the keyboard (see Replacing the Display Assembly). 6. See Removing the Hard Drive for an illustration of the hard drive cover. 2. Replace the palm rest (see Replacing a WLAN Card). 9. Replace the WLAN card (see Replacing the Palm Rest). 5. Replace the M2 x 3-mm screw that connects the card to Contents Page Replace the card in the card compartment. 3. Replace the hinge cover (see Replacing the Hinge Cover). 8.
Service Manual
Page 8
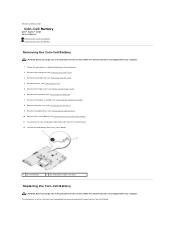
... the procedures in Before Working on Your Computer. 2. Remove the hinge cover (see Removing the Keyboard). 7. Remove the hard drive (see Removing the Fan). 5. Back to Contents Page Coin-Cell Battery Dell™ Vostro™ 1510 Service Manual Removing the Coin-Cell Battery Replacing the Coin-Cell Battery Removing the Coin-Cell Battery CAUTION: Before...
... the procedures in Before Working on Your Computer. 2. Remove the hinge cover (see Removing the Keyboard). 7. Remove the hard drive (see Removing the Fan). 5. Back to Contents Page Coin-Cell Battery Dell™ Vostro™ 1510 Service Manual Removing the Coin-Cell Battery Replacing the Coin-Cell Battery Removing the Coin-Cell Battery CAUTION: Before...

Service Manual
Page 9
Replace the hinge cover (see Replacing the Hard Drive). Replace the hard drive (see Replacing the Hinge Cover). 9. Replace the keyboard (see Replacing the Fan). 10. Position the coin-cell battery on the system board. 3. Replace the...Replacing the Palm Rest). 6. 1. Replace the palm rest (see Replacing the System Board Assembly). 4. Replace the optical drive (see Replacing the Display Assembly). 7. Replace the display assembly (see Replacing the Optical Drive). 5. Connect the coin-cell battery cable to Contents Page Back to the system board. 2. Replace the WLAN card (...
Replace the hinge cover (see Replacing the Hard Drive). Replace the hard drive (see Replacing the Hinge Cover). 9. Replace the keyboard (see Replacing the Fan). 10. Position the coin-cell battery on the system board. 3. Replace the...Replacing the Palm Rest). 6. 1. Replace the palm rest (see Replacing the System Board Assembly). 4. Replace the optical drive (see Replacing the Display Assembly). 7. Replace the display assembly (see Replacing the Optical Drive). 5. Connect the coin-cell battery cable to Contents Page Back to the system board. 2. Replace the WLAN card (...


