
User Manual
Page 6
...or a UL Listed 26 AWG or larger replacement when connecting this product is not responsible for signs of such problems. Remove the power cord from the printer before inspecting it. This product is incorrectly replaced. The safety features of fire or electrical shock results. The ... network. Discard used lithium batteries according to abrasion or stress. CAUTION-SHOCK HAZARD: Do not use of the printer, unplug the power cord from the wall outlet and disconnect all external connections (such as Ethernet and telephone system connections) are properly installed in their marked ...
...or a UL Listed 26 AWG or larger replacement when connecting this product is not responsible for signs of such problems. Remove the power cord from the printer before inspecting it. This product is incorrectly replaced. The safety features of fire or electrical shock results. The ... network. Discard used lithium batteries according to abrasion or stress. CAUTION-SHOCK HAZARD: Do not use of the printer, unplug the power cord from the wall outlet and disconnect all external connections (such as Ethernet and telephone system connections) are properly installed in their marked ...
User Manual
Page 11
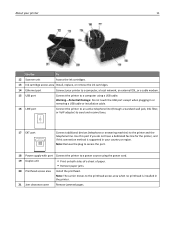
... using a USB cable. Note: Remove the plug to access the port. 18 Power supply with port Connect the printer to the printhead access area when no printhead is supported in your printer to a computer, a local network, an external ... jack, DSL filter, or VoIP adapter) to send and receive faxes. 17 EXT port Connect additional devices (telephone or answering machine) to a computer using the power cord. 19 Duplex unit • Print on both sides of a sheet of paper. • Remove paper jams. 20 Printhead access area Install the printhead.
... using a USB cable. Note: Remove the plug to access the port. 18 Power supply with port Connect the printer to the printhead access area when no printhead is supported in your printer to a computer, a local network, an external ... jack, DSL filter, or VoIP adapter) to send and receive faxes. 17 EXT port Connect additional devices (telephone or answering machine) to a computer using the power cord. 19 Duplex unit • Print on both sides of a sheet of paper. • Remove paper jams. 20 Printhead access area Install the printhead.

User Manual
Page 71
... the cable from the wall jack to the public switched telephone network. CAUTION-SHOCK HAZARD: Do not use only the telecommunications (RJ-11) cord provided with this product or a UL Listed 26 AWG or larger replacement when connecting this product to the port of the printer. Do not... of rings that you want to receive faxes automatically (Auto Answer On), then set up on any electrical or cabling connections, such as the power supply cord or telephone, during a lightning storm. Faxing 71 Faxing CAUTION-POTENTIAL INJURY: To reduce risk of fire, use the fax feature during a lightning...
... the cable from the wall jack to the public switched telephone network. CAUTION-SHOCK HAZARD: Do not use only the telecommunications (RJ-11) cord provided with this product or a UL Listed 26 AWG or larger replacement when connecting this product to the port of the printer. Do not... of rings that you want to receive faxes automatically (Auto Answer On), then set up on any electrical or cabling connections, such as the power supply cord or telephone, during a lightning storm. Faxing 71 Faxing CAUTION-POTENTIAL INJURY: To reduce risk of fire, use the fax feature during a lightning...
User Manual
Page 125
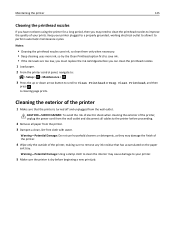
...: Do not use household cleaners or detergents, as they may need to clean the printhead nozzles to improve the quality of the printer, unplug the power cord from the wall outlet and disconnect all cables to perform automatic maintenance cycles.
...: Do not use household cleaners or detergents, as they may need to clean the printhead nozzles to improve the quality of the printer, unplug the power cord from the wall outlet and disconnect all cables to perform automatic maintenance cycles.
User Manual
Page 128
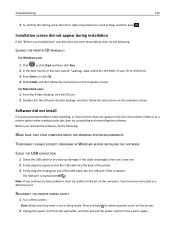
Troubleshooting 128 Troubleshooting Before you troubleshoot Use this checklist to solve most printer problems: • Make sure the power cord is plugged into the printer and into a properly grounded, working electrical outlet. • Make sure the printer is turned on. • Make sure the printer ...; "Cannot print through USB" on page 132 Incorrect language appears on . If Troubleshooting does not solve your problem Visit our Web site at http://support.dell.com to the language you want, and then press .
Troubleshooting 128 Troubleshooting Before you troubleshoot Use this checklist to solve most printer problems: • Make sure the power cord is plugged into the printer and into a properly grounded, working electrical outlet. • Make sure the printer is turned on. • Make sure the printer ...; "Cannot print through USB" on page 132 Incorrect language appears on . If Troubleshooting does not solve your problem Visit our Web site at http://support.dell.com to the language you want, and then press .
User Manual
Page 129
... to scroll to turn off the printer. If the cable is marked with . RECONNECT THE PRINTER POWER SUPPLY 1 Turn off the printer. 2 Unplug the power cord from the wall outlet, and then pull out the power cord from the power supply. The USB port is damaged, then use a new one. 2 Firmly plug the square end of...
... to scroll to turn off the printer. If the cable is marked with . RECONNECT THE PRINTER POWER SUPPLY 1 Turn off the printer. 2 Unplug the power cord from the wall outlet, and then pull out the power cord from the power supply. The USB port is damaged, then use a new one. 2 Firmly plug the square end of...

User Manual
Page 130
...DEFAULT PRINTER RECONNECT THE PRINTER POWER SUPPLY 1 Turn off the printer. 2 Unplug the power cord from the wall outlet, and then pull out the power cord from the power supply. 3 After one minute, reconnect the power cord into the power supply, and then plug the power cord into the wall outlet. ...open the printer. 2 Make sure the cartridges are inserted correctly. Troubleshooting 130 3 After one minute, reconnect the power cord into the power supply, and then plug the power cord into the matching color slot of the following : MAKE SURE THE INK CARTRIDGES ARE INSERTED CORRECTLY 1 Turn the...
...DEFAULT PRINTER RECONNECT THE PRINTER POWER SUPPLY 1 Turn off the printer. 2 Unplug the power cord from the wall outlet, and then pull out the power cord from the power supply. 3 After one minute, reconnect the power cord into the power supply, and then plug the power cord into the wall outlet. ...open the printer. 2 Make sure the cartridges are inserted correctly. Troubleshooting 130 3 After one minute, reconnect the power cord into the power supply, and then plug the power cord into the matching color slot of the following : MAKE SURE THE INK CARTRIDGES ARE INSERTED CORRECTLY 1 Turn the...
User Manual
Page 131
... Deep Clean Printhead, and then press . If the printer will not come out of Sleep mode, then reset the power: 1 Unplug the power cord from the wall outlet, and then wait 10 seconds. 2 Insert the power cord into the USB port of the computer. Note: If you troubleshoot" checklist does not solve the problem, then... 131 CHECK THE USB CONNECTION 1 Check the USB cable for more of the following: MAKE SURE THE PRINTER IS NOT IN SLEEP MODE If the power light is blinking on and off slowly, then the printer is in Sleep mode.
... Deep Clean Printhead, and then press . If the printer will not come out of Sleep mode, then reset the power: 1 Unplug the power cord from the wall outlet, and then wait 10 seconds. 2 Insert the power cord into the USB port of the computer. Note: If you troubleshoot" checklist does not solve the problem, then... 131 CHECK THE USB CONNECTION 1 Check the USB cable for more of the following: MAKE SURE THE PRINTER IS NOT IN SLEEP MODE If the power light is blinking on and off slowly, then the printer is in Sleep mode.
User Manual
Page 132
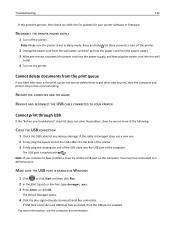
... Bus controllers. Press and hold for your printer software or firmware. Cannot delete documents from the power supply. 3 After one minute, reconnect the power cord into the power supply, and then plug the power cord into the USB port of the following: CHECK THE USB CONNECTION 1 Check the USB cable for... USB If the "Before you have jobs stuck in Sleep mode. RECONNECT THE PRINTER POWER SUPPLY 1 Turn off the printer. 2 Unplug the power cord from the wall outlet, and then pull out the power cord from the print queue If you troubleshoot" checklist does not solve the problem, then...
... Bus controllers. Press and hold for your printer software or firmware. Cannot delete documents from the power supply. 3 After one minute, reconnect the power cord into the power supply, and then plug the power cord into the USB port of the following: CHECK THE USB CONNECTION 1 Check the USB cable for... USB If the "Before you have jobs stuck in Sleep mode. RECONNECT THE PRINTER POWER SUPPLY 1 Turn off the printer. 2 Unplug the power cord from the wall outlet, and then pull out the power cord from the print queue If you troubleshoot" checklist does not solve the problem, then...
User Manual
Page 159
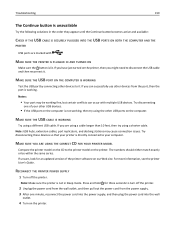
...the USB port on the printer. If unsure, look for three seconds to it . Try disconnecting one minute, reconnect the power cord into the power supply, and then plug the power cord into the wall outlet. 4 Turn on the computer is not working fine, but certain conflicts can successfully use other devices ... PRINTER MODEL Compare the printer model on the CD to disconnect the USB cable and then reconnect it . RECONNECT THE PRINTER POWER SUPPLY 1 Turn off the printer. 2 Unplug the power cord from the wall outlet, and then pull out the power cord from the port, then the port is working.
...the USB port on the printer. If unsure, look for three seconds to it . Try disconnecting one minute, reconnect the power cord into the power supply, and then plug the power cord into the wall outlet. 4 Turn on the computer is not working fine, but certain conflicts can successfully use other devices ... PRINTER MODEL Compare the printer model on the CD to disconnect the USB cable and then reconnect it . RECONNECT THE PRINTER POWER SUPPLY 1 Turn off the printer. 2 Unplug the power cord from the wall outlet, and then pull out the power cord from the port, then the port is working.

User Manual
Page 171
... the Sleep Mode Timeout to a low value reduces energy consumption, but may not apply to completely stop product power consumption, disconnect the power supply cord from hard‑copy original documents. 17 Scan The product is scanning hard‑copy documents. 11 Ready The...saving mode. 4.5 Off The product is plugged into a wall outlet, but uses more energy. Notices 171 Power consumption Product power consumption The following table documents the power consumption characteristics of each mode in minutes): 60 By using the configuration menus, the Sleep Mode Timeout can...
... the Sleep Mode Timeout to a low value reduces energy consumption, but may not apply to completely stop product power consumption, disconnect the power supply cord from hard‑copy original documents. 17 Scan The product is scanning hard‑copy documents. 11 Ready The...saving mode. 4.5 Off The product is plugged into a wall outlet, but uses more energy. Notices 171 Power consumption Product power consumption The following table documents the power consumption characteristics of each mode in minutes): 60 By using the configuration menus, the Sleep Mode Timeout can...

