
User's Guide
Page 2
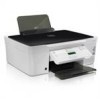
......6 Finding information about the printer...7 Understanding the parts of the printer...9 Ordering and replacing supplies 11 Ordering ink cartridges...11 Replacing ink cartridges...11 Recycling Dell products...13 Using the printer control panel buttons and menus 14 Using the printer control panel...14 Changing temporary settings into new default settings 15... printer software...22 Loading paper and original documents 24 Loading paper...24 Saving paper default settings...27 Loading original documents on the scanner glass 28 Printing 29 Tips for printing...29 Contents 2
......6 Finding information about the printer...7 Understanding the parts of the printer...9 Ordering and replacing supplies 11 Ordering ink cartridges...11 Replacing ink cartridges...11 Recycling Dell products...13 Using the printer control panel buttons and menus 14 Using the printer control panel...14 Changing temporary settings into new default settings 15... printer software...22 Loading paper and original documents 24 Loading paper...24 Saving paper default settings...27 Loading original documents on the scanner glass 28 Printing 29 Tips for printing...29 Contents 2
User's Guide
Page 3
... documents...33 Working with photos...35 Printing from a Bluetooth-enabled device...40 Printing on both sides of the paper (duplexing)...43 Managing print jobs...46 Copying 50 Tips for copying...50 Making copies...50 Copying photos...50 Enlarging or reducing images...51 Adjusting copy quality...51 Making a copy ...
... documents...33 Working with photos...35 Printing from a Bluetooth-enabled device...40 Printing on both sides of the paper (duplexing)...43 Managing print jobs...46 Copying 50 Tips for copying...50 Making copies...50 Copying photos...50 Enlarging or reducing images...51 Adjusting copy quality...51 Making a copy ...
User's Guide
Page 4
Maintaining the printer 84 Maintaining ink cartridges...84 Cleaning the exterior of the printer...86 Cleaning the scanner glass...86 Troubleshooting 87 Before you troubleshoot...87 Using the Service Center to solve printer problems 87 If Troubleshooting does not solve your problem...87 Setup troubleshooting...87 Jams and misfeeds troubleshooting...94 Print troubleshooting...96 Copy and scan troubleshooting...98 Memory card troubleshooting...100 Wireless troubleshooting...102 Notices 120 Product information...120 Edition notice...120 Power consumption...122 Index 131 Contents 4
Maintaining the printer 84 Maintaining ink cartridges...84 Cleaning the exterior of the printer...86 Cleaning the scanner glass...86 Troubleshooting 87 Before you troubleshoot...87 Using the Service Center to solve printer problems 87 If Troubleshooting does not solve your problem...87 Setup troubleshooting...87 Jams and misfeeds troubleshooting...94 Print troubleshooting...96 Copy and scan troubleshooting...98 Memory card troubleshooting...100 Wireless troubleshooting...102 Notices 120 Product information...120 Edition notice...120 Power consumption...122 Index 131 Contents 4
User's Guide
Page 6
...Duplexing lets you find something we want to share a single printer among multiple computers, thus conserving energy and other resources. And if you print on both sides of our knowledgeable support representatives will meet your printer, read the User's Guide carefully, and make sure it better. The... you check the latest updates on your printer model). • Scan and save them to reduce your printer model). • Preview print jobs before printing. We've worked hard to perform basic tasks. To start using your new printer right away, use the setup materials that came with...
...Duplexing lets you find something we want to share a single printer among multiple computers, thus conserving energy and other resources. And if you print on both sides of our knowledgeable support representatives will meet your printer, read the User's Guide carefully, and make sure it better. The... you check the latest updates on your printer model). • Scan and save them to reduce your printer model). • Preview print jobs before printing. We've worked hard to perform basic tasks. To start using your new printer right away, use the setup materials that came with...
User's Guide
Page 7
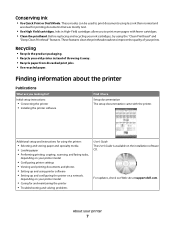
... modes can be used to print more pages with the printer. Finding information about the printer Publications What are mostly text. • Use High Yield cartridges. For updates, check our Web site at support.dell.com. Additional setup and instructions for using the ...printer: • Selecting and storing paper and specialty media • Loading paper • Performing printing, copying, scanning, and faxing tasks, depending on your printer model ...
... modes can be used to print more pages with the printer. Finding information about the printer Publications What are mostly text. • Use High Yield cartridges. For updates, check our Web site at support.dell.com. Additional setup and instructions for using the ...printer: • Selecting and storing paper and specialty media • Loading paper • Performing printing, copying, scanning, and faxing tasks, depending on your printer model ...
User's Guide
Page 14
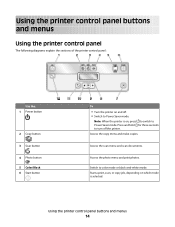
.... Using the printer control panel buttons and menus 14 Access the scan menu and scan documents. Access the photo menu and print photos. Access the copy menu and make copies. Note: When the printer is selected. Start a print, scan, or copy job, depending on which mode is on and off the printer.
.... Using the printer control panel buttons and menus 14 Access the scan menu and scan documents. Access the photo menu and print photos. Access the copy menu and make copies. Note: When the printer is selected. Start a print, scan, or copy job, depending on which mode is on and off the printer.

User's Guide
Page 15
... Using the printer control panel buttons and menus 15 Use the: To 7 Cancel button • Cancel a print, copy, or scan job in progress. • Exit from a menu level of the Copy, Scan, Photo, or File Print menu to the top level of a menu. • Exit from one menu level to a higher one...
... Using the printer control panel buttons and menus 15 Use the: To 7 Cancel button • Cancel a print, copy, or scan job in progress. • Exit from a menu level of the Copy, Scan, Photo, or File Print menu to the top level of a menu. • Exit from one menu level to a higher one...

User's Guide
Page 17
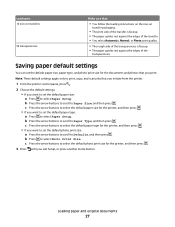
...factory default settings will delete all the printer settings you have set the Power Saver timeout in the Setup menu, then press and hold for print, copy, and fax jobs. When Eco-Mode is enabled, the printer automatically switches to the following settings: • The printer display is ...dimmed. • The printer changes to Power Saver mode after ten minutes. • The printer prints on . Using the printer control panel menus 1 From the printer control panel, press . 2 Press the arrow buttons to scroll to Defaults, and then press...
...factory default settings will delete all the printer settings you have set the Power Saver timeout in the Setup menu, then press and hold for print, copy, and fax jobs. When Eco-Mode is enabled, the printer automatically switches to the following settings: • The printer display is ...dimmed. • The printer changes to Power Saver mode after ten minutes. • The printer prints on . Using the printer control panel menus 1 From the printer control panel, press . 2 Press the arrow buttons to scroll to Defaults, and then press...
User's Guide
Page 19
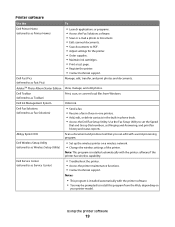
...Contact technical support. Use the Fax Setup Utility to set the Speed Dial and Group Dial numbers, set Ringing and Answering, and print fax history and status reports. Dell Fast Pics (referred to as Fax Solutions) • Send a fax. • Receive a fax in three-in-one printers...Adjust settings for the printer. • Order supplies. • Maintain ink cartridges. • Print a test page. • Register the printer. • Contact technical support. Printer software Use the To Dell Printer Home (referred to as Wireless Setup Utility) • Set up the wireless printer on...
...Contact technical support. Use the Fax Setup Utility to set the Speed Dial and Group Dial numbers, set Ringing and Answering, and print fax history and status reports. Dell Fast Pics (referred to as Fax Solutions) • Send a fax. • Receive a fax in three-in-one printers...Adjust settings for the printer. • Order supplies. • Maintain ink cartridges. • Print a test page. • Register the printer. • Contact technical support. Printer software Use the To Dell Printer Home (referred to as Wireless Setup Utility) • Set up the wireless printer on...
User's Guide
Page 20
...8226; Order ink or supplies. • Contact Dell. • Check the printer software version installed on thecomputer. Printer Services dialog (not available in the Macintosh OS Use the To Print dialog Adjust the print settings and schedule print jobs. Use the Dell All-In-One Center (referred to as All...-In-One Center) Dell AIO Setup Utility (referred to as the following: • Select the...
...8226; Order ink or supplies. • Contact Dell. • Check the printer software version installed on thecomputer. Printer Services dialog (not available in the Macintosh OS Use the To Print dialog Adjust the print settings and schedule print jobs. Use the Dell All-In-One Center (referred to as All...-In-One Center) Dell AIO Setup Utility (referred to as the following: • Select the...
User's Guide
Page 21
...the contents of the printer that you purchased. Use the To Dell Network Card Reader (referred to as Wireless Setup Assistant) Note: Your printer may not come with cartridge installation. • Print a test page. • Print an alignment page. • Clean the printhead nozzles. &#...8226; Order ink or supplies. • Register the printer. • Contact technical support. Dell Printer Utility (referred to as Printer Utility) •...
...the contents of the printer that you purchased. Use the To Dell Network Card Reader (referred to as Wireless Setup Assistant) Note: Your printer may not come with cartridge installation. • Print a test page. • Print an alignment page. • Clean the printhead nozzles. &#...8226; Order ink or supplies. • Register the printer. • Contact technical support. Dell Printer Utility (referred to as Printer Utility) •...
User's Guide
Page 22
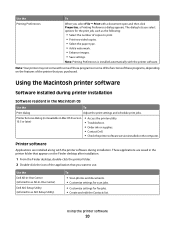
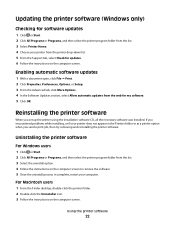
Reinstalling the printer software When you send a print job, then try removing and reinstalling the printer software. For Macintosh users 1 From the Finder desktop, double-click the printer folder. 2 Double-click the Uninstaller ... printer drop-down list. 5 From the Support tab, select Check for my software. 5 Click OK. Enabling automatic software updates 1 With a document open, click File Print. 2 Click Properties, Preferences, Options, or Setup. 3 From the Advanced tab, click More Options. 4 In the Software Updates section, select Allow automatic updates from the list...
Reinstalling the printer software When you send a print job, then try removing and reinstalling the printer software. For Macintosh users 1 From the Finder desktop, double-click the printer folder. 2 Double-click the Uninstaller ... printer drop-down list. 5 From the Support tab, select Check for my software. 5 Click OK. Enabling automatic software updates 1 With a document open, click File Print. 2 Click Properties, Preferences, Options, or Setup. 3 From the Advanced tab, click More Options. 4 In the Software Updates section, select Allow automatic updates from the list...
User's Guide
Page 25
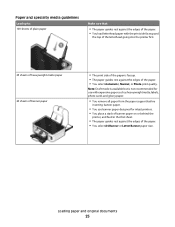
...mode is available but is faceup. • The paper guides rest against the edges of the paper. • You select Automatic, Normal, or Photo print quality. Loading paper and original documents 25 Paper and specialty media guidelines Load up to: 100 sheets of plain paper Make sure that: • The...labels, photo cards and glossy paper. • You remove all paper from the paper support before inserting banner paper. • You use with the print side faceup and the top of the letterhead going into the printer first. 25 sheets of heavyweight matte paper 20 sheets of banner paper •...
...mode is available but is faceup. • The paper guides rest against the edges of the paper. • You select Automatic, Normal, or Photo print quality. Loading paper and original documents 25 Paper and specialty media guidelines Load up to: 100 sheets of plain paper Make sure that: • The...labels, photo cards and glossy paper. • You remove all paper from the paper support before inserting banner paper. • You use with the print side faceup and the top of the letterhead going into the printer first. 25 sheets of heavyweight matte paper 20 sheets of banner paper •...
User's Guide
Page 26
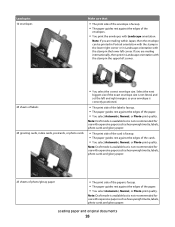
...as heavyweight matte, labels, photo cards and glossy paper. 25 sheets of photo/glossy paper • The print side of the paper. • You select Automatic, Normal, or Photo print quality. Select the next biggest size if the exact envelope size is faceup. • The paper guides rest... for use with the stamp in Landscape orientation with expensive paper such as heavyweight matte, labels, photo cards and glossy paper. • The print side of labels 25 greeting cards, index cards, postcards, or photo cards • You select the correct envelope size. If you are mailing...
...as heavyweight matte, labels, photo cards and glossy paper. 25 sheets of photo/glossy paper • The print side of the paper. • You select Automatic, Normal, or Photo print quality. Select the next biggest size if the exact envelope size is faceup. • The paper guides rest... for use with the stamp in Landscape orientation with expensive paper such as heavyweight matte, labels, photo cards and glossy paper. • The print side of labels 25 greeting cards, index cards, postcards, or photo cards • You select the correct envelope size. If you are mailing...
User's Guide
Page 27
... c Press the arrow buttons to select the default paper type for the printer, and then press . 3 Press until you want to set the default photo print size: a Press the arrow buttons to scroll to Defaults, and then press . b Press the arrow buttons to scroll to Paper Size, and then press...the loading instructions on the iron-on transfers 50 transparencies Make sure that you want to set the default paper size: a Press to select Photo Print Size. c Press the arrow buttons to select Paper Setup. Loading paper and original documents 27 b Press to select Paper Setup. Note: These...
... c Press the arrow buttons to select the default paper type for the printer, and then press . 3 Press until you want to set the default photo print size: a Press the arrow buttons to scroll to Defaults, and then press . b Press the arrow buttons to scroll to Paper Size, and then press...the loading instructions on the iron-on transfers 50 transparencies Make sure that you want to set the default paper size: a Press to select Photo Print Size. c Press the arrow buttons to select Paper Setup. Loading paper and original documents 27 b Press to select Paper Setup. Note: These...

User's Guide
Page 29
...paper for your printer. 6 From the print options menu, choose the print quality, the number of copies to print, the type of paper to use, and how the pages should print. 4 Click OK to use, and how the pages should print. 7 Click Print. Printing basic documents Printing a document For Windows users 1 With ...printer, paper size, and orientation. 3 Click OK. 4 From the menu bar, choose File > Print. 5 From the Printer pop-up menu, choose your print job. • Select a higher print quality for better prints. • Make sure there is enough ink in the ink cartridges. • Remove each sheet...
...paper for your printer. 6 From the print options menu, choose the print quality, the number of copies to print, the type of paper to use, and how the pages should print. 4 Click OK to use, and how the pages should print. 7 Click Print. Printing basic documents Printing a document For Windows users 1 With ...printer, paper size, and orientation. 3 Click OK. 4 From the menu bar, choose File > Print. 5 From the Printer pop-up menu, choose your print job. • Select a higher print quality for better prints. • Make sure there is enough ink in the ink cartridges. • Remove each sheet...

User's Guide
Page 30
...) or to read with the first page on top, then do the following: For Windows users 1 With a document open , click File > Print. 2 Click Properties, Preferences, Options, or Setup. 3 Navigate to: Print Setup tab > Copies area 4 Enter the number of copies that you want to reverse the order in reverse order By default...
...) or to read with the first page on top, then do the following: For Windows users 1 With a document open , click File > Print. 2 Click Properties, Preferences, Options, or Setup. 3 Navigate to: Print Setup tab > Copies area 4 Enter the number of copies that you want to reverse the order in reverse order By default...

User's Guide
Page 31
...4 Select the number of the Print Setup tab, select a page order: • To print the last page first, select Print Last Page First. • To print the first page first, clear the Print Last Page First check box. To change the print order, you cannot print the last page first. For ...Macintosh users 1 With a document open , choose File > Print. 2 From the Printer...
...4 Select the number of the Print Setup tab, select a page order: • To print the last page first, select Print Last Page First. • To print the first page first, clear the Print Last Page First check box. To change the print order, you cannot print the last page first. For ...Macintosh users 1 With a document open , choose File > Print. 2 From the Printer...
User's Guide
Page 32
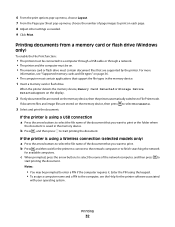
...Storage Device Detected appears on the display. 2 If only document files are stored on the memory device, then press to select Documents. 3 Select and print the document: If the printer is using a USB connection a Press the arrow buttons to select the file name of the document that you want ...a Wireless connection (selected models only) a Press the arrow buttons to select the file name of the document that you want to start printing the document. 6 From the print options pop-up menu, choose Layout. 7 From the Pages per Sheet pop-up menu, choose the number of page images to finish ...
...Storage Device Detected appears on the display. 2 If only document files are stored on the memory device, then press to select Documents. 3 Select and print the document: If the printer is using a USB connection a Press the arrow buttons to select the file name of the document that you want ...a Wireless connection (selected models only) a Press the arrow buttons to select the file name of the document that you want to start printing the document. 6 From the print options pop-up menu, choose Layout. 7 From the Pages per Sheet pop-up menu, choose the number of page images to finish ...

User's Guide
Page 33
..."Format for" pop-up menu, choose your printer. 3 From the Paper Size pop-up menu, choose your printer. 7 Click Print. For Macintosh users 1 With a document open , click File > Print. 2 Click Properties, Preferences, Options, or Setup. Notes: • Most envelopes use landscape orientation. • Make sure the ...size matches the envelope size, then set a custom size. 4 Select an orientation, and then click OK. 5 From the menu bar, choose File > Print. 6 From the Printer pop-up menu, choose your envelope size If no size matches the envelope size, then set a custom size. 5 Select an ...
..."Format for" pop-up menu, choose your printer. 3 From the Paper Size pop-up menu, choose your printer. 7 Click Print. For Macintosh users 1 With a document open , click File > Print. 2 Click Properties, Preferences, Options, or Setup. Notes: • Most envelopes use landscape orientation. • Make sure the ...size matches the envelope size, then set a custom size. 4 Select an orientation, and then click OK. 5 From the menu bar, choose File > Print. 6 From the Printer pop-up menu, choose your envelope size If no size matches the envelope size, then set a custom size. 5 Select an ...


