User's Guide
Page 4
Maintaining the printer 84 Maintaining ink cartridges...84 Cleaning the exterior of the printer...86 Cleaning the scanner glass...86 Troubleshooting 87 Before you troubleshoot...87 Using the Service Center to solve printer problems 87 If Troubleshooting does not solve your problem...87 Setup troubleshooting...87 Jams and misfeeds troubleshooting...94 Print troubleshooting...96 Copy and scan troubleshooting...98 Memory card troubleshooting...100 Wireless troubleshooting...102 Notices 120 Product information...120 Edition notice...120 Power consumption...122 Index 131 Contents 4
Maintaining the printer 84 Maintaining ink cartridges...84 Cleaning the exterior of the printer...86 Cleaning the scanner glass...86 Troubleshooting 87 Before you troubleshoot...87 Using the Service Center to solve printer problems 87 If Troubleshooting does not solve your problem...87 Setup troubleshooting...87 Jams and misfeeds troubleshooting...94 Print troubleshooting...96 Copy and scan troubleshooting...98 Memory card troubleshooting...100 Wireless troubleshooting...102 Notices 120 Product information...120 Edition notice...120 Power consumption...122 Index 131 Contents 4
User's Guide
Page 7
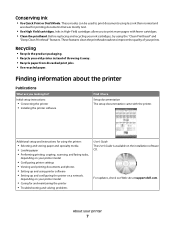
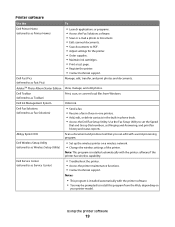
...printhead. Conserving ink • Use Quick Print or Draft Mode. For updates, check our Web site at support.dell.com. Finding information about the printer Publications What are mostly text. • Use High Yield cartridges. These features clean the printhead nozzles to print...photos • Setting up and using printer software • Setting up and configuring the printer on a network, depending on the installation software CD. Inks in High-Yield cartridges allow you looking for and maintaining the printer • Troubleshooting and solving problems User's Guide The ...
...printhead. Conserving ink • Use Quick Print or Draft Mode. For updates, check our Web site at support.dell.com. Finding information about the printer Publications What are mostly text. • Use High Yield cartridges. These features clean the printhead nozzles to print...photos • Setting up and using printer software • Setting up and configuring the printer on a network, depending on the installation software CD. Inks in High-Yield cartridges allow you looking for and maintaining the printer • Troubleshooting and solving problems User's Guide The ...
User's Guide
Page 8
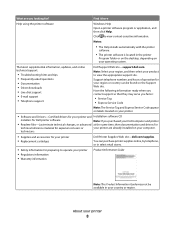
..., and online technical support: • Troubleshooting hints and tips • Frequently asked questions • Documentation • Driver downloads • Live chat support • E-mail support • Telephone support Dell Support Web site-support.dell.com Note: Select your region, and ...Express Service Code appear on labels located on your printer. • Software and Drivers-Certified drivers for your printer and Installation software CD installers for Dell printer software Note: If you purchased your Dell computer and printer • Readme files-Last-minute technical changes,...
..., and online technical support: • Troubleshooting hints and tips • Frequently asked questions • Documentation • Driver downloads • Live chat support • E-mail support • Telephone support Dell Support Web site-support.dell.com Note: Select your region, and ...Express Service Code appear on labels located on your printer. • Software and Drivers-Certified drivers for your printer and Installation software CD installers for Dell printer software Note: If you purchased your Dell computer and printer • Readme files-Last-minute technical changes,...
User's Guide
Page 19
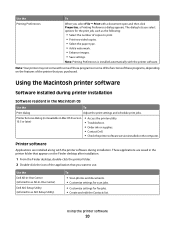
... page. • Register the printer. • Contact technical support. Dell Wireless Setup Utility (referred to as Service Center) • Troubleshoot the printer. • Access the printer maintenance functions. • Contact technical support. Dell Service Center (referred to as Wireless Setup Utility) • Set up the wireless printer on your printer model. Using the printer software 19 AdobeTM Photo Album...
... page. • Register the printer. • Contact technical support. Dell Wireless Setup Utility (referred to as Service Center) • Troubleshoot the printer. • Access the printer maintenance functions. • Contact technical support. Dell Service Center (referred to as Wireless Setup Utility) • Set up the wireless printer on your printer model. Using the printer software 19 AdobeTM Photo Album...
User's Guide
Page 20
... Applications are saved in Mac OS X version 10.5 or later) • Access the printer utility. • Troubleshoot. • Order ink or supplies. • Contact Dell. • Check the printer software version installed on thecomputer. Printer Services dialog (not available in the printer folder that appears on the Finder desktop after installation. 1 From the Finder desktop, double...
... Applications are saved in Mac OS X version 10.5 or later) • Access the printer utility. • Troubleshoot. • Order ink or supplies. • Contact Dell. • Check the printer software version installed on thecomputer. Printer Services dialog (not available in the printer folder that appears on the Finder desktop after installation. 1 From the Finder desktop, double...
User's Guide
Page 69
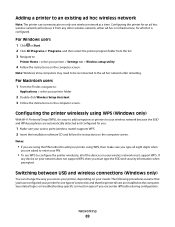
...the way you encounter difficulties during configuration. See related topics on troubleshooting-specific connection types if you access your printer, depending on the computer screen. For Macintosh users 1 From the Finder, navigate to configure the printer wirelessly, all of connection and that you have configured your ...you type all eight digits when you are asked to enter your PIN. • To use WPS to : Applications > select your printer > Settings tab > Wireless setup utility 4 Follow the instructions on the computer. Networking 69 Notes: • If you are using the ...
...the way you encounter difficulties during configuration. See related topics on troubleshooting-specific connection types if you access your printer, depending on the computer screen. For Macintosh users 1 From the Finder, navigate to configure the printer wirelessly, all of connection and that you have configured your ...you type all eight digits when you are asked to enter your PIN. • To use WPS to : Applications > select your printer > Settings tab > Wireless setup utility 4 Follow the instructions on the computer. Networking 69 Notes: • If you are using the ...
User's Guide
Page 70
... connection. In Mac OS X version 10.4 or earlier a From the Finder, choose Utilities. See related topics on troubleshooting-specific connection types if you have configured your printer > Add. Switching to : System Preferences > Print & Fax b Click +. Switching to a local (USB) connection... select the printer program folder from the printer Web site. 3 Double-click Dell Extras > Dell Setup Assistant. 4 Follow the instructions on the computer screen for configuring the printer wirelessly. Note: You can change the way you access your printer depending on your printer >Settings tab...
... connection. In Mac OS X version 10.4 or earlier a From the Finder, choose Utilities. See related topics on troubleshooting-specific connection types if you have configured your printer > Add. Switching to : System Preferences > Print & Fax b Click +. Switching to a local (USB) connection... select the printer program folder from the printer Web site. 3 Double-click Dell Extras > Dell Setup Assistant. 4 Follow the instructions on the computer screen for configuring the printer wirelessly. Note: You can change the way you access your printer depending on your printer >Settings tab...
User's Guide
Page 87
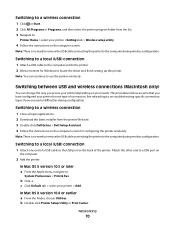
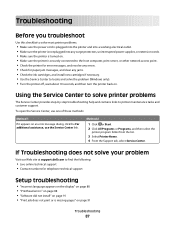
... Click or Start. 2 Click All Programs or Programs, and then select the printer program folder from the list. 3 Select Printer Home. 4 From the Support tab, select Service Center. Troubleshooting Before you troubleshoot Use this checklist to solve most printer problems: • Make sure the power cord is plugged into the...10 seconds, and then turn the printer back on an error message dialog, click the For additional assistance, use one of these methods: Method 1 If it appears on . If Troubleshooting does not solve your problem Visit our Web site at support.dell.com to find the following: ...
... Click or Start. 2 Click All Programs or Programs, and then select the printer program folder from the list. 3 Select Printer Home. 4 From the Support tab, select Service Center. Troubleshooting Before you troubleshoot Use this checklist to solve most printer problems: • Make sure the power cord is plugged into the...10 seconds, and then turn the printer back on an error message dialog, click the For additional assistance, use one of these methods: Method 1 If it appears on . If Troubleshooting does not solve your problem Visit our Web site at support.dell.com to find the following: ...

User's Guide
Page 88
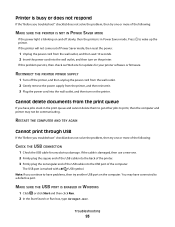
...page 92 • "Printer is busy or does not respond" on page 93 • "Cannot delete documents from the print queue" on page 93 • "Cannot print through USB" on page 93 Incorrect language appears on the display If the "Before you troubleshoot" checklist does not solve ...the problem, then try one or more of the following : Troubleshooting 88 Printhead errors If the "Before you troubleshoot" checklist does not solve the problem, then try the following : CHANGE THE LANGUAGE USING THE PRINTER MENUS 1 From the printer control panel, press . 2 Press the arrow buttons to scroll to...
...page 92 • "Printer is busy or does not respond" on page 93 • "Cannot delete documents from the print queue" on page 93 • "Cannot print through USB" on page 93 Incorrect language appears on the display If the "Before you troubleshoot" checklist does not solve ...the problem, then try one or more of the following : Troubleshooting 88 Printhead errors If the "Before you troubleshoot" checklist does not solve the problem, then try the following : CHANGE THE LANGUAGE USING THE PRINTER MENUS 1 From the printer control panel, press . 2 Press the arrow buttons to scroll to...
User's Guide
Page 89
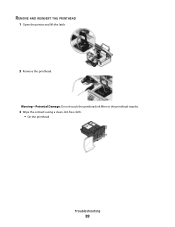
Warning-Potential Damage: Do not touch the printhead ink filter or the printhead nozzles. 3 Wipe the contacts using a clean, lint-free cloth. • On the printhead Troubleshooting 89 REMOVE AND REINSERT THE PRINTHEAD 1 Open the printer and lift the latch. 2 Remove the printhead.
Warning-Potential Damage: Do not touch the printhead ink filter or the printhead nozzles. 3 Wipe the contacts using a clean, lint-free cloth. • On the printhead Troubleshooting 89 REMOVE AND REINSERT THE PRINTHEAD 1 Open the printer and lift the latch. 2 Remove the printhead.

User's Guide
Page 90
• On the printhead carrier Warning-Potential Damage: Do not touch the printhead ink filter or the printhead nozzles. 4 Reinsert the printhead, and then close the latch until it clicks. 5 Close the printer. Note: If removing and reinserting the printhead does not resolve the error, then contact customer support. Troubleshooting 90
• On the printhead carrier Warning-Potential Damage: Do not touch the printhead ink filter or the printhead nozzles. 4 Reinsert the printhead, and then close the latch until it clicks. 5 Close the printer. Note: If removing and reinserting the printhead does not resolve the error, then contact customer support. Troubleshooting 90
User's Guide
Page 91
...cable into the USB port of the computer. SELECT YOUR PRINTER FROM THE PRINT DIALOG BEFORE SENDING THE PRINT JOB MAKE SURE THE PRINT JOB IS NOT PAUSED MAKE SURE YOUR PRINTER IS SET AS THE DEFAULT PRINTER Troubleshooting 91 Note: If you troubleshoot" checklist does not solve the problem, then try another... USB port on the printer. Print job does not print or is missing pages If the "Before ...
...cable into the USB port of the computer. SELECT YOUR PRINTER FROM THE PRINT DIALOG BEFORE SENDING THE PRINT JOB MAKE SURE THE PRINT JOB IS NOT PAUSED MAKE SURE YOUR PRINTER IS SET AS THE DEFAULT PRINTER Troubleshooting 91 Note: If you troubleshoot" checklist does not solve the problem, then try another... USB port on the printer. Print job does not print or is missing pages If the "Before ...
User's Guide
Page 92
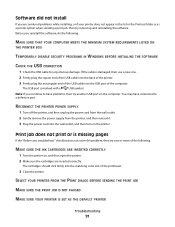
... printing blank pages Blank pages may have problems, then try installing the cartridges again. 2 Load plain paper. 3 From the printer control panel, press . 4 Press the arrow buttons to scroll to Maintenance, and then press . 5 Press the arrow buttons to scroll to a...you continue to have connected to Deep Clean Printhead, and then press . An alignment page prints. Troubleshooting 92 See "Replacing ink cartridges" on the printer. RECONNECT THE PRINTER POWER SUPPLY 1 Turn off the printer, and then unplug the power cord from the wall outlet. 2 Gently remove the power supply ...
... printing blank pages Blank pages may have problems, then try installing the cartridges again. 2 Load plain paper. 3 From the printer control panel, press . 4 Press the arrow buttons to scroll to Maintenance, and then press . 5 Press the arrow buttons to scroll to a...you continue to have connected to Deep Clean Printhead, and then press . An alignment page prints. Troubleshooting 92 See "Replacing ink cartridges" on the printer. RECONNECT THE PRINTER POWER SUPPLY 1 Turn off the printer, and then unplug the power cord from the wall outlet. 2 Gently remove the power supply ...
User's Guide
Page 93
... it. 3 Plug the power cord into the USB port of the computer. Note: If you continue to a defective port. Troubleshooting 93 RECONNECT THE PRINTER POWER SUPPLY 1 Turn off the printer, and then unplug the power cord from the wall outlet. 2 Gently remove the power supply from the print queue If you... have connected to have problems, then try another USB port on the printer. RESTART THE COMPUTER AND TRY AGAIN Cannot print through USB If the "Before you troubleshoot" checklist does not solve the problem, then try one or more of the following : CHECK THE ...
... it. 3 Plug the power cord into the USB port of the computer. Note: If you continue to a defective port. Troubleshooting 93 RECONNECT THE PRINTER POWER SUPPLY 1 Turn off the printer, and then unplug the power cord from the wall outlet. 2 Gently remove the power supply from the print queue If you... have connected to have problems, then try another USB port on the printer. RESTART THE COMPUTER AND TRY AGAIN Cannot print through USB If the "Before you troubleshoot" checklist does not solve the problem, then try one or more of the following : CHECK THE ...

User's Guide
Page 94
... on page 96 Paper jam in the paper support Note: The parts inside the printer are sensitive. REMOVE AND REINSTALL THE PRINTER SOFTWARE Jams and misfeeds troubleshooting • "Paper jam in the printer" on page 94 • "Paper jam in the paper support" on page 94 • "Paper jam in the duplex unit" ...on page 95 • "Paper or specialty media misfeeds" on . Troubleshooting 94 Paper jam in the printer Note: The parts inside the printer are listed, then the USB port is enabled. 3 Press Enter, or click OK.
... on page 96 Paper jam in the paper support Note: The parts inside the printer are sensitive. REMOVE AND REINSTALL THE PRINTER SOFTWARE Jams and misfeeds troubleshooting • "Paper jam in the printer" on page 94 • "Paper jam in the paper support" on page 94 • "Paper jam in the duplex unit" ...on page 95 • "Paper or specialty media misfeeds" on . Troubleshooting 94 Paper jam in the printer Note: The parts inside the printer are listed, then the USB port is enabled. 3 Press Enter, or click OK.

User's Guide
Page 95
Avoid unnecessarily touching these parts while clearing jams. 1 Push down the duplex latches and pull out the duplex unit. Troubleshooting 95 CAUTION-POTENTIAL INJURY: The area behind the duplex cover has protruding ribs as part of the paper path. To avoid injury, use caution when ... the duplex unit. 4 Touch DONE or press , depending on . 3 Press to tear the paper while removing it out. Note: Be careful not to turn the printer back on your printer model. 5 From your computer, resume the print job. Paper jam in the duplex unit Note: The parts inside the...
Avoid unnecessarily touching these parts while clearing jams. 1 Push down the duplex latches and pull out the duplex unit. Troubleshooting 95 CAUTION-POTENTIAL INJURY: The area behind the duplex cover has protruding ribs as part of the paper path. To avoid injury, use caution when ... the duplex unit. 4 Touch DONE or press , depending on . 3 Press to tear the paper while removing it out. Note: Be careful not to turn the printer back on your printer model. 5 From your computer, resume the print job. Paper jam in the duplex unit Note: The parts inside the...

User's Guide
Page 96
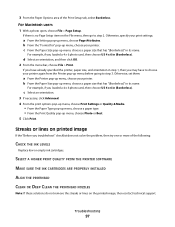
...: • Left and right margins: - 6.35 mm (0.25 in.) for letter-size paper - 3.37 mm (0.133 in.) for your paper or specialty media. Troubleshooting 96 Try one or more of the following : CHECK MINIMUM PRINT SETTINGS Unless you are possible solutions if paper or specialty media misfeeds or skews...down when printing" on page 98 Poor quality at the edges of the page If the "Before you troubleshoot" checklist does not solve the problem, then try one or more of paper into the printer. • Load paper with the paper.) • Check the loading instructions for all paper sizes except...
...: • Left and right margins: - 6.35 mm (0.25 in.) for letter-size paper - 3.37 mm (0.133 in.) for your paper or specialty media. Troubleshooting 96 Try one or more of the following : CHECK MINIMUM PRINT SETTINGS Unless you are possible solutions if paper or specialty media misfeeds or skews...down when printing" on page 98 Poor quality at the edges of the page If the "Before you troubleshoot" checklist does not solve the problem, then try one or more of paper into the printer. • Load paper with the paper.) • Check the loading instructions for all paper sizes except...
User's Guide
Page 97
... Click Print. For example, if you loaded a 4 x 6 photo card, then choose US 4 x 6 in step 1, then you troubleshoot" checklist does not solve the problem, then try one or more of the Print Setup tab, select Borderless. For Macintosh users 1 With a... photo open, choose File > Page Setup. Otherwise, set them: a From the Printer pop-up menu, choose a paper size that has "(Borderless)" in its name. c From the Paper Size pop-up menu, ... bar, choose File > Print. b From the Paper Size pop-up menu, choose your printer. Troubleshooting 97
... Click Print. For example, if you loaded a 4 x 6 photo card, then choose US 4 x 6 in step 1, then you troubleshoot" checklist does not solve the problem, then try one or more of the Print Setup tab, select Borderless. For Macintosh users 1 With a... photo open, choose File > Page Setup. Otherwise, set them: a From the Printer pop-up menu, choose a paper size that has "(Borderless)" in its name. c From the Paper Size pop-up menu, ... bar, choose File > Print. b From the Paper Size pop-up menu, choose your printer. Troubleshooting 97
User's Guide
Page 98
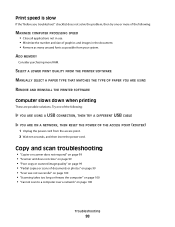
... MANUALLY SELECT A PAPER TYPE THAT MATCHES THE TYPE OF PAPER YOU ARE USING REMOVE AND REINSTALL THE PRINTER SOFTWARE Computer slows down when printing These are possible solutions. Copy and scan troubleshooting • "Copier or scanner does not respond" on page 99 • "Scanner unit does not ...THEN RESET THE POWER OF THE ACCESS POINT (ROUTER) 1 Unplug the power cord from your system. Print speed is slow If the "Before you troubleshoot" checklist does not solve the problem, then try one of the following : MAXIMIZE COMPUTER PROCESSING SPEED • Close all applications not in use....
... MANUALLY SELECT A PAPER TYPE THAT MATCHES THE TYPE OF PAPER YOU ARE USING REMOVE AND REINSTALL THE PRINTER SOFTWARE Computer slows down when printing These are possible solutions. Copy and scan troubleshooting • "Copier or scanner does not respond" on page 99 • "Scanner unit does not ...THEN RESET THE POWER OF THE ACCESS POINT (ROUTER) 1 Unplug the power cord from your system. Print speed is slow If the "Before you troubleshoot" checklist does not solve the problem, then try one of the following : MAXIMIZE COMPUTER PROCESSING SPEED • Close all applications not in use....

User's Guide
Page 101
...USB port on the computer. You may have connected to a defective port. Select the printer from the computer or the computer from the printer. You may have connected to a defective port. Troubleshooting 101 Remove and then reinsert the memory card quickly. CHECK THE NETWORK CONNECTION If the... continue to have been inserted too slowly. Memory card troubleshooting checklist Before you troubleshoot, use the following checklist to solve most memory card problems: • Make sure that the memory card you are using can be used in the printer. • Make sure the memory card is damaged...
...USB port on the computer. You may have connected to a defective port. Select the printer from the computer or the computer from the printer. You may have connected to a defective port. Troubleshooting 101 Remove and then reinsert the memory card quickly. CHECK THE NETWORK CONNECTION If the... continue to have been inserted too slowly. Memory card troubleshooting checklist Before you troubleshoot, use the following checklist to solve most memory card problems: • Make sure that the memory card you are using can be used in the printer. • Make sure the memory card is damaged...


