Dell™ Technology Guide
Page 82
... NOTE: High-speed optical drive vibration is shut down. 2 Straighten a paper clip and insert one end into the eject hole at the front of different regions worldwide and different disc formats, not all DVD drives. RUN CHECK DISK -...H E C O M P U T E R T O C O O L B E F O R E T U R N I N G I T O N - See "Running the Dell Diagnostics" on . See the help files for drives that are not slot-loading) 1 Ensure that the disc is partially ejected. 3 Gently pull out the tray until it on page 281. The drive tray cannot eject (for your CD, DVD, or BD software. A hot hard drive may cause noise...
... NOTE: High-speed optical drive vibration is shut down. 2 Straighten a paper clip and insert one end into the eject hole at the front of different regions worldwide and different disc formats, not all DVD drives. RUN CHECK DISK -...H E C O M P U T E R T O C O O L B E F O R E T U R N I N G I T O N - See "Running the Dell Diagnostics" on . See the help files for drives that are not slot-loading) 1 Ensure that the disc is partially ejected. 3 Gently pull out the tray until it on page 281. The drive tray cannot eject (for your CD, DVD, or BD software. A hot hard drive may cause noise...
Dell™ Technology Guide
Page 204
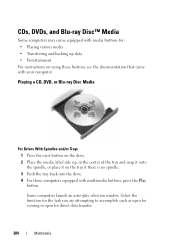
... the spindle, or place it on using these buttons see the documentation that came with your computer. Playing a CD, DVD, or Blu-ray Disc Media For Drives With Spindles and/or Trays 1 Press the eject button on the drive. 2 Place the media, label side up data • Entertainment For instructions on the...
... the spindle, or place it on using these buttons see the documentation that came with your computer. Playing a CD, DVD, or Blu-ray Disc Media For Drives With Spindles and/or Trays 1 Press the eject button on the drive. 2 Place the media, label side up data • Entertainment For instructions on the...
Dell™ Technology Guide
Page 205
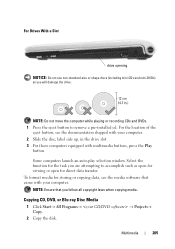
... media for storing or copying data, see the documentation shipped with multimedia buttons, press the Play button. Multimedia 205 For the location of the eject button, see the media software that you will damage the drive. NOTE: Do not move the computer while playing or recording... CDs and DVDs. 1 Press the eject button to accomplish such as you follow all copyright laws when copying media. Copying CD, DVD, or Blu-ray Disc Media 1 Click Start→ All Programs→ → Projects→ ...
... media for storing or copying data, see the documentation shipped with multimedia buttons, press the Play button. Multimedia 205 For the location of the eject button, see the media software that you will damage the drive. NOTE: Do not move the computer while playing or recording... CDs and DVDs. 1 Press the eject button to accomplish such as you follow all copyright laws when copying media. Copying CD, DVD, or Blu-ray Disc Media 1 Click Start→ All Programs→ → Projects→ ...
Dell™ Technology Guide
Page 206
...data from the source disk to create audio DVDs with your source disk and copies the data to the blank disk. The computer reads your CD/DVD software. HINT: Use Microsoft® Windows® Explorer to drag and drop files to a disk only after you have finished copying the... source disk, it automatically ejects. See the manufacturer's instructions on your CD/DVD creation software and open a project. • Use a blank disk to practice recording. • You may not be able to...
...data from the source disk to create audio DVDs with your source disk and copies the data to the blank disk. The computer reads your CD/DVD software. HINT: Use Microsoft® Windows® Explorer to drag and drop files to a disk only after you have finished copying the... source disk, it automatically ejects. See the manufacturer's instructions on your CD/DVD creation software and open a project. • Use a blank disk to practice recording. • You may not be able to...


