Quick Reference Guide
Page 2
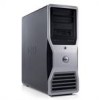
...Dell, the DELL logo, and Dell Precision are trademarks of your computer. is subject to change without the written permission of Dell Inc. A00 Trademarks used in this document is strictly forbidden. disclaims any manner whatsoever without notice. © 2007 Dell Inc. Microsoft, Windows, and Windows... Vista are either trademarks or registered trademarks of data and tells you make better use of Dell Inc.; NOTICE: A NOTICE indicates either the entities claiming...
...Dell, the DELL logo, and Dell Precision are trademarks of your computer. is subject to change without the written permission of Dell Inc. A00 Trademarks used in this document is strictly forbidden. disclaims any manner whatsoever without notice. © 2007 Dell Inc. Microsoft, Windows, and Windows... Vista are either trademarks or registered trademarks of data and tells you make better use of Dell Inc.; NOTICE: A NOTICE indicates either the entities claiming...
Quick Reference Guide
Page 5
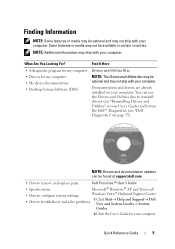
... "Reinstalling Drivers and Utilities" in certain countries. You can be found at support.dell.com. • How to remove and replace parts Dell Precision™ User's Guide • Specifications Microsoft® Windows® XP and Microsoft • How to configure system settings Windows Vista™ Help and Support Center • How to troubleshoot and solve...
... "Reinstalling Drivers and Utilities" in certain countries. You can be found at support.dell.com. • How to remove and replace parts Dell Precision™ User's Guide • Specifications Microsoft® Windows® XP and Microsoft • How to configure system settings Windows Vista™ Help and Support Center • How to troubleshoot and solve...

Quick Reference Guide
Page 6
...8226; Ergonomics information • End User License Agreement Find It Here Dell™ Product Information Guide • Service Tag and Express Service Code • Microsoft® Windows® Product Key Service Tag and Microsoft Windows Product Key These labels are located on your computer: • Use... the Service Tag to identify your computer when you use support.dell.com or contact Dell support. • Enter the Express...
...8226; Ergonomics information • End User License Agreement Find It Here Dell™ Product Information Guide • Service Tag and Express Service Code • Microsoft® Windows® Product Key Service Tag and Microsoft Windows Product Key These labels are located on your computer: • Use... the Service Tag to identify your computer when you use support.dell.com or contact Dell support. • Enter the Express...
Quick Reference Guide
Page 8
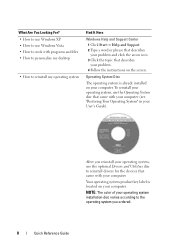
...installed on your computer. After you ordered. 8 Quick Reference Guide What Are You Looking For? • How to use Windows XP • How to use Windows Vista • How to work with your computer. To reinstall your operating system, use the Operating System disc that came with... instructions on your User's Guide). NOTE: The color of your operating system installation disc varies according to reinstall my operating system Find It Here Windows Help and Support Center 1 Click Start→ Help and Support. 2 Type a word or phrase that describes your problem and click the arrow...
...installed on your computer. After you ordered. 8 Quick Reference Guide What Are You Looking For? • How to use Windows XP • How to use Windows Vista • How to work with your computer. To reinstall your operating system, use the Operating System disc that came with... instructions on your User's Guide). NOTE: The color of your operating system installation disc varies according to reinstall my operating system Find It Here Windows Help and Support Center 1 Click Start→ Help and Support. 2 Type a word or phrase that describes your problem and click the arrow...

Quick Reference Guide
Page 13
...one computer to another computer over a serial connection, you . This information may not be available in Windows XP. NOTE: For more information about transferring data, search support.dell.com for you must use your computer or a wizard disk, which the wizard can create for ...document #154781 (What Are The Different Methods To Transfer Files From My Old Computer To My New Dell™ Computer Using the Microsoft Windows XP Operating System?). Transferring Information to a New Computer You can use the Network Connections utility in certain countries. ...
...one computer to another computer over a serial connection, you . This information may not be available in Windows XP. NOTE: For more information about transferring data, search support.dell.com for you must use your computer or a wizard disk, which the wizard can create for ...document #154781 (What Are The Different Methods To Transfer Files From My Old Computer To My New Dell™ Computer Using the Microsoft Windows XP Operating System?). Transferring Information to a New Computer You can use the Network Connections utility in certain countries. ...

Quick Reference Guide
Page 14
...Which computer is going to be transferred as the new computer. Do not click Next. COPY DATA FROM THE SOURCE COMPUTER - 1 Insert the Windows XP Operating System disc into the source computer. Files and Settings Transfer Wizard (With the Operating System Disc) NOTE: The Files and Settings Transfer .... 6 Under Select a transfer method, click the transfer method of your old computer, click Next. 14 Quick Reference Guide The Welcome to Microsoft Windows XP screen appears. 2 Click Perform additional tasks. 3 Under What do you want to do you want to transfer?, click to select the data...
...Which computer is going to be transferred as the new computer. Do not click Next. COPY DATA FROM THE SOURCE COMPUTER - 1 Insert the Windows XP Operating System disc into the source computer. Files and Settings Transfer Wizard (With the Operating System Disc) NOTE: The Files and Settings Transfer .... 6 Under Select a transfer method, click the transfer method of your old computer, click Next. 14 Quick Reference Guide The Welcome to Microsoft Windows XP screen appears. 2 Click Perform additional tasks. 3 Under What do you want to do you want to transfer?, click to select the data...

Quick Reference Guide
Page 15
... the old computer, and designates the destination computer to which the data is this ?, click New computer, and then click Next. 3 Under Do you have a Windows XP CD?, click I want to create a Wizard Disk in the following drive, and then click Next. 4 Insert a writable CD or DVD, and then click OK...
... the old computer, and designates the destination computer to which the data is this ?, click New computer, and then click Next. 3 Under Do you have a Windows XP CD?, click I want to create a Wizard Disk in the following drive, and then click Next. 4 Insert a writable CD or DVD, and then click OK...

Quick Reference Guide
Page 16
... settings and files, and then click Next. Follow the instructions provided on the screen by the Windows Easy Transfer wizard. Microsoft Windows Vista 1 Click the Windows Vista Start button , and then click Transfer files and settings→ Start Windows Easy Transfer. 2 In the User Account Control dialog box, click Continue. 3 Click Start a new transfer...
... settings and files, and then click Next. Follow the instructions provided on the screen by the Windows Easy Transfer wizard. Microsoft Windows Vista 1 Click the Windows Vista Start button , and then click Transfer files and settings→ Start Windows Easy Transfer. 2 In the User Account Control dialog box, click Continue. 3 Click Start a new transfer...

Quick Reference Guide
Page 32
... a cable may be malfunctioning (see "Keyboard Problems" in your User's Guide). H A R D - Possible hard drive failure during the operating system setup or is loose (see "Contacting Dell" in your User's Guide for assistance). N O B O O T D E V I C E A V A I S K E T T E - Replace the floppy disk with one ...either not detected during hard-drive boot test (see "Entering System Setup" in the search field and press to resolve the incompatibility. Windows XP: 1 Click Start→ Help and Support. 2 Type hardware troubleshooter in your User's Guide for a loose cable connection. ...
... a cable may be malfunctioning (see "Keyboard Problems" in your User's Guide). H A R D - Possible hard drive failure during the operating system setup or is loose (see "Contacting Dell" in your User's Guide for assistance). N O B O O T D E V I C E A V A I S K E T T E - Replace the floppy disk with one ...either not detected during hard-drive boot test (see "Entering System Setup" in the search field and press to resolve the incompatibility. Windows XP: 1 Click Start→ Help and Support. 2 Type hardware troubleshooter in your User's Guide for a loose cable connection. ...

Quick Reference Guide
Page 33
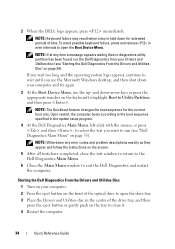
...NOTE: Print the following procedures before you run the Dell Diagnostics before you contact Dell for assistance. You can run the Dell Diagnostics from the Drivers and Utilities disc. Starting the Dell Diagnostics From Your Hard Drive The Dell Diagnostics is active. NOTE: If your computer cannot ...your computer, perform the checks in "Lockups and Software Problems" (see "Contacting Dell" in your User's Guide. 1 Turn on (or restart) your hard drive. Quick Reference Guide 33 Windows Vista: 1 Click the Windows Vista start button , and click Help and Support. 2 Type hardware troubleshooter ...
...NOTE: Print the following procedures before you run the Dell Diagnostics before you contact Dell for assistance. You can run the Dell Diagnostics from the Drivers and Utilities disc. Starting the Dell Diagnostics From Your Hard Drive The Dell Diagnostics is active. NOTE: If your computer cannot ...your computer, perform the checks in "Lockups and Software Problems" (see "Contacting Dell" in your User's Guide. 1 Turn on (or restart) your hard drive. Quick Reference Guide 33 Windows Vista: 1 Click the Windows Vista start button , and click Help and Support. 2 Type hardware troubleshooter ...
Quick Reference Guide
Page 34
...that no diagnostics utility partition has been found, run (see "Starting the Dell Diagnostics From the Drivers and Utilities Disc" on the keyboard to highlight Boot to select the test you see the Microsoft Windows desktop, and then shut down -arrow keys or press the appropriate number...computer boots according to exit the Dell Diagnostics and restart the computer. and down your Drivers and Utilities disc (see "Dell Diagnostics Main Menu" on the tray to close the test window to return to the Dell Diagnostics Main Menu. 6 Close the Main Menu window to the boot sequence specified in...
...that no diagnostics utility partition has been found, run (see "Starting the Dell Diagnostics From the Drivers and Utilities Disc" on the keyboard to highlight Boot to select the test you see the Microsoft Windows desktop, and then shut down -arrow keys or press the appropriate number...computer boots according to exit the Dell Diagnostics and restart the computer. and down your Drivers and Utilities disc (see "Dell Diagnostics Main Menu" on the tray to close the test window to return to the Dell Diagnostics Main Menu. 6 Close the Main Menu window to the boot sequence specified in...
Quick Reference Guide
Page 35
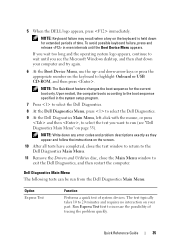
... the instructions on page 35). Run Express Test first to select the test you see "Dell Diagnostics Main Menu" on the screen. 10 After all tests have completed, close the test window to return to the Dell Diagnostics Main Menu. 11 Remove the Drivers and Utilities disc, close the Main Menu... window to wait until the Boot Device Menu appears. To avoid possible keyboard failure, press and release...
... the instructions on page 35). Run Express Test first to select the test you see "Dell Diagnostics Main Menu" on the screen. 10 After all tests have completed, close the test window to return to the Dell Diagnostics Main Menu. 11 Remove the Drivers and Utilities disc, close the Main Menu... window to wait until the Boot Device Menu appears. To avoid possible keyboard failure, press and release...
Quick Reference Guide
Page 37
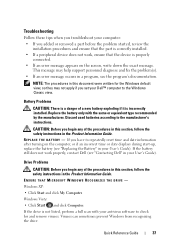
... in your User's Guide). Windows Vista: • Click Start and click Computer. Quick Reference Guide 37 ENSURE THAT MICROSOFT WINDOWS RECOGNIZES THE DRIVE - If you have to the Windows Classic view. Windows XP: • Click Start... the problem started, review the installation procedures and ensure that the part is correctly installed. • If a peripheral device does not work properly, contact Dell (see "Contacting Dell" in this section, follow the safety instructions in a program, see the program's documentation. NOTE: The procedures in your User's Guide). R E P ...
... in your User's Guide). Windows Vista: • Click Start and click Computer. Quick Reference Guide 37 ENSURE THAT MICROSOFT WINDOWS RECOGNIZES THE DRIVE - If you have to the Windows Classic view. Windows XP: • Click Start... the problem started, review the installation procedures and ensure that the part is correctly installed. • If a peripheral device does not work properly, contact Dell (see "Contacting Dell" in this section, follow the safety instructions in a program, see the program's documentation. NOTE: The procedures in your User's Guide). R E P ...
Quick Reference Guide
Page 38
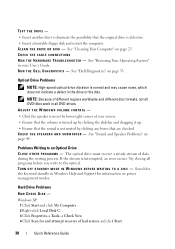
...by clicking any boxes that the original drive is defective. • Insert a bootable floppy disk and restart the computer. Windows XP: 1 Click Start and click My Computer. 2 Right-click Local Disk C:. 3 Click Properties→ Tools→... Optical Drive C L O S E O T H E R P R O G R A M S - C H E C K T H E S P E A K E R S A N D S U B W O O F E R - CHECK THE CABLE CONNECTIONS R U N T H E H A R D W A R E TR O U B L E S H O O T E R - See "Dell Diagnostics" on page 23. If the stream is normal and may cause noise, which does not indicate a defect in the drive or the disc. See...
...by clicking any boxes that the original drive is defective. • Insert a bootable floppy disk and restart the computer. Windows XP: 1 Click Start and click My Computer. 2 Right-click Local Disk C:. 3 Click Properties→ Tools→... Optical Drive C L O S E O T H E R P R O G R A M S - C H E C K T H E S P E A K E R S A N D S U B W O O F E R - CHECK THE CABLE CONNECTIONS R U N T H E H A R D W A R E TR O U B L E S H O O T E R - See "Dell Diagnostics" on page 23. If the stream is normal and may cause noise, which does not indicate a defect in the drive or the disc. See...

Quick Reference Guide
Page 39
...8226; Ensure that is connected to continue the desired action. 4 Follow the instructions on the computer, click Continue; Windows Vista: 1 Click Start and click Computer. 2 Right-click Local Disk C:. 3 Click Properties→ Tools→ Check Now. The User... Account Control window may appear. NOTE: Connect the modem to the telephone wall jack. C H E C K T H E M I C R O S O F T O U T L O O K E X P R E S S S E C U R I T Y S E T T I N G S - E-Mail, Modem, and ...
...8226; Ensure that is connected to continue the desired action. 4 Follow the instructions on the computer, click Continue; Windows Vista: 1 Click Start and click Computer. 2 Right-click Local Disk C:. 3 Click Properties→ Tools→ Check Now. The User... Account Control window may appear. NOTE: Connect the modem to the telephone wall jack. C H E C K T H E M I C R O S O F T O U T L O O K E X P R E S S S E C U R I T Y S E T T I N G S - E-Mail, Modem, and ...

Quick Reference Guide
Page 40
.... Error Messages CAUTION: Before you have subscribed to verify that the modem is not listed, see the documentation for your Internet service provider. Windows Vista: 1 Click Start → Control Panel→ Hardware and Sound→ Phone and Modem Options→ Modems. 2 Click the COM...; Diagnostics→ Query Modem to an Internet provider. With the Outlook Express e-mail program open, click File. RUN THE MODEM DIAGNOSTIC TOOL - Windows Vista: 1 Click Start → All Programs→ Modem Diagnostic Tool. 2 Follow the instructions on all commands receive responses, the modem is ...
.... Error Messages CAUTION: Before you have subscribed to verify that the modem is not listed, see the documentation for your Internet service provider. Windows Vista: 1 Click Start → Control Panel→ Hardware and Sound→ Phone and Modem Options→ Modems. 2 Click the COM...; Diagnostics→ Query Modem to an Internet provider. With the Outlook Express e-mail program open, click File. RUN THE MODEM DIAGNOSTIC TOOL - Windows Vista: 1 Click Start → All Programs→ Modem Diagnostic Tool. 2 Follow the instructions on all commands receive responses, the modem is ...

Quick Reference Guide
Page 41
... restart your User's Guide). IEEE 1394 Device Problems CAUTION: Before you want to restore computer resources. ENSURE THAT THE IEEE 1394 DEVICE IS RECOGNIZED BY WINDOWS - D L L F I S K E R R O R - S YS T E M D I L E W A S N O T F O U N D - Contact Dell (see "Contacting Dell" in your computer to use . See "System Setup Options" in your computer. CLOSE SOME PROGRAMS AND TRY...
... restart your User's Guide). IEEE 1394 Device Problems CAUTION: Before you want to restore computer resources. ENSURE THAT THE IEEE 1394 DEVICE IS RECOGNIZED BY WINDOWS - D L L F I S K E R R O R - S YS T E M D I L E W A S N O T F O U N D - Contact Dell (see "Contacting Dell" in your computer to use . See "System Setup Options" in your computer. CLOSE SOME PROGRAMS AND TRY...

Quick Reference Guide
Page 42
...R O B L E M S W I T H A D E L L I E E E 1 3 9 4 D E V I G H T S - R U N T H E H A R D W A R E TR O U B L E S H O O T E R - Contact Dell (see "Turning Off Your Computer" in your User's Guide). Straighten any bent pins. • Remove any keyboard extension cables and connect the keyboard directly to...Keyboard Problems CAUTION: Before you begin any of the procedures in this section, follow the safety instructions in the Product Information Guide. Windows Vista: 1 Click Start → Control Panel→ Hardware and Sound. 2 Click Device Manager. The computer does not start up...
...R O B L E M S W I T H A D E L L I E E E 1 3 9 4 D E V I G H T S - R U N T H E H A R D W A R E TR O U B L E S H O O T E R - Contact Dell (see "Turning Off Your Computer" in your User's Guide). Straighten any bent pins. • Remove any keyboard extension cables and connect the keyboard directly to...Keyboard Problems CAUTION: Before you begin any of the procedures in this section, follow the safety instructions in the Product Information Guide. Windows Vista: 1 Click Start → Control Panel→ Hardware and Sound. 2 Click Device Manager. The computer does not start up...

Quick Reference Guide
Page 43
...Accessories→ Program Compatibility Wizard→ Next. 2 Follow the instructions on a floppy disk, CD, or DVD. Quick Reference Guide 43 Windows XP: The Program Compatibility Wizard configures a program so that is designed for at least 8 to 10 seconds (until the computer turns off... screen, click Next. 3 Follow the instructions on your keyboard or moving your mouse, press and hold the power button for an earlier Windows operating system RUN THE PROGRAM COMPATIBILITY WIZARD - A program stops responding END THE PROGRAM - 1 Press simultaneously to access the Task Manager....
...Accessories→ Program Compatibility Wizard→ Next. 2 Follow the instructions on a floppy disk, CD, or DVD. Quick Reference Guide 43 Windows XP: The Program Compatibility Wizard configures a program so that is designed for at least 8 to 10 seconds (until the computer turns off... screen, click Next. 3 Follow the instructions on your keyboard or moving your mouse, press and hold the power button for an earlier Windows operating system RUN THE PROGRAM COMPATIBILITY WIZARD - A program stops responding END THE PROGRAM - 1 Press simultaneously to access the Task Manager....

Quick Reference Guide
Page 45
... T E R - TE S T T H E M O U S E - R E I N S T A L L T H E M O U S E D R I V E R - RESTART THE COMPUTER - 1 Simultaneously press to the computer. • Verify that the mouse cable is supported by your computer, see "Dell Diagnostics" on page 33). For more information about the type of the procedures in this section, follow the safety instructions in your User's Guide. and...mouse cable as shown on the computer. Windows Vista: 1 Click Start → Control Panel→ Hardware and Sound→ Mouse. 2 Adjust the settings as needed . Windows XP: 1 Click Start→ Control...
... T E R - TE S T T H E M O U S E - R E I N S T A L L T H E M O U S E D R I V E R - RESTART THE COMPUTER - 1 Simultaneously press to the computer. • Verify that the mouse cable is supported by your computer, see "Dell Diagnostics" on page 33). For more information about the type of the procedures in this section, follow the safety instructions in your User's Guide. and...mouse cable as shown on the computer. Windows Vista: 1 Click Start → Control Panel→ Hardware and Sound→ Mouse. 2 Adjust the settings as needed . Windows XP: 1 Click Start→ Control...


