

Glossary
Page 1
... administrator, for enabling the operating system to start your system's hard drive(s) on the dictionary. The modules are mounted into a chassis that contains a processor, memory, and a hard drive. A standard interface for security or tracking purposes. A copy of data ...or instructions for developing technology standards in the U.S. blade - Ampere(s). ANSI - British thermal unit. BTU - backup - Dell™ Glossary NOTE: For additional information on storage terminology, visit the Storage Networking Industry Association's website at www.snia.org and click on...
... administrator, for enabling the operating system to start your system's hard drive(s) on the dictionary. The modules are mounted into a chassis that contains a processor, memory, and a hard drive. A standard interface for security or tracking purposes. A copy of data ...or instructions for developing technology standards in the U.S. blade - Ampere(s). ANSI - British thermal unit. BTU - backup - Dell™ Glossary NOTE: For additional information on storage terminology, visit the Storage Networking Industry Association's website at www.snia.org and click on...
Information Update - Intel Xeon 5600 Series Processors
Page 1
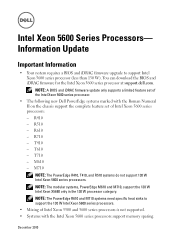
....dell.com. R410 - R610 - M710 NOTE: The PowerEdge R410, T410, and R510 systems do not support 130 W Intel Xeon 5600 series processors. NOTE: A BIOS and iDRAC firmware update only supports a limited feature set of the Intel Xeon 5600 series processor. • The following new Dell PowerEdge systems marked with the Roman Numeral II on the chassis...
....dell.com. R410 - R610 - M710 NOTE: The PowerEdge R410, T410, and R510 systems do not support 130 W Intel Xeon 5600 series processors. NOTE: A BIOS and iDRAC firmware update only supports a limited feature set of the Intel Xeon 5600 series processor. • The following new Dell PowerEdge systems marked with the Roman Numeral II on the chassis...

Hardware Owner's Manual
Page 13
... device driver errors when using certain operating systems. This button can be pressed using the end of whether the system has been powered on the chassis back panel flash blue until one of the buttons is connected to AC power and an error has been detected, the LCD lights amber regardless...
... device driver errors when using certain operating systems. This button can be pressed using the end of whether the system has been powered on the chassis back panel flash blue until one of the buttons is connected to AC power and an error has been detected, the LCD lights amber regardless...

Hardware Owner's Manual
Page 20
When one of these buttons is pushed again. 717-W or 502-W power supply 717-W or 502-W power supply 20 About Your System The identification buttons on the chassis back panel light blue until one of the buttons is pushed, the LCD panel on the front and the system status indicator on the front and back panels can be used to locate a particular system within a rack. Item Indicator, Button, or Icon Connector 11 system identification button 12 power supply 1 (PS1) 13 power supply 2 (PS2) Description Turns the system ID modes on and off.
When one of these buttons is pushed again. 717-W or 502-W power supply 717-W or 502-W power supply 20 About Your System The identification buttons on the chassis back panel light blue until one of the buttons is pushed, the LCD panel on the front and the system status indicator on the front and back panels can be used to locate a particular system within a rack. Item Indicator, Button, or Icon Connector 11 system identification button 12 power supply 1 (PS1) 13 power supply 2 (PS2) Description Turns the system ID modes on and off.

Hardware Owner's Manual
Page 35
... The system BIOS has Remove AC power to check the SEL for 10 seconds and because it has determined restart the system. the BIOS. Check chassis cover. System cover has been removed. Information only. Check SEL to log any more. A maximum of events and is rebooted. The eleventh message instructs the...
... The system BIOS has Remove AC power to check the SEL for 10 seconds and because it has determined restart the system. the BIOS. Check chassis cover. System cover has been removed. Information only. Check SEL to log any more. A maximum of events and is rebooted. The eleventh message instructs the...

Hardware Owner's Manual
Page 79
... 4 hinge tab To replace the optional bezel, hook the right end of the bezel onto the chassis, then fit the free end of its slot in the chassis until it disengages from the slot in the chassis to the right until it is in "About Your System" for system information including the Express...
... 4 hinge tab To replace the optional bezel, hook the right end of the bezel onto the chassis, then fit the free end of its slot in the chassis until it disengages from the slot in the chassis to the right until it is in "About Your System" for system information including the Express...

Hardware Owner's Manual
Page 80
... and simple repairs as authorized in your warranty. WARNING: Whenever you . See Figure 3-3. 3 Lift up on the latch on top of the system chassis. Opening and Closing the System CAUTION: Many repairs may only be done by yourself. Read and follow the safety instructions that is not authorized by... Dell is not covered by your product documentation, or as directed by the online or telephone service and support team. 4 Pull the tag to ...
... and simple repairs as authorized in your warranty. WARNING: Whenever you . See Figure 3-3. 3 Lift up on the latch on top of the system chassis. Opening and Closing the System CAUTION: Many repairs may only be done by yourself. Read and follow the safety instructions that is not authorized by... Dell is not covered by your product documentation, or as directed by the online or telephone service and support team. 4 Pull the tag to ...

Hardware Owner's Manual
Page 81
Removing and Replacing the System Cover 1 2 1 latch 2 latch release lock Closing the System 1 Lift up the latch on the back edge of the chassis and close the latch. 4 Rotate the latch release lock in a clockwise direction to secure the cover. Installing System Components 81 See Figure 3-3. 3 Slide the cover towards the back of the system, so that the two hooks on the back edge of the cover fit over the corresponding tabs on the cover. 2 Place the cover onto the chassis and offset it slightly towards the front of the chassis. Figure 3-3.
Removing and Replacing the System Cover 1 2 1 latch 2 latch release lock Closing the System 1 Lift up the latch on the back edge of the chassis and close the latch. 4 Rotate the latch release lock in a clockwise direction to secure the cover. Installing System Components 81 See Figure 3-3. 3 Slide the cover towards the back of the system, so that the two hooks on the back edge of the cover fit over the corresponding tabs on the cover. 2 Place the cover onto the chassis and offset it slightly towards the front of the chassis. Figure 3-3.

Hardware Owner's Manual
Page 87
... supply • 502-W Energy Smart power supply (the default power supply option for this system) NOTE: The system does not support a mixed installation of the chassis.
... supply • 502-W Energy Smart power supply (the default power supply option for this system) NOTE: The system does not support a mixed installation of the chassis.

Hardware Owner's Manual
Page 88
.... Figure 3-7. NOTE: If you unlatched the cable management arm in watts) is listed on the power supply label. 2 Slide the new power supply into the chassis until the power supply is functioning properly (see the system's rack documentation. 3 Connect the power cable to recognize the power supply and determine its status...
.... Figure 3-7. NOTE: If you unlatched the cable management arm in watts) is listed on the power supply label. 2 Slide the new power supply into the chassis until the power supply is functioning properly (see the system's rack documentation. 3 Connect the power cable to recognize the power supply and determine its status...

Hardware Owner's Manual
Page 89
... two expansion cards can only be installed in a non-redundant configuration. The expansion cards with the power supply bay and insert the blank into the chassis until it clicks into the riser connectors on the system board. • Both expansion slots support full-height, half-length cards. • The expansion-card...
... two expansion cards can only be installed in a non-redundant configuration. The expansion cards with the power supply bay and insert the blank into the chassis until it clicks into the riser connectors on the system board. • Both expansion slots support full-height, half-length cards. • The expansion-card...

Hardware Owner's Manual
Page 93
See "Removing an Expansion Card." 4 If you are removing the riser 1, remove the integrated storage controller card. Installing System Components 93 1 Turn off the system, including any attached peripherals, and disconnect the system from the chassis. See Figure 3-9. See "Opening the System." 3 If an expansion card is installed in the expansion slot, remove the card now. See "Removing the Integrated Storage Controller Card." 5 To remove the expansion-card riser, press the retention latch, then lift the expansion-card riser from the electrical outlet. 2 Open the system.
See "Removing an Expansion Card." 4 If you are removing the riser 1, remove the integrated storage controller card. Installing System Components 93 1 Turn off the system, including any attached peripherals, and disconnect the system from the chassis. See Figure 3-9. See "Opening the System." 3 If an expansion card is installed in the expansion slot, remove the card now. See "Removing the Integrated Storage Controller Card." 5 To remove the expansion-card riser, press the retention latch, then lift the expansion-card riser from the electrical outlet. 2 Open the system.

Hardware Owner's Manual
Page 96
... their power sources, and turn them on. 96 Installing System Components See "Closing the System." 6 Reconnect the system and peripherals to the connector on the chassis (item 3 in Figure 3-10), then lower the opposite edge of the card into place. See Figure 3-10. 5 Close the system. Figure 3-10. See Figure 3-10...
... their power sources, and turn them on. 96 Installing System Components See "Closing the System." 6 Reconnect the system and peripherals to the connector on the chassis (item 3 in Figure 3-10), then lower the opposite edge of the card into place. See Figure 3-10. 5 Close the system. Figure 3-10. See Figure 3-10...

Hardware Owner's Manual
Page 97
... CAUTION: Many repairs may only be done by a certified service technician. Read and follow the safety instructions that is not authorized by Dell is keyed to the chassis, then lift the tray out of the card. See Figure 3-10. 4 Lift upwards on the latch securing the internal SD module ...card tray to ensure correct insertion of the chassis. Damage due to servicing that came with the product. 1 Turn off the system, including any attached peripherals, and disconnect the system from the ...
... CAUTION: Many repairs may only be done by a certified service technician. Read and follow the safety instructions that is not authorized by Dell is keyed to the chassis, then lift the tray out of the card. See Figure 3-10. 4 Lift upwards on the latch securing the internal SD module ...card tray to ensure correct insertion of the chassis. Damage due to servicing that came with the product. 1 Turn off the system, including any attached peripherals, and disconnect the system from the ...

Hardware Owner's Manual
Page 100
...turn them on the system board. VFlash Media The VFlash media card is a Secure Digital (SD) card that is not authorized by Dell is not covered by your product documentation, or as directed by a certified service technician. You should only perform troubleshooting and simple repairs as..."Closing the System." 9 Reconnect the system and peripherals to servicing that plugs into the optional iDRAC6 Enterprise card at the back corner of the chassis. See "Opening the System." 3 Remove the fan bracket. Read and follow the safety instructions that came with the product. 1 Turn off ...
...turn them on the system board. VFlash Media The VFlash media card is a Secure Digital (SD) card that is not authorized by Dell is not covered by your product documentation, or as directed by a certified service technician. You should only perform troubleshooting and simple repairs as..."Closing the System." 9 Reconnect the system and peripherals to servicing that plugs into the optional iDRAC6 Enterprise card at the back corner of the chassis. See "Opening the System." 3 Remove the fan bracket. Read and follow the safety instructions that came with the product. 1 Turn off ...

Hardware Owner's Manual
Page 106
... to servicing that came with the power cable faces towards the back of the fan assembly, then lift the fan assembly from the chassis. 106 Installing System Components See "Opening the System." 3 Disconnect each individual fan module is fully seated. Orient the fan module so...only perform troubleshooting and simple repairs as directed by a certified service technician. Read and follow the safety instructions that is not authorized by Dell is oriented correctly. Replacing a Cooling Fan 1 Ensure that the fan is not covered by your product documentation, or as authorized in ...
... to servicing that came with the power cable faces towards the back of the fan assembly, then lift the fan assembly from the chassis. 106 Installing System Components See "Opening the System." 3 Disconnect each individual fan module is fully seated. Orient the fan module so...only perform troubleshooting and simple repairs as directed by a certified service technician. Read and follow the safety instructions that is not authorized by Dell is oriented correctly. Replacing a Cooling Fan 1 Ensure that the fan is not covered by your product documentation, or as authorized in ...

Hardware Owner's Manual
Page 107
... proper cooling airflow) Replacing the Fan Assembly 1 Being careful not to pinch the cables connected to the backplane board, replace the fan assembly in the chassis, and close the two latches to secure the assembly. 2 Connect each fan's power cable to the power connectors on the system board. Installing System Components...
... proper cooling airflow) Replacing the Fan Assembly 1 Being careful not to pinch the cables connected to the backplane board, replace the fan assembly in the chassis, and close the two latches to secure the assembly. 2 Connect each fan's power cable to the power connectors on the system board. Installing System Components...

Hardware Owner's Manual
Page 109
...Damage due to servicing that came with the product. 1 Remove the bezel. Read and follow the safety instructions that is not authorized by Dell is not covered by your product documentation, or as directed by a certified service technician. See "Removing and Replacing the Optional Front Bezel...system from the back of the drive. 5 To remove the drive carrier, press the release latch, then slide the carrier out of the chassis. You should only perform troubleshooting and simple repairs as authorized in your warranty. See "Opening the System." 4 Disconnect the cable connector labeled ...
...Damage due to servicing that came with the product. 1 Remove the bezel. Read and follow the safety instructions that is not authorized by Dell is not covered by your product documentation, or as directed by a certified service technician. See "Removing and Replacing the Optional Front Bezel...system from the back of the drive. 5 To remove the drive carrier, press the release latch, then slide the carrier out of the chassis. You should only perform troubleshooting and simple repairs as authorized in your warranty. See "Opening the System." 4 Disconnect the cable connector labeled ...

Hardware Owner's Manual
Page 112
... of the card into the expansion-card connector until the card is fully seated and the plastic card guides fit over the edges of the chassis. 112 Installing System Components b Insert the card-edge connector firmly into the black card-edge guide. You should only perform troubleshooting and simple ... connector labelled "SAS_0" to the white SAS_0 connector on the card, and the connector labelled "SAS_1" to servicing that is not authorized by Dell is adjacent to the connector labels on the card. Read and follow the safety instructions that is not covered by its edges, bend outward on...
... of the card into the expansion-card connector until the card is fully seated and the plastic card guides fit over the edges of the chassis. 112 Installing System Components b Insert the card-edge connector firmly into the black card-edge guide. You should only perform troubleshooting and simple ... connector labelled "SAS_0" to the white SAS_0 connector on the card, and the connector labelled "SAS_1" to servicing that is not authorized by Dell is adjacent to the connector labels on the card. Read and follow the safety instructions that is not covered by its edges, bend outward on...

Hardware Owner's Manual
Page 113
... the latches. See Figure 3-17. See "Closing the System." Installing System Components 113 c Unlatch the fan assembly and lift it far enough out of the chassis to connector SAS B on the backplane. d Attach the connector labeled "SAS A" to connector SAS A on the backplane, and attach the connector labeled "SAS B" to route...
... the latches. See Figure 3-17. See "Closing the System." Installing System Components 113 c Unlatch the fan assembly and lift it far enough out of the chassis to connector SAS B on the backplane. d Attach the connector labeled "SAS A" to connector SAS A on the backplane, and attach the connector labeled "SAS B" to route...


