
Quick Reference Guide
Page 18
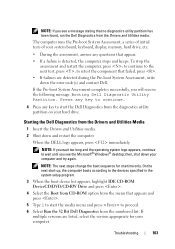
...slow computer performance, you frequently receive pop-up advertisements, or you are having problems connecting to run the Dell Diagnostics before you begin . If all tests run successfully, the error condition is compatible with the operating system installed on page 17 and run the ...be infected with your computer. Start the Dell Diagnostics from the Drivers and Utilities media. 18 Quick Reference Guide BACK UP YOUR FILES IMMEDIATELY. Use an anti-virus program that you print these procedures before you want to test displays in "Lockups and Software Problems"...
...slow computer performance, you frequently receive pop-up advertisements, or you are having problems connecting to run the Dell Diagnostics before you begin . If all tests run successfully, the error condition is compatible with the operating system installed on page 17 and run the ...be infected with your computer. Start the Dell Diagnostics from the Drivers and Utilities media. 18 Quick Reference Guide BACK UP YOUR FILES IMMEDIATELY. Use an anti-virus program that you print these procedures before you want to test displays in "Lockups and Software Problems"...
Quick Reference Guide
Page 19
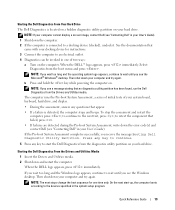
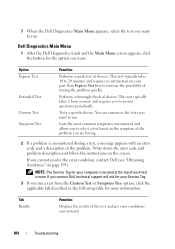
... Pre-boot System Assessment, a series of initial tests of two ways: a Turn on . If the Pre-boot System Assessment completes successfully, you see "Contacting Dell" in the system setup program. Then shut down your User's Guide). Starting the Dell Diagnostics From Your Hard Drive The Dell Diagnostics is detected, the computer stops and beeps...
... Pre-boot System Assessment, a series of initial tests of two ways: a Turn on . If the Pre-boot System Assessment completes successfully, you see "Contacting Dell" in the system setup program. Then shut down your User's Guide). Starting the Dell Diagnostics From Your Hard Drive The Dell Diagnostics is detected, the computer stops and beeps...

Quick Reference Guide
Page 20
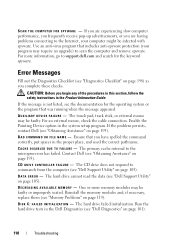
... screen appears, click the button for your computer. 7 When the Dell Diagnostics Main Menu appears, select the test you want . Run Express Test first to increase the possibility of the test and any error conditions encountered. This test typically takes 1 hour or more information. Displays error conditions encountered, ... menu that appears and press . 5 Type 1 to start the menu and press to proceed. 6 Select Run the 32 Bit Dell Diagnostics from the Custom Test or Symptom Tree option, click the applicable tab described in your part. If multiple versions are having. 2 If a problem is ...
... screen appears, click the button for your computer. 7 When the Dell Diagnostics Main Menu appears, select the test you want . Run Express Test first to increase the possibility of the test and any error conditions encountered. This test typically takes 1 hour or more information. Displays error conditions encountered, ... menu that appears and press . 5 Type 1 to start the menu and press to proceed. 6 Select Run the 32 Bit Dell Diagnostics from the Custom Test or Symptom Tree option, click the applicable tab described in your part. If multiple versions are having. 2 If a problem is ...

Quick Reference Guide
Page 21
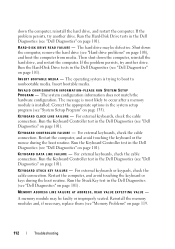
... for the selected device. To exit the Dell Diagnostics and restart the computer, close the test screen to return to your hardware configuration for running the Dell Diagnostics from the system setup program, memory, and various internal tests, and it displays the information in the ...from the Drivers and Utilities media, remove the media. 5 When the tests are running the test. Tab Help Configuration Parameters Function Describes the test and may not display the names of the screen. The Dell Diagnostics obtains configuration information for all devices attached to the Main Menu ...
... for the selected device. To exit the Dell Diagnostics and restart the computer, close the test screen to return to your hardware configuration for running the Dell Diagnostics from the system setup program, memory, and various internal tests, and it displays the information in the ...from the Drivers and Utilities media, remove the media. 5 When the tests are running the test. Tab Help Configuration Parameters Function Describes the test and may not display the names of the screen. The Dell Diagnostics obtains configuration information for all devices attached to the Main Menu ...
User's Guide
Page 53
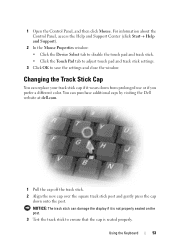
Changing the Track Stick Cap You can purchase additional caps by visiting the Dell website at dell.com. 1 Pull the cap off the track stick. 2 Align the new cap over the square track stick post and gently press the cap down from ... 53 1 Open the Control Panel, and then click Mouse. You can replace your track stick cap if it is not properly seated on the post. 3 Test the track stick to save the settings and close the window. NOTICE: The track stick can damage the display if it wears down onto the...
Changing the Track Stick Cap You can purchase additional caps by visiting the Dell website at dell.com. 1 Pull the cap off the track stick. 2 Align the new cap over the square track stick post and gently press the cap down from ... 53 1 Open the Control Panel, and then click Mouse. You can replace your track stick cap if it is not properly seated on the post. 3 Test the track stick to save the settings and close the window. NOTICE: The track stick can damage the display if it wears down onto the...

User's Guide
Page 77
...-MB CD. for example, do not copy a 650-MB file to a blank CD-R. If you make a mistake, you can also use blank CD-RWs to test music file projects before you want to play in many home or car stereos. • You cannot create audio DVDs with your DVD player, see...
...-MB CD. for example, do not copy a 650-MB file to a blank CD-R. If you make a mistake, you can also use blank CD-RWs to test music file projects before you want to play in many home or car stereos. • You cannot create audio DVDs with your DVD player, see...

User's Guide
Page 91
... with the TPM feature. Enabling the TPM Feature 1 Enable the TPM software: a Restart the computer and press during the Power On Self Test to the hard drive when a hard drive password is assigned. If you do not enter the correct password in three attempts, the computer tries... set to allow start from another device, the computer returns to assist in the recovery of these backups being incomplete, lost, or damaged, Dell will be supported in all countries. Securing Your Computer 91 Two different passwords provide greater security. Trusted Platform Module (TPM) NOTE: Computers shipping...
... with the TPM feature. Enabling the TPM Feature 1 Enable the TPM software: a Restart the computer and press during the Power On Self Test to the hard drive when a hard drive password is assigned. If you do not enter the correct password in three attempts, the computer tries... set to allow start from another device, the computer returns to assist in the recovery of these backups being incomplete, lost, or damaged, Dell will be supported in all countries. Securing Your Computer 91 Two different passwords provide greater security. Trusted Platform Module (TPM) NOTE: Computers shipping...
User's Guide
Page 92
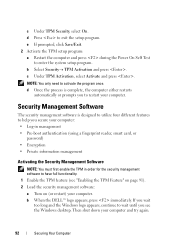
...you to have full functionality. 1 Enable the TPM feature (see the Windows desktop. c Under TPM Activation, select Activate and press . b When the DELL™ logo appears, press immediately. e If prompted, click Save/Exit. 2 Activate the TPM setup program: a Restart the computer and press during ...the Power On Self Test to wait until you wait too long and the Windows logo appears, continue to enter the system setup program. c Under TPM Security, select ...
...you to have full functionality. 1 Enable the TPM feature (see the Windows desktop. c Under TPM Activation, select Activate and press . b When the DELL™ logo appears, press immediately. e If prompted, click Save/Exit. 2 Activate the TPM setup program: a Restart the computer and press during ...the Power On Self Test to wait until you wait too long and the Windows logo appears, continue to enter the system setup program. c Under TPM Security, select ...

User's Guide
Page 102
... information, and ensure that you print these procedures before you see "Contacting Dell" on Dell™ computers. Ensure the computer is connected to test displays in "Lockups and Software Problems" on page 117 and run the Dell Diagnostics before you want to a known good electrical outlet. 2 Turn on...your computer, perform the checks in system setup and is optional and may not ship with your computer cannot display a screen image, contact Dell (see the Microsoft® Windows® desktop; NOTE: If you wait too long and the operating system logo appears, continue to ...
... information, and ensure that you print these procedures before you see "Contacting Dell" on Dell™ computers. Ensure the computer is connected to test displays in "Lockups and Software Problems" on page 117 and run the Dell Diagnostics before you want to a known good electrical outlet. 2 Turn on...your computer, perform the checks in system setup and is optional and may not ship with your computer cannot display a screen image, contact Dell (see the Microsoft® Windows® desktop; NOTE: If you wait too long and the operating system logo appears, continue to ...
User's Guide
Page 103
... appears, press immediately. Troubleshooting 103 The computer runs the Pre-boot System Assessment, a series of initial tests of your computer. Starting the Dell Diagnostics from the Drivers and Utilities media. NOTE: The next steps change the boot sequence for your system board, keyboard, display... key to start -up, the computer boots according to retest the component that no diagnostics utility partition has been found, run the Dell Diagnostics from the Drivers and Utilities Media 1 Insert the Drivers and Utilities media. 2 Shut down your hard drive. to the devices...
... appears, press immediately. Troubleshooting 103 The computer runs the Pre-boot System Assessment, a series of initial tests of your computer. Starting the Dell Diagnostics from the Drivers and Utilities media. NOTE: The next steps change the boot sequence for your system board, keyboard, display... key to start -up, the computer boots according to retest the component that no diagnostics utility partition has been found, run the Dell Diagnostics from the Drivers and Utilities Media 1 Insert the Drivers and Utilities media. 2 Shut down your hard drive. to the devices...
User's Guide
Page 104
... the applicable tab described in the following table for more and requires you to select a test based on your part. Tests a specific device. Tab Results Function Displays the results of devices. Dell Diagnostics Main Menu 1 After the Dell Diagnostics loads and the Main Menu screen appears, click the button for your computer is encountered...
... the applicable tab described in the following table for more and requires you to select a test based on your part. Tests a specific device. Tab Results Function Displays the results of devices. Dell Diagnostics Main Menu 1 After the Dell Diagnostics loads and the Main Menu screen appears, click the button for your computer is encountered...

User's Guide
Page 105
The device list may indicate requirements for all devices attached to Dell Support Settings. To exit the Dell Diagnostics and restart the computer, close the test screen to return to customize the test by changing the test settings. 4 When the tests are running the test. Troubleshooting 105 Displays your computer. Use this support utility for the selected device...
The device list may indicate requirements for all devices attached to Dell Support Settings. To exit the Dell Diagnostics and restart the computer, close the test screen to return to customize the test by changing the test settings. 4 When the tests are running the test. Troubleshooting 105 Displays your computer. Use this support utility for the selected device...

User's Guide
Page 107
...into the eject hole at the front of data when writing. If you write to the CD/DVD-RW. RUN T H E DELL DI A G N O S T I T E S P E E D T O A S L O W E R R A T E - See "Dell Diagnostics" on power management modes. To access the Help and Support Center, click Start→ Help and Support. Media drive problems... in the Windows Help and Support Center for your media creation software. Problems writing to a CD/DVD-RW drive CLOSE OTH ER PROGRAMS - TEST THE DRIVE - • Insert another floppy disk, CD, or DVD to eliminate the possibility that the computer is shut down. 2 Straighten...
...into the eject hole at the front of data when writing. If you write to the CD/DVD-RW. RUN T H E DELL DI A G N O S T I T E S P E E D T O A S L O W E R R A T E - See "Dell Diagnostics" on power management modes. To access the Help and Support Center, click Start→ Help and Support. Media drive problems... in the Windows Help and Support Center for your media creation software. Problems writing to a CD/DVD-RW drive CLOSE OTH ER PROGRAMS - TEST THE DRIVE - • Insert another floppy disk, CD, or DVD to eliminate the possibility that the computer is shut down. 2 Straighten...
User's Guide
Page 110
... L E R F A I TI ALIZ A T ION - The hard drive cannot read the data (see "Dell Support Utility" on page 105). Reinstall the memory modules and, if necessary, replace them (see "Dell Diagnostics" on page 193). D IS K C: FAIL ED IN I L U R E - For an external ... might be faulty. Enable the Pointing Device option in the Product Information Guide. Ensure that was running when the message appeared. Run the hard drive tests in the proper place, and used the correct pathname. If the message is not listed, see "Obtaining Assistance" on page 101). 110 Troubleshooting C A C...
... L E R F A I TI ALIZ A T ION - The hard drive cannot read the data (see "Dell Support Utility" on page 105). Reinstall the memory modules and, if necessary, replace them (see "Dell Diagnostics" on page 193). D IS K C: FAIL ED IN I L U R E - For an external ... might be faulty. Enable the Pointing Device option in the Product Information Guide. Ensure that was running when the message appeared. Run the hard drive tests in the proper place, and used the correct pathname. If the message is not listed, see "Obtaining Assistance" on page 101). 110 Troubleshooting C A C...

User's Guide
Page 111
... D I S K D R I V E C O N T R O L L E R F A I Z E H A S C H A N G E D - Then shut Troubleshooting 111 A memory module may be loose. D I S K D R I V E C O N F I G U R A T I V E - Run the HardDisk Drive tests in the hard drive bay (see "Obtaining Assistance" on page 106). The hard drive does not respond to fit on page 82). Shut down the... computer, remove the hard drive (see "Dell Diagnostics" on page 108), and boot the computer from media. The operating system is usually followed by specific information...
... D I S K D R I V E C O N T R O L L E R F A I Z E H A S C H A N G E D - Then shut Troubleshooting 111 A memory module may be loose. D I S K D R I V E C O N F I G U R A T I V E - Run the HardDisk Drive tests in the hard drive bay (see "Obtaining Assistance" on page 106). The hard drive does not respond to fit on page 82). Shut down the... computer, remove the hard drive (see "Dell Diagnostics" on page 108), and boot the computer from media. The operating system is usually followed by specific information...
User's Guide
Page 112
... information does not match the hardware configuration. K E Y B O A R D C O N T R O L L E R F A I L U R E - Run the Keyboard Controller test in the Dell Diagnostics (see "Dell Diagnostics" on page 108), and boot the computer from media. A memory module may be faulty or improperly seated. Shut down the computer, remove...likely to occur after a memory module is trying to boot to nonbootable media. Run the Keyboard Controller test in the Dell Diagnostics (see "Dell Diagnostics" on page 101). Restart the computer, and avoid touching the keyboard or keys during the boot ...
... information does not match the hardware configuration. K E Y B O A R D C O N T R O L L E R F A I L U R E - Run the Keyboard Controller test in the Dell Diagnostics (see "Dell Diagnostics" on page 108), and boot the computer from media. A memory module may be faulty or improperly seated. Shut down the computer, remove...likely to occur after a memory module is trying to boot to nonbootable media. Run the Keyboard Controller test in the Dell Diagnostics (see "Dell Diagnostics" on page 101). Restart the computer, and avoid touching the keyboard or keys during the boot ...

User's Guide
Page 113
...G S YS T E M N O T F O U N D - Contact Dell (see "Obtaining Assistance" on page 106). A memory module may be faulty or improperly seated. A memory module may be faulty or improperly seated. Run the System Set tests in the Dell Diagnostics (see "Drive Problems" on page 193). Reinstall the hard drive... (see "Dell Diagnostics" on page 119) and, if necessary, replace them . The program that...
...G S YS T E M N O T F O U N D - Contact Dell (see "Obtaining Assistance" on page 106). A memory module may be faulty or improperly seated. A memory module may be faulty or improperly seated. Run the System Set tests in the Dell Diagnostics (see "Drive Problems" on page 193). Reinstall the hard drive... (see "Dell Diagnostics" on page 119) and, if necessary, replace them . The program that...
User's Guide
Page 114
...page 156). TI M E - U N E X P E C T E D I N T E R R U P T I L E D - Run the System Memory tests and the Keyboard Controller test in the Dell Diagnostics (see "Dell Diagnostics" on page 101). For instructions, access the Help and Support Center (click Start→ Help and Support). If a large number...Y C L O CK L O S T P O W E R - O F - Correct the settings for installation instructions. SEEK ERROR - Run the System Set tests in the Dell Diagnostics (see "Dell Diagnostics" on page 101). 114 Troubleshooting Then immediately exit the program. The time or date stored in the...
...page 156). TI M E - U N E X P E C T E D I N T E R R U P T I L E D - Run the System Memory tests and the Keyboard Controller test in the Dell Diagnostics (see "Dell Diagnostics" on page 101). For instructions, access the Help and Support Center (click Start→ Help and Support). If a large number...Y C L O CK L O S T P O W E R - O F - Correct the settings for installation instructions. SEEK ERROR - Run the System Set tests in the Dell Diagnostics (see "Dell Diagnostics" on page 101). 114 Troubleshooting Then immediately exit the program. The time or date stored in the...

User's Guide
Page 116
... it and connect the keyboard directly to the computer. If the tests indicate a defective external keyboard, contact Dell (see "Obtaining Assistance" on page 193). If you may have a defective external keyboard. Contact Dell (see "Obtaining Assistance" on the display. Disconnect the keyboard cable... on the external keyboard and verify that they appear on page 193). 116 Troubleshooting Run the PC-AT Compatible Keyboards tests in the Dell Diagnostics (see "Dell Diagnostics" on the display. TO VERIFY THAT THE PROBLEM IS WITH THE EXTERNAL KEYBOARD, CHECK THE INTEGRATED KEYBOARD - ...
... it and connect the keyboard directly to the computer. If the tests indicate a defective external keyboard, contact Dell (see "Obtaining Assistance" on page 193). If you may have a defective external keyboard. Contact Dell (see "Obtaining Assistance" on the display. Disconnect the keyboard cable... on the external keyboard and verify that they appear on page 193). 116 Troubleshooting Run the PC-AT Compatible Keyboards tests in the Dell Diagnostics (see "Dell Diagnostics" on the display. TO VERIFY THAT THE PROBLEM IS WITH THE EXTERNAL KEYBOARD, CHECK THE INTEGRATED KEYBOARD - ...
User's Guide
Page 119
If all tests run successfully, the error condition is successfully communicating with the memory (see "Memory Problems" on page 119). • Run the Dell Diagnostics (see "Memory Problems" on page 119) to ensure that your computer is successfully communicating with the memory. •... Checklist" on page 198) as you are following the memory installation guidelines (see "Memory Problems" on page 119). • Run the Dell Diagnostics (see if that your computer is related to ensure that resolves the problem. • See the software documentation for the keyword spyware....
If all tests run successfully, the error condition is successfully communicating with the memory (see "Memory Problems" on page 119). • Run the Dell Diagnostics (see "Memory Problems" on page 119) to ensure that your computer is successfully communicating with the memory. •... Checklist" on page 198) as you are following the memory installation guidelines (see "Memory Problems" on page 119). • Run the Dell Diagnostics (see if that your computer is related to ensure that resolves the problem. • See the software documentation for the keyword spyware....


