Setup Guide
Page 15
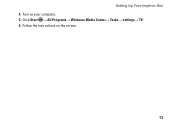
Click Start → All Programs→ Windows Media Center→ Tasks→ settings→ TV. 6. Follow the instructions on your computer. 5. Turn on the screen. 13 Setting Up Your Inspiron One 4.
Click Start → All Programs→ Windows Media Center→ Tasks→ settings→ TV. 6. Follow the instructions on your computer. 5. Turn on the screen. 13 Setting Up Your Inspiron One 4.
Setup Guide
Page 17
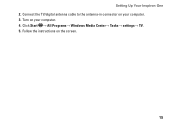
Follow the instructions on your computer. 3. Click Start → All Programs→ Windows Media Center→ Tasks→ settings→ TV. 5. Turn on the screen. 15 Connect the TV/digital antenna cable to the antenna-in connector on your computer. 4. Setting Up Your Inspiron One 2.
Follow the instructions on your computer. 3. Click Start → All Programs→ Windows Media Center→ Tasks→ settings→ TV. 5. Turn on the screen. 15 Connect the TV/digital antenna cable to the antenna-in connector on your computer. 4. Setting Up Your Inspiron One 2.

Setup Guide
Page 24
...the latest driver for your computer: 1. To set up wireless display on the desktop. Ensure that wireless is turned on the TV. 5. Setting Up Your Inspiron One Set Up Wireless Display (Optional) NOTE: Wireless display may not be purchased separately. 4. Select the appropriate video ...source for "Intel Wireless Display Connection Manager" available at support.dell.com. Ensure that your computer and must be ...
...the latest driver for your computer: 1. To set up wireless display on the desktop. Ensure that wireless is turned on the TV. 5. Setting Up Your Inspiron One Set Up Wireless Display (Optional) NOTE: Wireless display may not be purchased separately. 4. Select the appropriate video ...source for "Intel Wireless Display Connection Manager" available at support.dell.com. Ensure that your computer and must be ...
Setup Guide
Page 27
... power supply. The computer is not receiving power. 25 Contact Dell (see "Contacting Dell" on page 75) for assistance. • Blinking amber - Contact Dell (see "Contacting Dell" on page 75) for assistance. • Off - A blinking white light indicates hard drive activity. Turns the computer on the button indicates the following power states: &#...be an issue with audio programs. 7 Hard drive activity light - The computer is on the back of your computer. 6 Audio-in hibernate mode, turned off when pressed. Using Your Inspiron One 5 Audio-out/Headphone connector -
... power supply. The computer is not receiving power. 25 Contact Dell (see "Contacting Dell" on page 75) for assistance. • Blinking amber - Contact Dell (see "Contacting Dell" on page 75) for assistance. • Off - A blinking white light indicates hard drive activity. Turns the computer on the button indicates the following power states: &#...be an issue with audio programs. 7 Hard drive activity light - The computer is on the back of your computer. 6 Audio-in hibernate mode, turned off when pressed. Using Your Inspiron One 5 Audio-out/Headphone connector -
Setup Guide
Page 46
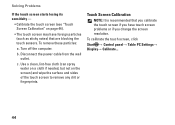
... foreign particles (such as sticky notes) that you calibrate the touch screen if you have touch screen problems or if you change the screen resolution. b. Turn off the computer. Solving Problems If the touch screen starts losing its sensitivity - • Calibrate the touch screen (see "Touch Screen Calibration" on the screen...
... foreign particles (such as sticky notes) that you calibrate the touch screen if you have touch screen problems or if you change the screen resolution. b. Turn off the computer. Solving Problems If the touch screen starts losing its sensitivity - • Calibrate the touch screen (see "Touch Screen Calibration" on the screen...
Setup Guide
Page 49
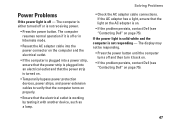
... device, such as a lamp. • Check the AC adapter cable connections. The computer is either turned off and then turn it back on. • If the problem persists, contact Dell (see "Contacting Dell" on page 75). The display may not be responding. • Press the power button until the ...computer turns off or is not receiving power. • Press the power button. If the power light is solid white and the computer is on. • If the problem persists, contact Dell (see "Contacting Dell" on page 75). 47 Solving Problems Power Problems...
... device, such as a lamp. • Check the AC adapter cable connections. The computer is either turned off and then turn it back on. • If the problem persists, contact Dell (see "Contacting Dell" on page 75). The display may not be responding. • Press the power button until the ...computer turns off or is not receiving power. • Press the power button. If the power light is solid white and the computer is on. • If the problem persists, contact Dell (see "Contacting Dell" on page 75). 47 Solving Problems Power Problems...
Setup Guide
Page 50
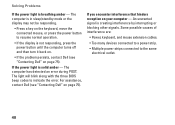
... an error during POST. The light will blink along with the three BIOS beep codes to the same electrical outlet. 48 For assistance, contact Dell (see "Contacting Dell" on page 75). An unwanted signal is breathing amber - Some possible causes of interference are: • Power, keyboard, and mouse extension cables...you encounter interference that hinders reception on page 75). If the power light is not responding, press the power button until the computer turns off and then turn it back on. • If the problem persists, contact Dell (see "Contacting Dell" on your computer -
... an error during POST. The light will blink along with the three BIOS beep codes to the same electrical outlet. 48 For assistance, contact Dell (see "Contacting Dell" on page 75). An unwanted signal is breathing amber - Some possible causes of interference are: • Power, keyboard, and mouse extension cables...you encounter interference that hinders reception on page 75). If the power light is not responding, press the power button until the computer turns off and then turn it back on. • If the problem persists, contact Dell (see "Contacting Dell" on your computer -
Setup Guide
Page 52
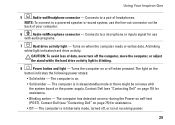
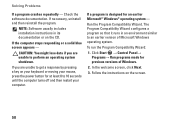
CAUTION: You might lose data if you are unable to 10 seconds until the computer turns off and then restart your mouse, press the power button for at least 8 to perform an operating system shutdown. To run the Program Compatibility Wizard: 1. ...
CAUTION: You might lose data if you are unable to 10 seconds until the computer turns off and then restart your mouse, press the power button for at least 8 to perform an operating system shutdown. To run the Program Compatibility Wizard: 1. ...
Setup Guide
Page 58
... or from the Drivers and Utilities disc. NOTE: Dell Diagnostics works only on your computer. 56 Start Dell Diagnostics from the boot menu and press . When the DELL™ logo appears, press immediately. Turn on page 49 and run Dell Diagnostics before you begin. Using Support Tools Dell Diagnostics If you experience a problem with your computer...
... or from the Drivers and Utilities disc. NOTE: Dell Diagnostics works only on your computer. 56 Start Dell Diagnostics from the boot menu and press . When the DELL™ logo appears, press immediately. Turn on page 49 and run Dell Diagnostics before you begin. Using Support Tools Dell Diagnostics If you experience a problem with your computer...
Setup Guide
Page 65
... AC adapter. 3. then, shut down your computer. 2. Turn on ) connected to restore your computer. 4. You can use Dell Factory Image Restore (see the Microsoft Windows desktop; Dell DataSafe Local Backup allows you purchased your operating system and the Dell factory-installed software while preserving the data files: 1. Turn off your computer and try again. 63...
... AC adapter. 3. then, shut down your computer. 2. Turn on ) connected to restore your computer. 4. You can use Dell Factory Image Restore (see the Microsoft Windows desktop; Dell DataSafe Local Backup allows you purchased your operating system and the Dell factory-installed software while preserving the data files: 1. Turn off your computer and try again. 63...

Setup Guide
Page 69
... take five or more minutes to restart the computer. 67 then, shut down your configuration, you want to proceed with the Dell Factory Image Restore, click Cancel. 8. A message appears when the operating system and factory-installed applications have been restored to access... the Advanced Boot Options window. Restoring Your Operating System Starting Dell Factory Image Restore 1. Turn on as a local user. When the DELL™ logo appears, press several times to factory condition. 9. Select Repair Your Computer. To access ...
... take five or more minutes to restart the computer. 67 then, shut down your configuration, you want to proceed with the Dell Factory Image Restore, click Cancel. 8. A message appears when the operating system and factory-installed applications have been restored to access... the Advanced Boot Options window. Restoring Your Operating System Starting Dell Factory Image Restore 1. Turn on as a local user. When the DELL™ logo appears, press several times to factory condition. 9. Select Repair Your Computer. To access ...
Setup Guide
Page 76
... You may be asked to fill out the following Diagnostics Checklist. If possible, turn on the back of the computer): • Express Service Code: • Return Material Authorization Number (if provided by Dell support technician): • Operating system and version: • Devices: • ...Expansion cards: • Are you call Dell for assistance and call from a telephone at the computer itself. Getting Help ...
... You may be asked to fill out the following Diagnostics Checklist. If possible, turn on the back of the computer): • Express Service Code: • Return Material Authorization Number (if provided by Dell support technician): • Operating system and version: • Devices: • ...Expansion cards: • Are you call Dell for assistance and call from a telephone at the computer itself. Getting Help ...

Service Manual
Page 3
Back to the computer. 8. Failure to do so may result in damage to Contents Page Connect your computer and all screws and ensure that no stray screws remain inside the computer. CAUTION: Before turning on the computer, replace all attached devices to electrical outlets, and turn them on.
Back to the computer. 8. Failure to do so may result in damage to Contents Page Connect your computer and all screws and ensure that no stray screws remain inside the computer. CAUTION: Before turning on the computer, replace all attached devices to electrical outlets, and turn them on.
Service Manual
Page 4
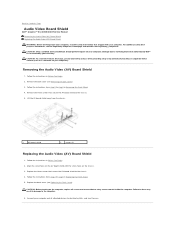
...and all screws and ensure that secure the AV board shield to the chassis. 4. Back to Contents Page Audio Video Board Shield Dell™ Inspiron™ One 2305/2310 Service Manual Removing the Audio Video (AV) Board Shield Replacing the Audio Video (AV) Board Shield WARNING: Before working inside ... 3. Follow the instructions in damage to the computer. 6. Align the screw holes on the AV board shield with your computer. CAUTION: Before turning on the chassis. 3. Remove the three screws that shipped with the screw holes on the computer, replace all attached devices to the chassis. ...
...and all screws and ensure that secure the AV board shield to the chassis. 4. Back to Contents Page Audio Video Board Shield Dell™ Inspiron™ One 2305/2310 Service Manual Removing the Audio Video (AV) Board Shield Replacing the Audio Video (AV) Board Shield WARNING: Before working inside ... 3. Follow the instructions in damage to the computer. 6. Align the screw holes on the AV board shield with your computer. CAUTION: Before turning on the chassis. 3. Remove the three screws that shipped with the screw holes on the computer, replace all attached devices to the chassis. ...

Service Manual
Page 7
...5 in damage to the computer. 10. Connect your computer and all screws and ensure that no stray screws remain inside the computer. CAUTION: Before turning on the computer, replace all attached devices to the connector on . Replace the back cover (see Replacing the Audio Video (AV) Board). 6. Connect... the AV board cable to electrical outlets, and turn them on the AV board. 7. Failure to Contents Page 5. Replace the AV board shield (see Replacing the Audio Video (AV) Board Shield). 8.
...5 in damage to the computer. 10. Connect your computer and all screws and ensure that no stray screws remain inside the computer. CAUTION: Before turning on the computer, replace all attached devices to the connector on . Replace the back cover (see Replacing the Audio Video (AV) Board). 6. Connect... the AV board cable to electrical outlets, and turn them on the AV board. 7. Failure to Contents Page 5. Replace the AV board shield (see Replacing the Audio Video (AV) Board Shield). 8.

Service Manual
Page 9
Failure to do so may result in damage to Contents Page Connect your computer and all screws and ensure that no stray screws remain inside the computer. 7. CAUTION: Before turning on the computer, replace all attached devices to electrical outlets, and turn them on. Back to the computer. 8. Replace the back cover (see Replacing the Back Cover).
Failure to do so may result in damage to Contents Page Connect your computer and all screws and ensure that no stray screws remain inside the computer. 7. CAUTION: Before turning on the computer, replace all attached devices to electrical outlets, and turn them on. Back to the computer. 8. Replace the back cover (see Replacing the Back Cover).

Service Manual
Page 11
Connect your computer and all screws and ensure that no stray screws remain inside the computer. Back to the computer. 5. CAUTION: Before turning on the computer, replace all attached devices to electrical outlets, and turn them on. Failure to do so may result in damage to Contents Page
Connect your computer and all screws and ensure that no stray screws remain inside the computer. Back to the computer. 5. CAUTION: Before turning on the computer, replace all attached devices to electrical outlets, and turn them on. Failure to do so may result in damage to Contents Page
Service Manual
Page 13
Follow the instructions from step 4 to the computer. 9. Connect your computer and all attached devices to Contents Page CAUTION: Before turning on . 6. Replace the system-board shield (see Replacing the Back Cover). Replace the back cover (see Removing the System-Board Shield). 7. Failure to do so may result in damage to step 5 in Replacing the Front Stand. 8. Back to electrical outlets, and turn them on the computer, replace all screws and ensure that no stray screws remain inside the computer.
Follow the instructions from step 4 to the computer. 9. Connect your computer and all attached devices to Contents Page CAUTION: Before turning on . 6. Replace the system-board shield (see Replacing the Back Cover). Replace the back cover (see Removing the System-Board Shield). 7. Failure to do so may result in damage to step 5 in Replacing the Front Stand. 8. Back to electrical outlets, and turn them on the computer, replace all screws and ensure that no stray screws remain inside the computer.
Service Manual
Page 14
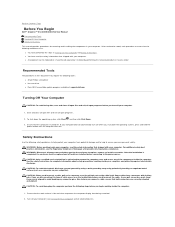
... noted, each procedure assumes that shipped with your computer. 1. Also, before you turn off your computer. Turn off when you begin working inside the computer. 1. Back to Contents Page Before You Begin Dell™ Inspiron™ One 2305/2310 Service Manual Recommended Tools Turning Off Your Computer Safety Instructions This manual provides procedures for complete information about...
... noted, each procedure assumes that shipped with your computer. 1. Also, before you turn off your computer. Turn off when you begin working inside the computer. 1. Back to Contents Page Before You Begin Dell™ Inspiron™ One 2305/2310 Service Manual Recommended Tools Turning Off Your Computer Safety Instructions This manual provides procedures for complete information about...
Service Manual
Page 16
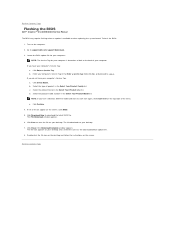
... the Enter a service tag: field, click Go, and proceed to support.dell.com/support/downloads. 3. Click Save to download the latest BIOS file. Back to Contents Page Flashing the BIOS Dell™ Inspiron™ One 2305/2310 Service Manual The BIOS may require flashing when an update is titled the...computer's Service Tag: a. The file icon appears on the top right of your computer's Service Tag in the Select Your Product Family list. Turn on the screen. The File Download window appears. 6. Back to your computer's Service Tag: a. Locate the BIOS update file for your computer...
... the Enter a service tag: field, click Go, and proceed to support.dell.com/support/downloads. 3. Click Save to download the latest BIOS file. Back to Contents Page Flashing the BIOS Dell™ Inspiron™ One 2305/2310 Service Manual The BIOS may require flashing when an update is titled the...computer's Service Tag: a. The file icon appears on the top right of your computer's Service Tag in the Select Your Product Family list. Turn on the screen. The File Download window appears. 6. Back to your computer's Service Tag: a. Locate the BIOS update file for your computer...


