Owners Manual
Page 1
Inspiron 23 Owner's Manual Computer model: Inspiron 2350 Regulatory model: W07C Regulatory type: W07C002
Inspiron 23 Owner's Manual Computer model: Inspiron 2350 Regulatory model: W07C Regulatory type: W07C002
Owners Manual
Page 2
... license; Intel® and Intel SpeedStep® are registered trademarks of Intel Corporation in this text: Dell™, the DELL logo, and Inspiron™ are trademarks of Microsoft corporation in the United States and/or other countries. 2013 - 08 Rev. WARNING: A WARNING indicates a potential for property damage, personal ...
... license; Intel® and Intel SpeedStep® are registered trademarks of Intel Corporation in this text: Dell™, the DELL logo, and Inspiron™ are trademarks of Microsoft corporation in the United States and/or other countries. 2013 - 08 Rev. WARNING: A WARNING indicates a potential for property damage, personal ...

Owners Manual
Page 3
Contents Before You Begin 9 Safety Instructions 10 Recommended Tools 10 After Working Inside Your Computer 11 Removing the Memory Module(s 12 Procedure 12 Replacing the Memory Module(s 14 Procedure 14 Removing the Base Cover 15 Procedure 15 Replacing the Base Cover 17 Procedure 17 Removing the Computer Base 18 Prerequisites 18 Procedure 18 Replacing the Computer Base 20 Procedure 20 Postrequisites 20 Removing the Coin-Cell Battery 21 Prerequisites 21 Procedure 21 Replacing the Coin-Cell Battery 22 Procedure 22 Postrequisites 22 Contents | 3
Contents Before You Begin 9 Safety Instructions 10 Recommended Tools 10 After Working Inside Your Computer 11 Removing the Memory Module(s 12 Procedure 12 Replacing the Memory Module(s 14 Procedure 14 Removing the Base Cover 15 Procedure 15 Replacing the Base Cover 17 Procedure 17 Removing the Computer Base 18 Prerequisites 18 Procedure 18 Replacing the Computer Base 20 Procedure 20 Postrequisites 20 Removing the Coin-Cell Battery 21 Prerequisites 21 Procedure 21 Replacing the Coin-Cell Battery 22 Procedure 22 Postrequisites 22 Contents | 3
Owners Manual
Page 4
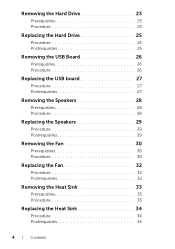
Removing the Hard Drive 23 Prerequisites 23 Procedure 23 Replacing the Hard Drive 25 Procedure 25 Postrequisites 25 Removing the USB Board 26 Prerequisites 26 Procedure 26 Replacing the USB board 27 Procedure 27 Postrequisites 27 Removing the Speakers 28 Prerequisites 28 Procedure 28 Replacing the Speakers 29 Procedure 29 Postrequisites 29 Removing the Fan 30 Prerequisites 30 Procedure 30 Replacing the Fan 32 Procedure 32 Postrequisites 32 Removing the Heat Sink 33 Prerequisites 33 Procedure 33 Replacing the Heat Sink 34 Procedure 34 Postrequisites 34 4 | Contents
Removing the Hard Drive 23 Prerequisites 23 Procedure 23 Replacing the Hard Drive 25 Procedure 25 Postrequisites 25 Removing the USB Board 26 Prerequisites 26 Procedure 26 Replacing the USB board 27 Procedure 27 Postrequisites 27 Removing the Speakers 28 Prerequisites 28 Procedure 28 Replacing the Speakers 29 Procedure 29 Postrequisites 29 Removing the Fan 30 Prerequisites 30 Procedure 30 Replacing the Fan 32 Procedure 32 Postrequisites 32 Removing the Heat Sink 33 Prerequisites 33 Procedure 33 Replacing the Heat Sink 34 Procedure 34 Postrequisites 34 4 | Contents

Owners Manual
Page 5
Removing the Wireless Mini-Card 35 Prerequisites 35 Procedure 35 Replacing the Wireless Mini-Card 36 Procedure 36 Postrequisites 36 Removing the Processor 37 Prerequisites 37 Procedure 37 Replacing the Processor 38 Procedure 38 Postrequisites 39 Removing the System Board 40 Prerequisites 40 Procedure 41 Replacing the System Board 42 Procedure 42 Postrequisites 42 Entering the Service Tag in the BIOS 42 Removing the Back Cover 43 Prerequisites 43 Procedure 43 Replacing the Back Cover 44 Procedure 44 Postrequisites 44 Removing the Converter Board 45 Prerequisites 45 ...
Removing the Wireless Mini-Card 35 Prerequisites 35 Procedure 35 Replacing the Wireless Mini-Card 36 Procedure 36 Postrequisites 36 Removing the Processor 37 Prerequisites 37 Procedure 37 Replacing the Processor 38 Procedure 38 Postrequisites 39 Removing the System Board 40 Prerequisites 40 Procedure 41 Replacing the System Board 42 Procedure 42 Postrequisites 42 Entering the Service Tag in the BIOS 42 Removing the Back Cover 43 Prerequisites 43 Procedure 43 Replacing the Back Cover 44 Procedure 44 Postrequisites 44 Removing the Converter Board 45 Prerequisites 45 ...

Owners Manual
Page 6
Removing the Camera 47 Prerequisites 47 Procedure 47 Replacing the Camera 48 Procedure 48 Postrequisites 48 Removing the Microphones 49 Prerequisites 49 Procedure 49 Replacing the Microphones 50 Procedure 50 Postrequisites 50 Removing the Power-Button Assembly 51 Prerequisites 51 Procedure 51 Replacing the Power-Button Assembly 52 Procedure 52 Postrequisites 52 Removing the Control-Buttons Board 53 Prerequisites 53 Procedure 53 Replacing the Control-Buttons Board 54 Procedure 54 Postrequisites 54 Removing the Stand Assembly 55 Prerequisites 55 Procedure 56 Replacing ...
Removing the Camera 47 Prerequisites 47 Procedure 47 Replacing the Camera 48 Procedure 48 Postrequisites 48 Removing the Microphones 49 Prerequisites 49 Procedure 49 Replacing the Microphones 50 Procedure 50 Postrequisites 50 Removing the Power-Button Assembly 51 Prerequisites 51 Procedure 51 Replacing the Power-Button Assembly 52 Procedure 52 Postrequisites 52 Removing the Control-Buttons Board 53 Prerequisites 53 Procedure 53 Replacing the Control-Buttons Board 54 Procedure 54 Postrequisites 54 Removing the Stand Assembly 55 Prerequisites 55 Procedure 56 Replacing ...

Owners Manual
Page 9
Before You Begin | 9 CAUTION: Place the computer on a flat surface. Before You Begin CAUTION: To avoid losing data, save and close all open files and exit all telephone cables, network cables, and attached devices from your mouse pointer to the upper-right or lower-right corner of your operating system for 5 seconds to ground the system board. NOTE: If you turn off your computer. 1 Save and close all open files and exit all open programs before you are using a different operating system, see the documentation of the screen to open programs. 2 Move your computer. 5 After the ...
Before You Begin | 9 CAUTION: Place the computer on a flat surface. Before You Begin CAUTION: To avoid losing data, save and close all open files and exit all telephone cables, network cables, and attached devices from your mouse pointer to the upper-right or lower-right corner of your operating system for 5 seconds to ground the system board. NOTE: If you turn off your computer. 1 Save and close all open files and exit all open programs before you are using a different operating system, see the documentation of the screen to open programs. 2 Move your computer. 5 After the ...
Owners Manual
Page 10
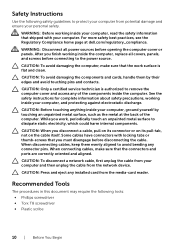
... the computer cover and access any of the computer. When disconnecting cables, keep them by touching an unpainted metal surface, such as the metal at dell.com/regulatory_compliance. Recommended Tools The procedures in this document may require the following safety guidelines to dissipate static electricity, which could harm internal components. CAUTION...
... the computer cover and access any of the computer. When disconnecting cables, keep them by touching an unpainted metal surface, such as the metal at dell.com/regulatory_compliance. Recommended Tools The procedures in this document may require the following safety guidelines to dissipate static electricity, which could harm internal components. CAUTION...

Owners Manual
Page 11
After Working Inside Your Computer | 11 After Working Inside Your Computer CAUTION: Leaving stray or loose screws inside your computer may severely damage your computer. 1 Replace all screws and make sure that no stray screws remain inside your computer. 2 Place the computer in an upright position. 3 Connect any external devices, cables, cards, and any other part(s) you removed before working on your computer. 4 Connect your computer and all attached devices to their electrical outlets.
After Working Inside Your Computer | 11 After Working Inside Your Computer CAUTION: Leaving stray or loose screws inside your computer may severely damage your computer. 1 Replace all screws and make sure that no stray screws remain inside your computer. 2 Place the computer in an upright position. 3 Connect any external devices, cables, cards, and any other part(s) you removed before working on your computer. 4 Connect your computer and all attached devices to their electrical outlets.

Owners Manual
Page 12
For more safety best practices, see the Regulatory Compliance home page at dell.com/regulatory_compliance. After working inside your computer and follow the instructions in "After Working Inside Your Computer" on page 15". 12 | Removing the Memory Module(s) ...
For more safety best practices, see the Regulatory Compliance home page at dell.com/regulatory_compliance. After working inside your computer and follow the instructions in "After Working Inside Your Computer" on page 15". 12 | Removing the Memory Module(s) ...

Owners Manual
Page 13
3 Use your fingertips to spread apart the securing clips on each end of the memory-module connector until the memory module pops up. 4 Remove the memory module from the memory-module connector. 1 2 1 memory-module connector 3 securing clips (2) 3 2 memory module Removing the Memory Module(s) | 13
3 Use your fingertips to spread apart the securing clips on each end of the memory-module connector until the memory module pops up. 4 Remove the memory module from the memory-module connector. 1 2 1 memory-module connector 3 securing clips (2) 3 2 memory module Removing the Memory Module(s) | 13

Owners Manual
Page 14
... computer, follow the steps in "After Working Inside Your Computer" on page 11. For more safety best practices, see the Regulatory Compliance home page at dell.com/regulatory_compliance. NOTE: If you do not hear the click, remove the memory module and reinstall it clicks into place. Replacing the Memory Module(s) WARNING...
... computer, follow the steps in "After Working Inside Your Computer" on page 11. For more safety best practices, see the Regulatory Compliance home page at dell.com/regulatory_compliance. NOTE: If you do not hear the click, remove the memory module and reinstall it clicks into place. Replacing the Memory Module(s) WARNING...

Owners Manual
Page 15
... the computer base. 1 2 3 1 captive screw 3 screws (8) 2 base cover Removing the Base Cover | 15 For more safety best practices, see the Regulatory Compliance home page at dell.com/regulatory_compliance. After working inside your computer, follow the steps in "After Working Inside Your Computer" on page 9. Removing the Base Cover WARNING: Before working...
... the computer base. 1 2 3 1 captive screw 3 screws (8) 2 base cover Removing the Base Cover | 15 For more safety best practices, see the Regulatory Compliance home page at dell.com/regulatory_compliance. After working inside your computer, follow the steps in "After Working Inside Your Computer" on page 9. Removing the Base Cover WARNING: Before working...

Owners Manual
Page 16
3 Starting from the right side, pry up the base cover to release the ports on the system board from the slots on the base cover. 4 Lift the base cover off the computer base. 16 | Removing the Base Cover
3 Starting from the right side, pry up the base cover to release the ports on the system board from the slots on the base cover. 4 Lift the base cover off the computer base. 16 | Removing the Base Cover

Owners Manual
Page 17
... "After Working Inside Your Computer" on page 11. Replacing the Base Cover | 17 For more safety best practices, see the Regulatory Compliance home page at dell.com/regulatory_compliance. Procedure 1 Slide the slots on the base cover into the ports on the system board and snap the base cover into place. 2 Replace...
... "After Working Inside Your Computer" on page 11. Replacing the Base Cover | 17 For more safety best practices, see the Regulatory Compliance home page at dell.com/regulatory_compliance. Procedure 1 Slide the slots on the base cover into the ports on the system board and snap the base cover into place. 2 Replace...

Owners Manual
Page 18
... Your Computer" on page 11. See "Removing the Base Cover" on page 15. For more safety best practices, see the Regulatory Compliance home page at dell.com/regulatory_compliance. Prerequisites Remove the base cover.
... Your Computer" on page 11. See "Removing the Base Cover" on page 15. For more safety best practices, see the Regulatory Compliance home page at dell.com/regulatory_compliance. Prerequisites Remove the base cover.

Owners Manual
Page 19
3 Remove the screws that secure the computer base to the stand assembly. 4 Lift the computer base slightly and slide the display cables and antenna cables through the slot on the computer base. 5 Lift the computer base away from the stand assembly. 1 2 3 1 screws (2) 3 computer base 2 slot Removing the Computer Base | 19
3 Remove the screws that secure the computer base to the stand assembly. 4 Lift the computer base slightly and slide the display cables and antenna cables through the slot on the computer base. 5 Lift the computer base away from the stand assembly. 1 2 3 1 screws (2) 3 computer base 2 slot Removing the Computer Base | 19

Owners Manual
Page 20
For more safety best practices, see the Regulatory Compliance home page at dell.com/regulatory_compliance. See "Replacing the Base Cover" on page 11. Postrequisites Replace the base cover. Procedure 1 Slide the display cables and antenna cables through the ...
For more safety best practices, see the Regulatory Compliance home page at dell.com/regulatory_compliance. See "Replacing the Base Cover" on page 11. Postrequisites Replace the base cover. Procedure 1 Slide the display cables and antenna cables through the ...

Owners Manual
Page 21
For more safety best practices, see the Regulatory Compliance home page at dell.com/regulatory_compliance. See "Removing the Base Cover" on page 18. It is recommended that shipped with its cable, off the coin-cell battery from the ...
For more safety best practices, see the Regulatory Compliance home page at dell.com/regulatory_compliance. See "Removing the Base Cover" on page 18. It is recommended that shipped with its cable, off the coin-cell battery from the ...

Owners Manual
Page 22
... computer, follow the steps in "After Working Inside Your Computer" on page 11. For more safety best practices, see the Regulatory Compliance home page at dell.com/regulatory_compliance.
... computer, follow the steps in "After Working Inside Your Computer" on page 11. For more safety best practices, see the Regulatory Compliance home page at dell.com/regulatory_compliance.
