Inspiron 17 5000 Service Manual
Page 4
Replacing the battery 28 Procedure 28 Post-requisites 28 Removing the hard drive 29 Prerequisites 29 Procedure 29 Replacing the hard drive 32 Procedure 32 Post-requisites 32 Removing the memory modules 33 Prerequisites 33 Procedure 33 Replacing the memory modules 35 Procedure 35 Post-requisites 37 Removing the wireless card 38 Prerequisites 38 Procedure 38 Replacing the wireless card 40 Procedure 40 Post-requisites 42 Removing the coin-cell battery 43 Prerequisites 43 Procedure 43 4
Replacing the battery 28 Procedure 28 Post-requisites 28 Removing the hard drive 29 Prerequisites 29 Procedure 29 Replacing the hard drive 32 Procedure 32 Post-requisites 32 Removing the memory modules 33 Prerequisites 33 Procedure 33 Replacing the memory modules 35 Procedure 35 Post-requisites 37 Removing the wireless card 38 Prerequisites 38 Procedure 38 Replacing the wireless card 40 Procedure 40 Post-requisites 42 Removing the coin-cell battery 43 Prerequisites 43 Procedure 43 4
Inspiron 17 5000 Service Manual
Page 32
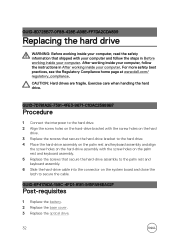
... practices, see the Regulatory Compliance home page at www.dell.com/ regulatory_compliance. GUID-7D781A2E-7391-4FE3-9671-C1DAC25889B7 Procedure 1 Connect the interposer to the hard drive. 2 Align the screw holes on the hard-drive bracket with the screw holes on the hard drive. 3 Replace the screws that secure the hard-drive assembly to the palm rest and keyboard assembly. 6 Slide...
... practices, see the Regulatory Compliance home page at www.dell.com/ regulatory_compliance. GUID-7D781A2E-7391-4FE3-9671-C1DAC25889B7 Procedure 1 Connect the interposer to the hard drive. 2 Align the screw holes on the hard-drive bracket with the screw holes on the hard drive. 3 Replace the screws that secure the hard-drive assembly to the palm rest and keyboard assembly. 6 Slide...
Inspiron 17 5000 Service Manual
Page 49
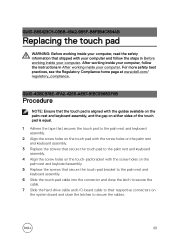
...-9B5F-B8F3B4C854AB Replacing the touch pad WARNING: Before working inside your computer, read the safety information that secure the touch-pad bracket to the palm rest and keyboard assembly. 6 Slide the touch-pad cable into the connector and close the latch to secure the cable. 7 Slide the hard-drive cable and ...on the touch-pad bracket with the screw holes on the palm rest and keyboard assembly. 5 Replace the screws that shipped with the screw holes on the palm rest and keyboard assembly. 3 Replace the screws that secure the touch pad to secure the cables. 49 For more safety best practices,...
...-9B5F-B8F3B4C854AB Replacing the touch pad WARNING: Before working inside your computer, read the safety information that secure the touch-pad bracket to the palm rest and keyboard assembly. 6 Slide the touch-pad cable into the connector and close the latch to secure the cable. 7 Slide the hard-drive cable and ...on the touch-pad bracket with the screw holes on the palm rest and keyboard assembly. 5 Replace the screws that shipped with the screw holes on the palm rest and keyboard assembly. 3 Replace the screws that secure the touch pad to secure the cables. 49 For more safety best practices,...
Inspiron 17 5000 Service Manual
Page 56
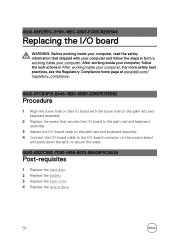
...-481B-8EF3-9BA08F5CBA26 Post-requisites 1 Replace the hard drive. 2 Replace the battery. 3 Replace the base cover. 4 Replace the optical drive. 56 After working inside your computer, follow the steps in After working inside your computer. GUID-98F27B1C-9F09-48EC-83D7-FC85C825E6A4 Replacing the I/O board WARNING: Before working...in Before working inside your computer. For more safety best practices, see the Regulatory Compliance home page at www.dell.com/ regulatory_compliance. GUID-0FCB4F15-BA46-4820-8DB5-229B75736B52 Procedure 1 Align the screw hole on the I /O-board connector ...
...-481B-8EF3-9BA08F5CBA26 Post-requisites 1 Replace the hard drive. 2 Replace the battery. 3 Replace the base cover. 4 Replace the optical drive. 56 After working inside your computer, follow the steps in After working inside your computer. GUID-98F27B1C-9F09-48EC-83D7-FC85C825E6A4 Replacing the I/O board WARNING: Before working...in Before working inside your computer. For more safety best practices, see the Regulatory Compliance home page at www.dell.com/ regulatory_compliance. GUID-0FCB4F15-BA46-4820-8DB5-229B75736B52 Procedure 1 Align the screw hole on the I /O-board connector ...
Inspiron 17 5000 Service Manual
Page 60
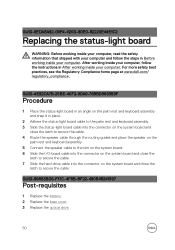
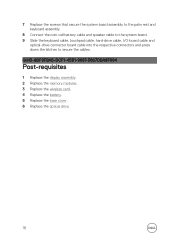
...computer. For more safety best practices, see the Regulatory Compliance home page at www.dell.com/ regulatory_compliance. GUID-89853BD6-F17C-4F8B-BF22-480B48241997 Post-requisites 1 Replace the battery. 2 Replace the base cover. 3 Replace the optical drive. 60 GUID-4E82CA7B-25BE-40F2-9DA9-76BBD969359F Procedure 1 Place the status-light board in...Slide the I/O-board cable into the connector on the system board and close the latch to secure the cable. 7 Slide the hard-drive cable into the connector on the palm rest and keyboard assembly and snap it in After working inside your computer.
...computer. For more safety best practices, see the Regulatory Compliance home page at www.dell.com/ regulatory_compliance. GUID-89853BD6-F17C-4F8B-BF22-480B48241997 Post-requisites 1 Replace the battery. 2 Replace the base cover. 3 Replace the optical drive. 60 GUID-4E82CA7B-25BE-40F2-9DA9-76BBD969359F Procedure 1 Place the status-light board in...Slide the I/O-board cable into the connector on the system board and close the latch to secure the cable. 7 Slide the hard-drive cable into the connector on the palm rest and keyboard assembly and snap it in After working inside your computer.
Inspiron 17 5000 Service Manual
Page 76
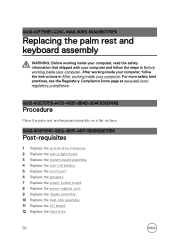
... keyboard cable, touchpad cable, hard-drive cable, I/O-board cable and optical-drive connector board cable into the respective connectors and press down the latches to secure the cables. GUID-8BF9FBA6-DCF1-45B1-9687-5867DDA6F094 Post-requisites 1 Replace the display assembly. 2 Replace the memory modules. 3 Replace the wireless card. 4 Replace the battery. 5 Replace the base cover. 6 Replace the optical drive. 76
... keyboard cable, touchpad cable, hard-drive cable, I/O-board cable and optical-drive connector board cable into the respective connectors and press down the latches to secure the cables. GUID-8BF9FBA6-DCF1-45B1-9687-5867DDA6F094 Post-requisites 1 Replace the display assembly. 2 Replace the memory modules. 3 Replace the wireless card. 4 Replace the battery. 5 Replace the base cover. 6 Replace the optical drive. 76
Inspiron 17 5000 Service Manual
Page 88
... system-board assembly. 4 Replace the coin-cell battery. 5 Replace the touch pad. 6 Replace the speakers. 7 Replace the power-button board. 8 Replace the power-adapter port. 9 Replace the display assembly. 10 Replace the heat-sink assembly. 11 Replace the I/O board. 12 Replace the hard drive. 88 For more safety best practices, see the Regulatory Compliance home page at www.dell.com/ regulatory_compliance. After...
... system-board assembly. 4 Replace the coin-cell battery. 5 Replace the touch pad. 6 Replace the speakers. 7 Replace the power-button board. 8 Replace the power-adapter port. 9 Replace the display assembly. 10 Replace the heat-sink assembly. 11 Replace the I/O board. 12 Replace the hard drive. 88 For more safety best practices, see the Regulatory Compliance home page at www.dell.com/ regulatory_compliance. After...


