
Service Manual
Page 7
19 Coin-Cell Battery 87 Removing the Coin-Cell Battery 87 Replacing the Coin-Cell Battery 88 20 Thermal Cooling Assembly 89 Removing the Thermal Cooling Assembly 89 Replacing the Thermal Cooling Assembly 90 21 Processor Module 91 Removing the Processor Module 91 Replacing the Processor Module 92 22 Hard-Drive Assembly 95 Removing the Hard-Drive Assembly 95 Replacing the Hard-Drive Assembly 97 23 I/O Board 99 Removing the I/O Board 99 Replacing the I/O Board 100 24 AC-Adapter Connector 101 Removing the AC-Adapter Connector 101 Contents 7
19 Coin-Cell Battery 87 Removing the Coin-Cell Battery 87 Replacing the Coin-Cell Battery 88 20 Thermal Cooling Assembly 89 Removing the Thermal Cooling Assembly 89 Replacing the Thermal Cooling Assembly 90 21 Processor Module 91 Removing the Processor Module 91 Replacing the Processor Module 92 22 Hard-Drive Assembly 95 Removing the Hard-Drive Assembly 95 Replacing the Hard-Drive Assembly 97 23 I/O Board 99 Removing the I/O Board 99 Replacing the I/O Board 100 24 AC-Adapter Connector 101 Removing the AC-Adapter Connector 101 Contents 7
Service Manual
Page 80
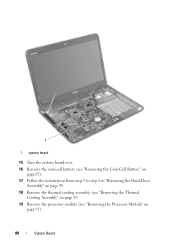
1 1 system board 15 Turn the system board over. 16 Remove the coin-cell battery (see "Removing the Coin-Cell Battery" on page 87). 17 Follow the instructions from step 3 to step 5 in "Removing the Hard-Drive Assembly" on page 95. 18 Remove the thermal cooling assembly (see "Removing the Thermal Cooling Assembly" on page 89. 19 Remove the processor module (see "Removing the Processor Module" on page 91). 80 System Board
1 1 system board 15 Turn the system board over. 16 Remove the coin-cell battery (see "Removing the Coin-Cell Battery" on page 87). 17 Follow the instructions from step 3 to step 5 in "Removing the Hard-Drive Assembly" on page 95. 18 Remove the thermal cooling assembly (see "Removing the Thermal Cooling Assembly" on page 89. 19 Remove the processor module (see "Removing the Processor Module" on page 91). 80 System Board
Service Manual
Page 81
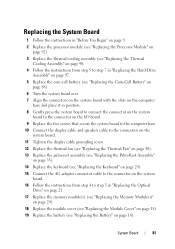
... Replace the thermal cooling assembly (see "Replacing the Thermal Cooling Assembly" on page 90. 4 Follow the instructions from step 5 to step 7 in "Replacing the Hard-Drive Assembly" on page 97. 5 Replace the coin-cell battery (see "Replacing the Coin-Cell Battery" on page 88). 6 Turn the system board over. 7 Align...the AC-adapter connector cable to the connector on the system board. 16 Follow the instructions from step 4 to step 5 in "Replacing the Optical Drive" on page 21. 17 Replace the memory module(s) (see "Replacing the Memory Module(s)" on page 24). 18 Replace the module cover (see "...
... Replace the thermal cooling assembly (see "Replacing the Thermal Cooling Assembly" on page 90. 4 Follow the instructions from step 5 to step 7 in "Replacing the Hard-Drive Assembly" on page 97. 5 Replace the coin-cell battery (see "Replacing the Coin-Cell Battery" on page 88). 6 Turn the system board over. 7 Align...the AC-adapter connector cable to the connector on the system board. 16 Follow the instructions from step 4 to step 5 in "Replacing the Optical Drive" on page 21. 17 Replace the memory module(s) (see "Replacing the Memory Module(s)" on page 24). 18 Replace the module cover (see "...
Service Manual
Page 95
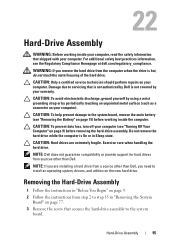
... instructions from step 2 to the system board. NOTE: If you are extremely fragile. Hard-Drive Assembly 95 CAUTION: To prevent data loss, turn off your computer. CAUTION: Hard drives are installing a hard drive from a source other than Dell, you remove the hard drive from sources other than Dell. CAUTION: To avoid electrostatic discharge, ground yourself by using a wrist grounding strap...
... instructions from step 2 to the system board. NOTE: If you are extremely fragile. Hard-Drive Assembly 95 CAUTION: To prevent data loss, turn off your computer. CAUTION: Hard drives are installing a hard drive from a source other than Dell, you remove the hard drive from sources other than Dell. CAUTION: To avoid electrostatic discharge, ground yourself by using a wrist grounding strap...
Service Manual
Page 96
4 Slide the hard-drive assembly in the direction shown in the illustration to disconnect it from the connector on the system board. 5 Lift the hard-drive assembly off the system board. 2 1 1 hard-drive assembly 2 screw 6 Remove the four screws that secure the hard-drive bracket to the hard drive. 7 Lift the hard drive away from the hard-drive bracket. 96 Hard-Drive Assembly
4 Slide the hard-drive assembly in the direction shown in the illustration to disconnect it from the connector on the system board. 5 Lift the hard-drive assembly off the system board. 2 1 1 hard-drive assembly 2 screw 6 Remove the four screws that secure the hard-drive bracket to the hard drive. 7 Lift the hard drive away from the hard-drive bracket. 96 Hard-Drive Assembly
Service Manual
Page 97
.... 7 Replace the screw that secure the hard-drive bracket to the hard drive. 5 Place the hard-drive assembly on the system board. 6 Slide the hard-drive assembly to connect it to the connector on page 9. 2 Remove the new hard drive from its packaging. Hard-Drive Assembly 97 3 2 1 1 screws (4) 3 hard drive 2 hard-drive bracket Replacing the Hard-Drive Assembly 1 Follow the instructions in the hard-drive bracket. 4 Replace the four screws...
.... 7 Replace the screw that secure the hard-drive bracket to the hard drive. 5 Place the hard-drive assembly on the system board. 6 Slide the hard-drive assembly to connect it to the connector on page 9. 2 Remove the new hard drive from its packaging. Hard-Drive Assembly 97 3 2 1 1 screws (4) 3 hard drive 2 hard-drive bracket Replacing the Hard-Drive Assembly 1 Follow the instructions in the hard-drive bracket. 4 Replace the four screws...

Service Manual
Page 98
8 Follow the instructions from step 6 to the computer. 98 Hard-Drive Assembly CAUTION: Before turning on page 81. Failure to do so may result in damage to step 20 in "Replacing the System Board" on the computer, replace all screws and ensure that no stray screws remain inside the computer.
8 Follow the instructions from step 6 to the computer. 98 Hard-Drive Assembly CAUTION: Before turning on page 81. Failure to do so may result in damage to step 20 in "Replacing the System Board" on the computer, replace all screws and ensure that no stray screws remain inside the computer.

Setup Guide
Page 27
... video signal is automatically shut off or in sleep state. NOTE: If you to USB devices, such as a mouse, keyboard, printer, external drive, or MP3 player). Connects to charge USB devices when the computer is powered off when only 10% of the total battery life remains. 4 ...(such as external hard drives or optical drives) or USB devices (such as a mouse, keyboard, printer, external drive, or MP3 player. 25 Connects to a TV for both 5.1 audio and video signals. Connects to charge the device. In such cases, turn off or in sleep state. Using Your Inspiron Laptop 1 VGA ...
... video signal is automatically shut off or in sleep state. NOTE: If you to USB devices, such as a mouse, keyboard, printer, external drive, or MP3 player). Connects to charge USB devices when the computer is powered off when only 10% of the total battery life remains. 4 ...(such as external hard drives or optical drives) or USB devices (such as a mouse, keyboard, printer, external drive, or MP3 player. 25 Connects to a TV for both 5.1 audio and video signals. Connects to charge the device. In such cases, turn off or in sleep state. Using Your Inspiron Laptop 1 VGA ...
Setup Guide
Page 33
... on when wireless is on page 32. A solid white light indicates hard drive activity. NOTE: The battery is charging when the computer is enabled. A solid white light indicates that wireless is powered using the AC adapter. 4 Wireless status light - Using Your Inspiron Laptop 1 Power indicator light - NOTE: To enable or disable wireless, see...
... on when wireless is on page 32. A solid white light indicates hard drive activity. NOTE: The battery is charging when the computer is enabled. A solid white light indicates that wireless is powered using the AC adapter. 4 Wireless status light - Using Your Inspiron Laptop 1 Power indicator light - NOTE: To enable or disable wireless, see...
Setup Guide
Page 62
... its documentation or on the screen. To run the Program Compatibility Wizard: 1. NOTE: Software usually includes installation instructions in an environment similar to check the hard drive or CDs. 60 Run the Program Compatibility Wizard. If you have other software problems - • Back up your files immediately. • Use a virus-scanning program...
... its documentation or on the screen. To run the Program Compatibility Wizard: 1. NOTE: Software usually includes installation instructions in an environment similar to check the hard drive or CDs. 60 Run the Program Compatibility Wizard. If you have other software problems - • Back up your files immediately. • Use a virus-scanning program...
Setup Guide
Page 64
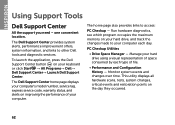
... events and restoration points on your hard drive, and track the changes made to your keyboard or click Start → All Programs→ Dell→ Dell Support Center→ Launch Dell Support Center. The home page also provides links to other Dell tools and diagnostic services. INSPIRON Using Support Tools Dell Support Center All the support you need...
... events and restoration points on your hard drive, and track the changes made to your keyboard or click Start → All Programs→ Dell→ Dell Support Center→ Launch Dell Support Center. The home page also provides links to other Dell tools and diagnostic services. INSPIRON Using Support Tools Dell Support Center All the support you need...
Setup Guide
Page 66
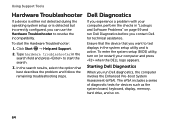
... your computer, perform the checks in "Lockups and Software Problems" on page 59 and run Dell diagnostics, the computer invokes the Enhanced Pre-boot System Assessment (ePSA). Starting Dell Diagnostics When you want to test displays in the search field and press to resolve the incompatibility...3. In the search results, select the option that you run Dell Diagnostics before you contact Dell for devices such as the system board, keyboard, display, memory, hard drive, and so on (or restart) your computer and press when the DELL logo appears. Click Start → Help and Support. 2. To...
... your computer, perform the checks in "Lockups and Software Problems" on page 59 and run Dell diagnostics, the computer invokes the Enhanced Pre-boot System Assessment (ePSA). Starting Dell Diagnostics When you want to test displays in the search field and press to resolve the incompatibility...3. In the search results, select the option that you run Dell Diagnostics before you contact Dell for devices such as the system board, keyboard, display, memory, hard drive, and so on (or restart) your computer and press when the DELL logo appears. Click Start → Help and Support. 2. To...

Setup Guide
Page 68
...If possible, backup your data files before using any of System Restore and Dell DataSafe Local Backup when installing the Dell factory-installed software on a newly installed hard drive Dell Factory Image Restore Operating System disc to restore your computer to the operating ...state it was in when you received your computer to restore your operating system permanently deletes all data files on your computer NOTE: The Operating System disc may not ship with your computer. 66 INSPIRON...
...If possible, backup your data files before using any of System Restore and Dell DataSafe Local Backup when installing the Dell factory-installed software on a newly installed hard drive Dell Factory Image Restore Operating System disc to restore your computer to the operating ...state it was in when you received your computer to restore your operating system permanently deletes all data files on your computer NOTE: The Operating System disc may not ship with your computer. 66 INSPIRON...
Setup Guide
Page 71
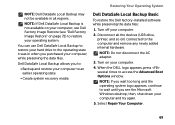
... Local Backup is not available on your computer, use Dell DataSafe Local Backup to restore your hard drive to restore your operating system. Turn on ) connected to an earlier operating state • Create system recovery media Dell DataSafe Local Backup Basic To restore the Dell factory-installed software while preserving the data files: 1. then, shut...
... Local Backup is not available on your computer, use Dell DataSafe Local Backup to restore your hard drive to restore your operating system. Turn on ) connected to an earlier operating state • Create system recovery media Dell DataSafe Local Backup Basic To restore the Dell factory-installed software while preserving the data files: 1. then, shut...

Setup Guide
Page 73
... instructions on your computer. • Hard drive failure that prevents data from the list and press . 4. Insert the system recovery disc or USB key and restart the computer. 2. When the DELL logo appears, press immediately. Restoring Your Operating System To restore the Dell factory-installed software of your data files...and try again. 3. You can use of : • Operating system failure that prevents the use the system recovery media, created using Dell DataSafe Local Backup, to return your hard drive to wait until you backup your computer using the system recovery media: 1.
... instructions on your computer. • Hard drive failure that prevents data from the list and press . 4. Insert the system recovery disc or USB key and restart the computer. 2. When the DELL logo appears, press immediately. Restoring Your Operating System To restore the Dell factory-installed software of your data files...and try again. 3. You can use of : • Operating system failure that prevents the use the system recovery media, created using Dell DataSafe Local Backup, to return your hard drive to wait until you backup your computer using the system recovery media: 1.
Setup Guide
Page 74
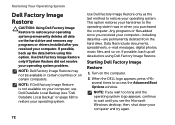
... received your computer. This option restores your hard drive to wait until you wait too long and the operating system logo appears, continue to the operating state it was in certain countries or on . NOTE: If you see "Dell DataSafe Local Backup" on page 68) to... available in when you received your computer, use Dell DataSafe Local Backup (see the Microsoft Windows desktop; NOTE: If Dell Factory Image Restore is not available on your computer-including data files-are permanently deleted from the hard drive. Starting Dell Factory Image Restore 1. then, shut down your ...
... received your computer. This option restores your hard drive to wait until you wait too long and the operating system logo appears, continue to the operating state it was in certain countries or on . NOTE: If you see "Dell DataSafe Local Backup" on page 68) to... available in when you received your computer, use Dell DataSafe Local Backup (see the Microsoft Windows desktop; NOTE: If Dell Factory Image Restore is not available on your computer-including data files-are permanently deleted from the hard drive. Starting Dell Factory Image Restore 1. then, shut down your ...

Setup Guide
Page 75
...Select Repair Your Computer. The System Recovery Options window appears. 4. The restore process begins and may need to the factory condition, then click Next. The Dell Factory Image Restore welcome screen appears. Click Next. Restoring Your Operating System 8. Click Finish to proceed with the Factory Image Restore, click Cancel. Select ... Deletion screen appears. To access the recovery options, log on as a local user. NOTE: If you do not want to continue to reformat the hard drive and restore the system software to select Dell Factory Tools, then Dell Factory Image Restore. 7.
...Select Repair Your Computer. The System Recovery Options window appears. 4. The restore process begins and may need to the factory condition, then click Next. The Dell Factory Image Restore welcome screen appears. Click Next. Restoring Your Operating System 8. Click Finish to proceed with the Factory Image Restore, click Cancel. Select ... Deletion screen appears. To access the recovery options, log on as a local user. NOTE: If you do not want to continue to reformat the hard drive and restore the system software to select Dell Factory Tools, then Dell Factory Image Restore. 7.

Setup Guide
Page 80
lost removable media that you back up any data on the hard drive(s) and on any other storage device in the product. or damaged or lost or corrupted data; Getting Help Returning Items for Repair Under Warranty or ..." on page 82. 2. Remove any accessories that you return the product to call for your confidential, proprietary or personal information; For the telephone number to Dell, ensure that may be included with the item(s) being returned, whether for repair or credit, as CDs and media cards.
lost removable media that you back up any data on the hard drive(s) and on any other storage device in the product. or damaged or lost or corrupted data; Getting Help Returning Items for Repair Under Warranty or ..." on page 82. 2. Remove any accessories that you return the product to call for your confidential, proprietary or personal information; For the telephone number to Dell, ensure that may be included with the item(s) being returned, whether for repair or credit, as CDs and media cards.

Setup Guide
Page 86
...INSPIRON Finding More Information and Resources If you need to contact technical support the bottom of your computer may void your computer the Dell Support Center. For more information about the Microsoft Windows operating system and features support.dell.com upgrade your computer with new or additional components like a new hard drive... reinstall or replace a worn or defective part the Service Manual at support.dell.com/manuals NOTE: In some countries...
...INSPIRON Finding More Information and Resources If you need to contact technical support the bottom of your computer may void your computer the Dell Support Center. For more information about the Microsoft Windows operating system and features support.dell.com upgrade your computer with new or additional components like a new hard drive... reinstall or replace a worn or defective part the Service Manual at support.dell.com/manuals NOTE: In some countries...

Setup Guide
Page 95
...% (noncondensing) Storage 5% to 35,000 ft) Airborne G2 or lower as defined contaminant level by ISA-S71.04-1985 93 for operating - measured with the hard drive in head-parked position and a 2-ms half-sine pulse): Operating 110 G NonOperating 160 G Altitude (maximum): Operating -15.2 to 3048 m (-50 to... a random vibration spectrum that simulates user environment): Operating 0.66 GRMS NonOperating 1.30 GRMS Specifications Computer Environment Maximum shock (for non-operating - measured with Dell Diagnostics running on the hard drive and a 2-ms half-sine pulse;
...% (noncondensing) Storage 5% to 35,000 ft) Airborne G2 or lower as defined contaminant level by ISA-S71.04-1985 93 for operating - measured with the hard drive in head-parked position and a 2-ms half-sine pulse): Operating 110 G NonOperating 160 G Altitude (maximum): Operating -15.2 to 3048 m (-50 to... a random vibration spectrum that simulates user environment): Operating 0.66 GRMS NonOperating 1.30 GRMS Specifications Computer Environment Maximum shock (for non-operating - measured with Dell Diagnostics running on the hard drive and a 2-ms half-sine pulse;


