
Owner's Manual
Page 5
... Operating System 41 Using Microsoft Windows XP System Restore 42 Using Dell PC Restore by Symantec 43 Using the Operating System CD 45 Resolving Software and Hardware Incompatibilities 46 4 Removing and Installing Parts Before You Begin 47 Recommended Tools 47 Turning ... 55 Installing Memory 56 Cards 58 PCI Cards 58 Front Panel 61 Removing the Front Panel 62 Removing the Front-Panel Insert 63 Reattaching the Front Panel 64 Drives 64 General Installation Guidelines 65 Connecting Drive Cables 65 Hard Drive 66 Removing a Hard Drive 66 Installing a Hard Drive 68 Contents 5
... Operating System 41 Using Microsoft Windows XP System Restore 42 Using Dell PC Restore by Symantec 43 Using the Operating System CD 45 Resolving Software and Hardware Incompatibilities 46 4 Removing and Installing Parts Before You Begin 47 Recommended Tools 47 Turning ... 55 Installing Memory 56 Cards 58 PCI Cards 58 Front Panel 61 Removing the Front Panel 62 Removing the Front-Panel Insert 63 Reattaching the Front Panel 64 Drives 64 General Installation Guidelines 65 Connecting Drive Cables 65 Hard Drive 66 Removing a Hard Drive 66 Installing a Hard Drive 68 Contents 5

Owner's Manual
Page 21
...TELEPHONE WALL JACK - Listen for and attempt recovery of the procedures in this section, follow the safety instructions located in length, try a shorter one. Hard drive problems RUN CHECK DISK - 1 Click the Start button and click My Computer. 2 Right-click Local Disk C:. 3 Click Properties. 4 Click the... a telephone. CHECK THE TELEPHONE JACK - Follow the instructions on the screen to identify and resolve modem problems. (Modem Helper is connected to remove the checkmark. E-Mail, Modem, and Internet Problems CAUTION: Before you are using a line that the telephone line is 3 m (10 ft...
...TELEPHONE WALL JACK - Listen for and attempt recovery of the procedures in this section, follow the safety instructions located in length, try a shorter one. Hard drive problems RUN CHECK DISK - 1 Click the Start button and click My Computer. 2 Right-click Local Disk C:. 3 Click Properties. 4 Click the... a telephone. CHECK THE TELEPHONE JACK - Follow the instructions on the screen to identify and resolve modem problems. (Modem Helper is connected to remove the checkmark. E-Mail, Modem, and Internet Problems CAUTION: Before you are using a line that the telephone line is 3 m (10 ft...

Owner's Manual
Page 36
A possible floppy or hard drive failure has occurred. Light Pattern ABCD ABCD Problem Description A possible graphics card failure has occurred. Suggested Resolution • If the computer has a graphics card, remove the card, reinstall it (see page 58), and then restart the computer. • If the problem still exists, install a graphics card ...; Verify that the memory modules that you are installing are compatible with your computer (see page 55). • If the problem persists, contact Dell (see page 94). ABCD Reinstall all power and data cables and restart the computer.
A possible floppy or hard drive failure has occurred. Light Pattern ABCD ABCD Problem Description A possible graphics card failure has occurred. Suggested Resolution • If the computer has a graphics card, remove the card, reinstall it (see page 58), and then restart the computer. • If the problem still exists, install a graphics card ...; Verify that the memory modules that you are installing are compatible with your computer (see page 55). • If the problem persists, contact Dell (see page 94). ABCD Reinstall all power and data cables and restart the computer.

Owner's Manual
Page 37
..., reinstall the card that you removed, remove a different card, and then restart the computer. 3 Repeat this process for the devices installed on page 46). 4 If the problem persists, contact Dell (see page 94). • Ensure that the boot sequence is attempting to boot from the hard drive, CD drive, and DVD drive (see page 54). • If...
..., reinstall the card that you removed, remove a different card, and then restart the computer. 3 Repeat this process for the devices installed on page 46). 4 If the problem persists, contact Dell (see page 94). • Ensure that the boot sequence is attempting to boot from the hard drive, CD drive, and DVD drive (see page 54). • If...

Owner's Manual
Page 42
... screen. Restoring the Computer to an Earlier Operating State If problems occur after you received the computer. Dell PC Restore permanently deletes all data on the hard drive and removes any files or programs until the system restoration is selected and click Next. 3 Click a calendar date... resolve your data files. The Select a Restore Point screen provides a calendar that is automatically selected. • Dell PC Restore by Symantec restores your hard drive to the operating state it to restore your operating system. NOTE: The procedures in when you to see Windows ...
... screen. Restoring the Computer to an Earlier Operating State If problems occur after you received the computer. Dell PC Restore permanently deletes all data on the hard drive and removes any files or programs until the system restoration is selected and click Next. 3 Click a calendar date... resolve your data files. The Select a Restore Point screen provides a calendar that is automatically selected. • Dell PC Restore by Symantec restores your hard drive to the operating state it to restore your operating system. NOTE: The procedures in when you to see Windows ...

Owner's Manual
Page 43
...PC Restore only if System Restore did not resolve your computer-including data files-are permanently deleted from the hard drive. PC Restore restores your hard drive to restore your computer. To change the restore point, you can undo the restoration. If possible, back ... on the hard drive and removes any files or programs until the system restoration is automatically disabled. Enabling System Restore If you purchased the computer. Use Dell PC Restore by Symantec NOTICE: Using Dell PC Restore permanently deletes all computers. 5 Click Next. Using Dell PC Restore ...
...PC Restore only if System Restore did not resolve your computer-including data files-are permanently deleted from the hard drive. PC Restore restores your hard drive to restore your computer. To change the restore point, you can undo the restoration. If possible, back ... on the hard drive and removes any files or programs until the system restoration is automatically disabled. Enabling System Restore If you purchased the computer. Use Dell PC Restore by Symantec NOTICE: Using Dell PC Restore permanently deletes all computers. 5 Click Next. Using Dell PC Restore ...

Owner's Manual
Page 44
... the computer restarts, click OK. NOTICE: If you do not remove PC Restore from your computer, even to gain additional hard-drive space. Because the computer is recommended that you do not want to proceed with www.dell.com appears at the top of the screen. 2 Immediately upon ...same ones that appeared the first time the computer was in when you purchased your computer. Removing Dell PC Restore NOTICE: Removing Dell PC Restore from the hard drive permanently deletes the PC Restore utility from the hard drive, you cannot ever recall it to use PC Restore: 1 Turn on as a local ...
... the computer restarts, click OK. NOTICE: If you do not remove PC Restore from your computer, even to gain additional hard-drive space. Because the computer is recommended that you do not want to proceed with www.dell.com appears at the top of the screen. 2 Immediately upon ...same ones that appeared the first time the computer was in when you purchased your computer. Removing Dell PC Restore NOTICE: Removing Dell PC Restore from the hard drive permanently deletes the PC Restore utility from the hard drive, you cannot ever recall it to use PC Restore: 1 Turn on as a local ...

Owner's Manual
Page 45
...by the computer. For conventional hard drive configurations, the primary hard drive is no partition to delete. 4 Click OK to correct a problem with your hard drive. To reinstall Windows XP, you need the following items: • Dell™ Operating System CD • Dell ResourceCD NOTE: The ResourceCD ... region from where you ordered your computer, or whether you are considering reinstalling the Windows XP operating system to remove the PC Restore partition on the hard drive. 5 Click Yes when a confirmation message appears. After you reinstall the operating system, you to do so....
...by the computer. For conventional hard drive configurations, the primary hard drive is no partition to delete. 4 Click OK to correct a problem with your hard drive. To reinstall Windows XP, you need the following items: • Dell™ Operating System CD • Dell ResourceCD NOTE: The ResourceCD ... region from where you ordered your computer, or whether you are considering reinstalling the Windows XP operating system to remove the PC Restore partition on the hard drive. 5 Click Yes when a confirmation message appears. After you reinstall the operating system, you to do so....

Owner's Manual
Page 49
... View 1 10 2 9 3 8 7 4 6 5 1 CD or DVD driveactivity light The drive activity light is on the computer. button 3 floppy-drive eject button Press to eject a floppy disk from the floppy drive. (On computers with an optional floppy drive.) 4 hard-drive activity light The light is on booting to a USB device). Removing and Installing Parts 49 NOTICE: To avoid losing...
... View 1 10 2 9 3 8 7 4 6 5 1 CD or DVD driveactivity light The drive activity light is on the computer. button 3 floppy-drive eject button Press to eject a floppy disk from the floppy drive. (On computers with an optional floppy drive.) 4 hard-drive activity light The light is on booting to a USB device). Removing and Installing Parts 49 NOTICE: To avoid losing...

Owner's Manual
Page 53
CAUTION: To guard against electrical shock, always unplug your computer from the electrical outlet before opening the computer cover. release lever* CD or DVD drive floppy drive hard drive power supply system board *May not be present on all computers. Inside View of Your Computer CAUTION: Before you begin any of the procedures in this section, see the safety instructions located in the Product Information Guide. Removing and Installing Parts 53
CAUTION: To guard against electrical shock, always unplug your computer from the electrical outlet before opening the computer cover. release lever* CD or DVD drive floppy drive hard drive power supply system board *May not be present on all computers. Inside View of Your Computer CAUTION: Before you begin any of the procedures in this section, see the safety instructions located in the Product Information Guide. Removing and Installing Parts 53

Owner's Manual
Page 64
Reattaching the Front Panel 1 Reattach the front panel to two CD or DVD drives 64 Removing and Installing Parts side hinges (3) front panel 2 Rotate the front panel until it snaps onto the front of these devices: • One hard drive • One optional floppy • Up to the side hinges. Drives Your computer supports a combination of the computer.
Reattaching the Front Panel 1 Reattach the front panel to two CD or DVD drives 64 Removing and Installing Parts side hinges (3) front panel 2 Rotate the front panel until it snaps onto the front of these devices: • One hard drive • One optional floppy • Up to the side hinges. Drives Your computer supports a combination of the computer.

Owner's Manual
Page 65
...on configuring devices for correct insertion; that is, a notch or a missing pin on one end of the drive and to the system board. Connect CD/DVD drives to the system board connector labeled PRI IDE. When disconnecting an IDE cable, grasp the colored pull tab and...the back of the audio cable will attach to the drive connector and the other connector. Some drives may also have an audio connector; Power Cable Connector power input connector power cable Removing and Installing Parts 65 General Installation Guidelines Connect the IDE hard drive to the connector labeled J6J1.
...on configuring devices for correct insertion; that is, a notch or a missing pin on one end of the drive and to the system board. Connect CD/DVD drives to the system board connector labeled PRI IDE. When disconnecting an IDE cable, grasp the colored pull tab and...the back of the audio cable will attach to the drive connector and the other connector. Some drives may also have an audio connector; Power Cable Connector power input connector power cable Removing and Installing Parts 65 General Installation Guidelines Connect the IDE hard drive to the connector labeled J6J1.

Owner's Manual
Page 66
...the procedures in this procedure. 2 Follow the procedures in the Product Information Guide. Removing a Hard Drive 1 Disconnect the power and data cables from the drive and from the computer. 66 Removing and Installing Parts Hard Drive CAUTION: Before you begin this section, follow the safety instructions located in "Before...your computer from the electrical outlet before you are replacing a hard drive that the bracket tabs can be disengaged from the computer: a Remove the two screws securing the bracket to the drive, do not set the drive on a surface, such as a foam pad, that will...
...the procedures in this procedure. 2 Follow the procedures in the Product Information Guide. Removing a Hard Drive 1 Disconnect the power and data cables from the drive and from the computer. 66 Removing and Installing Parts Hard Drive CAUTION: Before you begin this section, follow the safety instructions located in "Before...your computer from the electrical outlet before you are replacing a hard drive that the bracket tabs can be disengaged from the computer: a Remove the two screws securing the bracket to the drive, do not set the drive on a surface, such as a foam pad, that will...

Owner's Manual
Page 67
b Remove the hard drive from the bracket: a Remove the hard drive-securing screws. small bracket tabs (2) drive bracket hard drive screws (2) Removing and Installing Parts 67 hard drive bracket tabs (2) drive bracket bracket-securing screws (2) 3 If you are replacing the hard drive, remove the drive from the bracket.
b Remove the hard drive from the bracket: a Remove the hard drive-securing screws. small bracket tabs (2) drive bracket hard drive screws (2) Removing and Installing Parts 67 hard drive bracket tabs (2) drive bracket bracket-securing screws (2) 3 If you are replacing the hard drive, remove the drive from the bracket.

Owner's Manual
Page 68
... the two screws that secure the bracket to the hard drive bracket. 5 Install the hard drive bracket containing the hard drive: a Insert the two bracket tabs into the drive screw holes on one side of the drive with the screw hole in the chassis. hard drive bracket tabs (2) drive bracket bracket screws (2) 68 Removing and Installing Parts b Rotate the bracket toward the...
... the two screws that secure the bracket to the hard drive bracket. 5 Install the hard drive bracket containing the hard drive: a Insert the two bracket tabs into the drive screw holes on one side of the drive with the screw hole in the chassis. hard drive bracket tabs (2) drive bracket bracket screws (2) 68 Removing and Installing Parts b Rotate the bracket toward the...
Owner's Manual
Page 69
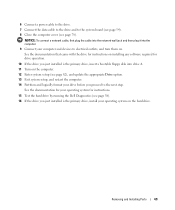
... instructions. 15 Test the hard drive by running the Dell Diagnostics (see page 38). 16 If the drive you proceed to electrical outlets, and turn them on. See the documentation for your operating system for drive operation. 10 If the drive you just installed is the primary drive, insert a bootable floppy ..., first plug the cable into the network wall jack and then plug it into drive A. 11 Turn on the hard drive. Removing and Installing Parts 69 6 Connect a power cable to the drive. 7 Connect the data cable to the drive and to the system board (see page 54). 8 Close the computer cover (...
... instructions. 15 Test the hard drive by running the Dell Diagnostics (see page 38). 16 If the drive you proceed to electrical outlets, and turn them on. See the documentation for your operating system for drive operation. 10 If the drive you just installed is the primary drive, insert a bootable floppy ..., first plug the cable into the network wall jack and then plug it into drive A. 11 Turn on the hard drive. Removing and Installing Parts 69 6 Connect a power cable to the drive. 7 Connect the data cable to the drive and to the system board (see page 54). 8 Close the computer cover (...

Owner's Manual
Page 82
... the system configuration information after you add, change, or remove any hardware in your computer • To set or change a user-selectable option such as the user password • To read the current amount of memory or set the type of hard drive installed Before you use system setup, it is recommended that...
... the system configuration information after you add, change, or remove any hardware in your computer • To set or change a user-selectable option such as the user password • To read the current amount of memory or set the type of hard drive installed Before you use system setup, it is recommended that...

Owner's Manual
Page 85
... the order by its listing. The drive is no installed drive, it appears as Hard Disk Drive C:). • IDE - To remove the device from the boot sequence, use + or - To change the boot order, use the spacebar to its drive letter (such as IDE CD-ROM Device (not installed). Memory ... amount of installed memory. For information on supported memory see "Memory" on page 79. Hyper-Threading is Off. • Enabled - Identifies the hard drive. If there is listed by which they boot. • Floppy device - Hyper-Threading is On. An included device displays with a checkmark next...
... the order by its listing. The drive is no installed drive, it appears as Hard Disk Drive C:). • IDE - To remove the device from the boot sequence, use + or - To change the boot order, use the spacebar to its drive letter (such as IDE CD-ROM Device (not installed). Memory ... amount of installed memory. For information on supported memory see "Memory" on page 79. Hyper-Threading is Off. • Enabled - Identifies the hard drive. If there is listed by which they boot. • Floppy device - Hyper-Threading is On. An included device displays with a checkmark next...

Owner's Manual
Page 114
... User License Agreement, 7 ergonomics information, 7 error messages about, 22 diagnostic lights, 35 F floppy drive activity light, 50 eject button, 49 installing, 71 removing, 70 front panel insert, 63 removing, 62 H hard drive activity light, 49 installing, 68 problems, 21 removing, 66 hardware Dell Diagnostics, 38 Hardware Troubleshooter, 46 headphone connector, 49 Help and Support Center, 8 help file...
... User License Agreement, 7 ergonomics information, 7 error messages about, 22 diagnostic lights, 35 F floppy drive activity light, 50 eject button, 49 installing, 71 removing, 70 front panel insert, 63 removing, 62 H hard drive activity light, 49 installing, 68 problems, 21 removing, 66 hardware Dell Diagnostics, 38 Hardware Troubleshooter, 46 headphone connector, 49 Help and Support Center, 8 help file...

Owner's Manual
Page 115
...removing, 60 playing CDs and DVDs, 14 power button, 49 connector, 51 light, 50 problems, 28 power light conditions, 28 printer cable, 9 connecting, 9 parallel, 10 problems, 29 setting up, 9 USB, 9 problems battery, 19 blue screen, 25 CD drive, 20 CD-RW drive, 20 computer crashes, 24-25 computer stops responding, 24 Dell... Diagnostics, 38 diagnostic lights, 35 drives, 19 DVD drive, 20 e-mail, 21 error messages, 22 general, 24 hard drive, 21 IEEE 1394, 23 Internet, 21 ...
...removing, 60 playing CDs and DVDs, 14 power button, 49 connector, 51 light, 50 problems, 28 power light conditions, 28 printer cable, 9 connecting, 9 parallel, 10 problems, 29 setting up, 9 USB, 9 problems battery, 19 blue screen, 25 CD drive, 20 CD-RW drive, 20 computer crashes, 24-25 computer stops responding, 24 Dell... Diagnostics, 38 diagnostic lights, 35 drives, 19 DVD drive, 20 e-mail, 21 error messages, 22 general, 24 hard drive, 21 IEEE 1394, 23 Internet, 21 ...


