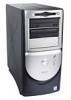
Dell Dimension 8100 Solutions Guide
Page 2
... a potentially hazardous situation which, if not avoided, may be used in this text: Dell, the DELL logo, Dimension, Inspiron, Dell Precision, OptiPlex, Latitude, DellPlus, DellNet, and DellWare are registered trademarks of your computer. Information in this document is strictly forbidden. To open the file, click the Start button on the Windows desktop, point to change...
... a potentially hazardous situation which, if not avoided, may be used in this text: Dell, the DELL logo, Dimension, Inspiron, Dell Precision, OptiPlex, Latitude, DellPlus, DellNet, and DellWare are registered trademarks of your computer. Information in this document is strictly forbidden. To open the file, click the Start button on the Windows desktop, point to change...

Dell Dimension 8100 Solutions Guide
Page 8
...these safety guidelines when appropriate: • When you remove the computer cover, perform the following steps in Dell documentation. Replace the battery only with care. www.dell.com | support.dell.com • Do not push any telephone or telecommunication lines from the computer. 4 Disconnect the power ... service the computer yourself, except as explained in this guide and elsewhere in the sequence indicated. Also, disconnect any objects into the openings of a new battery exploding if it is a danger of your computer. Don't touch the components on the computer to dissipate any...
...these safety guidelines when appropriate: • When you remove the computer cover, perform the following steps in Dell documentation. Replace the battery only with care. www.dell.com | support.dell.com • Do not push any telephone or telecommunication lines from the computer. 4 Disconnect the power ... service the computer yourself, except as explained in this guide and elsewhere in the sequence indicated. Also, disconnect any objects into the openings of a new battery exploding if it is a danger of your computer. Don't touch the components on the computer to dissipate any...

Dell Dimension 8100 Solutions Guide
Page 14
... 1 Save and exit any other devices connected to power. www.dell.com | support.dell.com If you connect an older printer and it doesn't work after...computer automatically turns off after the shutdown process finishes. 5 Turn off your monitor and any programs and files you have open . 2 Click the Start button, and then click Shut Down. 3 Click the pull-down menu under What do ?.... 4 Click Shut down and then click OK. NOTICE: To prevent data loss, you have open . 2 Click the Start button, and then click Shut Down. 3 In the Shut Down Windows window, click Shut ...
... 1 Save and exit any other devices connected to power. www.dell.com | support.dell.com If you connect an older printer and it doesn't work after...computer automatically turns off after the shutdown process finishes. 5 Turn off your monitor and any programs and files you have open . 2 Click the Start button, and then click Shut Down. 3 Click the pull-down menu under What do ?.... 4 Click Shut down and then click OK. NOTICE: To prevent data loss, you have open . 2 Click the Start button, and then click Shut Down. 3 In the Shut Down Windows window, click Shut ...

Dell Dimension 8100 Solutions Guide
Page 29
... PROGRAMS AND T R Y A G A I B L E . THE FILE BEING COPIED IS TOO LARGE FOR THE DESTINATION D R I R E D . Try copying the file to open is missing an essential file. Insert a disk into the drive and try again. Close all windows and open . A R E Q U I V E- D L L F I S N O T R E A D Y - Verify that your network settings are trying to copy is functioning. T H E D E V I C E I L E W A S N O T F O U N D - You have too many programs...
... PROGRAMS AND T R Y A G A I B L E . THE FILE BEING COPIED IS TOO LARGE FOR THE DESTINATION D R I R E D . Try copying the file to open is missing an essential file. Insert a disk into the drive and try again. Close all windows and open . A R E Q U I V E- D L L F I S N O T R E A D Y - Verify that your network settings are trying to copy is functioning. T H E D E V I C E I L E W A S N O T F O U N D - You have too many programs...

Dell Dimension 8100 Solutions Guide
Page 31
... website or e-mail service, call waiting, dial: is checked and then select the proper code according to http://support.dell.com and then click E-Mail Dell in your telephone directory for technical assistance (see page 68). P H O N E ) - C A L L D E L L- If Work Offline has a... check next to it, click the check to remove it and connect to receive an e-mail message from Dell within hours. With the Outlook Express e-mail program open, click File. Solving Problems 31 TU R N O F F C A L L W A I T I N T E R N E T - See your telephone directory. 5 ...
... website or e-mail service, call waiting, dial: is checked and then select the proper code according to http://support.dell.com and then click E-Mail Dell in your telephone directory for technical assistance (see page 68). P H O N E ) - C A L L D E L L- If Work Offline has a... check next to it, click the check to remove it and connect to receive an e-mail message from Dell within hours. With the Outlook Express e-mail program open, click File. Solving Problems 31 TU R N O F F C A L L W A I T I N T E R N E T - See your telephone directory. 5 ...

Dell Dimension 8100 Solutions Guide
Page 49
HINT: Installing filler brackets over empty cardslot openings is necessary to On. The brackets also keep dust and dirt out of your computer. Wait at least 5 seconds, and then remove the computer cover (... its top corners, and ease it out of its connector. 5 If you are removing the card permanently, install a filler bracket in the empty card-slot opening, using the screw you removed in step 3. 6 Replace the computer cover, reconnect the computer and devices to their electrical outlets, and turn them on. 7 If...
HINT: Installing filler brackets over empty cardslot openings is necessary to On. The brackets also keep dust and dirt out of your computer. Wait at least 5 seconds, and then remove the computer cover (... its top corners, and ease it out of its connector. 5 If you are removing the card permanently, install a filler bracket in the empty card-slot opening, using the screw you removed in step 3. 6 Replace the computer cover, reconnect the computer and devices to their electrical outlets, and turn them on. 7 If...


