
Owner's Manual
Page 5
... 43 Restoring Your Operating System 43 Using Microsoft Windows XP System Restore 43 Using Dell PC Restore by Symantec 45 Resolving Software and Hardware Incompatibilities 46 4 Removing and Installing Parts Before You Begin 47 Recommended Tools 47 Turning Off Your Computer 47 Before Working Inside Your Computer 48 Front and Back View...
... 43 Restoring Your Operating System 43 Using Microsoft Windows XP System Restore 43 Using Dell PC Restore by Symantec 45 Resolving Software and Hardware Incompatibilities 46 4 Removing and Installing Parts Before You Begin 47 Recommended Tools 47 Turning Off Your Computer 47 Before Working Inside Your Computer 48 Front and Back View...

Owner's Manual
Page 11
... the same time you purchased your computer, the cable may not come with a printer cable, so if you purchase a cable separately, ensure that it is turned on the computer and the printer. See the documentation that came with your printer. 3 Attach the USB printer cable to the computer. • Load paper...
... the same time you purchased your computer, the cable may not come with a printer cable, so if you purchase a cable separately, ensure that it is turned on the computer and the printer. See the documentation that came with your printer. 3 Attach the USB printer cable to the computer. • Load paper...

Owner's Manual
Page 12
NOTICE: For best results, use a 3-m (10-ft) or shorter parallel cable. 3 Attach the parallel printer cable to the connector on the printer and snap the two clips into the two notches. 12 Setting Up and Using Your Computer www.dell.com | support.dell.com USB connector on computer USB printer cable USB connector on the computer and tighten the two screws. Attach the cable to the parallel connector on printer Connecting a Parallel Printer 1 Complete the operating system setup, if you have not already done so. 2 Turn off the computer (see page 47).
NOTICE: For best results, use a 3-m (10-ft) or shorter parallel cable. 3 Attach the parallel printer cable to the connector on the printer and snap the two clips into the two notches. 12 Setting Up and Using Your Computer www.dell.com | support.dell.com USB connector on computer USB printer cable USB connector on the computer and tighten the two screws. Attach the cable to the parallel connector on printer Connecting a Parallel Printer 1 Complete the operating system setup, if you have not already done so. 2 Turn off the computer (see page 47).
Owner's Manual
Page 13
... not remove the cap to the integrated video connector. parallel connector on computer screws (2) connector on printer clips (2) notches (2) parallel printer cable 4 Turn on the printer and then turn on page 47. If the Add New Hardware Wizard window appears, click Cancel. 5 Install the printer driver if necessary. The instructions tell you...
... not remove the cap to the integrated video connector. parallel connector on computer screws (2) connector on printer clips (2) notches (2) parallel printer cable 4 Turn on the printer and then turn on page 47. If the Add New Hardware Wizard window appears, click Cancel. 5 Install the printer driver if necessary. The instructions tell you...
Owner's Manual
Page 15
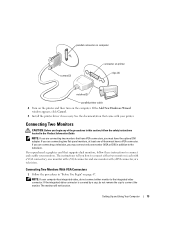
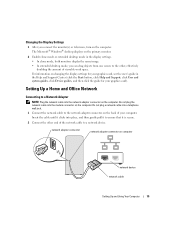
... in the display settings. • In clone mode, both monitors display the same image. • In extended desktop mode, you connect the monitor(s) or television, turn on the back of the network cable to a Network Adapter NOTE: Plug the network cable into the modem connector on computer network device network cable...
... in the display settings. • In clone mode, both monitors display the same image. • In extended desktop mode, you connect the monitor(s) or television, turn on the back of the network cable to a Network Adapter NOTE: Plug the network cable into the modem connector on computer network device network cable...
Owner's Manual
Page 21
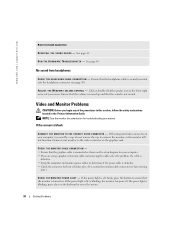
Replace the battery only with your computer: • If you have to repeatedly reset time and date information after turning on the screen, write down the exact message. CAUTION: Before you begin any of a new battery exploding if it is a danger of the procedures ... the problem started, review the installation procedures and ensure that the part is correctly installed. • If a peripheral device does not work properly, contact Dell (see page 88). Solving Problems Troubleshooting Tips Follow these tips when you troubleshoot your antivirus software to check for and remove viruses.
Replace the battery only with your computer: • If you have to repeatedly reset time and date information after turning on the screen, write down the exact message. CAUTION: Before you begin any of a new battery exploding if it is a danger of the procedures ... the problem started, review the installation procedures and ensure that the part is correctly installed. • If a peripheral device does not work properly, contact Dell (see page 88). Solving Problems Troubleshooting Tips Follow these tips when you troubleshoot your antivirus software to check for and remove viruses.
Owner's Manual
Page 22
...• Insert a bootable floppy disk and restart the computer. See the Dell Dimension Help file. See page 46. NOTE: Because of data when writing. ...turned up . • Ensure that are checked. See "Sound and Speaker Problems" on power management modes. 22 Solving Problems CD and DVD drive problems NOTE: High-speed CD or DVD drive vibration is interrupted, an error occurs. R W D I N G T O A C D / D V D - C L E A N T H E D R I V E O R D I C S - C H E C K T H E S P E A K E R S A N D S U B W O O F E R - R U N T H E D E L L D I A G N O S T I S K - See the Dell Dimension...
...• Insert a bootable floppy disk and restart the computer. See the Dell Dimension Help file. See page 46. NOTE: Because of data when writing. ...turned up . • Ensure that are checked. See "Sound and Speaker Problems" on power management modes. 22 Solving Problems CD and DVD drive problems NOTE: High-speed CD or DVD drive vibration is interrupted, an error occurs. R W D I N G T O A C D / D V D - C L E A N T H E D R I V E O R D I C S - C H E C K T H E S P E A K E R S A N D S U B W O O F E R - R U N T H E D E L L D I A G N O S T I S K - See the Dell Dimension...
Owner's Manual
Page 26
...up C H E C K T H E D I A G N O S T I C L I G H T S - See page 37. TU R N T H E C O M P U T E R O F F - If you are unable to 10 seconds until the computer turns off. CHECK THE KEYBOARD CABLE - • Ensure that the keyboard cable is firmly connected to the computer. • Shut down the computer (see page 47... any of the procedures in this section, follow the safety instructions located in the Product Information Guide. www.dell.com | support.dell.com Keyboard Problems CAUTION: Before you begin any of the procedures in this section, follow the safety instructions located...
...up C H E C K T H E D I A G N O S T I C L I G H T S - See page 37. TU R N T H E C O M P U T E R O F F - If you are unable to 10 seconds until the computer turns off. CHECK THE KEYBOARD CABLE - • Ensure that the keyboard cable is firmly connected to the computer. • Shut down the computer (see page 47... any of the procedures in this section, follow the safety instructions located in the Product Information Guide. www.dell.com | support.dell.com Keyboard Problems CAUTION: Before you begin any of the procedures in this section, follow the safety instructions located...

Owner's Manual
Page 27
... - A program stops responding END THE PROGRAM - 1 Press simultaneously. 2 Click Applications. 3 Click the program that is designed for at least 8 to 10 seconds until the computer turns off. If you are unable to All Programs→ Accessories, and then click Program Compatibility Wizard. 2 In the welcome screen, click Next. 3 Follow the instructions...
... - A program stops responding END THE PROGRAM - 1 Press simultaneously. 2 Click Applications. 3 Click the program that is designed for at least 8 to 10 seconds until the computer turns off. If you are unable to All Programs→ Accessories, and then click Program Compatibility Wizard. 2 In the welcome screen, click Next. 3 Follow the instructions...
Owner's Manual
Page 29
...Dell Dimension Help file for your computer. 4 Start the computer. To access the help file, see page 47), reconnect the mouse cable as shown on the on cleaning the mouse. Straighten bent pins. 2 Remove mouse extension cables, if used, and connect the mouse directly to the computer. 3 Shut down or Turn... Off, and then press . 3 After the computer turns off, reconnect the mouse cable as shown on the setup diagram for instructions on the setup diagram for damaged or frayed ...
...Dell Dimension Help file for your computer. 4 Start the computer. To access the help file, see page 47), reconnect the mouse cable as shown on the on cleaning the mouse. Straighten bent pins. 2 Remove mouse extension cables, if used, and connect the mouse directly to the computer. 3 Shut down or Turn... Off, and then press . 3 After the computer turns off, reconnect the mouse cable as shown on the setup diagram for instructions on the setup diagram for damaged or frayed ...
Owner's Manual
Page 31
...I G H T I S O F F - I F T H E P O W E R L I G H T I S S T E A D Y A M B E R - I F T H E P O W E R L I G H T I S B L I N K I N T E R F E R E N C E - ENSURE THAT THE PRINTER IS TURNED ON Solving Problems 31 E L I M I N A T E I N G A M B E R - The computer is receiving electrical power, but an internal power problem might be malfunctioning or incorrectly installed. • Remove and then...R I N T E R D O C U M E N T A T I O N - The computer is either turned off or is not receiving power. • Reseat the power cable into both the power connector on the back of interference are ...
...I G H T I S O F F - I F T H E P O W E R L I G H T I S S T E A D Y A M B E R - I F T H E P O W E R L I G H T I S B L I N K I N T E R F E R E N C E - ENSURE THAT THE PRINTER IS TURNED ON Solving Problems 31 E L I M I N A T E I N G A M B E R - The computer is receiving electrical power, but an internal power problem might be malfunctioning or incorrectly installed. • Remove and then...R I N T E R D O C U M E N T A T I O N - The computer is either turned off or is not receiving power. • Reseat the power cable into both the power connector on the back of interference are ...

Owner's Manual
Page 33
... the sound is listed, Windows recognizes the scanner. No sound from the speakers is working by testing it with the speakers. If you did not turn the player volume down or off nearby fans, fluorescent lights, or halogen lamps to the computer's front-panel headphone connector. C H E C K T H E S P E A K E R C A B L E C O N N E C T I S C O N N E C T H E A D P H O N E S F R O M T H E H ... supplied with another device, such as shown on the setup diagram supplied with the speakers. Turn off . Solving Problems 33 Sound and Speaker Problems CAUTION: Before you purchased a sound card...
... the sound is listed, Windows recognizes the scanner. No sound from the speakers is working by testing it with the speakers. If you did not turn the player volume down or off nearby fans, fluorescent lights, or halogen lamps to the computer's front-panel headphone connector. C H E C K T H E S P E A K E R C A B L E C O N N E C T I S C O N N E C T H E A D P H O N E S F R O M T H E H ... supplied with another device, such as shown on the setup diagram supplied with the speakers. Turn off . Solving Problems 33 Sound and Speaker Problems CAUTION: Before you purchased a sound card...
Owner's Manual
Page 34
...R R E C T V I O N - If the power light is not muted. Ensure that the volume is turned up and that the monitor is off, firmly press the button to the video connector on . NOTE: See the monitor ...C A B L E C O N N E C T I D E O C O N N E C T O R - A D J U S T T H E W I V E R - CHECK THE MONITOR CABLE CONNECTION - • Ensure that the headphone cable is lit or blinking, the monitor has power. www.dell.com | support.dell.com RUN THE SPEAKER DIAGNOSTICS R E I N S T A L L T H E S O U N D D R I N D O W S V O L U M E C O N T R O L - R U N T H E H A R D W A R E TR O U B L E S H O ...
...R R E C T V I O N - If the power light is not muted. Ensure that the volume is turned up and that the monitor is off, firmly press the button to the video connector on . NOTE: See the monitor ...C A B L E C O N N E C T I D E O C O N N E C T O R - A D J U S T T H E W I V E R - CHECK THE MONITOR CABLE CONNECTION - • Ensure that the headphone cable is lit or blinking, the monitor has power. www.dell.com | support.dell.com RUN THE SPEAKER DIAGNOSTICS R E I N S T A L L T H E S O U N D D R I N D O W S V O L U M E C O N T R O L - R U N T H E H A R D W A R E TR O U B L E S H O ...
Owner's Manual
Page 35
... monitor, and running the monitor self-test. Fans, fluorescent lights, halogen lamps, and other electrical devices can cause the screen image to check for interference. Turn off nearby devices to appear "shaky." If the screen is difficult to read C H E C K T H E M O N I T O R S E T T I C S - M O V E T H E M O N I C A L O U T L E T - Solving Problems 35 Ensure that the subwoofer is working by testing it...
... monitor, and running the monitor self-test. Fans, fluorescent lights, halogen lamps, and other electrical devices can cause the screen image to check for interference. Turn off nearby devices to appear "shaky." If the screen is difficult to read C H E C K T H E M O N I T O R S E T T I C S - M O V E T H E M O N I C A L O U T L E T - Solving Problems 35 Ensure that the subwoofer is working by testing it...
Owner's Manual
Page 40
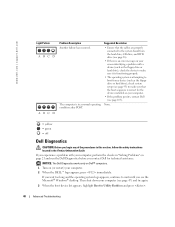
... on your computer, perform the checks in the Product Information Guide. NOTICE: The Dell Diagnostics works only on Dell™ computers. 1 Turn on page 21 and run the Dell Diagnostics before you see page 105). Then shut down your computer. 2 When the DELL™ logo appears, press immediately. The computer is correct for technical assistance...
... on your computer, perform the checks in the Product Information Guide. NOTICE: The Dell Diagnostics works only on Dell™ computers. 1 Turn on page 21 and run the Dell Diagnostics before you see page 105). Then shut down your computer. 2 When the DELL™ logo appears, press immediately. The computer is correct for technical assistance...

Owner's Manual
Page 45
... Restore by Symantec Use Dell PC Restore by Symantec only as the End User License Agreement, are permanently deleted from the hard drive. PC Restore restores your hard drive to the operating state it was turned on the hard drive and removes any applications or drivers installed after you received your ... click System Restore. 2 Click Undo my last restoration and click Next. Any programs or files added since you do not want to proceed with www.dell.com appears at the top of the screen. 2 Immediately upon seeing the blue bar, press . including data files-are the same ones that appeared ...
... Restore by Symantec Use Dell PC Restore by Symantec only as the End User License Agreement, are permanently deleted from the hard drive. PC Restore restores your hard drive to the operating state it was turned on the hard drive and removes any applications or drivers installed after you received your ... click System Restore. 2 Click Undo my last restoration and click Next. Any programs or files added since you do not want to proceed with www.dell.com appears at the top of the screen. 2 Immediately upon seeing the blue bar, press . including data files-are the same ones that appeared ...
Owner's Manual
Page 46
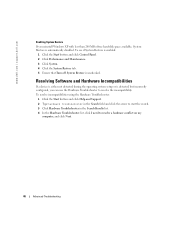
...button and click Control Panel. 2 Click Performance and Maintenance. 3 Click System. 4 Click the System Restore tab. 5 Ensure that Turn off System Restore is automatically disabled. Resolving Software and Hardware Incompatibilities If a device is either not detected during the operating system setup ... Troubleshooter in the Search Results list. 4 In the Hardware Troubleshooter list, click I need to resolve the incompatibility. www.dell.com | support.dell.com Enabling System Restore If you can use the Hardware Troubleshooter to resolve a hardware conflict on my computer, and click Next...
...button and click Control Panel. 2 Click Performance and Maintenance. 3 Click System. 4 Click the System Restore tab. 5 Ensure that Turn off System Restore is automatically disabled. Resolving Software and Hardware Incompatibilities If a device is either not detected during the operating system setup ... Troubleshooter in the Search Results list. 4 In the Hardware Troubleshooter list, click I need to resolve the incompatibility. www.dell.com | support.dell.com Enabling System Restore If you can use the Hardware Troubleshooter to resolve a hardware conflict on my computer, and click Next...
Owner's Manual
Page 47
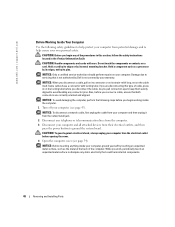
...may require the following conditions exist: • You have performed the steps in "Turning Off Your Computer" and "Before Working Inside Your Computer." • You have read the safety information in your Dell™ Product Information Guide. • A component can be replaced by performing the... removal procedure in your operating system, press and hold the power button for removing and installing the components in reverse order. The computer turns off after the ...
...may require the following conditions exist: • You have performed the steps in "Turning Off Your Computer" and "Before Working Inside Your Computer." • You have read the safety information in your Dell™ Product Information Guide. • A component can be replaced by performing the... removal procedure in your operating system, press and hold the power button for removing and installing the components in reverse order. The computer turns off after the ...
Owner's Manual
Page 48
...cover. 4 Open the computer cover (see page 47). Hold a card by its edges or by its metal mounting bracket. www.dell.com | support.dell.com Before Working Inside Your Computer Use the following steps before you begin any connector pins. Hold a component such as the metal at... the back of the procedures in this type of cable, press in the Product Information Guide. NOTICE: Before touching anything inside the computer. 1 Turn...
...cover. 4 Open the computer cover (see page 47). Hold a card by its edges or by its metal mounting bracket. www.dell.com | support.dell.com Before Working Inside Your Computer Use the following steps before you begin any connector pins. Hold a component such as the metal at... the back of the procedures in this type of cable, press in the Product Information Guide. NOTICE: Before touching anything inside the computer. 1 Turn...
Owner's Manual
Page 50
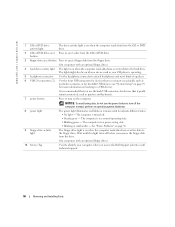
... website or call technical support. 50 Removing and Installing Parts www.dell.com | support.dell.com 1 CD or DVD driveactivity light The drive activity light is in a normal operating state. • Blinking green - It is turned off before you remove the floppy disk from the CD or DVD drive. 2... CD or DVD drive eject Press to turn off the computer. The computer...
... website or call technical support. 50 Removing and Installing Parts www.dell.com | support.dell.com 1 CD or DVD driveactivity light The drive activity light is in a normal operating state. • Blinking green - It is turned off before you remove the floppy disk from the CD or DVD drive. 2... CD or DVD drive eject Press to turn off the computer. The computer...

