
Owner's Manual
Page 1
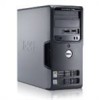
Dell™ Dimension™ 3100/E310 Owner's Manual Service Tag CD or DVD activity light FlexBay for optional floppy drive or Media Card Reader headphone connector diagnostic lights 1234 CD or DVD eject button USB 2.0 connectors (2) hard drive activity light power button cover latch release card slots for PCI (2), PCI Express x1 (1) power connector sound-card connectors USB 2.0 connectors (4) network adapter VGA video connector (integrated) Model DCSM www.dell.com | support.dell.com
Dell™ Dimension™ 3100/E310 Owner's Manual Service Tag CD or DVD activity light FlexBay for optional floppy drive or Media Card Reader headphone connector diagnostic lights 1234 CD or DVD eject button USB 2.0 connectors (2) hard drive activity light power button cover latch release card slots for PCI (2), PCI Express x1 (1) power connector sound-card connectors USB 2.0 connectors (4) network adapter VGA video connector (integrated) Model DCSM www.dell.com | support.dell.com
Owner's Manual
Page 6
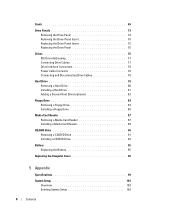
... 75 Replacing the Drive-Panel Insert 75 Replacing the Drive Panel 76 Drives 76 IDE Drive Addressing 77 Connecting Drive Cables 77 Drive Interface Connectors 78 Power Cable Connector 78 Connecting and Disconnecting Drive Cables 79 Hard Drive 79 Removing a Hard Drive 80 Installing a Hard Drive 81 Adding a Second Hard Drive (optional 82 Floppy Drive 83 Removing a Floppy Drive 83 Installing a Floppy Drive 85 Media Card Reader 87 Removing a Media Card Reader 87 Installing a Media Card Reader 89 CD/DVD Drive 90 Removing a CD/DVD Drive 91 Installing a CD/DVD Drive 92 Battery 95...
... 75 Replacing the Drive-Panel Insert 75 Replacing the Drive Panel 76 Drives 76 IDE Drive Addressing 77 Connecting Drive Cables 77 Drive Interface Connectors 78 Power Cable Connector 78 Connecting and Disconnecting Drive Cables 79 Hard Drive 79 Removing a Hard Drive 80 Installing a Hard Drive 81 Adding a Second Hard Drive (optional 82 Floppy Drive 83 Removing a Floppy Drive 83 Installing a Floppy Drive 85 Media Card Reader 87 Removing a Media Card Reader 87 Installing a Media Card Reader 89 CD/DVD Drive 90 Removing a CD/DVD Drive 91 Installing a CD/DVD Drive 92 Battery 95...

Owner's Manual
Page 10
...; Windows® License These labels are located on my computer configuration, product specifications, and white papers • Downloads - Troubleshooting hints and tips, articles Dell Support Website - Computer documentation, details on your computer. • Use the Service Tag to view the appropriate support questions site. • Community - To download Desktop System Software: 1 Go to System and Configuration Utilities, and click Dell Desktop System Software. 10 Finding Information Online discussion with technical support...
...; Windows® License These labels are located on my computer configuration, product specifications, and white papers • Downloads - Troubleshooting hints and tips, articles Dell Support Website - Computer documentation, details on your computer. • Use the Service Tag to view the appropriate support questions site. • Community - To download Desktop System Software: 1 Go to System and Configuration Utilities, and click Dell Desktop System Software. 10 Finding Information Online discussion with technical support...

Owner's Manual
Page 18
... Start button and click Control Panel. 2 Under Pick a category, click Appearance and Themes. 3 Under Pick a task..., click Change the screen resolution. 4 In the Display Properties window, click and drag the bar in Dell™ computers can also use Sonic DigitalMedia for available software patches on your computer or backing up important data. You can write to and read DVD+/-R, DVD+/-RW and DVD+R DL (dual...
... Start button and click Control Panel. 2 Under Pick a category, click Appearance and Themes. 3 Under Pick a task..., click Change the screen resolution. 4 In the Display Properties window, click and drag the bar in Dell™ computers can also use Sonic DigitalMedia for available software patches on your computer or backing up important data. You can write to and read DVD+/-R, DVD+/-RW and DVD+R DL (dual...

Owner's Manual
Page 39
... and try using the mouse. C L E A N T H E M O U S E - R E I N S T A L L T H E M O U S E D R I V E R - R U N T H E H A R D W A R E TR O U B L E S H O O T E R - CHECK THE MOUSE SETTINGS - 1 Click the Start button, click Control Panel, and then click Printers and Other Hardware. 2 Click Mouse. 3 Try adjusting the settings. For more information about the type of the procedures in this section, follow the safety instructions located in the setup diagram for your computer. See "Reinstalling Drivers" on page 65. • Run the Dell Diagnostics (see page 51). Solving Problems 39
... and try using the mouse. C L E A N T H E M O U S E - R E I N S T A L L T H E M O U S E D R I V E R - R U N T H E H A R D W A R E TR O U B L E S H O O T E R - CHECK THE MOUSE SETTINGS - 1 Click the Start button, click Control Panel, and then click Printers and Other Hardware. 2 Click Mouse. 3 Try adjusting the settings. For more information about the type of the procedures in this section, follow the safety instructions located in the setup diagram for your computer. See "Reinstalling Drivers" on page 65. • Run the Dell Diagnostics (see page 51). Solving Problems 39
Owner's Manual
Page 47
..., contact Dell for technical assistance. outlet Also see ""Installing Memory" on the front panel to the operating system. If the computer starts normally, reinstall an additional module. successfully boots to help you have identified a faulty module or reinstalled all four lights turn off . Memory modules are off " condition or Plug the computer into a working memory of the lights identify the problem. When the computer starts normally, the lights flash...
..., contact Dell for technical assistance. outlet Also see ""Installing Memory" on the front panel to the operating system. If the computer starts normally, reinstall an additional module. successfully boots to help you have identified a faulty module or reinstalled all four lights turn off . Memory modules are off " condition or Plug the computer into a working memory of the lights identify the problem. When the computer starts normally, the lights flash...

Owner's Manual
Page 53
... may need to replace the driver with a [!]) on your computer might not work correctly. Identifying Drivers If you experience a problem with any device has an exclamation point (a yellow circle with the previously installed version. 1 Click the Start button and click Control Panel. 2 Under Pick a Category, click Performance and Maintenance. 3 Click System. 4 In the System Properties window, click the Hardware tab. 5 Click Device Manager. 6 Right-click the device for Dell...
... may need to replace the driver with a [!]) on your computer might not work correctly. Identifying Drivers If you experience a problem with any device has an exclamation point (a yellow circle with the previously installed version. 1 Click the Start button and click Control Panel. 2 Under Pick a Category, click Performance and Maintenance. 3 Click System. 4 In the System Properties window, click the Hardware tab. 5 Click Device Manager. 6 Right-click the device for Dell...

Owner's Manual
Page 55
... problem. The Restoration Complete screen appears after you install a device driver, use System Restore. All calendar dates with available restore points appear in an undesirable operating state. To change the restore point, you can undo the restoration. System Restore does not monitor your computer to an earlier operating state (without affecting data files) if changes to the hardware, software, or other system settings have left the computer in boldface type. 4 Select a restore...
... problem. The Restoration Complete screen appears after you install a device driver, use System Restore. All calendar dates with available restore points appear in an undesirable operating state. To change the restore point, you can undo the restoration. System Restore does not monitor your computer to an earlier operating state (without affecting data files) if changes to the hardware, software, or other system settings have left the computer in boldface type. 4 Select a restore...

Owner's Manual
Page 74
... you installed a sound card: a Enter system setup, select Audio Controller, and then change the setting to the add-in the open . Do not connect the network cable to Off (see page 103). Cables routed over or behind the cards. If you are removing the card permanently, install a filler bracket in network adapter and want to disable the integrated network adapter: a Enter system setup, select Network Controller, and then change the setting to the integrated connector on . 11 If you installed an add-in...
... you installed a sound card: a Enter system setup, select Audio Controller, and then change the setting to the add-in the open . Do not connect the network cable to Off (see page 103). Cables routed over or behind the cards. If you are removing the card permanently, install a filler bracket in network adapter and want to disable the integrated network adapter: a Enter system setup, select Network Controller, and then change the setting to the integrated connector on . 11 If you installed an add-in...

Owner's Manual
Page 75
b Connect the network cable to the integrated connector on the back panel of the computer. 8 If you removed an add-in the Product Information Guide. Drive Panels CAUTION: Before you removed a sound card: a Enter system setup, select Audio Controller, and then change the setting to On (see page 103). Removing and Installing Parts 73 b Connect external audio devices to the audio connectors on the back panel of the computer. CAUTION: To guard against electrical shock, always unplug your computer from...
b Connect the network cable to the integrated connector on the back panel of the computer. 8 If you removed an add-in the Product Information Guide. Drive Panels CAUTION: Before you removed a sound card: a Enter system setup, select Audio Controller, and then change the setting to On (see page 103). Removing and Installing Parts 73 b Connect external audio devices to the audio connectors on the back panel of the computer. CAUTION: To guard against electrical shock, always unplug your computer from...

Owner's Manual
Page 84
... and out of the procedures in this section, follow the safety instructions located in upper bay hard drive bay 6 Connect a power cable to the drive. 7 Connect the data cable to the drive and to electrical outlets, and turn them on. Adding a Second Hard Drive (optional) CAUTION: Before you hear a click or feel the drive securely installed. NOTICE: To connect a network cable, first plug the cable into the network port or device, and then plug it on a hard surface.
... and out of the procedures in this section, follow the safety instructions located in upper bay hard drive bay 6 Connect a power cable to the drive. 7 Connect the data cable to the drive and to electrical outlets, and turn them on. Adding a Second Hard Drive (optional) CAUTION: Before you hear a click or feel the drive securely installed. NOTICE: To connect a network cable, first plug the cable into the network port or device, and then plug it on a hard surface.

Owner's Manual
Page 88
NOTICE: To connect a network cable, first plug the cable in to the network port or device, and then plug it in to the computer. 10 Connect your computer works correctly by running the Dell Diagnostics (see page 51). 86 Removing and Installing Parts power cable data cable 7 Check all cable connections and fold cables out of the way, to their electrical outlets, and turn them on installing any software required for drive operation. 11 Enter system setup (see page 103) and...
NOTICE: To connect a network cable, first plug the cable in to the network port or device, and then plug it in to the computer. 10 Connect your computer works correctly by running the Dell Diagnostics (see page 51). 86 Removing and Installing Parts power cable data cable 7 Check all cable connections and fold cables out of the way, to their electrical outlets, and turn them on installing any software required for drive operation. 11 Enter system setup (see page 103) and...

Owner's Manual
Page 96
.... 8 Connect your computer works correctly by running the Dell Diagnostics (see page 76). NOTICE: To connect a network cable, first plug the cable in to the network port or device, and then plug it in to avoid blocking the fan and cooling vents. 6 Replace the computer cover (see page 96). 7 Replace the drive panel (see page 51). 94 Removing and Installing Parts See the documentation that came with the drive for instructions on . 4 Connect the power and data cables...
.... 8 Connect your computer works correctly by running the Dell Diagnostics (see page 76). NOTICE: To connect a network cable, first plug the cable in to the network port or device, and then plug it in to avoid blocking the fan and cooling vents. 6 Replace the computer cover (see page 96). 7 Replace the drive panel (see page 51). 94 Removing and Installing Parts See the documentation that came with the drive for instructions on . 4 Connect the power and data cables...

Owner's Manual
Page 107
... board as Off, USB, Internal, or Read Only. Pressing this field configures the system memory allocation reserved for RAID. Offering selectable options of 1MB and 8MB, this key combination causes a menu to display that USB devices will be detected and supported in the system setup menu. To boot from a network server. Drives Diskette Drive Drives 0 through 1 SATA Operation Identifies and defines the floppy drive attached to the SATA connectors on the computer. Identifies and defines the SATA controller settings...
... board as Off, USB, Internal, or Read Only. Pressing this field configures the system memory allocation reserved for RAID. Offering selectable options of 1MB and 8MB, this key combination causes a menu to display that USB devices will be detected and supported in the system setup menu. To boot from a network server. Drives Diskette Drive Drives 0 through 1 SATA Operation Identifies and defines the floppy drive attached to the SATA connectors on the computer. Identifies and defines the SATA controller settings...

Owner's Manual
Page 136
... Flex Bay drive Media Card Reader, 59 floppy drive installing, 85 removing, 83 H hard drive activity light, 60 installing, 81 installing second, 82 problems, 33 removing, 80 hardware Dell Diagnostics, 50 Hardware Troubleshooter, 53 headphone connector, 60 Help and Support Center, 11 help file Windows Help and Support Center, 11 hibernate mode, 23, 25 Hyper-Threading, 30 I installing parts before you begin, 57 recommended tools, 57 turning off your computer, 57 Internet connection, about, 14 connection, options, 14 connection, setting up, 15 problems, 33 K keyboard problems, 36 L labels...
... Flex Bay drive Media Card Reader, 59 floppy drive installing, 85 removing, 83 H hard drive activity light, 60 installing, 81 installing second, 82 problems, 33 removing, 80 hardware Dell Diagnostics, 50 Hardware Troubleshooter, 53 headphone connector, 60 Help and Support Center, 11 help file Windows Help and Support Center, 11 hibernate mode, 23, 25 Hyper-Threading, 30 I installing parts before you begin, 57 recommended tools, 57 turning off your computer, 57 Internet connection, about, 14 connection, options, 14 connection, setting up, 15 problems, 33 K keyboard problems, 36 L labels...

Service Manual
Page 6
... Dell Diagnostics obtains configuration information for all devices from system setup, memory, and various internal tests, and it displays the information in the device list in the following table for your Service Tag. 3. Allows you contact Dell, technical support will ask for the option you cannot resolve the error condition, contact Dell. Close the test screen to return to wake the computer. System Lights Your power button light and hard-drive light may not display the names of the problem...
... Dell Diagnostics obtains configuration information for all devices from system setup, memory, and various internal tests, and it displays the information in the device list in the following table for your Service Tag. 3. Allows you contact Dell, technical support will ask for the option you cannot resolve the error condition, contact Dell. Close the test screen to return to wake the computer. System Lights Your power button light and hard-drive light may not display the names of the problem...

Service Manual
Page 8
... devices installed on then off before the system starts. If your Owner's Manual. If all of -day clock stopped 4-4-1 Serial or parallel port test failure 4-4-2 Failure to decompress code to make sure the boot sequence is correct for technical assistance. Reseat the processor (see "System Board Components"). floppy drive or hard drive); During normal operation, all of beeps, called a beep code, identifies a problem. Also see "Power Problems" in your computer. Unplug the power supply and check the 4-pin processor power cable connection (see "Processor"). Run...
... devices installed on then off before the system starts. If your Owner's Manual. If all of -day clock stopped 4-4-1 Serial or parallel port test failure 4-4-2 Failure to decompress code to make sure the boot sequence is correct for technical assistance. Reseat the processor (see "System Board Components"). floppy drive or hard drive); During normal operation, all of beeps, called a beep code, identifies a problem. Also see "Power Problems" in your computer. Unplug the power supply and check the 4-pin processor power cable connection (see "Processor"). Run...

Service Manual
Page 28
... Drive option. 12. Replace the drive panel. 9. Verify that came with the drive for instructions on . Attach the power and data cables to their electrical outlets, and turn them on installing any of the way to the connector labeled "FLOPPY" on the system board and route the cable through the clip on the computer chassis. 1. Replace the computer cover. You can do so by running the Dell Diagnostics. Remove the drive panel. Media Card Reader Removing a Media Card Reader...
... Drive option. 12. Replace the drive panel. 9. Verify that came with the drive for instructions on . Attach the power and data cables to their electrical outlets, and turn them on installing any of the way to the connector labeled "FLOPPY" on the system board and route the cable through the clip on the computer chassis. 1. Replace the computer cover. You can do so by running the Dell Diagnostics. Remove the drive panel. Media Card Reader Removing a Media Card Reader...

Service Manual
Page 44
... the System Password option. This setting specifies which video controller is enabled. If your hard drive image. Your computer does not test or change the current acoustics mode setting. Integrated NIC Controller You can set the NIC to boot from the next device in the BIOS may not appear exactly as Off, USB, Internal, or Read Only. On = Media Card Reader is primary when two video controllers are present on the computer. Processor Info Memory Info Date...
... the System Password option. This setting specifies which video controller is enabled. If your hard drive image. Your computer does not test or change the current acoustics mode setting. Integrated NIC Controller You can set the NIC to boot from the next device in the BIOS may not appear exactly as Off, USB, Internal, or Read Only. On = Media Card Reader is primary when two video controllers are present on the computer. Processor Info Memory Info Date...
Service Manual
Page 45
... using a power strip or surge protector. Boot Sequence This feature allows you to reset every option back to the way it skips certain configurations and tests. Execute Disable This field specifies whether Execute Disable Memory Protection Technology will be bootable. Sets the computer to increase or decrease the numbers, or type numbers in the upper-right corner of each key. The BIOS detects the device and adds the USB flash option...
... using a power strip or surge protector. Boot Sequence This feature allows you to reset every option back to the way it skips certain configurations and tests. Execute Disable This field specifies whether Execute Disable Memory Protection Technology will be bootable. Sets the computer to increase or decrease the numbers, or type numbers in the upper-right corner of each key. The BIOS detects the device and adds the USB flash option...


