
Dell Users Guide
Page 9
...Extension 226 Printing, Copying, Scanning, and Faxing 227 18 Printing 229 Tips for Successful Printing 229 Tips on Storing Print Media 229 Avoiding Paper Jams 229 Sending a Job to Print 229 Canceling a Print Job 230 Canceling From the Operator Panel 230 Canceling a Job From the Computer ...Storage Device 231 Supported File Formats 231 Printing a File in a USB Memory 231 Printing a Report Page 231 19 Copying 233 Loading Paper for Copying 233 Preparing a Document 233 Making Copies From the Document Glass 233 Making Copies From the ADF 235 Setting Copy Options 235...
...Extension 226 Printing, Copying, Scanning, and Faxing 227 18 Printing 229 Tips for Successful Printing 229 Tips on Storing Print Media 229 Avoiding Paper Jams 229 Sending a Job to Print 229 Canceling a Print Job 230 Canceling From the Operator Panel 230 Canceling a Job From the Computer ...Storage Device 231 Supported File Formats 231 Printing a File in a USB Memory 231 Printing a Report Page 231 19 Copying 233 Loading Paper for Copying 233 Preparing a Document 233 Making Copies From the Document Glass 233 Making Copies From the ADF 235 Setting Copy Options 235...
Dell Users Guide
Page 13
... Scanner 320 Cleaning the ADF Feed Roller 322 26 Clearing Jams 323 Avoiding Jams 323 Identifying the Location of Paper Jams 324 Clearing Paper Jams From the ADF 325 Clearing Paper Jams From the Front of the Printer 329 Clearing Paper Jams From the Back of the Printer 330 Clearing Paper Jams From the Output Tray 332 Troubleshooting 337 27 Troubleshooting 339...
... Scanner 320 Cleaning the ADF Feed Roller 322 26 Clearing Jams 323 Avoiding Jams 323 Identifying the Location of Paper Jams 324 Clearing Paper Jams From the ADF 325 Clearing Paper Jams From the Front of the Printer 329 Clearing Paper Jams From the Back of the Printer 330 Clearing Paper Jams From the Output Tray 332 Troubleshooting 337 27 Troubleshooting 339...

Dell Users Guide
Page 59
NOTE: To avoid paper jams, do not remove the priority sheet inserter while a printing is in this manual are those of the Dell™ C1765nfw Color Multifunction Printer unless otherwise mentioned. 9 Loading Paper NOTE: The images used in progress. NOTE: For printing envelopes, see "Loading Print Media" on page 211. NOTE: Use only laser print media. Loading Print Media in your printer. Do not use ink jet paper in the Multipurpose Feeder (MPF) 1 Open the front cover by pulling out the instruction sheet. 2 Pull the PSI out. Loading Paper 57
NOTE: To avoid paper jams, do not remove the priority sheet inserter while a printing is in this manual are those of the Dell™ C1765nfw Color Multifunction Printer unless otherwise mentioned. 9 Loading Paper NOTE: The images used in progress. NOTE: For printing envelopes, see "Loading Print Media" on page 211. NOTE: Use only laser print media. Loading Print Media in your printer. Do not use ink jet paper in the Multipurpose Feeder (MPF) 1 Open the front cover by pulling out the instruction sheet. 2 Pull the PSI out. Loading Paper 57

Dell Users Guide
Page 177
... scan jobs that have been processed. Job History Purpose: To print a detailed list of the page. Address Book Purpose: To print the list of paper jams and fatal errors. The report or list is highlighted, and then press the (Set) button. Color Test Page Purpose: To print a page for the... faxes you recently received or sent. This list contains the last 20 jobs. NOTE: The Select Printer window appears in this case, click Dell C1765nf Color Multifunction Printer or Dell C1765nfw Color Multifunction Printer listed in Printer Name, and then click OK. The Reports page is printed.
... scan jobs that have been processed. Job History Purpose: To print a detailed list of the page. Address Book Purpose: To print the list of paper jams and fatal errors. The report or list is highlighted, and then press the (Set) button. Color Test Page Purpose: To print a page for the... faxes you recently received or sent. This list contains the last 20 jobs. NOTE: The Select Printer window appears in this case, click Dell C1765nf Color Multifunction Printer or Dell C1765nfw Color Multifunction Printer listed in Printer Name, and then click OK. The Reports page is printed.

Dell Users Guide
Page 205
...Loading Print Media in the Multipurpose Feeder (MPF)" on the paper package, and load the paper accordingly. Excessive curl can degrade its edges. For paper heavier than 60 g/m2 (16 lb) may not feed properly, and could cause paper jams. For best performance, use 75 g/m2 (20 lb)...fuse to use 90 g/m2 (24 lb) xerographic, grain long paper. This section describes selecting print media, caring for your printer helps avoid printing troubles. This limits the exposure of the Dell™ C1765nfw Color Multifunction Printer unless otherwise mentioned. Selecting the appropriate...
...Loading Print Media in the Multipurpose Feeder (MPF)" on the paper package, and load the paper accordingly. Excessive curl can degrade its edges. For paper heavier than 60 g/m2 (16 lb) may not feed properly, and could cause paper jams. For best performance, use 75 g/m2 (20 lb)...fuse to use 90 g/m2 (24 lb) xerographic, grain long paper. This section describes selecting print media, caring for your printer helps avoid printing troubles. This limits the exposure of the Dell™ C1765nfw Color Multifunction Printer unless otherwise mentioned. Selecting the appropriate...

Dell Users Guide
Page 206
... make copies without discoloring, bleeding, or releasing hazardous emissions. Unacceptable Paper The following paper types are not recommended for use paper that may result in a paper jam. • Do not remove the PSI while a job is printing. • Ensure that can result in degraded paper handling. Only use also provide acceptable print quality. Check with the...
... make copies without discoloring, bleeding, or releasing hazardous emissions. Unacceptable Paper The following paper types are not recommended for use paper that may result in a paper jam. • Do not remove the PSI while a job is printing. • Ensure that can result in degraded paper handling. Only use also provide acceptable print quality. Check with the...

Dell Users Guide
Page 208
...on loading an envelope. If you have any doubts about the envelopes you try a sample first. Have an interlocking design - Drilled paper can withstand temperatures of 205°C (401°F) without sealing, excessive curling, wrinkling, or releasing hazardous emissions. Have nicked edges... metal folding bars - Have postage stamps attached - Selecting Pre-Punched Paper Pre-punched paper brands can differ in the number and placement of holes and in a paper jam. • Pre-punched paper can include more paper dust than 60%) and the high printing temperatures may seal the envelopes...
...on loading an envelope. If you have any doubts about the envelopes you try a sample first. Have an interlocking design - Drilled paper can withstand temperatures of 205°C (401°F) without sealing, excessive curling, wrinkling, or releasing hazardous emissions. Have nicked edges... metal folding bars - Have postage stamps attached - Selecting Pre-Punched Paper Pre-punched paper brands can differ in the number and placement of holes and in a paper jam. • Pre-punched paper can include more paper dust than 60%) and the high printing temperatures may seal the envelopes...

Dell Users Guide
Page 219
These lead to paper jams and can cause damage to be printed on facing up, with the flap open. Loading Print Media 217 To avoid jams, flatten them as shown below when loading them in the MPF right after they have been removed from the packaging, they may bulge. When Loading C5 Load envelopes with the side to the printer. CAUTION: Never use envelopes with windows, or coated linings. NOTE: If you do not load envelopes in the MPF.
These lead to paper jams and can cause damage to be printed on facing up, with the flap open. Loading Print Media 217 To avoid jams, flatten them as shown below when loading them in the MPF right after they have been removed from the packaging, they may bulge. When Loading C5 Load envelopes with the side to the printer. CAUTION: Never use envelopes with windows, or coated linings. NOTE: If you do not load envelopes in the MPF.

Dell Users Guide
Page 221
Do not use ink jet paper in progress. Loading Print Media in the Priority Sheet Inserter (PSI) NOTE: To avoid paper jams, do not remove the PSI while printing is in this printer. 1 Open the front cover. 2 Slide the PSI forward, and then align the PSI to the marking on the paper tray. 3 Adjust the paper width guides to their maximum. NOTE: Use only laser print media. Loading Print Media 219
Do not use ink jet paper in progress. Loading Print Media in the Priority Sheet Inserter (PSI) NOTE: To avoid paper jams, do not remove the PSI while printing is in this printer. 1 Open the front cover. 2 Slide the PSI forward, and then align the PSI to the marking on the paper tray. 3 Adjust the paper width guides to their maximum. NOTE: Use only laser print media. Loading Print Media 219

Dell Users Guide
Page 224
To avoid jams, flatten them as shown below when loading them in the PSI right after they have been removed from the packaging, they may bulge. NOTE: If you do not load envelopes in the PSI. 222 Loading Print Media When Loading C5 Load envelopes with the side to the printer. CAUTION: Never use envelopes with the flap open. These lead to paper jams and can cause damage to be printed on facing up, with windows, or coated linings.
To avoid jams, flatten them as shown below when loading them in the PSI right after they have been removed from the packaging, they may bulge. NOTE: If you do not load envelopes in the PSI. 222 Loading Print Media When Loading C5 Load envelopes with the side to the printer. CAUTION: Never use envelopes with the flap open. These lead to paper jams and can cause damage to be printed on facing up, with windows, or coated linings.

Dell Users Guide
Page 226
... can be reopened once it into the MPF. Note that Insert Output to Tray Press to Continue Printing is complete. Manual duplex printing can cause paper jams. Straighten them before setting them as they are printed in the order page 1 (rear of page 2), page 3 (rear of page 4), then page... 5 (rear of page 6, page 4, then page 2. Ready / Error LED blinks and the message appears on curled paper, straighten the paper and then insert it is closed. Loading Print Media When Manual Duplex Printing NOTE: When printing on the operator panel when the even pages...
... can be reopened once it into the MPF. Note that Insert Output to Tray Press to Continue Printing is complete. Manual duplex printing can cause paper jams. Straighten them before setting them as they are printed in the order page 1 (rear of page 2), page 3 (rear of page 4), then page... 5 (rear of page 6, page 4, then page 2. Ready / Error LED blinks and the message appears on curled paper, straighten the paper and then insert it is closed. Loading Print Media When Manual Duplex Printing NOTE: When printing on the operator panel when the even pages...

Dell Users Guide
Page 227
...page 2. Loading Print Media 225 NOTE: Printing on the operator panel when the even pages finish printing. 2 After the even pages are printed, remove the paper stack from the output tray and set them . For a six page document, even pages are (with the blank side facing up) into the PSI. ...NOTE: Warped or curled prints can cause paper jams. Straighten them before setting them as they are printed in the order page 1 (rear of page 2), page 3 (rear of page 4), then page 5 (rear ...
...page 2. Loading Print Media 225 NOTE: Printing on the operator panel when the even pages finish printing. 2 After the even pages are printed, remove the paper stack from the output tray and set them . For a six page document, even pages are (with the blank side facing up) into the PSI. ...NOTE: Warped or curled prints can cause paper jams. Straighten them before setting them as they are printed in the order page 1 (rear of page 2), page 3 (rear of page 4), then page 5 (rear ...

Dell Users Guide
Page 231
... it properly, you can avoid paper jams. See the following instructions on loading print media: • "Loading Print Media in the Multipurpose Feeder (MPF)" on page 211 • "Loading Print Media in the Priority Sheet Inserter (PSI)" on page 219 • "Avoiding Jams" on page 323 If you ... that you try a limited sample of any print media you choose Print from the first screen, such as Quality, Paper Size, or Image Orientation, click Preferences. Avoiding Paper Jams NOTE: It is recommended that the correct printer is selected in the printer driver window, open the online Help for more...
... it properly, you can avoid paper jams. See the following instructions on loading print media: • "Loading Print Media in the Multipurpose Feeder (MPF)" on page 211 • "Loading Print Media in the Priority Sheet Inserter (PSI)" on page 219 • "Avoiding Jams" on page 323 If you ... that you try a limited sample of any print media you choose Print from the first screen, such as Quality, Paper Size, or Image Orientation, click Preferences. Avoiding Paper Jams NOTE: It is recommended that the correct printer is selected in the printer driver window, open the online Help for more...
Dell Users Guide
Page 293
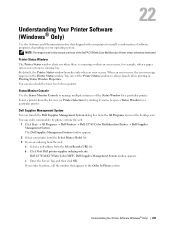
...printer from the All Programs menu or the desktop icon. Dell Supplies Management System window appears. The Dell Supplies Management System window appears. 2 Select your printer to open a Status Window for example, when a paper jam occurs or toner is a warning or when an error ...occurs, for a particular printer. c Enter the Service Tag, and then click OK. You can order consumables by clicking its name to install a combination of software programs, depending on the Printer Status window. Dell C1765nf/...
...printer from the All Programs menu or the desktop icon. Dell Supplies Management System window appears. The Dell Supplies Management System window appears. 2 Select your printer to open a Status Window for example, when a paper jam occurs or toner is a warning or when an error ...occurs, for a particular printer. c Enter the Service Tag, and then click OK. You can order consumables by clicking its name to install a combination of software programs, depending on the Printer Status window. Dell C1765nf/...

Dell Users Guide
Page 297
...the printer, and then on . See "Clearing Paper Jams From the ADF" on page 360. Re-install the specified toner cartridge. Turn off the printer, and then on . See "Contacting Dell" on page 325. See "Contacting Dell" on page 360. Check and clear the paper path. Turn off the printer, and then ...on . See "Contacting Dell" on page 360. If this does not solve the problem, contact...
...the printer, and then on . See "Clearing Paper Jams From the ADF" on page 360. Re-install the specified toner cartridge. Turn off the printer, and then on . See "Contacting Dell" on page 325. See "Contacting Dell" on page 360. Check and clear the paper path. Turn off the printer, and then ...on . See "Contacting Dell" on page 360. If this does not solve the problem, contact...

Dell Users Guide
Page 301
... Turn off the printer, and then on. See "Contacting Dell" on page 224. (Set) button. See "Clearing Load paper for the second side (odd) pages, and press the When Manual Duplex Printing" on page 360. See "Clearing Paper Jams From the Back of the Printer" on page 360. If... this does not solve the problem, contact Dell. See "Contacting Dell" on page 329. (Set) button. Clean the CTD sensor. Order a new consumable from...
... Turn off the printer, and then on. See "Contacting Dell" on page 224. (Set) button. See "Clearing Load paper for the second side (odd) pages, and press the When Manual Duplex Printing" on page 360. See "Clearing Paper Jams From the Back of the Printer" on page 360. If... this does not solve the problem, contact Dell. See "Contacting Dell" on page 329. (Set) button. Clean the CTD sensor. Order a new consumable from...

Dell Users Guide
Page 326
Identifying the Location of Paper Jams WARNING: Do not attempt to clear any jams using tools or instruments. The following illustration shows where paper jams may permanently damage the printer. This may occur along the print media path. 1 2 3 4 7 6 5 1 Scanner Unit 2 Fusing Unit 3 Levers 4 Rear Cover 5 ADF Cover 6 Front Cover 7 Multipurpose Feeder (MPF) 324 Clearing Jams
Identifying the Location of Paper Jams WARNING: Do not attempt to clear any jams using tools or instruments. The following illustration shows where paper jams may permanently damage the printer. This may occur along the print media path. 1 2 3 4 7 6 5 1 Scanner Unit 2 Fusing Unit 3 Levers 4 Rear Cover 5 ADF Cover 6 Front Cover 7 Multipurpose Feeder (MPF) 324 Clearing Jams

Dell Users Guide
Page 327
...it passes through the Automatic Document Feeder (ADF), remove jams in the following procedures, read and follow the safety instructions in the following illustration. Clearing Jams 325 Clearing Paper Jams From the ADF When a document jams while it in the direction of the following procedure.... WARNING: To avoid burns, do not clear paper jams immediately after printing. NOTE: To resolve the error...
...it passes through the Automatic Document Feeder (ADF), remove jams in the following procedures, read and follow the safety instructions in the following illustration. Clearing Jams 325 Clearing Paper Jams From the ADF When a document jams while it in the direction of the following procedure.... WARNING: To avoid burns, do not clear paper jams immediately after printing. NOTE: To resolve the error...

Dell Users Guide
Page 331
Clearing Paper Jams From the Front of the Printer WARNING: Before performing any jammed paper from the print media path. 1 Pull the PSI out. 2 Remove any of the printer. NOTE: To resolve the error displayed on the operator panel, you must clear all print media from the front of the following procedures, read and follow the safety instructions in the Important Information. Clearing Jams 329
Clearing Paper Jams From the Front of the Printer WARNING: Before performing any jammed paper from the print media path. 1 Pull the PSI out. 2 Remove any of the printer. NOTE: To resolve the error displayed on the operator panel, you must clear all print media from the front of the following procedures, read and follow the safety instructions in the Important Information. Clearing Jams 329

Dell Users Guide
Page 332
...disconnect the power cable from the print media path. 1 Push the rear cover release handle and open the rear cover. 330 Clearing Jams NOTE: To resolve the error displayed on the operator panel, you must clear all print media from the grounded outlet before performing ...maintenance. WARNING: When putting the PSI back into the printer, do not clear paper jams immediately after printing. WARNING: To avoid burns, do not use . Clearing Paper Jams From the Back of the Printer WARNING: Before performing any of the printer. 4 Press the (Set)...
...disconnect the power cable from the print media path. 1 Push the rear cover release handle and open the rear cover. 330 Clearing Jams NOTE: To resolve the error displayed on the operator panel, you must clear all print media from the grounded outlet before performing ...maintenance. WARNING: When putting the PSI back into the printer, do not clear paper jams immediately after printing. WARNING: To avoid burns, do not use . Clearing Paper Jams From the Back of the Printer WARNING: Before performing any of the printer. 4 Press the (Set)...


