
Quick Reference Guide
Page 2
...-sheet or 550-sheet tray, then remove the tray from the printer. 5 Remove the jammed paper, and then insert the tray. 6 Press . 4 Place the toner cartridge aside on a flat, smooth surface. Use the cartridge handle whenever you are holding the cartridge. Note: If the paper is exiting the printer, then... remove the paper from a hot component, allow the surface to cool before touching. To reduce the risk of injury from there. 6 Align and reinstall the toner cartridge. 7 Close the front cover. 8 Close the multipurpose feeder door. 9 Press . 202 and 203 paper jams If the paper is not easy to...
...-sheet or 550-sheet tray, then remove the tray from the printer. 5 Remove the jammed paper, and then insert the tray. 6 Press . 4 Place the toner cartridge aside on a flat, smooth surface. Use the cartridge handle whenever you are holding the cartridge. Note: If the paper is exiting the printer, then... remove the paper from a hot component, allow the surface to cool before touching. To reduce the risk of injury from there. 6 Align and reinstall the toner cartridge. 7 Close the front cover. 8 Close the multipurpose feeder door. 9 Press . 202 and 203 paper jams If the paper is not easy to...
User Guide
Page 3
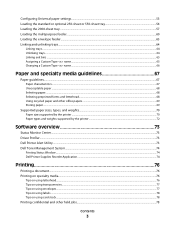
... ...70 Paper types and weights supported by the printer ...72 Software overview 73 Status Monitor Center...73 Driver Profiler...73 Dell Printer Alert Utility...73 Dell Toner Management System...74 Printing Status Window...74 Dell Printer Supplies Reorder Application ...74 Printing 76 Printing a document...76 Printing on specialty media...76 Tips on using letterhead...
... ...70 Paper types and weights supported by the printer ...72 Software overview 73 Status Monitor Center...73 Driver Profiler...73 Dell Printer Alert Utility...73 Dell Toner Management System...74 Printing Status Window...74 Dell Printer Supplies Reorder Application ...74 Printing 76 Printing a document...76 Printing on specialty media...76 Tips on using letterhead...

User Guide
Page 5
... computer 130 Ordering supplies...130 Printer attached to a network ...130 Printer attached locally to a computer ...130 Replacing supplies...131 Replacing the toner cartridge ...131 Replacing the photoconductor kit ...132 Recycling Dell products...135 Moving the printer...135 Before moving the printer ...135 Moving the printer to another location...135 Shipping the printer...
... computer 130 Ordering supplies...130 Printer attached to a network ...130 Printer attached locally to a computer ...130 Replacing supplies...131 Replacing the toner cartridge ...131 Replacing the photoconductor kit ...132 Recycling Dell products...135 Moving the printer...135 Before moving the printer ...135 Moving the printer to another location...135 Shipping the printer...

User Guide
Page 9
Streaked vertical lines ...182 Streaked horizontal lines...183 Toner fog or background shading appears on the page 183 Toner rubs off...184 Toner specks...184 Transparency print quality is poor...185 Uneven print density...185 Contacting Technical Support...185 Appendix 186 Index 188 Contents 9
Streaked vertical lines ...182 Streaked horizontal lines...183 Toner fog or background shading appears on the page 183 Toner rubs off...184 Toner specks...184 Transparency print quality is poor...185 Uneven print density...185 Contacting Technical Support...185 Appendix 186 Index 188 Contents 9

User Guide
Page 67
... for 24 to high temperatures. Consider these characteristics when evaluating new paper stock. For paper smaller than 176 g/m2, grain short is too rough, then toner cannot fuse to it in its edges. Excessive curl can cause paper feeding problems. Curl can cause feeding problems. Smoothness Paper smoothness directly affects print...
... for 24 to high temperatures. Consider these characteristics when evaluating new paper stock. For paper smaller than 176 g/m2, grain short is too rough, then toner cannot fuse to it in its edges. Excessive curl can cause paper feeding problems. Curl can cause feeding problems. Smoothness Paper smoothness directly affects print...

User Guide
Page 68
... been cut or trimmed by the resin in doubt, contact the paper supplier. This information is made from 100% chemically treated pulped wood. When in toner. For detailed information on paper with a high degree of the paper. Unacceptable paper The following paper types are specifically designed for 60-90 g/m2 (16...
... been cut or trimmed by the resin in doubt, contact the paper supplier. This information is made from 100% chemically treated pulped wood. When in toner. For detailed information on paper with a high degree of the paper. Unacceptable paper The following paper types are specifically designed for 60-90 g/m2 (16...
User Guide
Page 74
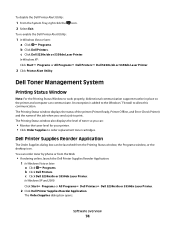
... Programs. b Click Dell Printers. Dell Printer Supplies Reorder Application The Order Supplies dialog box can be in place so the printer and computer can order toner by phone or from the Printing Status window, the Programs window, or the desktop icon. c Click Dell 5230n/dn or 5350dn Laser Printer. The Order... Supplies dialog box opens. To disable the Dell Printer Alert Utility: 1 From the System ...
... Programs. b Click Dell Printers. Dell Printer Supplies Reorder Application The Order Supplies dialog box can be in place so the printer and computer can order toner by phone or from the Printing Status window, the Programs window, or the desktop icon. c Click Dell 5230n/dn or 5350dn Laser Printer. The Order... Supplies dialog box opens. To disable the Dell Printer Alert Utility: 1 From the System ...

User Guide
Page 120
...Menu item Print Resolution 300 dpi 600 dpi 1200 dpi 1200 Image Q 2400 Image Q Pixel Boost Off Fonts Horizontally Vertically Both Directions Toner Darkness 1-10 Enhance Fine Lines On Off Gray Correction Auto Off Description Stacks copies or print jobs into staggered sets in a browser... • Vertically darkens vertical lines of printed output Note: Auto is the factory default setting. • Selecting a smaller number can help conserve toner. Lightens or darkens the printed output Notes: • 8 is the factory default setting. Enhances the printed quality of a print job. No ...
...Menu item Print Resolution 300 dpi 600 dpi 1200 dpi 1200 Image Q 2400 Image Q Pixel Boost Off Fonts Horizontally Vertically Both Directions Toner Darkness 1-10 Enhance Fine Lines On Off Gray Correction Auto Off Description Stacks copies or print jobs into staggered sets in a browser... • Vertically darkens vertical lines of printed output Note: Auto is the factory default setting. • Selecting a smaller number can help conserve toner. Lightens or darkens the printed output Notes: • 8 is the factory default setting. Enhances the printed quality of a print job. No ...

User Guide
Page 121
... -6 to +6 Contrast 0-5 Utilities menu Menu item Format Flash Yes No Defragment Flash Yes No Hex Trace Activate Description Adjusts or darkens printed output and conserves toner Notes: • 0 is the factory default setting. • A negative value will lighten them and conserve...
... -6 to +6 Contrast 0-5 Utilities menu Menu item Format Flash Yes No Defragment Flash Yes No Hex Trace Activate Description Adjusts or darkens printed output and conserves toner Notes: • 0 is the factory default setting. • A negative value will lighten them and conserve...

User Guide
Page 129
... the exterior of the printer 1 Make sure that the printer is turned off and unplugged from the printer control panel that will help you conserve toner and paper.
... the exterior of the printer 1 Make sure that the printer is turned off and unplugged from the printer control panel that will help you conserve toner and paper.

User Guide
Page 130
...address into the address field of your printer model from the printer drop-down arrow button until View supplies appears, and then press . The Order Toner Cartridges window opens. 6 Choose your Web browser. Note: If you do not know the IP address of the printer, print a network setup ... control panel, press the up or down arrow button until Status/Supplies appears, and then press . 3 Press the up or down list. 5 Click Dell Printer Supplies Reorder Application. Printer attached locally to a computer 1 Click or Start. 2 Click All Programs or Programs, and then select the printer program ...
...address into the address field of your printer model from the printer drop-down arrow button until View supplies appears, and then press . The Order Toner Cartridges window opens. 6 Choose your Web browser. Note: If you do not know the IP address of the printer, print a network setup ... control panel, press the up or down arrow button until Status/Supplies appears, and then press . 3 Press the up or down list. 5 Click Dell Printer Supplies Reorder Application. Printer attached locally to a computer 1 Click or Start. 2 Click All Programs or Programs, and then select the printer program ...

User Guide
Page 131
...3 3 Unpack the new toner cartridge. Warning-Potential Damage: When replacing a toner cartridge, do not leave the photoconductor kit exposed to redistribute the toner, and then reinsert it side-to-side and front-to-back several times to direct light for an extended period of your Dell printer Service Tag number.... To replace the toner cartridge: 1 Open the front door by printing a menu settings page. When shaking the cartridge no longer improves ...
...3 3 Unpack the new toner cartridge. Warning-Potential Damage: When replacing a toner cartridge, do not leave the photoconductor kit exposed to redistribute the toner, and then reinsert it side-to-side and front-to-back several times to direct light for an extended period of your Dell printer Service Tag number.... To replace the toner cartridge: 1 Open the front door by printing a menu settings page. When shaking the cartridge no longer improves ...

User Guide
Page 132
...also see the status of the photoconductor kit by aligning the rollers on the toner cartridge with the arrows on the display. While the printer may continue to distribute the toner. 5 Install the new toner cartridge by printing a menu settings page. The cartridge clicks into place when ... the printer 132 Replacing the photoconductor kit The printer automatically notifies you should immediately order a new photoconductor kit. Push the toner cartridge in all directions to function properly after the photoconductor kit has reached its official end-of the photoconductor kit. When 84...
...also see the status of the photoconductor kit by aligning the rollers on the toner cartridge with the arrows on the display. While the printer may continue to distribute the toner. 5 Install the new toner cartridge by printing a menu settings page. The cartridge clicks into place when ... the printer 132 Replacing the photoconductor kit The printer automatically notifies you should immediately order a new photoconductor kit. Push the toner cartridge in all directions to function properly after the photoconductor kit has reached its official end-of the photoconductor kit. When 84...

User Guide
Page 133
Place the unit on a flat, clean surface. 3 Press the button on the toner cartridge handle. Maintaining the printer 133 Pull the toner cartridge up and out using the handle. Note: The photoconductor kit and toner cartridge form a unit. 1 Open the front door by pressing the button on the left side of the printer and lowering the front door. 2 Pull the photoconductor kit and toner cartridge out of the printer as a unit by pulling on the base of the photoconductor kit.
Place the unit on a flat, clean surface. 3 Press the button on the toner cartridge handle. Maintaining the printer 133 Pull the toner cartridge up and out using the handle. Note: The photoconductor kit and toner cartridge form a unit. 1 Open the front door by pressing the button on the left side of the printer and lowering the front door. 2 Pull the photoconductor kit and toner cartridge out of the printer as a unit by pulling on the base of the photoconductor kit.

User Guide
Page 134
...unit as far as it clicks into place. 6 Install the unit into the photoconductor kit by aligning the arrows on the toner cartridge with the tracks. Maintaining the printer 134 Warning-Potential Damage: Resetting the photoconductor counter without replacing the photoconductor may damage your... printer and void your warranty. 8 Close the front door. 4 Unpack the new photoconductor kit. Push the toner cartridge until it will go. 7 After you replace the photoconductor kit, reset the photoconductor counter. Be careful not to touch the photoconductor ...
...unit as far as it clicks into place. 6 Install the unit into the photoconductor kit by aligning the arrows on the toner cartridge with the tracks. Maintaining the printer 134 Warning-Potential Damage: Resetting the photoconductor counter without replacing the photoconductor may damage your... printer and void your warranty. 8 Close the front door. 4 Unpack the new photoconductor kit. Push the toner cartridge until it will go. 7 After you replace the photoconductor kit, reset the photoconductor counter. Be careful not to touch the photoconductor ...
User Guide
Page 137
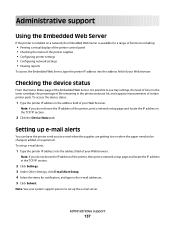
... the Embedded Web Server If the printer is installed on a network, the Embedded Web Server is possible to see tray settings, the level of toner in the toner cartridge, the percentage of life remaining in the photoconductor kit, and capacity measurements of the printer, print a network setup page and locate the IP...
... the Embedded Web Server If the printer is installed on a network, the Embedded Web Server is possible to see tray settings, the level of toner in the toner cartridge, the percentage of life remaining in the photoconductor kit, and capacity measurements of the printer, print a network setup page and locate the IP...

User Guide
Page 141
... 1 Push the release latch, and then lower the multipurpose feeder door. 2 Push the release latch, and then open the front cover. 4 1 2 3 3 Lift and pull the toner cartridge out of the cartridge. Open doors and covers and remove trays to access jam locations. Understanding jam numbers and locations When a jam occurs, a message...
... 1 Push the release latch, and then lower the multipurpose feeder door. 2 Push the release latch, and then open the front cover. 4 1 2 3 3 Lift and pull the toner cartridge out of the cartridge. Open doors and covers and remove trays to access jam locations. Understanding jam numbers and locations When a jam occurs, a message...

User Guide
Page 142
Warning-Potential Damage: The jammed paper may be hot. CAUTION-HOT SURFACE: The inside of injury from there. 6 Align and reinstall the toner cartridge. 7 Close the front cover. 8 Close the multipurpose feeder door. 9 Press . 201 paper jam 1 Push the release latch, and then lower the multipurpose... easy to remove, then open the front cover. 4 1 2 3 3 Lift and pull the toner cartridge out of the printer. Use the cartridge handle whenever you are holding the cartridge. 4 Place the toner cartridge aside on the underside of the cartridge. Clearing jams 142 To reduce the risk of the...
Warning-Potential Damage: The jammed paper may be hot. CAUTION-HOT SURFACE: The inside of injury from there. 6 Align and reinstall the toner cartridge. 7 Close the front cover. 8 Close the multipurpose feeder door. 9 Press . 201 paper jam 1 Push the release latch, and then lower the multipurpose... easy to remove, then open the front cover. 4 1 2 3 3 Lift and pull the toner cartridge out of the printer. Use the cartridge handle whenever you are holding the cartridge. 4 Place the toner cartridge aside on the underside of the cartridge. Clearing jams 142 To reduce the risk of the...

User Guide
Page 143
...component, allow the surface to light for extended periods. Clearing jams 143 CAUTION-HOT SURFACE: The inside of injury from there. 6 Align and reinstall the toner cartridge. 7 Close the front cover. 8 Close the multipurpose feeder door. 9 Press . 202 and 203 paper jams If the paper is exiting the...then pull the paper out, and then press . To reduce the risk of the printer might be covered with unfused toner which can stain garments and skin. 5 Remove the jammed paper. 4 Place the toner cartridge aside on a flat, smooth surface. Warning-Potential Damage: The jammed paper may be hot.
...component, allow the surface to light for extended periods. Clearing jams 143 CAUTION-HOT SURFACE: The inside of injury from there. 6 Align and reinstall the toner cartridge. 7 Close the front cover. 8 Close the multipurpose feeder door. 9 Press . 202 and 203 paper jams If the paper is exiting the...then pull the paper out, and then press . To reduce the risk of the printer might be covered with unfused toner which can stain garments and skin. 5 Remove the jammed paper. 4 Place the toner cartridge aside on a flat, smooth surface. Warning-Potential Damage: The jammed paper may be hot.

User Guide
Page 149
... envelope feeder. Make sure it lightly rests against the edge of the stack. Clearing jams 149 Note: If you cannot remove the envelope, then the toner cartridge will have to loosen them, and then fan them. Do not fold or crease the paper. For more information, see "200 paper jam" on...
... envelope feeder. Make sure it lightly rests against the edge of the stack. Clearing jams 149 Note: If you cannot remove the envelope, then the toner cartridge will have to loosen them, and then fan them. Do not fold or crease the paper. For more information, see "200 paper jam" on...


