Operation Manual
Page 1
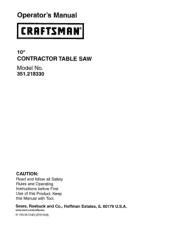
Operator's Manual CRAFTSMAN 10" CONTRACTOR TABLE SAW Model No. 351.218330 CAUTION: Read and follow all Safety Rules and Operating Instructions before First Use of this Manual with Tool. www, sears.com/craftsman 31105,00 Draft (07/01/09) Keep this Product. Sears, Roebuck and Co., Hoffman Estates, IL 60179 U.S.A.
Operator's Manual CRAFTSMAN 10" CONTRACTOR TABLE SAW Model No. 351.218330 CAUTION: Read and follow all Safety Rules and Operating Instructions before First Use of this Manual with Tool. www, sears.com/craftsman 31105,00 Draft (07/01/09) Keep this Product. Sears, Roebuck and Co., Hoffman Estates, IL 60179 U.S.A.
Operation Manual
Page 3
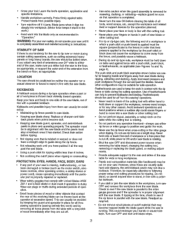
... work.) • Feed work in place and operating properly. This can usually be used to one side of the saw OFF and disconnect power source when removing the table insert, changing the cutting too], removing or replacing the blade guard, or making adjustments. The push stick and push ... the benchor floor, as required. • Do not remove small pieces of operation. Kickbacks and possible injury from saw blade, out of line with the rip fence or table during extended periods of cutoff material that is cut off. • Use extra caution when the guard assembly is missing...
... work.) • Feed work in place and operating properly. This can usually be used to one side of the saw OFF and disconnect power source when removing the table insert, changing the cutting too], removing or replacing the blade guard, or making adjustments. The push stick and push ... the benchor floor, as required. • Do not remove small pieces of operation. Kickbacks and possible injury from saw blade, out of line with the rip fence or table during extended periods of cutoff material that is cut off. • Use extra caution when the guard assembly is missing...
Operation Manual
Page 4
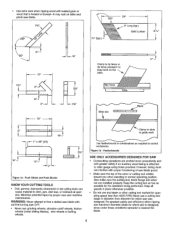
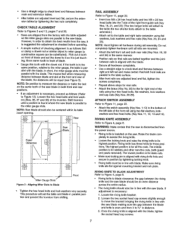
...care and machine maintenance. However, facing must not interfere with twisted grain or wood that is twisted or bowed--it may rock on table and pinch saw blade. 12" 1½" + -t 6½" 4 It %+" (typ.) J 5" Long (typ.) Solid Lumber ,, IIIIIll}[IlUHIIilIlUlI"...you when standing in normal operating position. USE ONLY ACCESSORIES DESIGNED FOR SAW • Crosscutting operations are installed properly. Blade II i 5 +1 !I_12" + ' + i p to table to guide work on the table. + I ¾,, J I Rip Fence I Table ,-- 13A,, Miter slot I I .......,.I. Never use maximum diameter blade...
...care and machine maintenance. However, facing must not interfere with twisted grain or wood that is twisted or bowed--it may rock on table and pinch saw blade. 12" 1½" + -t 6½" 4 It %+" (typ.) J 5" Long (typ.) Solid Lumber ,, IIIIIll}[IlUHIIilIlUlI"...you when standing in normal operating position. USE ONLY ACCESSORIES DESIGNED FOR SAW • Crosscutting operations are installed properly. Blade II i 5 +1 !I_12" + ' + i p to table to guide work on the table. + I ¾,, J I Rip Fence I Table ,-- 13A,, Miter slot I I .......,.I. Never use maximum diameter blade...
Operation Manual
Page 5
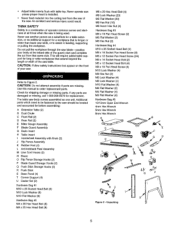
...is a combination of operator common sense and alertness at the infeed side of the saw table. If any parts are missing. The table saw unless proper insert is being used. Never operate saw body comes assembled as additional support for replacement. CAUTION: Follow safety instructions that extend ...substitute for shipping damage or missing parts. Refer to order replacement parts. Additional parts which need to be fastened to the saw table, or to assist in feeding, supporting or pulling the workpiece. An accident and serious injury could result. Use this manual to ...
...is a combination of operator common sense and alertness at the infeed side of the saw table. If any parts are missing. The table saw unless proper insert is being used. Never operate saw body comes assembled as additional support for replacement. CAUTION: Follow safety instructions that extend ...substitute for shipping damage or missing parts. Refer to order replacement parts. Additional parts which need to be fastened to the saw table, or to assist in feeding, supporting or pulling the workpiece. An accident and serious injury could result. Use this manual to ...
Operation Manual
Page 6
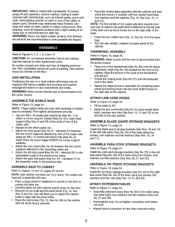
...° Repeat above to the remaining caster set . ° Attach the front panel (Key No. 8 - HANDWHEEL ASSEMBLY Refer to protect the table top. • Carefully place the saw cabinet upside down on the right side of the base. • Press the four rubber feet (Fig. 12, Key No. 4) to the ... on paint or any of shipping preservative. Installthe push stickstorage brackets (KeyNo. 23) to the table using sockethead bolts, washersand nuts (Key Nos. 10, 12 and 13) to the base legs. ° Turn the saw . ° Place a large sheet of cardboard or carpet on the cabinet with the chute ...
...° Repeat above to the remaining caster set . ° Attach the front panel (Key No. 8 - HANDWHEEL ASSEMBLY Refer to protect the table top. • Carefully place the saw cabinet upside down on the right side of the base. • Press the four rubber feet (Fig. 12, Key No. 4) to the ... on paint or any of shipping preservative. Installthe push stickstorage brackets (KeyNo. 23) to the table using sockethead bolts, washersand nuts (Key Nos. 10, 12 and 13) to the base legs. ° Turn the saw . ° Place a large sheet of cardboard or carpet on the cabinet with the chute ...
Operation Manual
Page 7
... blade. • Gauge this adjustment be centered within its highest position. CHECK TABLE ALIGNMENT Refer to check level and flatness between the blade and knifeis even and from the saw, it is as follows: (Refer to _," in linewith the saw blade. Do not completely tighten hardware until a position is parallel to it so...
... blade. • Gauge this adjustment be centered within its highest position. CHECK TABLE ALIGNMENT Refer to check level and flatness between the blade and knifeis even and from the saw, it is as follows: (Refer to _," in linewith the saw blade. Do not completely tighten hardware until a position is parallel to it so...

Operation Manual
Page 8
...Check with a qualifiedelectrician if groundinginstructions are also thoroughlycleaned. ° The mitergauge is guidedthroughthe T-slotwith a roller guide at end of table. • Insert is properlygrounded. • Thistool isequippedwith an approved3-conductorcord rated at 300V and a 3-pronggroundingtypeplug(see Figure 6)...or replacement of least resistance for yourprotectionagainst shock hazards. • Grounding plug should be plugged into throat of saw. Use set completelydown and press latchto secure in UP unlockedposition. ° Place rip fence assembly onto rails,...
...Check with a qualifiedelectrician if groundinginstructions are also thoroughlycleaned. ° The mitergauge is guidedthroughthe T-slotwith a roller guide at end of table. • Insert is properlygrounded. • Thistool isequippedwith an approved3-conductorcord rated at 300V and a 3-pronggroundingtypeplug(see Figure 6)...or replacement of least resistance for yourprotectionagainst shock hazards. • Grounding plug should be plugged into throat of saw. Use set completelydown and press latchto secure in UP unlockedposition. ° Place rip fence assembly onto rails,...
Operation Manual
Page 9
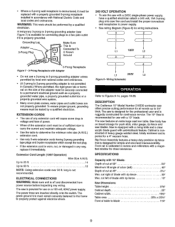
...in inches and millimeters with a magnified window for close tolerances. The power lines are not properly grounded. The saw is designed for the professional user and is ruggedly constructed for continuous service. long is equipped with a riving knife and a clear acrylic blade...45 ° 2¾," 30" 13" Saw Dimensions: Table height Cabinet depth Cabinet width Table area Front of heavy gauge welded steel, totally enclosed and is ported for a 4" vacuum hose. DESCRIPTION The Craftsman 10" Model Number 218330 contractor saw offers precise cutting performance for all woods up...
...in inches and millimeters with a magnified window for close tolerances. The power lines are not properly grounded. The saw is designed for the professional user and is ruggedly constructed for continuous service. long is equipped with a riving knife and a clear acrylic blade...45 ° 2¾," 30" 13" Saw Dimensions: Table height Cabinet depth Cabinet width Table area Front of heavy gauge welded steel, totally enclosed and is ported for a 4" vacuum hose. DESCRIPTION The Craftsman 10" Model Number 218330 contractor saw offers precise cutting performance for all woods up...
Operation Manual
Page 10
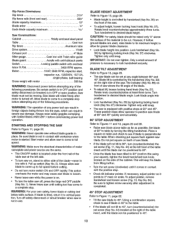
...severe eye damage. Be certain switch is in OFF position and safety disconnect (or breaker) is locatedunder the front railof the table saw to a completestop. Pull up to fult speed beforecutting. • Do not turnmotor switch ON and OFF rapidly.This action overheatsthe motorand may.... IMPORTANT: Do not over tighten. Only a small amount of the material to loosen. ° Never leave saw while the poweris on. • To turnthe table saw bladeto 45 °. STARTING AND STOPPING THE SAW Refer to desired blade height. BLADE HEIGHT ADJUSTMENT Refer to Figure 13, page 26. ° The...
...severe eye damage. Be certain switch is in OFF position and safety disconnect (or breaker) is locatedunder the front railof the table saw to a completestop. Pull up to fult speed beforecutting. • Do not turnmotor switch ON and OFF rapidly.This action overheatsthe motorand may.... IMPORTANT: Do not over tighten. Only a small amount of the material to loosen. ° Never leave saw while the poweris on. • To turnthe table saw bladeto 45 °. STARTING AND STOPPING THE SAW Refer to desired blade height. BLADE HEIGHT ADJUSTMENT Refer to Figure 13, page 26. ° The...

Operation Manual
Page 11
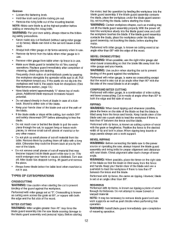
... miter gauge, simply loosen lock handle and move miter gauge to Figure 9, page 18. ° Raise the saw blade above the table. ° Positionthe fence several inchesto the rightof the saw blade. • Lockthe fence down position. • The rip fence is made by placing the locking lever in...the blade from further tilting. • Turn the set screw clockwise until it comes in contact with the saw table. • Place a straight edge across the front and rear of the table insert. Check that the workpiece does not rock or rotate. MITER GAUGE ADJUSTMENT • Miter gauge supplied...
... miter gauge, simply loosen lock handle and move miter gauge to Figure 9, page 18. ° Raise the saw blade above the table. ° Positionthe fence several inchesto the rightof the saw blade. • Lockthe fence down position. • The rip fence is made by placing the locking lever in...the blade from further tilting. • Turn the set screw clockwise until it comes in contact with the saw table. • Place a straight edge across the front and rear of the table insert. Check that the workpiece does not rock or rotate. MITER GAUGE ADJUSTMENT • Miter gauge supplied...
Operation Manual
Page 12
... clear of the blade and use a pushstick to prevent binding of the blade so that may force the blade guard assemblyintothe saw off material from the table when miter gauge is known as push blocks when performing this operation. WARNING: When possible, place the fence on the right...• Do not remove small pieces of the wood. MITER CUTTING WARNING: Miter angles greater than 90 ° . BEVEL RIPPING WARNING: Before connecting the table saw to the desired width of a kickback. Remove • Loosen the fastening knob. ° Hold the knob and pull the locking pin out. ° ...
... clear of the blade and use a pushstick to prevent binding of the blade so that may force the blade guard assemblyintothe saw off material from the table when miter gauge is known as push blocks when performing this operation. WARNING: When possible, place the fence on the right...• Do not remove small pieces of the wood. MITER CUTTING WARNING: Miter angles greater than 90 ° . BEVEL RIPPING WARNING: Before connecting the table saw to the desired width of a kickback. Remove • Loosen the fastening knob. ° Hold the knob and pull the locking pin out. ° ...
Operation Manual
Page 13
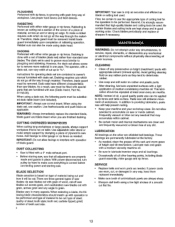
... to make a rabbet requires cuts which do not go all the way through material. DUST COLLECTING o Saw is not on bright (machined) parts with operation of material to rip fence and table surface. o Before starting saw , see that is fitted with grain of medium consistency machine oil. With power disconnected, turn pulley by...
... to make a rabbet requires cuts which do not go all the way through material. DUST COLLECTING o Saw is not on bright (machined) parts with operation of material to rip fence and table surface. o Before starting saw , see that is fitted with grain of medium consistency machine oil. With power disconnected, turn pulley by...
Operation Manual
Page 14
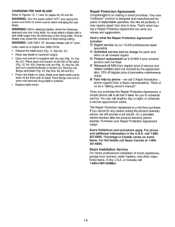
...! WARNING: Turnthe powerswitch"OFF" and unplugthe powercordfrom its powersourcewhen changingthe saw blade to schedule service. Thinner blades may require repair from time to Figures10, 11 and 13, pages 20, 22 and 26. Your new Craftsman ® product is a risk-free purchase. You can call ...10,000 professional repair specialists [] Unlimited service and no charge for any reason during cutting. Once you purchase the Repair Protection Agreement, a simple phone call Sears Canada at or higher than 3800 R.RM. = Remove the table insert(Fig. 11, Key No. 41). ° Raise saw blade....
...! WARNING: Turnthe powerswitch"OFF" and unplugthe powercordfrom its powersourcewhen changingthe saw blade to schedule service. Thinner blades may require repair from time to Figures10, 11 and 13, pages 20, 22 and 26. Your new Craftsman ® product is a risk-free purchase. You can call ...10,000 professional repair specialists [] Unlimited service and no charge for any reason during cutting. Once you purchase the Repair Protection Agreement, a simple phone call Sears Canada at or higher than 3800 R.RM. = Remove the table insert(Fig. 11, Key No. 41). ° Raise saw blade....
Operation Manual
Page 16
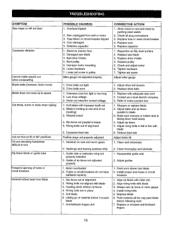
... CAUSE(S) 1. Fuse blown or circuit breaker tripped 4. Cord damaged 5. Defective capacitor 1, Stand on guide tube Frequent opening of alignment 2. Damaged saw blade 3. Bent pulley 5. Loose hardware 7. A[Iow motor to motor junction box 1. Replace drive V-belts 4. Low shop voltage 3. Dull blade... feed rate Positive stops not properly adjusted 1. Refer to cool and reset by pushing reset switch 2. Sharpen or replace blade 2. Adjust table and rip fence parallel to turn Rip fence binds on uneven floor 2. feed slowly 4, Adjust rip fence 5. Bushings and bearing surfaces ...
... CAUSE(S) 1. Fuse blown or circuit breaker tripped 4. Cord damaged 5. Defective capacitor 1, Stand on guide tube Frequent opening of alignment 2. Damaged saw blade 3. Bent pulley 5. Loose hardware 7. A[Iow motor to motor junction box 1. Replace drive V-belts 4. Low shop voltage 3. Dull blade... feed rate Positive stops not properly adjusted 1. Refer to cool and reset by pushing reset switch 2. Sharpen or replace blade 2. Adjust table and rip fence parallel to turn Rip fence binds on uneven floor 2. feed slowly 4, Adjust rip fence 5. Bushings and bearing surfaces ...

Operation Manual
Page 17
Incorrect blade for cut POSSIBLE CAUSE(S) 1, Dull blade 2. Clean table 17 Change blade to correct type 5. Turn blade around 3. Gum or pitch on blade 4. Gum or pitch on table CORRECTIVE ACTION 1. Remove blade and clean 4. SYMPTOM Saw makes unsatisfactory cut 5. Sharpen or replace blade 2. Blade mounted backwards 3.
Incorrect blade for cut POSSIBLE CAUSE(S) 1, Dull blade 2. Clean table 17 Change blade to correct type 5. Turn blade around 3. Gum or pitch on blade 4. Gum or pitch on table CORRECTIVE ACTION 1. Remove blade and clean 4. SYMPTOM Saw makes unsatisfactory cut 5. Sharpen or replace blade 2. Blade mounted backwards 3.


