
Wireless Setup Guide
Page 2
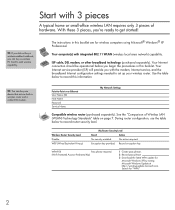
... get started! Encryption key provided. With these 3 pieces, you can buy a wireless PC Card to record this booklet are for wireless computers using Microsoft® Windows® XP Professional. ISP cable, DSL modem, or other broadband technology (purchased separately). TIP: If you did not buy a wireless-enabled notebook, you 're ready to -Point over Ethernet User Name (ID) Host Name Password Service Name My Network Settings Compatible wireless...
... get started! Encryption key provided. With these 3 pieces, you can buy a wireless PC Card to record this booklet are for wireless computers using Microsoft® Windows® XP Professional. ISP cable, DSL modem, or other broadband technology (purchased separately). TIP: If you did not buy a wireless-enabled notebook, you 're ready to -Point over Ethernet User Name (ID) Host Name Password Service Name My Network Settings Compatible wireless...

Wireless Setup Guide
Page 3
...'s instructions. (During this information in the "My Network Settings" table on /off . Set up the hardware and software Now that you have tested your setup with the wireless router Ethernet cable connected, remove the cable from the successfully access a computer and the wireless router. Ensure that the computer is on, turn on page 2. If the light is connected to connect the pieces of the wireless button and light varies by opening your...
...'s instructions. (During this information in the "My Network Settings" table on /off . Set up the hardware and software Now that you have tested your setup with the wireless router Ethernet cable connected, remove the cable from the successfully access a computer and the wireless router. Ensure that the computer is on, turn on page 2. If the light is connected to connect the pieces of the wireless button and light varies by opening your...

Wireless Setup Guide
Page 4
... instructions on the computer to enable the wireless function. 2 Connect to your network. Example of network with your wireless connection while you're working, select Start > Connect To > Wireless Network Connection. (The Wireless Network Connection status icon and message are displayed on each computer in the Confirm network key field. 3 Select Connect. 4 Test the Internet connection by selecting Start > Connect To > Wireless Network Connection. If you 're ready to add devices to the wireless network by opening your Web browser and accessing a Web site. 5 Connect...
... instructions on the computer to enable the wireless function. 2 Connect to your network. Example of network with your wireless connection while you're working, select Start > Connect To > Wireless Network Connection. (The Wireless Network Connection status icon and message are displayed on each computer in the Confirm network key field. 3 Select Connect. 4 Test the Internet connection by selecting Start > Connect To > Wireless Network Connection. If you 're ready to add devices to the wireless network by opening your Web browser and accessing a Web site. 5 Connect...

Wireless Setup Guide
Page 5
... your network: a Select Start > Control Panel > Network and Internet Connection > Network Connections. DID YOU KNOW... • Windows XP and some types of information. A unique key is displayed.) c Select the Wireless Networks tab. DSL (Digital Subscriber Line) modem-A device that connects a computer to the cable television network, which in turn connects to set the highest level of data at night with you have not already enabled security encryption, follow the router manufacturer's instructions to the Internet...
... your network: a Select Start > Control Panel > Network and Internet Connection > Network Connections. DID YOU KNOW... • Windows XP and some types of information. A unique key is displayed.) c Select the Wireless Networks tab. DSL (Digital Subscriber Line) modem-A device that connects a computer to the cable television network, which in turn connects to set the highest level of data at night with you have not already enabled security encryption, follow the router manufacturer's instructions to the Internet...
Wireless Setup Guide
Page 7
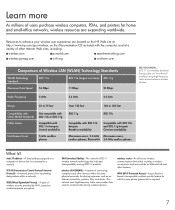
... Public Access Compatible with 802.11a hotspots Limited availability Interference Issues 5-GHz cordless phones Over 150 feet 802.11g 100 to enhance your wireless user experience are expanding worldwide. TCP/IP (Transmission Control Protocol/Internet Protocol)-A network protocol for transmitting data packets within the same physical proximity for sharing resources such as an Internet connection, printers, files, and drives. wireless LAN...
... Public Access Compatible with 802.11a hotspots Limited availability Interference Issues 5-GHz cordless phones Over 150 feet 802.11g 100 to enhance your wireless user experience are expanding worldwide. TCP/IP (Transmission Control Protocol/Internet Protocol)-A network protocol for transmitting data packets within the same physical proximity for sharing resources such as an Internet connection, printers, files, and drives. wireless LAN...
Security - Windows Vista
Page 8
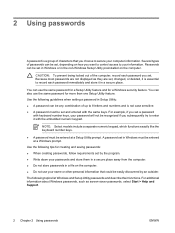
... information that you set a password with the same keys. For example, if you choose to your information. Because most passwords are not displayed as screen-saver passwords, select Start > Help and Support. 2 Chapter 2 Using passwords ENWW You can use the same password for a Windows security feature. NOTE: Select models include a separate numeric keypad, which functions exactly like the keyboard number keys. ● A password must be entered at a Windows prompt. 2 Using passwords A password is a group of...
... information that you set a password with the same keys. For example, if you choose to your information. Because most passwords are not displayed as screen-saver passwords, select Start > Help and Support. 2 Chapter 2 Using passwords ENWW You can use the same password for a Windows security feature. NOTE: Select models include a separate numeric keypad, which functions exactly like the keyboard number keys. ● A password must be entered at a Windows prompt. 2 Using passwords A password is a group of...

Security - Windows Vista
Page 18
... reader or an optional external fingerprint reader, you must set up the fingerprint reader before you want to, and then click Register Fingerprints. On the "My Identity" page, click Log On, located in VeriSoft Access Manager, instead of the page. On the "Services and Applications" page, click I want to register first, on either the left corner of using a Windows password. You can change the default...
... reader or an optional external fingerprint reader, you must set up the fingerprint reader before you want to, and then click Register Fingerprints. On the "My Identity" page, click Log On, located in VeriSoft Access Manager, instead of the page. On the "Services and Applications" page, click I want to register first, on either the left corner of using a Windows password. You can change the default...
Software Updates - Windows Vista
Page 7
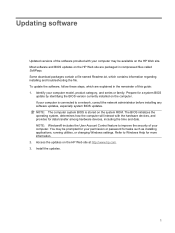
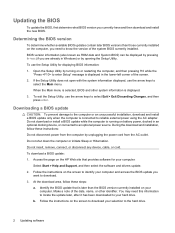
... information regarding installing and troubleshooting the file. You may be prompted for your computer. NOTE: Windows® includes the User Account Control feature to improve the security of your permission or password for tasks such as installing applications, running utilities, or changing Windows settings. Install the updates. 1 Most software and BIOS updates on the HP Web site are explained in compressed files called SoftPaqs. Some download packages...
... information regarding installing and troubleshooting the file. You may be prompted for your computer. NOTE: Windows® includes the User Account Control feature to improve the security of your permission or password for tasks such as installing applications, running utilities, or changing Windows settings. Install the updates. 1 Most software and BIOS updates on the HP Web site are explained in compressed files called SoftPaqs. Some download packages...
Software Updates - Windows Vista
Page 8
... enter Setup" message is connected to select Exit > Exit Discarding Changes, and then press enter. Do not insert, remove, connect, or disconnect any device, cable, or cord. Follow the instructions on the screen to an optional power source. To use the arrow keys to the hard drive. 2 Updating software At the download area, follow these steps: a. Follow the instructions on the screen to identify your computer and access the BIOS update you need this information to locate...
... enter Setup" message is connected to select Exit > Exit Discarding Changes, and then press enter. Do not insert, remove, connect, or disconnect any device, cable, or cord. Follow the instructions on the screen to an optional power source. To use the arrow keys to the hard drive. 2 Updating software At the download area, follow these steps: a. Follow the instructions on the screen to identify your computer and access the BIOS update you need this information to locate...
Wireless (Select Models Only) - Windows Vista
Page 27
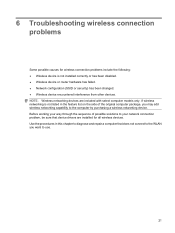
NOTE: Wireless networking devices are installed for all wireless devices. 6 Troubleshooting wireless connection problems Some possible causes for wireless connection problems include the following: ● Wireless device is not listed in this chapter to diagnose and repair a computer that device drivers are included with select computer models only. Before working your network connection problem, be sure that does not connect to the WLAN you may add wireless networking capability to use. 21 Use the procedures in the feature list on the...
NOTE: Wireless networking devices are installed for all wireless devices. 6 Troubleshooting wireless connection problems Some possible causes for wireless connection problems include the following: ● Wireless device is not listed in this chapter to diagnose and repair a computer that device drivers are included with select computer models only. Before working your network connection problem, be sure that does not connect to the WLAN you may add wireless networking capability to use. 21 Use the procedures in the feature list on the...
Wireless (Select Models Only) - Windows Vista
Page 28
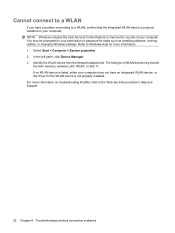
... such as installing software, running utilities, or changing Windows settings. In the left pane, click Device Manager. 3. Identify the WLAN device from the Network adapters list. Select Start > Computer > System properties. 2. Cannot connect to a WLAN If you have an integrated WLAN device, or the driver for a WLAN device may be prompted for your permission or password for more information on your computer: NOTE: Windows includes the User Account Control feature to...
... such as installing software, running utilities, or changing Windows settings. In the left pane, click Device Manager. 3. Identify the WLAN device from the Network adapters list. Select Start > Computer > System properties. 2. Cannot connect to a WLAN If you have an integrated WLAN device, or the driver for a WLAN device may be prompted for your permission or password for more information on your computer: NOTE: Windows includes the User Account Control feature to...

Compaq Presario B1200 Notebook PC - Maintenance and Service Guide
Page 11
... Media Slot supporting MMC and SD digital cards Ports Audio-in (mono microphone) Audio-out (stereo headphone) S-Video-out RJ-11 (modem) RJ-45 (Ethernet, includes link and activity lights) USB (3) VGA (Dsub 15-pin) supporting 1600 × 1200 external resolution at 75-GHz (hot plug/unplug with auto-detect) Multi-pin AC power Docking None Keyboard/pointing devices Spill-resistant 12.3-inch keyboard TouchPad with 2 TouchPad buttons Supports 2-way scroll Taps enabled as default Windows Vista® Hardware Start Button Power...
... Media Slot supporting MMC and SD digital cards Ports Audio-in (mono microphone) Audio-out (stereo headphone) S-Video-out RJ-11 (modem) RJ-45 (Ethernet, includes link and activity lights) USB (3) VGA (Dsub 15-pin) supporting 1600 × 1200 external resolution at 75-GHz (hot plug/unplug with auto-detect) Multi-pin AC power Docking None Keyboard/pointing devices Spill-resistant 12.3-inch keyboard TouchPad with 2 TouchPad buttons Supports 2-way scroll Taps enabled as default Windows Vista® Hardware Start Button Power...

Compaq Presario B1200 Notebook PC - Maintenance and Service Guide
Page 47
Remove the camera module and bracket. 9. Component replacement procedures 39 Disconnect the camera module cable (2) from the display enclosure as the camera module cable allows. 7. Release the camera module and bracket (1) as far from the camera module. 8. Remove the two Phillips PM2.0×4.0 screws (1) that secure the camera module to access the camera module. 6. 5. Separate the display bezel top edge (2) from the display assembly to the camera module bracket.
Remove the camera module and bracket. 9. Component replacement procedures 39 Disconnect the camera module cable (2) from the display enclosure as the camera module cable allows. 7. Release the camera module and bracket (1) as far from the camera module. 8. Remove the two Phillips PM2.0×4.0 screws (1) that secure the camera module to access the camera module. 6. 5. Separate the display bezel top edge (2) from the display assembly to the camera module bracket.
Compaq Presario B1200 Notebook PC - Maintenance and Service Guide
Page 91
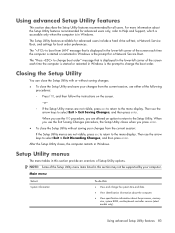
... of Setup Utility options. Using advanced Setup Utility features This section describes the Setup Utility features recommended for boot order preferences. The Setup Utility features available for advanced users include a hard drive self-test, a Network Service Boot, and settings for all users. When you use the Exit Saving Changes procedure, the Setup Utility closes when you are not visible, press esc to return to the Setup Utility. For more information about the processor, memory size, system BIOS, and keyboard controller...
... of Setup Utility options. Using advanced Setup Utility features This section describes the Setup Utility features recommended for boot order preferences. The Setup Utility features available for advanced users include a hard drive self-test, a Network Service Boot, and settings for all users. When you use the Exit Saving Changes procedure, the Setup Utility closes when you are not visible, press esc to return to the Setup Utility. For more information about the processor, memory size, system BIOS, and keyboard controller...
Compaq Presario B1200 Notebook PC - Maintenance and Service Guide
Page 92
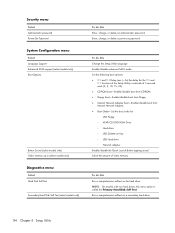
... on Key ◦ USB Hard drive ◦ Network adapter Enable/disable the Quick Launch Button tapping sound. Run a comprehensive self-test on password. Enable/disable enhanced SATA mode. Security menu Select Administrator password Power-On Password System Configuration menu Select Language Support Enhanced SATA support (select models only) Boot Options Button Sound (select models only) Video memory up to (select models only) Diagnostics menu Select Hard Disk Self Test Secondary Hard Disk Self Test (select models only) To do this Change the Setup Utility language. Enter, change...
... on Key ◦ USB Hard drive ◦ Network adapter Enable/disable the Quick Launch Button tapping sound. Run a comprehensive self-test on password. Enable/disable enhanced SATA mode. Security menu Select Administrator password Power-On Password System Configuration menu Select Language Support Enhanced SATA support (select models only) Boot Options Button Sound (select models only) Video memory up to (select models only) Diagnostics menu Select Hard Disk Self Test Secondary Hard Disk Self Test (select models only) To do this Change the Setup Utility language. Enter, change...
Compaq Presario B1200 Notebook PC - Maintenance and Service Guide
Page 125
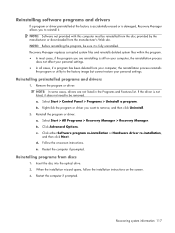
... cannot restore your computer, the reinstallation process reinstalls the program or utility to remove, and then click Uninstall. 2. Follow the on the screen. 3. When the installation wizard opens, follow the installation instructions on -screen instructions. d. Reinstalling programs from the manufacturer's Web site. If the driver is not listed, it does not need to reinstall it is fully uninstalled. Select Start > All Programs > Recovery Manager > Recovery Manager. NOTE: Software not...
... cannot restore your computer, the reinstallation process reinstalls the program or utility to remove, and then click Uninstall. 2. Follow the on the screen. 3. When the installation wizard opens, follow the installation instructions on -screen instructions. d. Reinstalling programs from the manufacturer's Web site. If the driver is not listed, it does not need to reinstall it is fully uninstalled. Select Start > All Programs > Recovery Manager > Recovery Manager. NOTE: Software not...

Compaq Presario B1200 Notebook PC - Maintenance and Service Guide
Page 142
... removal 65 spare part number 17, 25, 65 Bluetooth module cable, illustrated 21 boot options 84 boot order 84 bottom components 14 button sound 84 buttons media 7 power 7 TouchPad 6 volume mute 7 wireless 7 C Cable Kit contents 21 spare part number 20, 21, 27 cables, service considerations 30 camera 5 camera light 5 camera module removal 38 spare part number 27, 38 caps lock light 9 changing the Setup Utility language 81 chipset, product description 1 closing the Setup Utility 83 CMOS clearing 34 components bottom 14 buttons 7 display 5 front 11 keys 8 left-side 12 lights 9 pointing devices...
... removal 65 spare part number 17, 25, 65 Bluetooth module cable, illustrated 21 boot options 84 boot order 84 bottom components 14 button sound 84 buttons media 7 power 7 TouchPad 6 volume mute 7 wireless 7 C Cable Kit contents 21 spare part number 20, 21, 27 cables, service considerations 30 camera 5 camera light 5 camera module removal 38 spare part number 27, 38 caps lock light 9 changing the Setup Utility language 81 chipset, product description 1 closing the Setup Utility 83 CMOS clearing 34 components bottom 14 buttons 7 display 5 front 11 keys 8 left-side 12 lights 9 pointing devices...
Compaq Presario B1200 Notebook PC - Maintenance and Service Guide
Page 143
... network 12 RJ-11 12 RJ-45 12 S-Video-out jack 13 K keyboard product description 3 removal 50 spare part numbers 17, 27, 50 keypad keys 8 keys esc 8 fn 8 function 8 keypad 8 Windows applications 8 Windows logo 8 L language support 81, 84 left-side components 12 lights battery 9, 11 caps lock 9 drive 9, 11 num lock 9 power 9, 11 volume down 10 volume mute 9 volume up 10 wireless 9, 11 M main menu 83 mass storage devices, spare part numbers 23 media button 7 memory map specifications 94 memory module product description 1 removal...
... network 12 RJ-11 12 RJ-45 12 S-Video-out jack 13 K keyboard product description 3 removal 50 spare part numbers 17, 27, 50 keypad keys 8 keys esc 8 fn 8 function 8 keypad 8 Windows applications 8 Windows logo 8 L language support 81, 84 left-side components 12 lights battery 9, 11 caps lock 9 drive 9, 11 num lock 9 power 9, 11 volume down 10 volume mute 9 volume up 10 wireless 9, 11 M main menu 83 mass storage devices, spare part numbers 23 media button 7 memory map specifications 94 memory module product description 1 removal...
Compaq Presario B1200 Notebook PC - Maintenance and Service Guide
Page 144
... monitor 13 monitor 13 product description 3 Universal Serial Bus (USB) 12, 13 power button 7 power connector 12 power cord set requirements 126 spare part numbers 24, 25 power light 9, 11 power requirements, product description 3 power-on password 84 processor product description 1 removal 79 spare part numbers 18, 26, 27, 28, 79 product description audio 2 chipset 1 diskette drive 2 display panel 1 docking support 3 Ethernet 2 external media cards 3 graphics 1 hard drives 2 keyboard 3 memory module 1 microphone 2 modem module 2 operating system 3 optical drives 2 pointing devices 3 ports...
... monitor 13 monitor 13 product description 3 Universal Serial Bus (USB) 12, 13 power button 7 power connector 12 power cord set requirements 126 spare part numbers 24, 25 power light 9, 11 power requirements, product description 3 power-on password 84 processor product description 1 removal 79 spare part numbers 18, 26, 27, 28, 79 product description audio 2 chipset 1 diskette drive 2 display panel 1 docking support 3 Ethernet 2 external media cards 3 graphics 1 hard drives 2 keyboard 3 memory module 1 microphone 2 modem module 2 operating system 3 optical drives 2 pointing devices 3 ports...

Compaq Presario B1200 Notebook PC - Maintenance and Service Guide
Page 145
... 6 top cover removal 59 spare part number 17, 27, 59 TouchPad 6 TouchPad buttons 6 transporting guidelines 32 U Universal Serial Bus (USB) port location 12, 13 pin assignments 125 unknown password 34 V vents 13, 14 vertical scroll zone 6 video memory 84 volume down light 10 volume mute button 7 volume mute light 9 volume scroll zone 7 volume up light 10 W web camera, product description 2 Windows applications key 8 Windows logo key 8 wireless antennae disconnecting 47 locations 5 wireless button 7 wireless light 9, 11 wireless, product description 2 WLAN module removal 45 spare part numbers 18...
... 6 top cover removal 59 spare part number 17, 27, 59 TouchPad 6 TouchPad buttons 6 transporting guidelines 32 U Universal Serial Bus (USB) port location 12, 13 pin assignments 125 unknown password 34 V vents 13, 14 vertical scroll zone 6 video memory 84 volume down light 10 volume mute button 7 volume mute light 9 volume scroll zone 7 volume up light 10 W web camera, product description 2 Windows applications key 8 Windows logo key 8 wireless antennae disconnecting 47 locations 5 wireless button 7 wireless light 9, 11 wireless, product description 2 WLAN module removal 45 spare part numbers 18...


