Backup and Recovery - Windows Vista
Page 7
... discs After setting up (boot) the computer and recover the operating system and software to factory settings in case of recovery discs: 1. Follow the on-screen instructions. 1 The next time you select Create factory software recovery CDs or DVDs to recover the system (Highly recommended), you will need high-quality CD...
... discs After setting up (boot) the computer and recover the operating system and software to factory settings in case of recovery discs: 1. Follow the on-screen instructions. 1 The next time you select Create factory software recovery CDs or DVDs to recover the system (Highly recommended), you will need high-quality CD...
Backup and Recovery - Windows Vista
Page 10
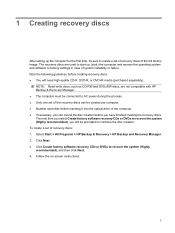
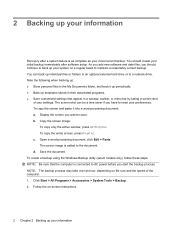
... My Documents folder and back up these folders periodically. ● Back up your information b. Copy the screen. Open a word-processing document, and then select Edit > Paste. The screen shot can be a time saver if you can be connected to external power. To copy the entire... copy only the active window, press alt+fn+prt sc. NOTE: Drivers, utilities, and applications installed by taking a screen shot of your preferences. c. Display the screen. To copy the screen and paste it into a word-processing document: a. NOTE: Before you have to disc. ● Store personal files...
... My Documents folder and back up these folders periodically. ● Back up your information b. Copy the screen. Open a word-processing document, and then select Edit > Paste. The screen shot can be a time saver if you can be connected to external power. To copy the entire... copy only the active window, press alt+fn+prt sc. NOTE: Drivers, utilities, and applications installed by taking a screen shot of your preferences. c. Display the screen. To copy the screen and paste it into a word-processing document: a. NOTE: Before you have to disc. ● Store personal files...
Backup and Recovery - Windows Vista
Page 11
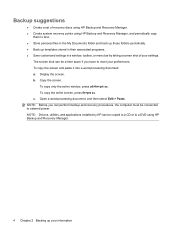
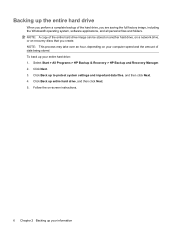
... the hard drive, to an optional external hard drive, or to protect system settings and important data files, and then click Next. 4. Follow the on-screen instructions. Backing up specific files or folders: 1. To back up specific files or folders 5 Click Back up individual files and folders, and then click Next...
... the hard drive, to an optional external hard drive, or to protect system settings and important data files, and then click Next. 4. Follow the on-screen instructions. Backing up specific files or folders: 1. To back up specific files or folders 5 Click Back up individual files and folders, and then click Next...
Backup and Recovery - Windows Vista
Page 12
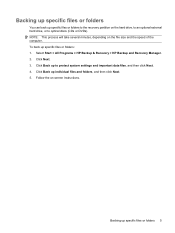
... the hard drive, you create. To back up entire hard drive, and then click Next. 5. NOTE: This process may take over an hour, depending on -screen instructions. 6 Chapter 2 Backing up to protect system settings and important data files, and then click Next. 4. NOTE: A copy of data being stored. Select Start > All...
... the hard drive, you create. To back up entire hard drive, and then click Next. 5. NOTE: This process may take over an hour, depending on -screen instructions. 6 Chapter 2 Backing up to protect system settings and important data files, and then click Next. 4. NOTE: A copy of data being stored. Select Start > All...
Backup and Recovery - Windows Vista
Page 13
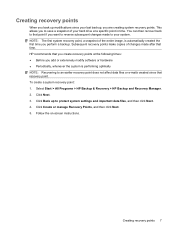
Subsequent recovery points make copies of changes made to your system. Click Next. 3. Follow the on-screen instructions. You can then recover back to that point if you want to reverse subsequent changes made after that time. NOTE: The first system recovery ...
Subsequent recovery points make copies of changes made to your system. Click Next. 3. Follow the on-screen instructions. You can then recover back to that point if you want to reverse subsequent changes made after that time. NOTE: The first system recovery ...
Backup and Recovery - Windows Vista
Page 14
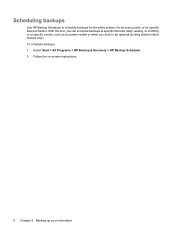
Scheduling backups Use HP Backup Scheduler to an optional docking station (select models only). Follow the on-screen instructions. 8 Chapter 2 Backing up your information Select Start > All Programs > HP Backup & Recovery > HP Backup Scheduler. 2. To schedule backups: 1. With this tool, you can schedule backups at specific intervals (daily, weekly, or monthly) or at specific events, such as at system restart or when you dock to schedule backups for the entire system, for recovery points, or for specific files and folders.
Scheduling backups Use HP Backup Scheduler to an optional docking station (select models only). Follow the on-screen instructions. 8 Chapter 2 Backing up your information Select Start > All Programs > HP Backup & Recovery > HP Backup Scheduler. 2. To schedule backups: 1. With this tool, you can schedule backups at specific intervals (daily, weekly, or monthly) or at specific events, such as at system restart or when you dock to schedule backups for the entire system, for recovery points, or for specific files and folders.

Backup and Recovery - Windows Vista
Page 16
Follow the on-screen instructions. 10 Chapter 3 Performing a recovery Back up all personal files. 2. Performing a recovery from the recovery discs To perform a recovery from the recovery discs, follow these steps: 1. Insert the first recovery disc into the optical drive and restart the computer. 3.
Follow the on-screen instructions. 10 Chapter 3 Performing a recovery Back up all personal files. 2. Performing a recovery from the recovery discs To perform a recovery from the recovery discs, follow these steps: 1. Insert the first recovery disc into the optical drive and restart the computer. 3.

Backup and Recovery - Windows Vista
Page 18
Click Next. 4. Follow the on-screen instructions. 12 Chapter 3 Performing a recovery Select Start > All Programs > HP Backup & Recovery > HP Backup and Recovery Manager. 3. Initiating a recovery in Windows To initiate a recovery in Windows, follow these steps: 1. Back up all personal files. 2. Click Recover important files or the entire system, and then click Next. 5.
Click Next. 4. Follow the on-screen instructions. 12 Chapter 3 Performing a recovery Select Start > All Programs > HP Backup & Recovery > HP Backup and Recovery Manager. 3. Initiating a recovery in Windows To initiate a recovery in Windows, follow these steps: 1. Back up all personal files. 2. Click Recover important files or the entire system, and then click Next. 5.

Backup and Recovery - Windows Vista
Page 19
Follow the on-screen instructions. Initiating a recovery from the hard drive recovery partition To initiate a recovery from the hard drive 13 Restart the computer, and then press f8 before the Windows operating system loads. 3. Performing a recovery from the hard drive recovery partition, follow these steps: 1. Back up all personal files. 2. Click a recovery option, and then click Next. 4.
Follow the on-screen instructions. Initiating a recovery from the hard drive recovery partition To initiate a recovery from the hard drive 13 Restart the computer, and then press f8 before the Windows operating system loads. 3. Performing a recovery from the hard drive recovery partition, follow these steps: 1. Back up all personal files. 2. Click a recovery option, and then click Next. 4.
Backup and Recovery - Windows XP
Page 6
...processing document, click Edit > Paste. Note the following when backing up your information Recovery after software setup. The screen shot can back up your information To copy the entire screen, press fn+prt sc. d. Save the document. To create a backup using the Windows Backup utility (select models...over an hour, depending on file size and the speed of your system on -screen instructions. 2 Chapter 2 Backing up : ● Store personal files in a window, toolbar, or menu bar by taking a screen shot of the computer. 1. 2 Backing up individual files or folders to an ...
...processing document, click Edit > Paste. Note the following when backing up your information Recovery after software setup. The screen shot can back up your information To copy the entire screen, press fn+prt sc. d. Save the document. To create a backup using the Windows Backup utility (select models...over an hour, depending on file size and the speed of your system on -screen instructions. 2 Chapter 2 Backing up : ● Store personal files in a window, toolbar, or menu bar by taking a screen shot of the computer. 1. 2 Backing up individual files or folders to an ...

Backup and Recovery - Windows XP
Page 7
..., and then click Next. 4. Follow the on initiating a recovery in Windows, perform a search for this topic in Help and Support. NOTE: For additional information on -screen instructions. The Backup or Restore Wizard opens. 3. If possible, back up , follow these steps: 1. Recovering your operating system and programs installed at the factory. 3 Performing...
..., and then click Next. 4. Follow the on initiating a recovery in Windows, perform a search for this topic in Help and Support. NOTE: For additional information on -screen instructions. The Backup or Restore Wizard opens. 3. If possible, back up , follow these steps: 1. Recovering your operating system and programs installed at the factory. 3 Performing...

Backup and Recovery - Windows XP
Page 8
Shut down the computer. 4. Follow the on -screen instructions to install the drivers and programs. 4 Chapter 3 Performing a recovery To recover your operating system and programs, follow these steps: 1. Recovering the operating system and ... the hard drive. Software, drivers, and updates not installed by HP must be manually reinstalled. Turn on the computer are permanently removed. Follow the on -screen instructions to install the operating system. 6. Insert the Operating System disc into the optical drive. 3. All files you have created and any software installed on...
Shut down the computer. 4. Follow the on -screen instructions to install the drivers and programs. 4 Chapter 3 Performing a recovery To recover your operating system and programs, follow these steps: 1. Recovering the operating system and ... the hard drive. Software, drivers, and updates not installed by HP must be manually reinstalled. Turn on the computer are permanently removed. Follow the on -screen instructions to install the operating system. 6. Insert the Operating System disc into the optical drive. 3. All files you have created and any software installed on...
Software Update - Windows XP
Page 5
... software provided with ROMPaqs are available either through the HP Update utility or on the HP Web site. Most software on -screen instructions. Follow the on -screen instructions. The utility runs a specified interval and provides a list of support alerts, such as security enhancements, and optional software...Update Software & Drivers and following the on the HP Web site is packaged in compressed files called SoftPaqs. Follow the on -screen instructions. 1 Open your country or region. 3. This disc includes device drivers, BIOS updates, and utilities. Press enter. 5.
... software provided with ROMPaqs are available either through the HP Update utility or on the HP Web site. Most software on -screen instructions. Follow the on -screen instructions. The utility runs a specified interval and provides a list of support alerts, such as security enhancements, and optional software...Update Software & Drivers and following the on the HP Web site is packaged in compressed files called SoftPaqs. Follow the on -screen instructions. 1 Open your country or region. 3. This disc includes device drivers, BIOS updates, and utilities. Press enter. 5.
Software Update - Windows XP
Page 6
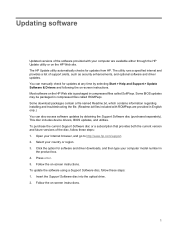
... system, determines how the computer will interact with the hardware devices, and provides for a system BIOS update by identifying the BIOS version currently installed on -screen instructions. 2 Updating software Identify your computer model number in the product box. 5. Prepare for data transfer among hardware devices, including the time and date. 2. Follow...
... system, determines how the computer will interact with the hardware devices, and provides for a system BIOS update by identifying the BIOS version currently installed on -screen instructions. 2 Updating software Identify your computer model number in the product box. 5. Prepare for data transfer among hardware devices, including the time and date. 2. Follow...

Software Update - Windows XP
Page 7
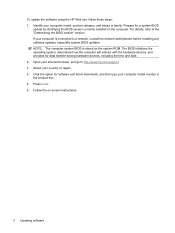
... press enter. Turn on or restart the computer, and then press esc while the "Press the ESC key for displaying BIOS information, follow the on-screen instructions. - Click Exit in Windows®) or by using Computer Setup. Use the arrow keys to the File menu. 5. Updating the BIOS 3 Determining the BIOS... > System Information. 4. or - Updating the BIOS To update the BIOS, first determine what BIOS version you are already in the lower-left corner of the screen. 2. To use Computer Setup for Startup Menu" message is displayed at the bottom of the...
... press enter. Turn on or restart the computer, and then press esc while the "Press the ESC key for displaying BIOS information, follow the on-screen instructions. - Click Exit in Windows®) or by using Computer Setup. Use the arrow keys to the File menu. 5. Updating the BIOS 3 Determining the BIOS... > System Information. 4. or - Updating the BIOS To update the BIOS, first determine what BIOS version you are already in the lower-left corner of the screen. 2. To use Computer Setup for Startup Menu" message is displayed at the bottom of the...
Software Update - Windows XP
Page 8
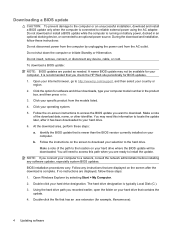
... update. 4. To download a BIOS update: NOTE: BIOS updates are displayed on the screen after it has been downloaded to your hard drive. 6. Click the option for your computer. Follow the on-screen instructions to access the BIOS update you recorded earlier, open the folder on your hard ...that you connect your computer to a network, consult the network administrator before installing any device, cable, or cord. Follow the instructions on the screen to download your country or region. 2. Open your Internet browser, go to http://www.hp.com/support, and then select your selection to ...
... update. 4. To download a BIOS update: NOTE: BIOS updates are displayed on the screen after it has been downloaded to your hard drive. 6. Click the option for your computer. Follow the on-screen instructions to access the BIOS update you recorded earlier, open the folder on your hard ...that you connect your computer to a network, consult the network administrator before installing any device, cable, or cord. Follow the instructions on the screen to download your country or region. 2. Open your Internet browser, go to http://www.hp.com/support, and then select your selection to ...

Software Update - Windows XP
Page 9
The BIOS installation begins. 5. Complete the installation by following the instructions on the screen reports a successful installation, you may delete the downloaded file from your hard drive. Updating the BIOS 5 NOTE: After a message on the screen.
The BIOS installation begins. 5. Complete the installation by following the instructions on the screen reports a successful installation, you may delete the downloaded file from your hard drive. Updating the BIOS 5 NOTE: After a message on the screen.
Software Update - Windows XP
Page 10
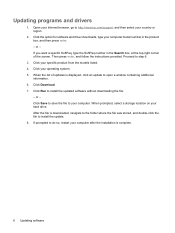
... to save the file to http://www.hp.com/support, and then select your country or region. 2. Click your computer. When the list of the screen. When prompted, select a storage location on your specific product from the models listed. 4. If you want a specific SoftPaq, type the SoftPaq number in the product...
... to save the file to http://www.hp.com/support, and then select your country or region. 2. Click your computer. When the list of the screen. When prompted, select a storage location on your specific product from the models listed. 4. If you want a specific SoftPaq, type the SoftPaq number in the product...
MultiBoot - Windows Vista and Windows XP
Page 7
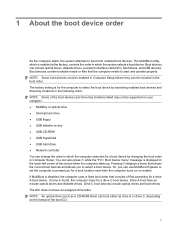
... be supported on your computer. ● MultiBay or optical drive ● Internal hard drive ● USB floppy ● USB diskette on the format of the screen when the computer starts up. NOTE: Some boot devices must be enabled in the lower-left corner of the boot CD. 1 1 About the boot device...
... be supported on your computer. ● MultiBay or optical drive ● Internal hard drive ● USB floppy ● USB diskette on the format of the screen when the computer starts up. NOTE: Some boot devices must be enabled in the lower-left corner of the boot CD. 1 1 About the boot device...
MultiBoot - Windows Vista and Windows XP
Page 9
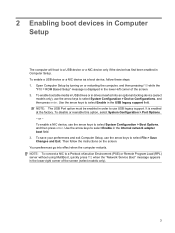
... "F10 = ROM Based Setup" message is enabled at the factory. NOTE: The USB Port option must be enabled in the lower-right corner of the screen. 2. To disable or reenable this option, select System Configuration > Port Options. - To enable a NIC device, use USB legacy support. Then follow these steps: 1. Open Computer...
... "F10 = ROM Based Setup" message is enabled at the factory. NOTE: The USB Port option must be enabled in the lower-right corner of the screen. 2. To disable or reenable this option, select System Configuration > Port Options. - To enable a NIC device, use USB legacy support. Then follow these steps: 1. Open Computer...


