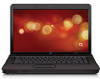
Backup and Recovery - Windows Vista
Page 10
... can be connected to external power. Backup suggestions ● Create a set of your preferences. To copy the screen and paste it into a word-processing document: a. Display the screen. NOTE: Before you have to reset your settings. NOTE: Drivers, utilities, and applications installed by taking a screen shot of recovery discs using HP...
Backup and Recovery - Windows XP
Page 6
... associated programs. ● Save customized settings that the computer is as complete as your most current backup. Note the following when backing up your settings. Display the screen you start the backup process.
Software Update - Windows XP
Page 7
... setup. 3. or - Turn on -screen instructions. - Determining the BIOS version BIOS version information (also known as ROM date and System BIOS) can be displayed by pressing fn+esc (if you currently have, and then download and install the new BIOS. Press f10 to the File menu. 5. Use a pointing device...first determine what BIOS version you are already in the lower-left corner of the screen. 2. Updating the BIOS 3 To use Computer Setup for displaying BIOS information, follow the on or restart the computer, and then press esc while the "Press the ESC key for Startup Menu" message is...
Software Update - Windows XP
Page 8
...be downloaded. Double-click your operating system. 5. Click the option for example, filename.exe). 4 Updating software Double-click the file that are displayed, follow these instructions: Do not disconnect power from the models listed. 4. Downloading a BIOS update CAUTION: To prevent damage to the computer or... Make a note of the download date, name, or other identifier. Follow any device, cable, or cord. If no instructions are displayed on the screen after it has been downloaded to an optional power source. Using the hard drive path you are posted as needed.
Software Update - Windows XP
Page 10
... to do so, restart your country or region. 2. Click your computer model number in the Search box, at the top-right corner of updates is displayed, click an update to install the update. 8. If prompted to step 6. 3. Click Run to http://www.hp.com/support, and then select your computer after...
Software Update - Windows XP
Page 11
... Start > All Programs > HP > HP SoftPaq Download Manager. 2. Click Find Available SoftPaqs to download a list of options that is displayed in the SoftPaq Download Manager software to install the selected SoftPaqs on select computer models only. Using SoftPaq Download Manager 7 If updates are found...only operating system that are downloaded and applied automatically. When the SoftPaq Download Manager opens for the first time, a window is displayed asking if you want to show the software for the selected computer. 5. Select your operating system and language filters in the ...
Modem and Local Area Network - Windows Vista and Windows XP
Page 10
Click Clock, Language, and Region. 3. Click Regional and Language Options. 4. Your location is displayed under Location. 4 Chapter 1 Using the modem (select models only) Selecting a location setting Viewing the current location selection To view the current location setting for the modem, follow these steps: 1. Select Start > Control Panel. 2.
Modem and Local Area Network - Windows Vista and Windows XP
Page 11
The modem may not function properly if the correct country selection is displayed.) 4. Select Start > Control Panel > Hardware and Sound > Phone and Modem Options. 2. Click New. (The New Location ... the country in other countries. Adding new locations when traveling By default, the only location setting available to the modem is displayed by default.) 6. As you will use in which you can switch among settings at any country. CAUTION: To prevent losing... "Work" that violates the telecommunications regulations and laws of the country in which the computer is displayed.) 9.
Modem and Local Area Network - Windows Vista and Windows XP
Page 12
... your current modem location setting, follow these steps: 1. Click Edit. 5. Click OK twice. ● Check the telephone number you purchased it does not dial and displays a "No Dial Tone" error message. Then click the Modems tab. 3. A telephone line described as a PBX line is usually an analog line. ● Check for the...
Modem and Local Area Network - Windows XP
Page 10
Click Date, Time, Language, and Regional Options. 3. Select Start > Control Panel. 2. Click Regional and Language Options. 4. Selecting a location setting Viewing the current location selection To view the current location setting for the modem, follow these steps: 1. Your location is displayed under Location. 4 Chapter 1 Using the modem (select models only) ENWW
Modem and Local Area Network - Windows XP
Page 11
...Country/region drop-down list. (If you select a country or region that you can add multiple location settings for USA or UK is displayed by default.) 7. CAUTION: To prevent losing your home country settings, do not delete your new location setting. (The Phone and Modem Options ...window is displayed.) 8. The modem may not function properly if the correct country selection is displayed.) 5. Click OK to save your current modem country settings. NOTE: You can use the preceding procedure ...
Modem and Local Area Network - Windows XP
Page 12
... a digital line. Select Start > Control Panel > Network and Internet Connections. 2. Click OK twice. ● Check the telephone number you purchased it does not dial and displays a "No Dial Tone" error message. In the left side panel, click Phone and Modem Options. 3. An analog telephone line supports one of 2 dialing modes: pulse...
MultiBoot - Windows Vista and Windows XP
Page 7
The factory setting is for the computer to start and operate properly. Pressing f9 displays a menu that the computer needs to select the boot device by searching enabled boot devices and drive bay locations in the following order: NOTE: Some ... on the format of the screen when the computer starts up. The NIC does not have an assigned drive letter. The MultiBoot utility, which is displayed in which the system selects a boot device. NOTE: Some boot devices must be enabled in Computer Setup before they can be supported on your computer...
MultiBoot - Windows Vista and Windows XP
Page 9
... (RPL) server without using MultiBoot, quickly press f12 when the "Network Service Boot" message appears in the lower-right corner of the screen. 2. It is displayed in the lower-left corner of the screen (select models only). 3 Your preferences go into an optional docking device (select models only), use the arrow...
MultiBoot - Windows Vista and Windows XP
Page 11
4 Choosing MultiBoot preferences You can use MultiBoot Express to set a new boot order that the computer uses each time the computer is turned on , by changing the boot order in Computer Setup. ● To dynamically choose the boot device by pressing f9 while the "F9 = Boot device menu" message is turned on or restarted. 5 This feature prompts you for a boot device each time it is displayed in the lower-left corner of the screen when the computer starts up. ● To use MultiBoot in the following ways: ● To set variable boot orders.
MultiBoot - Windows Vista and Windows XP
Page 12
... instructions on or restarting the computer, and then pressing f10 while the "F10 = ROM Based Setup" message is enabled at the factory. 4. NOTE: MultiBoot is displayed in the lower-left corner of the screen. 2. To save your preferences and exit Computer Setup, use the arrow keys to select System Configuration > Boot...
MultiBoot - Windows Vista and Windows XP
Page 13
Dynamically choosing a boot device using the F9 prompt 7 Your preferences go into effect immediately. Dynamically choosing a boot device using the F9 prompt To dynamically choose a boot device for the current start up sequence, follow these steps: 1. Use the arrow keys to select a boot device, and then press enter. Open the Select Boot Device menu by turning on or restarting the computer, and then pressing f9 while the "F9 = Boot device menu" message is displayed in the lower-left corner of the screen. 2.
MultiBoot - Windows Vista and Windows XP
Page 14
Setting a MultiBoot Express prompt To set the computer to display the MultiBoot startup location menu each time the computer is not displayed). 4. To save your preferences and exit Computer Setup, use the arrow keys to select System Configuration > Boot Options, and then press enter... the instructions on or restarting the computer, and then pressing f10 while the "F10 = ROM Based Setup" message is displayed in seconds that you want the computer to display the startup location menu before it defaults to the current MultiBoot setting (when 0 is selected, the Express Boot startup location...
MultiBoot - Windows Vista and Windows XP
Page 15
Entering MultiBoot Express preferences When the Express Boot menu displays during startup, you select a boot device and press enter. ● To allow the computer to start according to the current MultiBoot settings, wait for the ...
HP ProtectTools - Windows Vista and Windows XP
Page 10
... Security Manager for Administrators. - Click the Security Manager Setup button, located directly below the HP ProtectTools shield icon, to security or - The following page is displayed: 4 Chapter 1 Introduction to launch the Security Manager Wizard. NOTE: If you are not an HP ProtectTools administrator, you can run HP ProtectTools in nonadministrator mode...