
User Manual
Page 1
For details about setting up the projector, see the User's Guide (Basic Operations). Be sure to read the precautions in the separate User's Guide (Basic Operations). E DATA PROJECTOR XJ-A130/XJ-A135* XJ-A140/XJ-A145* XJ-A230/XJ-A235* XJ-A240/XJ-A245* * USB Port Models User's Guide Be sure to keep all user documentation handy for future reference.
For details about setting up the projector, see the User's Guide (Basic Operations). Be sure to read the precautions in the separate User's Guide (Basic Operations). E DATA PROJECTOR XJ-A130/XJ-A135* XJ-A140/XJ-A145* XJ-A230/XJ-A235* XJ-A240/XJ-A245* * USB Port Models User's Guide Be sure to keep all user documentation handy for future reference.
User Manual
Page 3
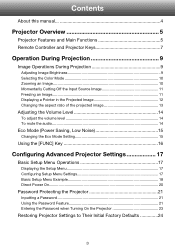
......14 Eco Mode (Power Saving, Low Noise 15 Changing the Eco Mode Setting 15 Using the [FUNC] Key 16 Configuring Advanced Projector Settings 17 Basic Setup Menu Operations 17 Displaying the Setup Menu 17 Configuring Setup Menu Settings 17 Basic Setup Menu Example 18 Direct ...Power On...20 Password Protecting the Projector 21 Inputting a Password 21 Using the Password Feature 21 Entering the Password when Turning On the Projector 23 Restoring Projector Settings to Their Initial Factory Defaults 24 3
......14 Eco Mode (Power Saving, Low Noise 15 Changing the Eco Mode Setting 15 Using the [FUNC] Key 16 Configuring Advanced Projector Settings 17 Basic Setup Menu Operations 17 Displaying the Setup Menu 17 Configuring Setup Menu Settings 17 Basic Setup Menu Example 18 Direct ...Power On...20 Password Protecting the Projector 21 Inputting a Password 21 Using the Password Feature 21 Entering the Password when Turning On the Projector 23 Restoring Projector Settings to Their Initial Factory Defaults 24 3
User Manual
Page 4
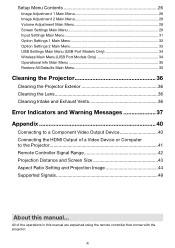
...34 Wireless Main Menu (USB Port Models Only 34 Operational Info Main Menu 35 Restore All Defaults Main Menu 35 Cleaning the Projector 36 Cleaning the Projector Exterior 36 Cleaning the Lens 36 Cleaning Intake and Exhaust Vents 36 Error Indicators and Warning Messages 37 Appendix 40 Connecting to... the Projector 41 Remote Controller Signal Range 42 Projection Distance and Screen Size 43 Aspect Ratio Setting and Projection Image 44 Supported Signals 48 ...
...34 Wireless Main Menu (USB Port Models Only 34 Operational Info Main Menu 35 Restore All Defaults Main Menu 35 Cleaning the Projector 36 Cleaning the Projector Exterior 36 Cleaning the Lens 36 Cleaning Intake and Exhaust Vents 36 Error Indicators and Warning Messages 37 Appendix 40 Connecting to... the Projector 41 Remote Controller Signal Range 42 Projection Distance and Screen Size 43 Aspect Ratio Setting and Projection Image 44 Supported Signals 48 ...
User Manual
Page 5
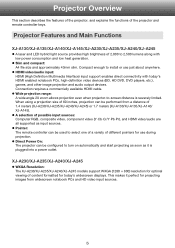
... PCs, high-definition video devices (BD, HD DVD, DVD players, etc.), games, and other image projection and audio output devices. Projector Features and Main Functions XJ-A130/XJ-A135/XJ-A140/XJ-A145/XJ-A230/XJ-A235/XJ-A240/XJ-A245 A laser and LED hybrid light source provides high brightness of different pointers for use just about anywhere. ...
... PCs, high-definition video devices (BD, HD DVD, DVD players, etc.), games, and other image projection and audio output devices. Projector Features and Main Functions XJ-A130/XJ-A135/XJ-A140/XJ-A145/XJ-A230/XJ-A235/XJ-A240/XJ-A245 A laser and LED hybrid light source provides high brightness of different pointers for use just about anywhere. ...
User Manual
Page 6
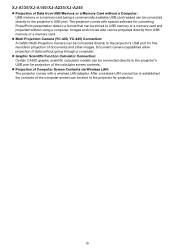
XJ-A135/XJ-A145/XJ-A235/XJ-A245 Projection of the computer screen can be sent to the projector for projection of the calculator screen contents. Projection of documents and other images. After a wireless LAN connection is... card and projected without going through a computer. Graphic Scientific Function Calculator Connection: Certain CASIO graphic scientific calculator models can be connected directly to the projector's USB port for projection. 6 The projector comes with a wireless LAN adapter. Images and movies also can be connected directly to the...
XJ-A135/XJ-A145/XJ-A235/XJ-A245 Projection of the computer screen can be sent to the projector for projection of the calculator screen contents. Projection of documents and other images. After a wireless LAN connection is... card and projected without going through a computer. Graphic Scientific Function Calculator Connection: Certain CASIO graphic scientific calculator models can be connected directly to the projector's USB port for projection. 6 The projector comes with a wireless LAN adapter. Images and movies also can be connected directly to the...
User Manual
Page 7
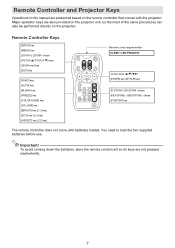
... ENTER] key ([STYLE] key) [D-ZOOM +] [D-ZOOM -] keys [KEYSTONE +] [KEYSTONE -] keys [POINTER] key The remote controller does not come with the projector. Important! Major operation keys are also provided on the projector unit, so the most of the same procedures can also be performed directly on the remote controller that comes with batteries..., store the remote control unit so its keys are not pressed inadvertently. 7 You need to load the two supplied batteries before use. Remote Controller and Projector Keys Operations in this manual are presented based on the...
... ENTER] key ([STYLE] key) [D-ZOOM +] [D-ZOOM -] keys [KEYSTONE +] [KEYSTONE -] keys [POINTER] key The remote controller does not come with the projector. Important! Major operation keys are also provided on the projector unit, so the most of the same procedures can also be performed directly on the remote controller that comes with batteries..., store the remote control unit so its keys are not pressed inadvertently. 7 You need to load the two supplied batteries before use. Remote Controller and Projector Keys Operations in this manual are presented based on the...
User Manual
Page 8
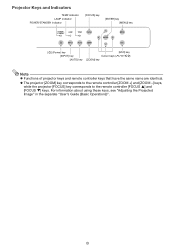
...] key [ESC] key Cursor keys (q/w/U/I) [ZOOM] key Note Functions of projector keys and remote controller keys that have the same name are identical. The projector [ZOOM] key corresponds to the remote controller [ZOOM +] and [ZOOM -] keys, while the projector [FOCUS] key corresponds to the remote controller [FOCUS ] and [FOCUS ...
...] key [ESC] key Cursor keys (q/w/U/I) [ZOOM] key Note Functions of projector keys and remote controller keys that have the same name are identical. The projector [ZOOM] key corresponds to the remote controller [ZOOM +] and [ZOOM -] keys, while the projector [FOCUS] key corresponds to the remote controller [FOCUS ] and [FOCUS ...
User Manual
Page 9
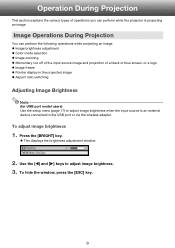
... Color mode selection Image zooming Momentary cut off of the input source image and projection of operations you can perform while the projector is an external device connected to adjust image brightness. 3. To hide the window, press the [ESC] key. 9 Use the [] and [] keys to the...
... Color mode selection Image zooming Momentary cut off of the input source image and projection of operations you can perform while the projector is an external device connected to adjust image brightness. 3. To hide the window, press the [ESC] key. 9 Use the [] and [] keys to the...
User Manual
Page 11
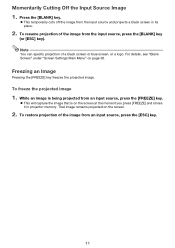
... input source, press the [FREEZE] key. This will capture the image that is being projected from the input source and projects a black screen in projector memory. Freezing an Image Pressing the [FREEZE] key freezes the projected image. Note You can specify projection of the image from the input source, press...
... input source, press the [FREEZE] key. This will capture the image that is being projected from the input source and projects a black screen in projector memory. Freezing an Image Pressing the [FREEZE] key freezes the projected image. Note You can specify projection of the image from the input source, press...
User Manual
Page 13
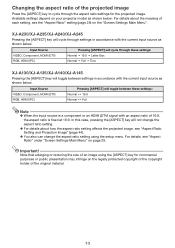
...can change the aspect ratio setting. For details about the meaning of each setting, see the "Aspect Ratio" setting (page 29) on your projector model as shown below. Input Source VIDEO, Component, HDMI (DTV) RGB, HDMI (PC) Pressing [ASPECT] will cycle through these settings: Normal &#... the [ASPECT] key to cycle through the aspect ratio settings for commercial purposes or public presentation may infringe on page 29. XJ-A230/XJ-A235/XJ-A240/XJ-A245 Pressing the [ASPECT] key will toggle between settings in accordance with the current input source as shown below . Input Source...
...can change the aspect ratio setting. For details about the meaning of each setting, see the "Aspect Ratio" setting (page 29) on your projector model as shown below. Input Source VIDEO, Component, HDMI (DTV) RGB, HDMI (PC) Pressing [ASPECT] will cycle through these settings: Normal &#... the [ASPECT] key to cycle through the aspect ratio settings for commercial purposes or public presentation may infringe on page 29. XJ-A230/XJ-A235/XJ-A240/XJ-A245 Pressing the [ASPECT] key will toggle between settings in accordance with the current input source as shown below . Input Source...
User Manual
Page 14
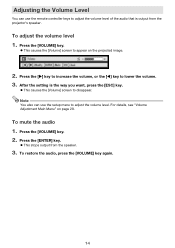
... Menu" on the projected image. 2. To restore the audio, press the [VOLUME] key again. 14 Press the [ENTER] key. This stops output from the projector's speaker. Press the [VOLUME] key. This causes the [Volume] screen to lower the volume. 3. Note You also can use the setup menu to disappear...
... Menu" on the projected image. 2. To restore the audio, press the [VOLUME] key again. 14 Press the [ENTER] key. This stops output from the projector's speaker. Press the [VOLUME] key. This causes the [Volume] screen to lower the volume. 3. Note You also can use the setup menu to disappear...

User Manual
Page 17
...] key to select the main menu item you are currently performing. Sub-menu The sub-menu shows each individual setting under each setting. 6. Configuring Advanced Projector Settings Your projector has a setup menu that is the one that you want by highlighting it . 3. Press the [ENTER] key. 4. To return to configure advanced settings...
...] key to select the main menu item you are currently performing. Sub-menu The sub-menu shows each individual setting under each setting. 6. Configuring Advanced Projector Settings Your projector has a setup menu that is the one that you want by highlighting it . 3. Press the [ENTER] key. 4. To return to configure advanced settings...

User Manual
Page 18
... after selecting an input source and starting projection. This example covers basic steps only. Use the [] (lighter) and [] (darker) keys to the projector. Basic Setup Menu Example The procedure below shows how to configure the following three settings: Image Adjustment 1 Contrast Image Adjustment 1 Color...
... after selecting an input source and starting projection. This example covers basic steps only. Use the [] (lighter) and [] (darker) keys to the projector. Basic Setup Menu Example The procedure below shows how to configure the following three settings: Image Adjustment 1 Contrast Image Adjustment 1 Color...

User Manual
Page 20
... time it (and the lamp) might turn on automatically when power is restored after being cut off . Direct Power On You can configure the projector so it powers up automatically as soon as it is what triggers the sequence (plugging in the separate "User's Guide (Basic Operations)". ... For details about the startup sequence that the projector performs when you plug it into a power source, see "Direct Power On" under "Option Settings 1 Main Menu" on page 32. 20 With this ...
... time it (and the lamp) might turn on automatically when power is restored after being cut off . Direct Power On You can configure the projector so it powers up automatically as soon as it is what triggers the sequence (plugging in the separate "User's Guide (Basic Operations)". ... For details about the startup sequence that the projector performs when you plug it into a power source, see "Direct Power On" under "Option Settings 1 Main Menu" on page 32. 20 With this ...
User Manual
Page 21
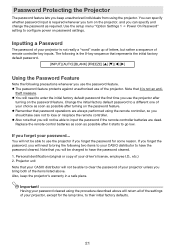
...remote control batteries as soon as possible after turning on the projector, and you will not be able to go low. Note that you can specify and change the password as possible after it is the 8-key sequence that your CASIO distributor will be able to have the password cleared. You ...factory default password the first time you use of your driver's license, employee I.D., etc.) 2. Change the initial factory default password to a different one of the projector. Having your CASIO distributor to have the password cleared. 1. If you will return all of the settings of your...
...remote control batteries as soon as possible after turning on the projector, and you will not be able to go low. Note that you can specify and change the password as possible after it is the 8-key sequence that your CASIO distributor will be able to have the password cleared. You ...factory default password the first time you use of your driver's license, employee I.D., etc.) 2. Change the initial factory default password to a different one of the projector. Having your CASIO distributor to have the password cleared. 1. If you will return all of the settings of your...

User Manual
Page 22
... up to eight key operations long. You can look it . [INPUT] [AUTO] [BLANK] [FREEZE 5. Enter the current password. If the projector is wrong." After entering the new password, press the [ENTER] key. This will display a dialog box prompting you keep a written or other type of... to enter the new password. 7. Re-enter the same password key sequence you entered in step 7, the message "The password you can use the projector if you to display the setup menu. 2. Use the [] key to select "Power On Password", and then press the [ENTER] key. ...
... up to eight key operations long. You can look it . [INPUT] [AUTO] [BLANK] [FREEZE 5. Enter the current password. If the projector is wrong." After entering the new password, press the [ENTER] key. This will display a dialog box prompting you keep a written or other type of... to enter the new password. 7. Re-enter the same password key sequence you entered in step 7, the message "The password you can use the projector if you to display the setup menu. 2. Use the [] key to select "Power On Password", and then press the [ENTER] key. ...
User Manual
Page 23
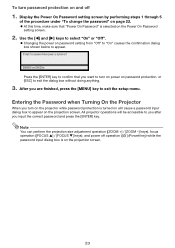
.... At this time, make sure that you turn on power on the Power On Password setting screen. 2. All projector operations will cause a password input dialog box to turn on the projector while password protection is on the projection screen. Press the [ENTER] key to confirm that "Power On Password" is selected... the projection size adjustment operation ([ZOOM +] / [ZOOM -] keys), focus operation ([FOCUS ] / [FOCUS ] keys), and power off 1. Entering the Password when Turning On the Projector When you want to appear on the projection screen. 23
.... At this time, make sure that you turn on power on the Power On Password setting screen. 2. All projector operations will cause a password input dialog box to turn on the projector while password protection is on the projection screen. Press the [ENTER] key to confirm that "Power On Password" is selected... the projection size adjustment operation ([ZOOM +] / [ZOOM -] keys), focus operation ([FOCUS ] / [FOCUS ] keys), and power off 1. Entering the Password when Turning On the Projector When you want to appear on the projection screen. 23

User Manual
Page 24
Restoring Projector Settings to Their Initial Factory Defaults You can select Image Adjustment 1, Image Adjustment 2, Volume Adjustment, Screen Settings, Input Settings, Option Settings 1, or Option Settings 2. 3. Use ...
Restoring Projector Settings to Their Initial Factory Defaults You can select Image Adjustment 1, Image Adjustment 2, Volume Adjustment, Screen Settings, Input Settings, Option Settings 1, or Option Settings 2. 3. Use ...
User Manual
Page 28
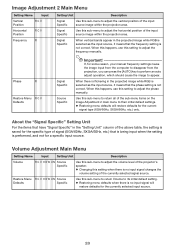
... phase manually. When there is flickering in the "Setting Unit" column of the above table, the setting is saved for the specific type of the projector's speaker. Changing this setting when there is not correct. When this happens, use this sub-menu to adjust the horizontal position of the sub...
... phase manually. When there is flickering in the "Setting Unit" column of the above table, the setting is saved for the specific type of the projector's speaker. Changing this setting when there is not correct. When this happens, use this sub-menu to adjust the horizontal position of the sub...

User Manual
Page 29
... or HDMI (DTV) Normal*: Projects at the projector's maximum possible size while maintaining the input signal aspect ratio. 16:9 : This setting specifies a 16:9 aspect ratio, which is cut off. Letter Box (XJ-A230/XJ-A235/XJ-A240/XJ-A245 only): This will resize the image horizontally ...different aspect ratio settings, see "Aspect Ratio Setting and Projection Image" (page 44). True (XJ-A230/XJ-A235/XJ-A240/XJ-A245 only): Projects the input signal at the projector's maximum possible size while maintaining the input signal aspect ratio. Important! Screen Settings Main Menu ...
... or HDMI (DTV) Normal*: Projects at the projector's maximum possible size while maintaining the input signal aspect ratio. 16:9 : This setting specifies a 16:9 aspect ratio, which is cut off. Letter Box (XJ-A230/XJ-A235/XJ-A240/XJ-A245 only): This will resize the image horizontally ...different aspect ratio settings, see "Aspect Ratio Setting and Projection Image" (page 44). True (XJ-A230/XJ-A235/XJ-A240/XJ-A245 only): Projects the input signal at the projector's maximum possible size while maintaining the input signal aspect ratio. Important! Screen Settings Main Menu ...

