
Owners Manual
Page 6
Plug the cash register into the mode switch 13 5. Set the time...13 8. Issuing daily reset report 17 14. Troubleshooting ...18 Introducing the Register 20 General guide ...20 Roll paper ...20 Mode key ...20 Drawer ...20 Drawer lock / Drawer key ...20 Magnetic plate ...20 Mode .... Tax table programming 14 9. Issuing reports ...18 16. Install receipt / journal paper 11 3. Introduction & Contents Introduction & Contents 2 Getting Started 10 1. Turn the mode switch to use your cash register 27 Before business hours ...28 Checking the time and date 28 To display and...
Plug the cash register into the mode switch 13 5. Set the time...13 8. Issuing daily reset report 17 14. Troubleshooting ...18 Introducing the Register 20 General guide ...20 Roll paper ...20 Mode key ...20 Drawer ...20 Drawer lock / Drawer key ...20 Magnetic plate ...20 Mode .... Tax table programming 14 9. Issuing reports ...18 16. Install receipt / journal paper 11 3. Introduction & Contents Introduction & Contents 2 Getting Started 10 1. Turn the mode switch to use your cash register 27 Before business hours ...28 Checking the time and date 28 To display and...

Owners Manual
Page 10
...Paper rolls Load the two memory protection batteries 1. printer cover platen arm battery compartment cover 3. Load a set of small children. WARNING! • Never try to recharge the batteries supplied with the unit. • Do not expose batteries to direct heat, let them apart. If your cash register...'s memory when there is included in the battery compartment. Remove the battery compartment cover. Remove the printer cover and open the platen arm (receipt side). 2. Note the (+) and ...
...Paper rolls Load the two memory protection batteries 1. printer cover platen arm battery compartment cover 3. Load a set of small children. WARNING! • Never try to recharge the batteries supplied with the unit. • Do not expose batteries to direct heat, let them apart. If your cash register...'s memory when there is included in the battery compartment. Remove the battery compartment cover. Remove the printer cover and open the platen arm (receipt side). 2. Note the (+) and ...

Owners Manual
Page 11
...the thermal paper) • Never touch the printer head and the platen. • Unpack the thermal paper just before your use. • Avoid heat/direct sunlight. • Avoid dusty and humid places for storage. • Do not scratch the paper. • Do not keep the printed paper under...of the paper through the cutter slot. Install receipt / journal paper. Platen arm Platen Printer Important! Take away the head protection sheet from the bottom of the roll, lower the roll into the space behind the printer. Step 3 Ensuring the paper is being fed from the printer and close...
...the thermal paper) • Never touch the printer head and the platen. • Unpack the thermal paper just before your use. • Avoid heat/direct sunlight. • Avoid dusty and humid places for storage. • Do not scratch the paper. • Do not keep the printed paper under...of the paper through the cutter slot. Install receipt / journal paper. Platen arm Platen Printer Important! Take away the head protection sheet from the bottom of the roll, lower the roll into the space behind the printer. Step 3 Ensuring the paper is being fed from the printer and close...

Owners Manual
Page 12
... the roll into the groove on . Complete Replace the printer cover. Step 2 Open the platen arm. Step 5 Close the platen arm slowly until it onto the reel two or three turns. Step 9 Place the take -up reel into place behind the printer. Step 3 Ensuring the paper is being fed from the bottom of... and wind it locks steadily. E 12 Step 7 Slide the leading end of the take -up reel. Step 8 Replace the paper guide of the paper into the space behind the printer, above the roll paper. Step 4 Put the leading end of the take up reel. Step 10 Press the j key to take -up any slack...
... the roll into the groove on . Complete Replace the printer cover. Step 2 Open the platen arm. Step 5 Close the platen arm slowly until it onto the reel two or three turns. Step 9 Place the take -up reel into place behind the printer. Step 3 Ensuring the paper is being fed from the bottom of... and wind it locks steadily. E 12 Step 7 Slide the leading end of the take -up reel. Step 8 Replace the paper guide of the paper into the space behind the printer, above the roll paper. Step 4 Put the leading end of the take up reel. Step 10 Press the j key to take -up any slack...

Owners Manual
Page 20
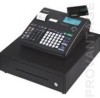
... connector cover Pop-up display (customer display) Main display Mode switch Keyboard Com port connector cover Printer cover Drawer Drawer lock Roll paper You can use the roll paper to any position, while the operator key can be used to set the mode switch to print receipts and a journal (page 11 ~ 12). The program ... the drawer. The drawer will not open if it is locked with the drawer key. Drawer lock / Drawer key Use the drawer key to the cash register and provides a general explanation of mode keys: the program key (marked "PGM") and the operator key (marked "OP").
... connector cover Pop-up display (customer display) Main display Mode switch Keyboard Com port connector cover Printer cover Drawer Drawer lock Roll paper You can use the roll paper to any position, while the operator key can be used to set the mode switch to print receipts and a journal (page 11 ~ 12). The program ... the drawer. The drawer will not open if it is locked with the drawer key. Drawer lock / Drawer key Use the drawer key to the cash register and provides a general explanation of mode keys: the program key (marked "PGM") and the operator key (marked "OP").

Owners Manual
Page 26
... skipped on receipts and journal are printout images. Preset graphic *1 REG 03-06-2008 11:58 C01 0001 000123 1 DEPT001 1 DEPT002 5 DEPT003 TA1 TX1 TL CASH CG T1 $1.00 T1 $2.00 $5.00 7 No $3.00 $0.15 $8.15 $10.00 $1.85 - Actual receipts are not actual size. They are 58 mm ....00 CG $1.90 REG 03-06-2008 11:59 C 01 0001 000125 *1 You can be produced if the roll paper is selected, the cash register will print the total amount of each transaction, and the details of premium, discount and reduction operations only, without printing department and PLU item...
... skipped on receipts and journal are printout images. Preset graphic *1 REG 03-06-2008 11:58 C01 0001 000123 1 DEPT001 1 DEPT002 5 DEPT003 TA1 TX1 TL CASH CG T1 $1.00 T1 $2.00 $5.00 7 No $3.00 $0.15 $8.15 $10.00 $1.85 - Actual receipts are not actual size. They are 58 mm ....00 CG $1.90 REG 03-06-2008 11:59 C 01 0001 000125 *1 You can be produced if the roll paper is selected, the cash register will print the total amount of each transaction, and the details of premium, discount and reduction operations only, without printing department and PLU item...

Owners Manual
Page 27
Page 13 • Check to make sure that totals are all zero. How to use your cash register The following describes the general procedure you should use in securely. Pages 11, 12 • Read the flash report to make sure there is... and leave it open. • Take the cash and journal to get the most out of your cash register. Page 28 DURING business hours... • Register transactions. • Periodically read totals. BEFORE business hours... • Check to confirm that the cash register is enough paper left on the roll. Page 75 • Check the date and time....
Page 13 • Check to make sure that totals are all zero. How to use your cash register The following describes the general procedure you should use in securely. Pages 11, 12 • Read the flash report to make sure there is... and leave it open. • Take the cash and journal to get the most out of your cash register. Page 28 DURING business hours... • Register transactions. • Periodically read totals. BEFORE business hours... • Check to confirm that the cash register is enough paper left on the roll. Page 75 • Check the date and time....

Owners Manual
Page 90
... Load new paper. Step 8 Remove the old paper roll from its holder. Step 4 Remove the journal takeup reel from the cash register. Go to the step 3 described on page 12 of paper. User Maintenance and Options To replace journal paper Step 1 ...Set the mode switch to feed about 20 cm of this manual. E 90 Step 2 Press j to the REG position and remove the printer...
... Load new paper. Step 8 Remove the old paper roll from its holder. Step 4 Remove the journal takeup reel from the cash register. Go to the step 3 described on page 12 of paper. User Maintenance and Options To replace journal paper Step 1 ...Set the mode switch to feed about 20 cm of this manual. E 90 Step 2 Press j to the REG position and remove the printer...

Owners Manual
Page 91
Step 2 Open the platen arm. Go to the REG position and remove the printer cover. User Maintenance and Options To replace receipt paper Step 1 Set the mode switch to the step 3 described on page 11 of this manual. XZ REG X2/Z2 OFF RF PGM User Maintenance and Options Options P-5880T roll paper WT-89 wetproof cover The optional wetproof cover protects the keyboard from the cash register. Consult your CASIO dealer for details. 91 E Step 3 Remove the old paper roll from moisture damage. Step 4 Load new paper.
Step 2 Open the platen arm. Go to the REG position and remove the printer cover. User Maintenance and Options To replace receipt paper Step 1 Set the mode switch to the step 3 described on page 11 of this manual. XZ REG X2/Z2 OFF RF PGM User Maintenance and Options Options P-5880T roll paper WT-89 wetproof cover The optional wetproof cover protects the keyboard from the cash register. Consult your CASIO dealer for details. 91 E Step 3 Remove the old paper roll from moisture damage. Step 4 Load new paper.
Owners Manual
Page 92
...protection batteries (two new size AA alkaline batteries) is printed automatically Journal: Thermal alpha-numeric system 24 digits Automatic take up roll winding Paper roll: 58 (W) × 80 (D) mm Paper thickness: 0.06 ~ 0.085 mm Paper feed: Separate for receipt and journal Print speed: About 14 l/s Listing ... of repeats, total, change without notice. of items, mode, clerk name Customer: Amount 8 digits (zero suppression) Printer Receipt: Thermal alpha-numeric system 24 digits, receipt on/off key Store name or slogan is approximately one year from installation into the...
...protection batteries (two new size AA alkaline batteries) is printed automatically Journal: Thermal alpha-numeric system 24 digits Automatic take up roll winding Paper roll: 58 (W) × 80 (D) mm Paper thickness: 0.06 ~ 0.085 mm Paper feed: Separate for receipt and journal Print speed: About 14 l/s Listing ... of repeats, total, change without notice. of items, mode, clerk name Customer: Amount 8 digits (zero suppression) Printer Receipt: Thermal alpha-numeric system 24 digits, receipt on/off key Store name or slogan is approximately one year from installation into the...
Owners Manual
Page 94
..., 52, 64 preset price 32 preset tax status 32 price 24 print control 61, 62, 63, 64 printer 20 printer cover 20 program backup 16 program end key 53, 54 program key 20 program mode 20 program report 82 ... refund mode 20 REG mode 20 register mode 20 repeat 23, 29, 34 report 74 report descriptor 58 report sample 77 report title 45, 59 RF mode 20, 40 right cursor key 54 roll paper 20 S shift key 53 sign... tax shift 25, 39, 71 tax status 31, 33, 36, 37 tax system 60 tax table 14 taxable status 68 thermal paper 11 time 28 time set 13 training clerk 72 U unit price 29, 31, 33 W watermark 16 X X mode 20...
..., 52, 64 preset price 32 preset tax status 32 price 24 print control 61, 62, 63, 64 printer 20 printer cover 20 program backup 16 program end key 53, 54 program key 20 program mode 20 program report 82 ... refund mode 20 REG mode 20 register mode 20 repeat 23, 29, 34 report 74 report descriptor 58 report sample 77 report title 45, 59 RF mode 20, 40 right cursor key 54 roll paper 20 S shift key 53 sign... tax shift 25, 39, 71 tax status 31, 33, 36, 37 tax system 60 tax table 14 taxable status 68 thermal paper 11 time 28 time set 13 training clerk 72 U unit price 29, 31, 33 W watermark 16 X X mode 20...

Quick Start Guide
Page 1
... the supplied 58mm thermal paper roll by the s key...French or Spanish. PGM PGM B) Enter 3 followed by lifting up the printer arm and placing the paper roll into the printer well. To stop unexpected long printing, press s key twice to cancel ... Protection Batteries and Paper Roll (See Pages 10 - 12 in Tax Table1. Quick Start Guide Press / for more information Visit http://casio4business.com/ecr Casio Model Number PCR-T2200/2100/220S ... status programming. Example: To set the paper roll, refer to page 12. 2 Initialize Your Cash Register (See Page 13 in the sequence shown below.
... the supplied 58mm thermal paper roll by the s key...French or Spanish. PGM PGM B) Enter 3 followed by lifting up the printer arm and placing the paper roll into the printer well. To stop unexpected long printing, press s key twice to cancel ... Protection Batteries and Paper Roll (See Pages 10 - 12 in Tax Table1. Quick Start Guide Press / for more information Visit http://casio4business.com/ecr Casio Model Number PCR-T2200/2100/220S ... status programming. Example: To set the paper roll, refer to page 12. 2 Initialize Your Cash Register (See Page 13 in the sequence shown below.


