imageCLASS MF4350d Cartridge - Canon
imageCLASS MF4350d Cartridge
View Results Below
Free Canon imageCLASS MF4350d manuals!
Problems with Canon imageCLASS MF4350d?
Ask a Question
Free Canon imageCLASS MF4350d manuals!
Problems with Canon imageCLASS MF4350d?
Ask a Question
Related Manual Pages


Similar Questions


Printer Cartridge Wont Move To Change Ink Cartridge
Hi . Can you tell me how do I get the ink cartridge holder to move so I can replace the ink cartridg...
Hi . Can you tell me how do I get the ink cartridge holder to move so I can replace the ink cartridg...
(Posted by coronicaestate1 11 years ago)

I Can't Put In A New Toner Cartridge. It Gets Stuck On The Black Button Inside.
(Posted by attorneysusan 11 years ago)

How Install Ink Cartridge Into Mg3122
Canon MG 3122 was a gift. Did not receive booklet with it. Out of ink. Where and how do I install ne...
Canon MG 3122 was a gift. Did not receive booklet with it. Out of ink. Where and how do I install ne...
(Posted by yuditecsedy 11 years ago)

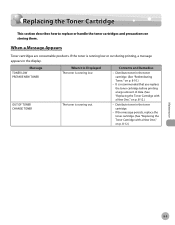
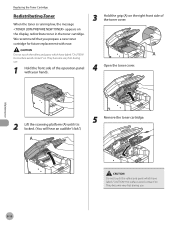
How To Replace Toner Cartridge?
I need to replace my Cannon mf4350d toner cartridge.This is my first time. Please send me a page of...
I need to replace my Cannon mf4350d toner cartridge.This is my first time. Please send me a page of...
(Posted by phorng9613 11 years ago)