Instruction Manual
Page 2
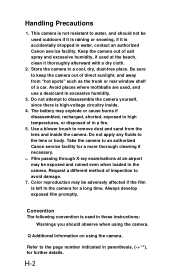
... through X-ray examinations at the beach, ciean it is left In the camera for a long time. Color reproduction may be adversely affected if the film is accidentaiiy dropped in a fire. 5. H-2 Be sure to high temperatures, or disposed of sait spray and excessive humidity, if...is high-voltage circuitry inside the camera. Refer to disassemble the camera yourself, since there is raining or snowing, if it thoroughiy afterward with a dry cioth. 2. Keep the camera out of in water, contact an authorized Canon sen/ice faciiity. Store the camera in parenthesis, (-> **), for ...
... through X-ray examinations at the beach, ciean it is left In the camera for a long time. Color reproduction may be adversely affected if the film is accidentaiiy dropped in a fire. 5. H-2 Be sure to high temperatures, or disposed of sait spray and excessive humidity, if...is high-voltage circuitry inside the camera. Refer to disassemble the camera yourself, since there is raining or snowing, if it thoroughiy afterward with a dry cioth. 2. Keep the camera out of in water, contact an authorized Canon sen/ice faciiity. Store the camera in parenthesis, (-> **), for ...
Instruction Manual
Page 4
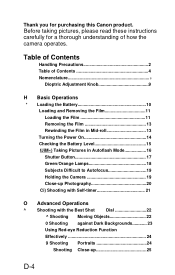
Table of Contents Handling Precautions 2 Table of how the camera operates. Before taking pictures, please read these instructions carefully for purchasing this Canon product. Thank you for a thorough understanding of Contents 4 Nomenclature 6 Dioptric Adjustment Knob 9 H Basic Operations * Loading ...Button 17 Green/Orange Lamps 18 Subjects Difficult to Autofocus 19 Holding the Camera 19 Close-up Photography 20 Ci) Shooting with Self-timer 21 O Advanced Operations ^ Shooting with the Best Shot Dial 22 ^ Shooting Moving Objects 22 0 Shooting against Dark Backgrounds 23...
Table of Contents Handling Precautions 2 Table of how the camera operates. Before taking pictures, please read these instructions carefully for purchasing this Canon product. Thank you for a thorough understanding of Contents 4 Nomenclature 6 Dioptric Adjustment Knob 9 H Basic Operations * Loading ...Button 17 Green/Orange Lamps 18 Subjects Difficult to Autofocus 19 Holding the Camera 19 Close-up Photography 20 Ci) Shooting with Self-timer 21 O Advanced Operations ^ Shooting with the Best Shot Dial 22 ^ Shooting Moving Objects 22 0 Shooting against Dark Backgrounds 23...
Instruction Manual
Page 12
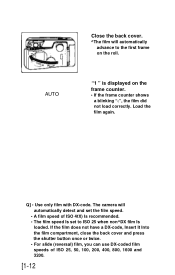
The camera will automatically advance to ISO 25 when non^DX film Is loaded. Q] • Use only film with DX-code. "1 " is displayed on the roll. If ...
The camera will automatically advance to ISO 25 when non^DX film Is loaded. Q] • Use only film with DX-code. "1 " is displayed on the roll. If ...

Instruction Manual
Page 13
Rewinding the Film in Mid-roll ' Use the strap buckle pin on the back of the camera. • Hold the button down and remove the film. When the film is not blinking, press the tt© button. Open the back cover. • ...
Rewinding the Film in Mid-roll ' Use the strap buckle pin on the back of the camera. • Hold the button down and remove the film. When the film is not blinking, press the tt© button. Open the back cover. • ...

Instruction Manual
Page 14
Turning the Power On Turn the best shot dial to a setting other than OFF. ^ The lens is initially set to the wide-angle position. • When you set the best shot dial to OFF, the lens retracts, the lens cover closes and the camera switches off. • When you switch the camera off, the dispiay on the LCD panei does not disappear. • • Do not push on the lens with your hand. • If the lens is not set for shooting, check to see if the battery is loaded correctly. (-»10) [1-14
Turning the Power On Turn the best shot dial to a setting other than OFF. ^ The lens is initially set to the wide-angle position. • When you set the best shot dial to OFF, the lens retracts, the lens cover closes and the camera switches off. • When you switch the camera off, the dispiay on the LCD panei does not disappear. • • Do not push on the lens with your hand. • If the lens is not set for shooting, check to see if the battery is loaded correctly. (-»10) [1-14
Instruction Manual
Page 15
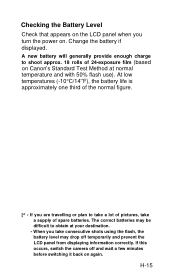
... life is approximately one third of the normal figure. [^ • If you take a supply of spare batteries. If this occurs, switch the camera off temporarily and prevent the LCD panel from displaying information correctly. H-15 A new battery will generally provide enough charge to shoot approx. 18 rolls of... Level Check that appears on the LCD panel when you turn the power on Canon's Standard Test Method at your destination. • When you are travelling or plan to take a lot of pictures, take consecutive shots using the flash, the battery level may drop off and wait a few minutes...
... life is approximately one third of the normal figure. [^ • If you take a supply of spare batteries. If this occurs, switch the camera off temporarily and prevent the LCD panel from displaying information correctly. H-15 A new battery will generally provide enough charge to shoot approx. 18 rolls of... Level Check that appears on the LCD panel when you turn the power on Canon's Standard Test Method at your destination. • When you are travelling or plan to take a lot of pictures, take consecutive shots using the flash, the battery level may drop off and wait a few minutes...
Instruction Manual
Page 17
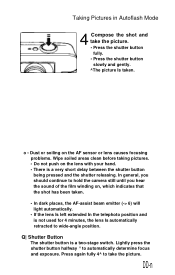
... on the AF sensor or lens causes focusing problems. Wipe soiled areas clean before taking pictures. • Do not push on , which indicates that the shot has been taken. • In dark places, the AF-assist beam emitter (-> 6) will light automatically. • If the lens Is left extended In the ...telephoto position and is not used for 4 minutes, the lens Is automatically retracted to wide-angle position. In general, you should continue to hold the camera still until you hear the sound of the film winding on the lens with your hand. • There is a two-stage switch. Taking Pictures in...
... on the AF sensor or lens causes focusing problems. Wipe soiled areas clean before taking pictures. • Do not push on , which indicates that the shot has been taken. • In dark places, the AF-assist beam emitter (-> 6) will light automatically. • If the lens Is left extended In the ...telephoto position and is not used for 4 minutes, the lens Is automatically retracted to wide-angle position. In general, you should continue to hold the camera still until you hear the sound of the film winding on the lens with your hand. • There is a two-stage switch. Taking Pictures in...

Instruction Manual
Page 18
Green/Orange Lamps When you press the shutter button halfway down, the lamps light or blink to show whether the camera is ready to shoot. ~ ' Green lamp Lit: Camera ready to shoot {subject in focus) Blinking: Too-close warning: 4 times per second Focusing-not-possible warning: 16 times per... second 'Orange lamp Lit: Flash ready Blinking: Camera shake warning (in ® mode) O * If a too-close warning is given, move back until the green lamp stops blinking and press the shutter...
Green/Orange Lamps When you press the shutter button halfway down, the lamps light or blink to show whether the camera is ready to shoot. ~ ' Green lamp Lit: Camera ready to shoot {subject in focus) Blinking: Too-close warning: 4 times per second Focusing-not-possible warning: 16 times per... second 'Orange lamp Lit: Flash ready Blinking: Camera shake warning (in ® mode) O * If a too-close warning is given, move back until the green lamp stops blinking and press the shutter...

Instruction Manual
Page 19
... in a building, etc. blue sky, or scenes of which are in the distance, e.g. o Holding the Camera • Grasp the camera firmly wifh both hands so that it does not move, and make sure that is difficult: • Subjects in scenes without much contrast, e.g. the body of a car which gives ...subjects which are extremely reflective, e.g. Main types of your finger on fhe shutter button and holding the camera firmly, gently press down on a subject that your subject (-> 30), and recompose the shot. animals in a cage • Subjects with the lens, the AF sensor or the flash. ■...
... in a building, etc. blue sky, or scenes of which are in the distance, e.g. o Holding the Camera • Grasp the camera firmly wifh both hands so that it does not move, and make sure that is difficult: • Subjects in scenes without much contrast, e.g. the body of a car which gives ...subjects which are extremely reflective, e.g. Main types of your finger on fhe shutter button and holding the camera firmly, gently press down on a subject that your subject (-> 30), and recompose the shot. animals in a cage • Subjects with the lens, the AF sensor or the flash. ■...
Instruction Manual
Page 20
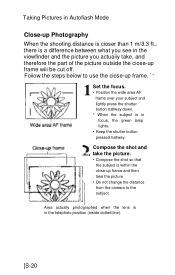
... photographed when the lens is in focus, the green lamp lights. • Keep the shutter button pressed halfway. Compose the shot and take the picture. • Compose the shot so that the subject is a difference between what you see in the viewfinder and the picture you actuaiiy take the picture &#...8226; Do not change the distance from the camera to use the ciose-up frame wiii be cut off. Taking Pictures in Autofiash...
... photographed when the lens is in focus, the green lamp lights. • Keep the shutter button pressed halfway. Compose the shot and take the picture. • Compose the shot so that the subject is a difference between what you see in the viewfinder and the picture you actuaiiy take the picture &#...8226; Do not change the distance from the camera to use the ciose-up frame wiii be cut off. Taking Pictures in Autofiash...
Instruction Manual
Page 21
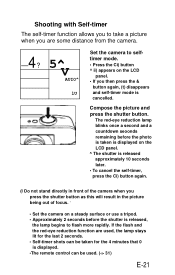
... the Ci) button ^ ii) appears on the LCD panel. • If you are used, the lamp stays lit for the last 2 seconds. • Self-timer shots oan be taken for the 4 minutes that 0 is displayed. •The remote control can be used. (-> 31) E-21 If the flash and the red-eye... reduction function are some distance from the camera. 4- ? 5^ V AUIO^ lU Set the camera to flash more rapidly. Shooting with Seif-timer The self-timer function allows you to take a picture when you then press the & button...
... the Ci) button ^ ii) appears on the LCD panel. • If you are used, the lamp stays lit for the last 2 seconds. • Self-timer shots oan be taken for the 4 minutes that 0 is displayed. •The remote control can be used. (-> 31) E-21 If the flash and the red-eye... reduction function are some distance from the camera. 4- ? 5^ V AUIO^ lU Set the camera to flash more rapidly. Shooting with Seif-timer The self-timer function allows you to take a picture when you then press the & button...
Instruction Manual
Page 22
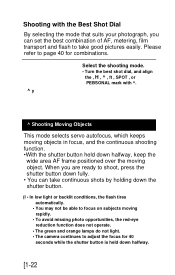
Please refer to take continuous shots by holding down halfway. [1-22 Shooting with ^. ^ у ^ Shooting Moving Objects This mode selects servo autofocus, which keeps moving objects in focus, and the continuous .... • The green and orange lamps do not light. • The camera continues to adjust the focus for combinations. Select the shooting mode. • Turn the best shot dial, and align the , H , ^ , ft , SPOT , or PEBSONAL mark with the Best Shot Dial By selecting the mode that suits your photograph, you are ready...
Please refer to take continuous shots by holding down halfway. [1-22 Shooting with ^. ^ у ^ Shooting Moving Objects This mode selects servo autofocus, which keeps moving objects in focus, and the continuous .... • The green and orange lamps do not light. • The camera continues to adjust the focus for combinations. Select the shooting mode. • Turn the best shot dial, and align the , H , ^ , ft , SPOT , or PEBSONAL mark with the Best Shot Dial By selecting the mode that suits your photograph, you are ready...
Instruction Manual
Page 23
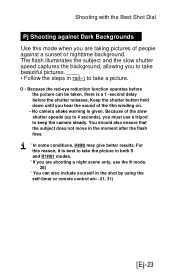
Keep the shutter button held down until you hear the sound of the film winding on. • No camera shake warning is best to take the picture in the shot by using the self-timer or remote control ей». 21, 31) [Ej-23 For this mode when you must...there is a 1 -second delay before the shutter releases. Because of peopie against Dark Backgrounds Use this reason, it is given. Shooting with the Best Shot Dial Pj Shooting against a sunset or nighttime background. O • Because the red-eye reduction function operates before the picture can also include yourself in ...
Keep the shutter button held down until you hear the sound of the film winding on. • No camera shake warning is best to take the picture in the shot by using the self-timer or remote control ей». 21, 31) [Ej-23 For this mode when you must...there is a 1 -second delay before the shutter releases. Because of peopie against Dark Backgrounds Use this reason, it is given. Shooting with the Best Shot Dial Pj Shooting against a sunset or nighttime background. O • Because the red-eye reduction function operates before the picture can also include yourself in ...
Instruction Manual
Page 24
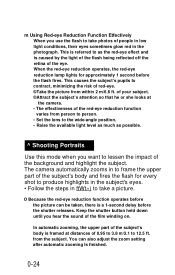
... lights for every shot to produce highlights in the subject's eyes. • Foilow the steps in to frame the upper part of the subject's body and fires the flash for approximately 1 second before the shutter releases. In automatic zooming, the upper part of the subject's body is framed at the camera. • The... delay before the flash fires. m Using Red-eye Reduction Function Etfectiveiy When you use the flash to take photos of the film winding on. The camera automatically zooms in ftWt») to take a picture.
... lights for every shot to produce highlights in the subject's eyes. • Foilow the steps in to frame the upper part of the subject's body and fires the flash for approximately 1 second before the shutter releases. In automatic zooming, the upper part of the subject's body is framed at the camera. • The... delay before the flash fires. m Using Red-eye Reduction Function Etfectiveiy When you use the flash to take photos of the film winding on. The camera automatically zooms in ftWt») to take a picture.
Instruction Manual
Page 27
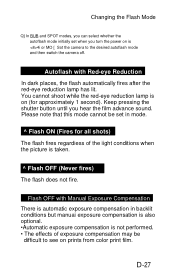
... conditions but manuai exposure compensation is also optional. •Automatic exposure compensation is 4i or MO ■ Sot the camera to see on (for all shots) The flash fires regardiess of the iight conditions when the picture is on prints from color print film. Keep pressing ...red-eye reduction lamp has lit. D-27 Please note that this mode cannot be difficult to the desired autoflash mode and then switch the camera off. Autoflash with Manual Exposure Compensation There is automatic exposure compensation in mode. ^ Flash ON (Fires for approximateiy 1 second). You cannot...
... conditions but manuai exposure compensation is also optional. •Automatic exposure compensation is 4i or MO ■ Sot the camera to see on (for all shots) The flash fires regardiess of the iight conditions when the picture is on prints from color print film. Keep pressing ...red-eye reduction lamp has lit. D-27 Please note that this mode cannot be difficult to the desired autoflash mode and then switch the camera off. Autoflash with Manual Exposure Compensation There is automatic exposure compensation in mode. ^ Flash ON (Fires for approximateiy 1 second). You cannot...
Instruction Manual
Page 28
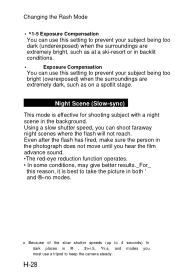
... shoot faraway night scenes where the flash will not reach. Even after the flash has fired, make sure the person in the photograph does not move until you can use a tripod to keep the camera steady. Night Scene (Slow-sync) This mode is best to take the picture in the background. Using...
... shoot faraway night scenes where the flash will not reach. Even after the flash has fired, make sure the person in the photograph does not move until you can use a tripod to keep the camera steady. Night Scene (Slow-sync) This mode is best to take the picture in the background. Using...

Instruction Manual
Page 29
m-29 Press the QD button. ^ d] appears on your subject. This mode is usefui when you want to centerpoint AF [I] mode. rn Using Center-point Focusing The QQB) , H and PERSONAL modes use AIAF (3-point focusing), but you can also set the camera to focus soieiy on the LCD panel. • If you press the CH button again, rn disappears from the LCD panel and AIAF is at the edge of the frame (-> 30) or when you are shooting a subject that is set.
m-29 Press the QD button. ^ d] appears on your subject. This mode is usefui when you want to centerpoint AF [I] mode. rn Using Center-point Focusing The QQB) , H and PERSONAL modes use AIAF (3-point focusing), but you can also set the camera to focus soieiy on the LCD panel. • If you press the CH button again, rn disappears from the LCD panel and AIAF is at the edge of the frame (-> 30) or when you are shooting a subject that is set.

Instruction Manual
Page 30
... mode, the focus remains locked for shots of this type, center-point focusing is recommended. o Take care that the distance from the camera to the subject does not change , iock the focus again. This gives you time to set the focus beforehand, compose the shot, and then take the picture. &#...8226; Compose the shot. • Press the shutter button fuily. • Press the...
... mode, the focus remains locked for shots of this type, center-point focusing is recommended. o Take care that the distance from the camera to the subject does not change , iock the focus again. This gives you time to set the focus beforehand, compose the shot, and then take the picture. &#...8226; Compose the shot. • Press the shutter button fuily. • Press the...

Instruction Manual
Page 31
... button Battery holder Transmitter Remote control sensor Battery holder release button Set the camera to remote control mode. • Press the Ci)i button. ^ 01 appears on the LCD panel to show that the camera has received the signal from up to 5 m /16.4 ft. Take the picture. • Point the remote control ...towards the sensor on the camera and press the transmitter button ^ The red-eye reduction lamp blinks 4 times a second (or remains iit when red-eye reduction is used) and a countdown is ...
... button Battery holder Transmitter Remote control sensor Battery holder release button Set the camera to remote control mode. • Press the Ci)i button. ^ 01 appears on the LCD panel to show that the camera has received the signal from up to 5 m /16.4 ft. Take the picture. • Point the remote control ...towards the sensor on the camera and press the transmitter button ^ The red-eye reduction lamp blinks 4 times a second (or remains iit when red-eye reduction is used) and a countdown is ...

Instruction Manual
Page 32
...a steady surface or use the remote control to take the picture or move the camera away from the fluorescent light. If this happens, use the self-timer to take pictures. Q] • Remote control shots can no longer use a tripod. Shooting with Remote Control • Shooting with ...remote controi may not operate correctly if the camera is exposed to sunlight or strong fluorescent light. If this happens, move the...
...a steady surface or use the remote control to take the picture or move the camera away from the fluorescent light. If this happens, use the self-timer to take pictures. Q] • Remote control shots can no longer use a tripod. Shooting with Remote Control • Shooting with ...remote controi may not operate correctly if the camera is exposed to sunlight or strong fluorescent light. If this happens, move the...


