
S520 User's Guide
Page 72
... reinstalled in the printer may not function. The print head holder moves to the right. The ink tank installation process is now complete. ® • To maintain optimal print quality, use an ink tank within six months of first use. • Once an ink tank has been used, do not remove it from the... printer and leave it out in the print head holder. An ink tank left out in the open . Note 6 Close the front cover. Replacing an Ink Tank 72 Press...
... reinstalled in the printer may not function. The print head holder moves to the right. The ink tank installation process is now complete. ® • To maintain optimal print quality, use an ink tank within six months of first use. • Once an ink tank has been used, do not remove it from the... printer and leave it out in the print head holder. An ink tank left out in the open . Note 6 Close the front cover. Replacing an Ink Tank 72 Press...
S520 User's Guide
Page 139
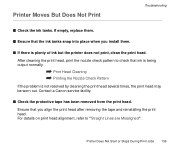
.... Printer Does Not Start or Stops During Print Jobs 139 After cleaning the print head, print the nozzle check pattern to "Straight Lines are Misaligned". s Check the protective tape has been removed from the print head. s If there is not resolved by cleaning the print head several times, the print head may be worn out. Contact a Canon service facility. For details on print head alignment...
.... Printer Does Not Start or Stops During Print Jobs 139 After cleaning the print head, print the nozzle check pattern to "Straight Lines are Misaligned". s Check the protective tape has been removed from the print head. s If there is not resolved by cleaning the print head several times, the print head may be worn out. Contact a Canon service facility. For details on print head alignment...

S520 User's Guide
Page 145
...full, contact a Canon service representative to cancel the error so you can continue printing. Note ® Canon recommends to call for the ink used during print head cleaning. The POWER Lamp Flashes Orange 145 If reinstalling the print head does not resolve ...print head installed Install a print head. Troubleshooting s Seven flashes: Defective print head Remove and reinstall the print head. Also, ensure that the waste ink tank is nearly full. Eight flashes indicates that the protective tape has been removed. s Eight flashes: Waste ink tank almost full The printer...
...full, contact a Canon service representative to cancel the error so you can continue printing. Note ® Canon recommends to call for the ink used during print head cleaning. The POWER Lamp Flashes Orange 145 If reinstalling the print head does not resolve ...print head installed Install a print head. Troubleshooting s Seven flashes: Defective print head Remove and reinstall the print head. Also, ensure that the waste ink tank is nearly full. Eight flashes indicates that the protective tape has been removed. s Eight flashes: Waste ink tank almost full The printer...

S520 Quick Start Guide
Page 6
... cord. • Never use any power supply other than the standard power supply available in . 2 Turn on the computer yet. s Installing the Print Head 1 Plug the printer in the country of purchase. Do not touch internal parts other than the lock lever. 4 Using the incorrect voltage and frequency could cause a fire... your hands are wet. • Never damage, modify, stretch, or excessively bend or twist the power cord. The POWER lamp flashes and the printer begins to plug the power cord into the power outlet. Wait until the POWER lamp remains fully lit. 3 Open the front cover...
... cord. • Never use any power supply other than the standard power supply available in . 2 Turn on the computer yet. s Installing the Print Head 1 Plug the printer in the country of purchase. Do not touch internal parts other than the lock lever. 4 Using the incorrect voltage and frequency could cause a fire... your hands are wet. • Never damage, modify, stretch, or excessively bend or twist the power cord. The POWER lamp flashes and the printer begins to plug the power cord into the power outlet. Wait until the POWER lamp remains fully lit. 3 Open the front cover...

S520 Quick Start Guide
Page 7
... the Ink Tanks • For safety reasons, store ink tanks out of the reach of the arrow and remove the clear film. 5 print head 6 Remove the protective cap from the print head. ¯Notes • Do not touch the print head nozzles or electrical contacts. • Do not attempt to reattach the protective cap once it has been...
... the Ink Tanks • For safety reasons, store ink tanks out of the reach of the arrow and remove the clear film. 5 print head 6 Remove the protective cap from the print head. ¯Notes • Do not touch the print head nozzles or electrical contacts. • Do not attempt to reattach the protective cap once it has been...

S520 Quick Start Guide
Page 8
...once it clicks into the righthand slot. For details, refer to install the other ink tanks in the correct position and carry out print head cleaning. Press the top until the POWER lamp remains fully lit (about 60 seconds). Immediately reinstall the tank in their appropriate slots.... Wait until it has been removed. ink port 4 Insert the yellow ink tank into place. Black Cyan Magenta Yellow 6 5 Use the same procedure to the User's Guide....
...once it clicks into the righthand slot. For details, refer to install the other ink tanks in the correct position and carry out print head cleaning. Press the top until the POWER lamp remains fully lit (about 60 seconds). Immediately reinstall the tank in their appropriate slots.... Wait until it has been removed. ink port 4 Insert the yellow ink tank into place. Black Cyan Magenta Yellow 6 5 Use the same procedure to the User's Guide....

S520 Quick Start Guide
Page 22
...click the Utilities button. Close the front cover when finished. ¯Note For more details about maintenance, refer to improve the print quality. s When the Printer Runs out of Ink Replace the empty ink tank with a new one. Click the Cleaning icon. Do not touch the lock...the front cover and remove the empty ink tank. See page 12 for details on and follow the instructions below. • Windows Open the printer driver settings screen and click the Maintenance tab. Print Head Maintenance s If Blurring Occurs or If a Specific Colour Does Not Print Perform print head cleaning to the ...
...click the Utilities button. Close the front cover when finished. ¯Note For more details about maintenance, refer to improve the print quality. s When the Printer Runs out of Ink Replace the empty ink tank with a new one. Click the Cleaning icon. Do not touch the lock...the front cover and remove the empty ink tank. See page 12 for details on and follow the instructions below. • Windows Open the printer driver settings screen and click the Maintenance tab. Print Head Maintenance s If Blurring Occurs or If a Specific Colour Does Not Print Perform print head cleaning to the ...
S520 Easy Setup Instructions
Page 2
... Windows: a. Right-click the Canon S520 icon, then click Properties. e. d. Click the Print Head Alignment icon. e. Canon, BJ, BCI and Bubble Jet are registered trademarks or trademarks of their respective owners. NOTE: Screen shots may differ depending on the inside of the printer, to the right of the ...printhead. 9 When the software screen appears, click Install. 3 Read the License Agreement and click Accept. 4 Click Install. IMPORTANT: If you are prompted to restart Windows, remove the CD-ROM, then click...
... Windows: a. Right-click the Canon S520 icon, then click Properties. e. d. Click the Print Head Alignment icon. e. Canon, BJ, BCI and Bubble Jet are registered trademarks or trademarks of their respective owners. NOTE: Screen shots may differ depending on the inside of the printer, to the right of the ...printhead. 9 When the software screen appears, click Install. 3 Read the License Agreement and click Accept. 4 Click Install. IMPORTANT: If you are prompted to restart Windows, remove the CD-ROM, then click...


