imageCLASS D480 Starter Guide
Page 14
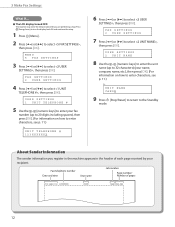
..., etc.), then press [OK]. (For information on how to select , then press [OK]. About Sender Information The sender information you are performing setup. FAX SETTINGS 2 USER SETTINGS 4 Press [ ] or [ ] to enter characters, see p. 11.) Ex. USER SETTINGS 1 UNIT TELEPHONE # 5 Use the - [...then press [OK]. (For information on how to the Standby mode. UNIT NAME CANON 9 Press [Stop/Reset] to return to enter characters, see p. 11.) Ex. FAX SETTINGS 2 USER SETTINGS 7 Press [ ] or [ ] to select , then press [OK]. MENU 5 FAX SETTINGS 3 Press [ ] or [ ] to select , then press [OK]....
..., etc.), then press [OK]. (For information on how to select , then press [OK]. About Sender Information The sender information you are performing setup. FAX SETTINGS 2 USER SETTINGS 4 Press [ ] or [ ] to enter characters, see p. 11.) Ex. USER SETTINGS 1 UNIT TELEPHONE # 5 Use the - [...then press [OK]. (For information on how to the Standby mode. UNIT NAME CANON 9 Press [Stop/Reset] to return to enter characters, see p. 11.) Ex. FAX SETTINGS 2 USER SETTINGS 7 Press [ ] or [ ] to select , then press [OK]. MENU 5 FAX SETTINGS 3 Press [ ] or [ ] to select , then press [OK]....

imageCLASS D480 Starter Guide
Page 15
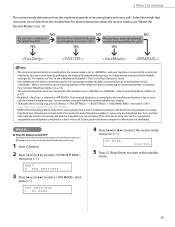
...SETTING 4 Use - [numeric keys] to the standby mode. - The current date and time settings are performing setup. By default, in the e-Manual. 13 Press [Energy Saver] to turn the display back ON and continue the setup. 1 Press [Menu]. 2 Press [ ] or [ ] to , see "Introduction of the following three ...date formats in the menu to select , then press [OK]. You can select one of the Machine," in the menu is displayed, then press [OK]. 3 Make Fax Settings Set Date and ...
...SETTING 4 Use - [numeric keys] to the standby mode. - The current date and time settings are performing setup. By default, in the e-Manual. 13 Press [Energy Saver] to turn the display back ON and continue the setup. 1 Press [Menu]. 2 Press [ ] or [ ] to , see "Introduction of the following three ...date formats in the menu to select , then press [OK]. You can select one of the Machine," in the menu is displayed, then press [OK]. 3 Make Fax Settings Set Date and ...
imageCLASS D480 Starter Guide
Page 17
... is activated. (See "Connect Telephone Cables," on p. 10.) - Press [Energy Saver] to turn the display back ON and continue the setup. 1 Press [Menu]. 2 Press [ ] or [ ] to select , then press [OK]. MENU 5 FAX SETTINGS 3 Press [ ] or [ ] to select , then press [OK]. Your machine automatically monitors incoming calls and the ring pattern, to use...
... is activated. (See "Connect Telephone Cables," on p. 10.) - Press [Energy Saver] to turn the display back ON and continue the setup. 1 Press [Menu]. 2 Press [ ] or [ ] to select , then press [OK]. MENU 5 FAX SETTINGS 3 Press [ ] or [ ] to select , then press [OK]. Your machine automatically monitors incoming calls and the ring pattern, to use...

imageCLASS MF4370dn/MF4350d Starter Guide
Page 17
... keys] to enter the unit name (up to 32 characters) (your fax number (up to 20 digits including spaces), then press [OK]. (For information on how to enter characters, see p. 14.) Ex. UNIT NAME CANON 9 Press [Stop/Reset] to return to select , then press [OK...]. About Sender Information The sender information you are performing setup. UNIT TELEPHONE # 123XXXXXXX 3 Make Fax Settings 6 Press [ ] or [ ] to the Standby mode. MENU 5 FAX SETTINGS 3 Press [ ] or [ ] to select...
... keys] to enter the unit name (up to 32 characters) (your fax number (up to 20 digits including spaces), then press [OK]. (For information on how to enter characters, see p. 14.) Ex. UNIT NAME CANON 9 Press [Stop/Reset] to return to select , then press [OK...]. About Sender Information The sender information you are performing setup. UNIT TELEPHONE # 123XXXXXXX 3 Make Fax Settings 6 Press [ ] or [ ] to the Standby mode. MENU 5 FAX SETTINGS 3 Press [ ] or [ ] to select...

imageCLASS MF4370dn/MF4350d Starter Guide
Page 18
..., in 24-hour format), then press [OK]. Press [Energy Saver] to turn the display back ON and continue the setup. 1 Press [Menu]. 2 Press [ ] or [ ] to . - 3 Make Fax Settings Set Date and Time Before using the machine, you are used as standard timer settings for functions that require them. ... or [ ] to move the cursor to the number that is set to select , then press [OK]. The current date and time settings are performing setup. Ex. If you want to set the current date and time. MENU 8 TIMER SETTINGS 3 Confirm that needs correction and overwrite it. 5 Press [Stop...
..., in 24-hour format), then press [OK]. Press [Energy Saver] to turn the display back ON and continue the setup. 1 Press [Menu]. 2 Press [ ] or [ ] to . - 3 Make Fax Settings Set Date and Time Before using the machine, you are used as standard timer settings for functions that require them. ... or [ ] to move the cursor to the number that is set to select , then press [OK]. The current date and time settings are performing setup. Ex. If you want to set the current date and time. MENU 8 TIMER SETTINGS 3 Confirm that needs correction and overwrite it. 5 Press [Stop...

imageCLASS MF4370dn/MF4350d Starter Guide
Page 20
Your telephone with distinctive ring patterns to a single telephone line, allowing you are performing setup. If an external telephone is ringing. - You can receive faxes by your telephone company for a fax or voice call is not supported with . - Contact your telephone company for information on p. 13.)... default setting is activated. (See "Connect Telephone Cables," on p. 17. - Press [Energy Saver] to turn the display back ON and continue the setup. 1 Press [Menu]. 2 Press [ ] or [ ] to select , then press [OK]. The remote reception function is useful when the receive mode...
Your telephone with distinctive ring patterns to a single telephone line, allowing you are performing setup. If an external telephone is ringing. - You can receive faxes by your telephone company for a fax or voice call is not supported with . - Contact your telephone company for information on p. 13.)... default setting is activated. (See "Connect Telephone Cables," on p. 17. - Press [Energy Saver] to turn the display back ON and continue the setup. 1 Press [Menu]. 2 Press [ ] or [ ] to select , then press [OK]. The remote reception function is useful when the receive mode...


