
User Manual
Page 1
Cover 1 Contents Back Next Page User Manual ♦ Please read this manual before operating this scanner. ♦ After you finish reading this manual, store it in a safe place for future reference. Introduction Contents Chapter 1 Before Using the Scanner Chapter 2 Setup Chapter 3 Basic Operation Chapter 4 CaptureOnTouch Settings Chapter 5 Other Scanning Methods Chapter 6 Scanner Driver Settings Chapter 7 Maintenance Chapter 8 Troubleshooting Chapter 9 Appendix INDEX
Cover 1 Contents Back Next Page User Manual ♦ Please read this manual before operating this scanner. ♦ After you finish reading this manual, store it in a safe place for future reference. Introduction Contents Chapter 1 Before Using the Scanner Chapter 2 Setup Chapter 3 Basic Operation Chapter 4 CaptureOnTouch Settings Chapter 5 Other Scanning Methods Chapter 6 Scanner Driver Settings Chapter 7 Maintenance Chapter 8 Troubleshooting Chapter 9 Appendix INDEX

User Manual
Page 2
... of Adobe Systems Incorporated in this document is a trademark of CANON ELECTRONICS INC. No part of computers and other countries. CANON ELECTRONICS INC. UNDER THIS WARRANTY IS LIMITED TO THE PURCHASE PRICE OF THE PRODUCT COVERED BY THE WARRANTY. y Intel and Pentium are registered trademarks of CANON ELECTRONICS INC. y imageFORMULA is a U.S. The program backs the...
... of Adobe Systems Incorporated in this document is a trademark of CANON ELECTRONICS INC. No part of computers and other countries. CANON ELECTRONICS INC. UNDER THIS WARRANTY IS LIMITED TO THE PURCHASE PRICE OF THE PRODUCT COVERED BY THE WARRANTY. y Intel and Pentium are registered trademarks of CANON ELECTRONICS INC. y imageFORMULA is a U.S. The program backs the...
User Manual
Page 3
... for repairs 9 2. IMPORTANT Indicates operational requirements and restrictions. Important Safety Instructions 6 Installation Location 6 AC Adapter 7 Moving the Scanner 7 Handling 8 Disposal 9 When sending the scanner for purchasing the Canon DR-2010C/DR-2510C/DR-2010M/DR-2510M Document Scanner. Names and Functions of the Scanner 9 3. WARNING Indicates a warning concerning operations that may lead to injury to persons, or damage to property if...
... for repairs 9 2. IMPORTANT Indicates operational requirements and restrictions. Important Safety Instructions 6 Installation Location 6 AC Adapter 7 Moving the Scanner 7 Handling 8 Disposal 9 When sending the scanner for purchasing the Canon DR-2010C/DR-2510C/DR-2010M/DR-2510M Document Scanner. Names and Functions of the Scanner 9 3. WARNING Indicates a warning concerning operations that may lead to injury to persons, or damage to property if...

User Manual
Page 4
... the Version 94 Chapter 7 Maintenance 95 1. Regular Maintenance 95 Cleaning the Scanner 95 Cleaning the Inside of Documents 58 Reducing Bleed Through for Thin Documents and Documents with the Job Buttons 46 8. Common Problems and Solutions 106 2. Special ...1. Q & A (Useful tips 108 4 Software Troubleshooting 108 3. Scanning with CapturePerfect 3.0 49 2. Before Using the Scanner 60 2. Other Functions 32 Setting the Long Document Mode 32 Chapter 4 CaptureOnTouch Settings 35 1. Output Method Settings 39 5. Environmental Settings 46 [Basic settings] Tab 47 [E-...
... the Version 94 Chapter 7 Maintenance 95 1. Regular Maintenance 95 Cleaning the Scanner 95 Cleaning the Inside of Documents 58 Reducing Bleed Through for Thin Documents and Documents with the Job Buttons 46 8. Common Problems and Solutions 106 2. Special ...1. Q & A (Useful tips 108 4 Software Troubleshooting 108 3. Scanning with CapturePerfect 3.0 49 2. Before Using the Scanner 60 2. Other Functions 32 Setting the Long Document Mode 32 Chapter 4 CaptureOnTouch Settings 35 1. Output Method Settings 39 5. Environmental Settings 46 [Basic settings] Tab 47 [E-...

User Manual
Page 6
...such as alcohol or paint thinner. • Avoid locations that the location where the scanner is installed meets the following environmental requirements. • Provide adequate space around the scanner for operation, maintenance, and ventilation. 4" (100mm) 4" (100mm) 4" (100mm)... The performance of the scanner for repairs 9 2. Chapter 1 Before Using the Scanner Contents Back Previous Page Next Page 1. Important Safety Instructions 6 Installation Location 6 AC Adapter 7 Moving the Scanner 7 Handling 8 Disposal 9 When sending the scanner for documents output after being scanned...
...such as alcohol or paint thinner. • Avoid locations that the location where the scanner is installed meets the following environmental requirements. • Provide adequate space around the scanner for operation, maintenance, and ventilation. 4" (100mm) 4" (100mm) 4" (100mm)... The performance of the scanner for repairs 9 2. Chapter 1 Before Using the Scanner Contents Back Previous Page Next Page 1. Important Safety Instructions 6 Installation Location 6 AC Adapter 7 Moving the Scanner 7 Handling 8 Disposal 9 When sending the scanner for documents output after being scanned...

User Manual
Page 7
... the one provided with the scanner. Moving the Scanner • When moving the scanner. Room temperature: 10 °C to 32.5 °C (50 °F to rapid changes in scanning quality. • The following conditions are placed on your local authorized Canon dealer or service representative for ...optimal scanning quality: - Also, when using an extension cord, make sure that the extension cord is rated for the current requirements of the scanner. • Never disassemble or modify the AC...
... the one provided with the scanner. Moving the Scanner • When moving the scanner. Room temperature: 10 °C to 32.5 °C (50 °F to rapid changes in scanning quality. • The following conditions are placed on your local authorized Canon dealer or service representative for ...optimal scanning quality: - Also, when using an extension cord, make sure that the extension cord is rated for the current requirements of the scanner. • Never disassemble or modify the AC...

User Manual
Page 8
...sheet of paper. 8 Failure to have the unit serviced. • Do not install the scanner in any other highly flammable substance near the scanner. • Do not cut your local authorized Canon dealer or service representative to do not pull or excessively bend the power cord. • ...power switch OFF, and disconnect the power plug from the power outlet. Then, contact your local authorized Canon dealer or service representative for further information. • Do not drop the scanner, or subject it in an emergency. • Do not allow water or flammable substances (alcohol, paint...
...sheet of paper. 8 Failure to have the unit serviced. • Do not install the scanner in any other highly flammable substance near the scanner. • Do not cut your local authorized Canon dealer or service representative to do not pull or excessively bend the power cord. • ...power switch OFF, and disconnect the power plug from the power outlet. Then, contact your local authorized Canon dealer or service representative for further information. • Do not drop the scanner, or subject it in an emergency. • Do not allow water or flammable substances (alcohol, paint...

User Manual
Page 9
... • When a request is 11.7" (298 mm)(W) x 6.3" (160 mm)(H) x 6.3" (160 mm)(D)). „ Fast Document Feeding The DR-2510C/DR-2510M can scan a maximum of 25 documents per minute, and the DR-2010C/DR-2010M can scan a maximum of 20 documents per minute in the scanner enables documents to be scanned in the packing box. 2. Contents Back Previous Page Next Page...
... • When a request is 11.7" (298 mm)(W) x 6.3" (160 mm)(H) x 6.3" (160 mm)(D)). „ Fast Document Feeding The DR-2510C/DR-2510M can scan a maximum of 25 documents per minute, and the DR-2010C/DR-2010M can scan a maximum of 20 documents per minute in the scanner enables documents to be scanned in the packing box. 2. Contents Back Previous Page Next Page...

User Manual
Page 10
...blank pages, regardless of whether each page of the document is two-sided or one-sided. „ Prescan Function The scanner is equipped with dark or uneven backgrounds, and the Advanced Text Enhancement II mode, for the DR-2510C/DR-2510M only) Ultrasonic waves are light. You can then... perform a scan simply by following the on the software you to scan a document without needing to scan the document again. „ Job Function The scanner includes three job buttons for automatically ...
...blank pages, regardless of whether each page of the document is two-sided or one-sided. „ Prescan Function The scanner is equipped with dark or uneven backgrounds, and the Advanced Text Enhancement II mode, for the DR-2510C/DR-2510M only) Ultrasonic waves are light. You can then... perform a scan simply by following the on the software you to scan a document without needing to scan the document again. „ Job Function The scanner includes three job buttons for automatically ...

User Manual
Page 11
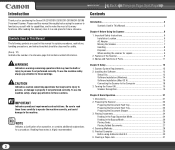
... Connect the supplied AC adapter to this section and familiarize yourself with the parts of the scanner before using the scanner. „ Front View/Right-Side View Document Feed Tray Open to place documents. (See p.23) Job Buttons These buttons can perform user-specified functions assigned with the power... Tray Open) Front Unit Open when clearing paper jams and cleaning the scanner. (See p.31 and p.101) Document Feeder Place the document to fit the width of the documents you set the switch to [AUTO], the scanner is linked to scan. Names and Functions of Parts This section describes...
... Connect the supplied AC adapter to this section and familiarize yourself with the parts of the scanner before using the scanner. „ Front View/Right-Side View Document Feed Tray Open to place documents. (See p.23) Job Buttons These buttons can perform user-specified functions assigned with the power... Tray Open) Front Unit Open when clearing paper jams and cleaning the scanner. (See p.31 and p.101) Document Feeder Place the document to fit the width of the documents you set the switch to [AUTO], the scanner is linked to scan. Names and Functions of Parts This section describes...

User Manual
Page 12
... the Software 13 Setup Disc 13 Software Installation (Windows 14 Software Installation (Mac OS X 16 Connecting the Scanner to the Computer 18 3. Turning the Power ON 19 Scanner Recognition 19 1. Scanner System Requirements To use the scanner, your computer must satisfy the following specifications: y CPU: Pentium 4 (3.2 GHz or faster) y Memory: 1 GB or more y Hard...
... the Software 13 Setup Disc 13 Software Installation (Windows 14 Software Installation (Mac OS X 16 Connecting the Scanner to the Computer 18 3. Turning the Power ON 19 Scanner Recognition 19 1. Scanner System Requirements To use the scanner, your computer must satisfy the following specifications: y CPU: Pentium 4 (3.2 GHz or faster) y Memory: 1 GB or more y Hard...

User Manual
Page 13
... Typical Installation Read Manuals Custom Installation 13 For details, consult your local authorized Canon dealer. • Scanning speeds are using should be the one originally included with the scanner. • If the CPU, memory, interface card, and other specifications do... either [Typical Installation] or [Custom Installation]. NOTE The Setup disc for use with Windows, use the scanner with Canon document scanners. Install the software using the scanner with ISIS-compatible (Windows only) and TWAIN-compatible applications. • CapturePerfect 3.0 (Windows only) An ...
... Typical Installation Read Manuals Custom Installation 13 For details, consult your local authorized Canon dealer. • Scanning speeds are using should be the one originally included with the scanner. • If the CPU, memory, interface card, and other specifications do... either [Typical Installation] or [Custom Installation]. NOTE The Setup disc for use with Windows, use the scanner with Canon document scanners. Install the software using the scanner with ISIS-compatible (Windows only) and TWAIN-compatible applications. • CapturePerfect 3.0 (Windows only) An ...

User Manual
Page 14
... → click [Yes] to Windows as an Administrator. • Close all of the computer. 3 Click [Typical Installation]. IMPORTANT • Install the software before connecting the scanner to the computer. • Log on to accept it. NOTE When you select [Typical Installation], all other applications before installing the software. 1 Turn the power...
... → click [Yes] to Windows as an Administrator. • Close all of the computer. 3 Click [Typical Installation]. IMPORTANT • Install the software before connecting the scanner to the computer. • Log on to accept it. NOTE When you select [Typical Installation], all other applications before installing the software. 1 Turn the power...

User Manual
Page 18
.... PageManager Photo and document management software from NewSoft Technology Corp. BizCard is a registered trademark of the scanner is OFF (O side). 2 Connect the power cord to the AC adapter. 18 Contents Back Previous Page Next Page Connecting the Scanner to the Computer Connect the scanner to the computer, ... The shapes of the power plug and power cord differ depending on the country and region. 1 Verify that the power switch of the scanner is OFF. Third-Party Software The following software is included on operating the software, refer to the Help for each software. • ...
.... PageManager Photo and document management software from NewSoft Technology Corp. BizCard is a registered trademark of the scanner is OFF (O side). 2 Connect the power cord to the AC adapter. 18 Contents Back Previous Page Next Page Connecting the Scanner to the Computer Connect the scanner to the computer, ... The shapes of the power plug and power cord differ depending on the country and region. 1 Verify that the power switch of the scanner is OFF. Third-Party Software The following software is included on operating the software, refer to the Help for each software. • ...

User Manual
Page 19
... automatically installs the required device driver. 4 Use the supplied USB cable to connect the scanner to the computer. IMPORTANT • If you turn the computer and the scanner ON for safety. Turning the Power ON When you turn the power OFF, wait at least 10 seconds before turning it... is connected to the computer. 1 Make sure that the scanner and computer are connected properly. 2 Press the power switch on the back of the scanner. 3. Contents Back Previous Page Next Page 3 Connect the plug of the AC adapter to the power connector...
... automatically installs the required device driver. 4 Use the supplied USB cable to connect the scanner to the computer. IMPORTANT • If you turn the computer and the scanner ON for safety. Turning the Power ON When you turn the power OFF, wait at least 10 seconds before turning it... is connected to the computer. 1 Make sure that the scanner and computer are connected properly. 2 Press the power switch on the back of the scanner. 3. Contents Back Previous Page Next Page 3 Connect the plug of the AC adapter to the power connector...

User Manual
Page 20
... properly connected to the computer. Check the status of the computer. 20 Contents 3 The scanner is recognized automatically. Simply wait a while, until the scanner is automatically recognized as new hardware. Windows taskbar Mac OS X menu bar If the taskbar icon appears as follows. NOTE If you set the... power switch on the task bar. In Windows, a balloon message such as shown below appears on the back of the scanner to [AUTO], the scanner is not properly connected to the computer, the (CaptureOnTouch) icon appears on the taskbar (or menu bar) as , the...
... properly connected to the computer. Check the status of the computer. 20 Contents 3 The scanner is recognized automatically. Simply wait a while, until the scanner is automatically recognized as new hardware. Windows taskbar Mac OS X menu bar If the taskbar icon appears as follows. NOTE If you set the... power switch on the task bar. In Windows, a balloon message such as shown below appears on the back of the scanner to [AUTO], the scanner is not properly connected to the computer, the (CaptureOnTouch) icon appears on the taskbar (or menu bar) as , the...

User Manual
Page 21
... 9.0 30 6. Other Functions 32 Setting the Long Document Mode 32 1. Documents The scanner can scan documents ranging in the Bypass Mode 26 Placing Cards 26 Placing Folded Documents 27 4. Documents 21 2. Scanning Methods 28 5. The document sizes that this scanner can scan documents up to 39.2" (1000 mm) long by setting the scanner to LTR/A4. Plain Paper Size Width...
... 9.0 30 6. Other Functions 32 Setting the Long Document Mode 32 1. Documents The scanner can scan documents ranging in the Bypass Mode 26 Placing Cards 26 Placing Folded Documents 27 4. Documents 21 2. Scanning Methods 28 5. The document sizes that this scanner can scan documents up to 39.2" (1000 mm) long by setting the scanner to LTR/A4. Plain Paper Size Width...

User Manual
Page 22
... smudges on the opposite side of each page may show through. Wrinkled or creased documents Carbon paper Curled documents Coated paper Torn documents Documents with the scanner. Always make a photocopy of embossment. 22 To scan such a document, make sure that the ink on a document is printed on thin paper, the image on the scanned image and transfer...
... smudges on the opposite side of each page may show through. Wrinkled or creased documents Carbon paper Curled documents Coated paper Torn documents Documents with the scanner. Always make a photocopy of embossment. 22 To scan such a document, make sure that the ink on a document is printed on thin paper, the image on the scanned image and transfer...

User Manual
Page 23
... main tray. Preparing the Document Eject Tray Open the document eject tray. 23 Preparing the Document Stopper Use the document stopper that corresponds with the document eject tray closed. • Open the document eject tray when you want to scan. Preparing the Document Feed Tray Open the document feed tray. Preparing the Scanner Prepare the document feed tray according to...
... main tray. Preparing the Document Eject Tray Open the document eject tray. 23 Preparing the Document Stopper Use the document stopper that corresponds with the document eject tray closed. • Open the document eject tray when you want to scan. Preparing the Document Feed Tray Open the document feed tray. Preparing the Scanner Prepare the document feed tray according to...

User Manual
Page 25
...creased, and that was successfully fed has been stored, and then resume scanning the remaining document pages. • After you finish scanning, close the document feed tray and the document eject tray to prevent damage to the scanner while it is not being used. 25 These items may cause a fire or electrical... switch, and disconnect the power cord from the power outlet to stop scanning. • Always smooth out any folds or curls in the scanner while you place a document, check to make sure that may cause a paper jam. • If feeding stops due to a system error or paper jam while ...
...creased, and that was successfully fed has been stored, and then resume scanning the remaining document pages. • After you finish scanning, close the document feed tray and the document eject tray to prevent damage to the scanner while it is not being used. 25 These items may cause a fire or electrical... switch, and disconnect the power cord from the power outlet to stop scanning. • Always smooth out any folds or curls in the scanner while you place a document, check to make sure that may cause a paper jam. • If feeding stops due to a system error or paper jam while ...


