
Users Manual - English
Page 3
Using the Printer 5 Printing Solutions 5 Driver Installation 6 CD Install ...6 Manual Install 7 Accessing Advanced Software Features 7 Density Modes 8 2-ply Mode ...8 Form Feed Modes 8 Selecting Media ...9 Cut Sheet Paper 9 Non-Perforated Roll Paper 9 Perforated Roll Paper 10 Windows Advanced Features Using PocketJet 3 Utility (Configuration Utility) ...... 10 Windows-Specific Operating System Features 11 Connecting to a DC Supply (Optional 2 Using the Operation Panel 3 Main Switch Functions 3 Indicator Lights 4 Chapter 2 - Setting Up the Printer 1 Connecting ...
Using the Printer 5 Printing Solutions 5 Driver Installation 6 CD Install ...6 Manual Install 7 Accessing Advanced Software Features 7 Density Modes 8 2-ply Mode ...8 Form Feed Modes 8 Selecting Media ...9 Cut Sheet Paper 9 Non-Perforated Roll Paper 9 Perforated Roll Paper 10 Windows Advanced Features Using PocketJet 3 Utility (Configuration Utility) ...... 10 Windows-Specific Operating System Features 11 Connecting to a DC Supply (Optional 2 Using the Operation Panel 3 Main Switch Functions 3 Indicator Lights 4 Chapter 2 - Setting Up the Printer 1 Connecting ...
Users Manual - English
Page 8
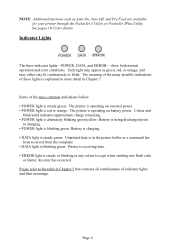
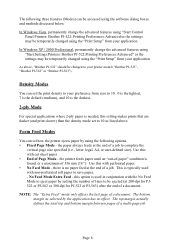
... or a command has been received from the computer. • DATA light is blinking green: Printer is receiving data. • ERROR light is steady or blinking in more common indications follow: • POWER light is steady green: The printer is operating on external power. • POWER light is red or orange: The printer is explained in any colour (except when sending new flash code or fonts): An error has occurred.
... or a command has been received from the computer. • DATA light is blinking green: Printer is receiving data. • ERROR light is steady or blinking in more common indications follow: • POWER light is steady green: The printer is operating on external power. • POWER light is red or orange: The printer is explained in any colour (except when sending new flash code or fonts): An error has occurred.
Users Manual - English
Page 10
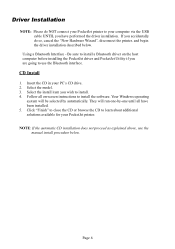
... Wizard", disconnect the printer, and begin the driver installation described below . Be sure to install a Bluetooth driver on -screen instructions to use the manual install procedure below . Select the model. 3. Follow all have performed the driver installation. Page 6 Your Windows operating system will run one until all on the host computer before installing the PocketJet driver and PocketJet Utility if you accidentally do NOT connect your PocketJet printer to your PocketJet printer. Click "Finish...
... Wizard", disconnect the printer, and begin the driver installation described below . Be sure to install a Bluetooth driver on -screen instructions to use the manual install procedure below . Select the model. 3. Follow all have performed the driver installation. Page 6 Your Windows operating system will run one until all on the host computer before installing the PocketJet driver and PocketJet Utility if you accidentally do NOT connect your PocketJet printer to your PocketJet printer. Click "Finish...
Users Manual - English
Page 11
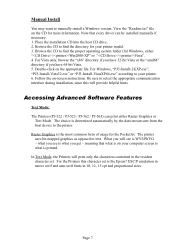
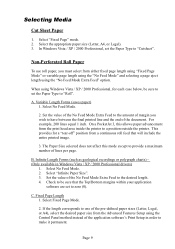
... CD to your printer. 6. Double-click on -screen instructions. For the Printers this will provide helpful hints. Place the installation CD into the host CD drive. 2. Accessing Advanced Software Features Text Mode: The Printers (PJ-522 / PJ-523 / PJ-562 / PJ-563) can be installed manually if necessary. 1. What you will print only the characters contained in the resident character set is printed. Manual Install You may want...
... CD to your printer. 6. Double-click on -screen instructions. For the Printers this will provide helpful hints. Place the installation CD into the host CD drive. 2. Accessing Advanced Software Features Text Mode: The Printers (PJ-522 / PJ-523 / PJ-562 / PJ-563) can be installed manually if necessary. 1. What you will print only the characters contained in the resident character set is printed. Manual Install You may want...
Users Manual - English
Page 12
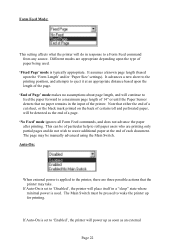
... application. the printer feeds paper until an "out-of lines to complete the vertical page size specified (i.e., letter, legal, A4, or user-defined size). The following options. • Fixed Page Mode - Use this setting makes prints that are darker (and print slower) than the density mode set how the printer ejects paper by setting the number of -paper" condition is no effect. This is needed, this with perforated paper. • No Feed Mode -
... application. the printer feeds paper until an "out-of lines to complete the vertical page size specified (i.e., letter, legal, A4, or user-defined size). The following options. • Fixed Page Mode - Use this setting makes prints that are darker (and print slower) than the density mode set how the printer ejects paper by setting the number of -paper" condition is no effect. This is needed, this with perforated paper. • No Feed Mode -
Users Manual - English
Page 13
..." position from the print head area inside the printer to zero (0). Select Fixed Page Mode. 2. The Paper Size selected does not affect this allows paper advancement from a continuous roll feed that the Top/Bottom margins within your application software are set the Paper Type to make it permanent. Select "Fixed Page" mode. 2. Select No Feed Mode. 2. If the length corresponds to one of the application software's Print Setup in Windows Vista / XP / 2000 Professional drivers) 1.
..." position from the print head area inside the printer to zero (0). Select Fixed Page Mode. 2. The Paper Size selected does not affect this allows paper advancement from a continuous roll feed that the Top/Bottom margins within your application software are set the Paper Type to make it permanent. Select "Fixed Page" mode. 2. Select No Feed Mode. 2. If the length corresponds to one of the application software's Print Setup in Windows Vista / XP / 2000 Professional drivers) 1.
Users Manual - English
Page 14
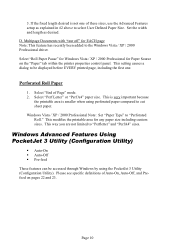
... driver. This setting causes a dialog to select User Defined Paper Size. Perforated Roll Paper 1. This modifies the printable area for EACH page Note: This feature has recently been added to cut sheet paper. D. Windows Advanced Features Using PocketJet 3 Utility (Configuration Utility) Auto-On Auto-Off Pre-feed These features can be displayed before EVERY printed page, including the first one of Page" mode...
... driver. This setting causes a dialog to select User Defined Paper Size. Perforated Roll Paper 1. This modifies the printable area for EACH page Note: This feature has recently been added to cut sheet paper. D. Windows Advanced Features Using PocketJet 3 Utility (Configuration Utility) Auto-On Auto-Off Pre-feed These features can be displayed before EVERY printed page, including the first one of Page" mode...
Users Manual - English
Page 17
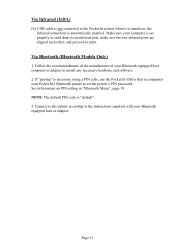
... necessary using a PIN code, use the PocketJet Utility that accompanies your computer is "default". 3. NOTE: The default PIN code is set the printer's PIN password. Page 13 Via Bluetooth (Bluetooth Models Only) 1. Connect to the printer according to the instructions supplied with your Bluetooth equipped host computer or adapter to set properly to send data via its infrared port, make sure the two infrared ports are aligned each other, and proceed to print. Make...
... necessary using a PIN code, use the PocketJet Utility that accompanies your computer is "default". 3. NOTE: The default PIN code is set the printer's PIN password. Page 13 Via Bluetooth (Bluetooth Models Only) 1. Connect to the printer according to the instructions supplied with your Bluetooth equipped host computer or adapter to set properly to send data via its infrared port, make sure the two infrared ports are aligned each other, and proceed to print. Make...

Users Manual - English
Page 19
... slight changes in the printer driver dialog. See "Accessing Advanced Software Features", on (without blinking), the printer has received insufficient data to print an entire page. Page 15 Turning the Printer OFF Press the main switch twice quickly to eject the page. If you are not using the Print Density Setting in the printer's speed and the number of inactivity. Press and hold the green Power button to turn itself off . Making Prints Lighter...
... slight changes in the printer driver dialog. See "Accessing Advanced Software Features", on (without blinking), the printer has received insufficient data to print an entire page. Page 15 Turning the Printer OFF Press the main switch twice quickly to eject the page. If you are not using the Print Density Setting in the printer's speed and the number of inactivity. Press and hold the green Power button to turn itself off . Making Prints Lighter...
Users Manual - English
Page 20
... Auto-Off Pre-Feed For Bluetooth Printers: PIN Code Setting Installing the PocketJet 3 Utility: When using the CD Installation program to complete the installation (See "Driver Installation", page 6). You must follow the onscreen instructions. This utility provides access to modify storable configuration options for systems with the printers (PJ-522, PJ-523, PJ-562 and PJ-563) contains a PocketJet Utility, a printer setup program, that allows the user to printer...
... Auto-Off Pre-Feed For Bluetooth Printers: PIN Code Setting Installing the PocketJet 3 Utility: When using the CD Installation program to complete the installation (See "Driver Installation", page 6). You must follow the onscreen instructions. This utility provides access to modify storable configuration options for systems with the printers (PJ-522, PJ-523, PJ-562 and PJ-563) contains a PocketJet Utility, a printer setup program, that allows the user to printer...
Users Manual - English
Page 24
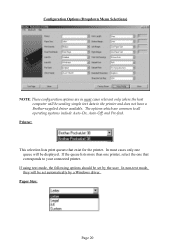
... sending simple text data to the printer and does not have a Brother-supplied driver available. In non-text mode, they will be set automatically by the user. If using text mode, the following options should be displayed. Paper Size: Page 20 Printer: This selection lists print queues that corresponds to your connected printer. Configuration Options (Dropdown Menu Selections) NOTE: These configuration options are common to all operating...
... sending simple text data to the printer and does not have a Brother-supplied driver available. In non-text mode, they will be set automatically by the user. If using text mode, the following options should be displayed. Paper Size: Page 20 Printer: This selection lists print queues that corresponds to your connected printer. Configuration Options (Dropdown Menu Selections) NOTE: These configuration options are common to all operating...
Users Manual - English
Page 26
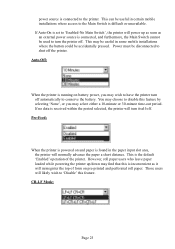
... a cut sheet, or the black mark printed on the back of certain roll and perforated paper, will be pressed to wake the printer up as soon as the end of a page. 'No Feed' mode ignores all Form Feed commands, and does not advance the paper after printing. If Auto-On is set to 'Disabled', the printer will place itself in a "sleep" state where minimal power is used . 'Fixed Page' mode is...
... a cut sheet, or the black mark printed on the back of certain roll and perforated paper, will be pressed to wake the printer up as soon as the end of a page. 'No Feed' mode ignores all Form Feed commands, and does not advance the paper after printing. If Auto-On is set to 'Disabled', the printer will place itself in a "sleep" state where minimal power is used . 'Fixed Page' mode is...
Users Manual - English
Page 27
...-LF Mode: Page 23 Power must be used to 'Enabled-No Main Switch', the printer will power up /down may select either a 10-minute or 30-minute time-out period. If no data is received within the period selected, the printer will normally advance the paper a short distance. power source is connected to 'Disable' this feature. Auto-Off: When the printer is running on and paper is the default 'Enabled' operation...
...-LF Mode: Page 23 Power must be used to 'Enabled-No Main Switch', the printer will power up /down may select either a 10-minute or 30-minute time-out period. If no data is received within the period selected, the printer will normally advance the paper a short distance. power source is connected to 'Disable' this feature. Auto-Off: When the printer is running on and paper is the default 'Enabled' operation...

Users Manual - English
Page 47
... the feed motor on without paper loaded. Insert the black cleaning cloth that came with the printer into the printer's paper input slot with the rough black side, which contains the cleaning material, towards the rear of paper or a higher density setting. 1. Pressing the main switch twice quickly will illuminate. 3. If the problem does not go away after you detect broken or light characters on the page. The printer...
... the feed motor on without paper loaded. Insert the black cleaning cloth that came with the printer into the printer's paper input slot with the rough black side, which contains the cleaning material, towards the rear of paper or a higher density setting. 1. Pressing the main switch twice quickly will illuminate. 3. If the problem does not go away after you detect broken or light characters on the page. The printer...

Users Manual - English
Page 49
... black side, which contains the cleaning material, towards the front of the printed image, or both. 1. If you attempt to initiate Cleaning Mode, a Form Feed will stop automatically after about two seconds. NOTE: If paper is powered on and off the printer. The "Data" LED will begin to an idle state. See Figure 18. The printer pulls the Cleaning Cloth through. 5. Page 45 Make sure the printer is loaded...
... black side, which contains the cleaning material, towards the front of the printed image, or both. 1. If you attempt to initiate Cleaning Mode, a Form Feed will stop automatically after about two seconds. NOTE: If paper is powered on and off the printer. The "Data" LED will begin to an idle state. See Figure 18. The printer pulls the Cleaning Cloth through. 5. Page 45 Make sure the printer is loaded...
Users Manual - English
Page 56
... "Service Mode". To print multiple pages, repeat steps 1~3. The test page (See page 32) contains firmware level, image quality, and configuration information. 1. Self-Test Feature The Self-Test Feature can also be printed from the Windows based Configuration Utility provided on and idle, and paper must be turned on the CD. The red DATA light will illuminate. 3. Page 52 Note: Test pages can be used to print a letter-size page test page...
... "Service Mode". To print multiple pages, repeat steps 1~3. The test page (See page 32) contains firmware level, image quality, and configuration information. 1. Self-Test Feature The Self-Test Feature can also be printed from the Windows based Configuration Utility provided on and idle, and paper must be turned on the CD. The red DATA light will illuminate. 3. Page 52 Note: Test pages can be used to print a letter-size page test page...

Users Manual - English
Page 58
... using the "Accessing Advanced Software Features", Chapter 2. Paper Problems The paper is too light or dark Raise or lower the density setting using the printer driver. See page 39, "Inserting Paper". Call technical support. The print quality is poor, and the image is jammed in the printer See page 41, "Clearing a Paper Jam". Also, check the Print Density setting using recommended Brother Genuine Thermal paper. Check to see whether the platen roller is , clean it completely. See page 15, "Making Prints Lighter or Darker". Paper...
... using the "Accessing Advanced Software Features", Chapter 2. Paper Problems The paper is too light or dark Raise or lower the density setting using the printer driver. See page 39, "Inserting Paper". Call technical support. The print quality is poor, and the image is jammed in the printer See page 41, "Clearing a Paper Jam". Also, check the Print Density setting using recommended Brother Genuine Thermal paper. Check to see whether the platen roller is , clean it completely. See page 15, "Making Prints Lighter or Darker". Paper...

Users Manual - English
Page 59
... pages continue to have black vertical lines, the print head may need maintenance. Follow the instructions in "Cleaning the Print Head", page 43. Follow the instructions in "Cleaning the Print Head", page 43. Light patches of print appear on the image The printer requires smooth paper to inserting it does not have any obvious deformities. Make sure the paper does not have any dents or wrinkles. Check the density setting using Brother Genuine Thermal paper. Follow the instructions in "Cleaning the Print Head", page...
... pages continue to have black vertical lines, the print head may need maintenance. Follow the instructions in "Cleaning the Print Head", page 43. Follow the instructions in "Cleaning the Print Head", page 43. Light patches of print appear on the image The printer requires smooth paper to inserting it does not have any obvious deformities. Make sure the paper does not have any dents or wrinkles. Check the density setting using Brother Genuine Thermal paper. Follow the instructions in "Cleaning the Print Head", page...
Quick Reference Card - English
Page 1
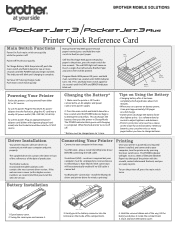
... Brother Paper and a test sheet will come on the inside the compartment. 5. INTERFACE AC ADAPT . ! 4. ® ® Printer Quick Reference Card Main Switch Functions Power On: Push main switch once quickly while the printer is complete. Charging the Battery* 1. The indicator will light. The POWER indicator blink green until DATA indicator turns red. install the Bluetooth driver and printer driver for wireless printing! Main Switch CHRAERFGREESH ONOFF POWER ERROR DATA POWER Indicator DATA Indicator ERROR Indicator Powering Your Printer PocketJet printers...
... Brother Paper and a test sheet will come on the inside the compartment. 5. INTERFACE AC ADAPT . ! 4. ® ® Printer Quick Reference Card Main Switch Functions Power On: Push main switch once quickly while the printer is complete. Charging the Battery* 1. The indicator will light. The POWER indicator blink green until DATA indicator turns red. install the Bluetooth driver and printer driver for wireless printing! Main Switch CHRAERFGREESH ONOFF POWER ERROR DATA POWER Indicator DATA Indicator ERROR Indicator Powering Your Printer PocketJet printers...
Quick Reference Card - English
Page 2
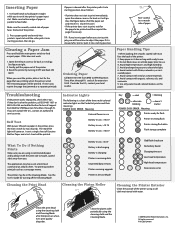
... Genuine Brother Paper and a test sheet will be in the printer, press the main switch for the page to 5PM Mountain Time Mon. DATA ERROR ONOFF POWER Clean the platen roller periodically using the cleaning cloth and Cleaning Mode after the printer pulls it into starting position, then let go . Try printing another print job such as a separate print job. See the User's Guide for extension 1659. If paper is receiving data Unprinted data remains Printer receiving upgrade Printer in use, >6.6 V Battery...
... Genuine Brother Paper and a test sheet will be in the printer, press the main switch for the page to 5PM Mountain Time Mon. DATA ERROR ONOFF POWER Clean the platen roller periodically using the cleaning cloth and Cleaning Mode after the printer pulls it into starting position, then let go . Try printing another print job such as a separate print job. See the User's Guide for extension 1659. If paper is receiving data Unprinted data remains Printer receiving upgrade Printer in use, >6.6 V Battery...


