
Users Manual - English
Page 3
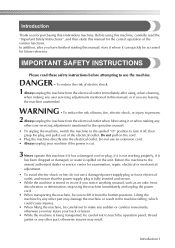
... dropped or damaged, or water is spilled on the cord. • Plug the machine directly into the electrical outlet. Introduction 1 Return the machine to persons: 2 Always unplug the machine from the bottom positions. Introduction Thank you for purchasing this manual for the correct operation...injuries may injure your machine if the power is cut. 3 Never operate this manual, or if you may result. IMPORTANT SAFETY INSTRUCTIONS Please read the "Important Safety Instructions", and then study this embroidery machine. Do not pull on the unit. Lifting the machine by any sudden or...
... dropped or damaged, or water is spilled on the cord. • Plug the machine directly into the electrical outlet. Introduction 1 Return the machine to persons: 2 Always unplug the machine from the bottom positions. Introduction Thank you for purchasing this manual for the correct operation...injuries may injure your machine if the power is cut. 3 Never operate this manual, or if you may result. IMPORTANT SAFETY INSTRUCTIONS Please read the "Important Safety Instructions", and then study this embroidery machine. Do not pull on the unit. Lifting the machine by any sudden or...
Users Manual - English
Page 7
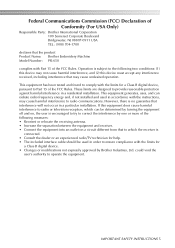
... the FCC Rules. Federal Communications Commission (FCC) Declaration of Conformity (For USA Only) Responsible Party: Brother International Corporation 100 Somerset Corporate Boulevard Bridgewater, NJ 08807-0911 USA TEL : (908) 704-1700 declares that the product Product Name: Brother Embroidery Machine Model Number: PR-650 complies with the instructions, may cause harmful interference to radio communications...
... the FCC Rules. Federal Communications Commission (FCC) Declaration of Conformity (For USA Only) Responsible Party: Brother International Corporation 100 Somerset Corporate Boulevard Bridgewater, NJ 08807-0911 USA TEL : (908) 704-1700 declares that the product Product Name: Brother Embroidery Machine Model Number: PR-650 complies with the instructions, may cause harmful interference to radio communications...

Users Manual - English
Page 8
...Except as otherwise provided herein, CUSTOMER may not: • Allow more than one copy of the CONTENT to be governed by regular mail, to Brother Industries, Ltd., 1-1-1 Kawagishi, Mizuho-ku, Nagoya 467-8562, Japan, Attention: P&H company Sales and Marketing Dept. 6 This agreement shall be... provided that are licensed (not sold) to you ("CUSTOMER") under any law. Nothing in this Agreement in combination with an embroidery machine to create embroidery. • Use the CONTENT in writing by the laws of the CONTENT, WHICH ORIGINALLY BEARS CERTAIN COPYRIGHT NOTICE UNDER THE NAME...
...Except as otherwise provided herein, CUSTOMER may not: • Allow more than one copy of the CONTENT to be governed by regular mail, to Brother Industries, Ltd., 1-1-1 Kawagishi, Mizuho-ku, Nagoya 467-8562, Japan, Attention: P&H company Sales and Marketing Dept. 6 This agreement shall be... provided that are licensed (not sold) to you ("CUSTOMER") under any law. Nothing in this Agreement in combination with an embroidery machine to create embroidery. • Use the CONTENT in writing by the laws of the CONTENT, WHICH ORIGINALLY BEARS CERTAIN COPYRIGHT NOTICE UNDER THE NAME...
Users Manual - English
Page 14
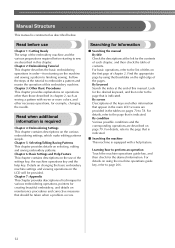
...■ Searching the manual By title Check the descriptions at the end of this embroidery machine. Read before use of the pages. For basic operations, refer to sew are described on the machine and sewing a pattern to page 206. 12 By condition Various possible conditions and.... Chapter 6: Basic Settings and Help Feature This chapter contains descriptions on the use Chapter 1: Getting Ready The setup of the embroidery machine and the various preparations required before starting to the list of titles on maintenance procedures and corrective measures that is indicated. Manual ...
...■ Searching the manual By title Check the descriptions at the end of this embroidery machine. Read before use of the pages. For basic operations, refer to sew are described on the machine and sewing a pattern to page 206. 12 By condition Various possible conditions and.... Chapter 6: Basic Settings and Help Feature This chapter contains descriptions on the use Chapter 1: Getting Ready The setup of the embroidery machine and the various preparations required before starting to the list of titles on maintenance procedures and corrective measures that is indicated. Manual ...
Users Manual - English
Page 18
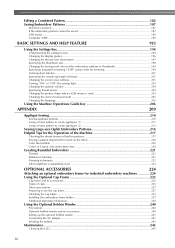
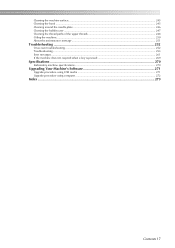
... Threads ...221 Stabilizers (backing) ...221 Hooping techniques...222 Fabric/stabilizer compatibility chart ...223 OPTIONAL ACCESSORIES 224 Attaching an optional embroidery frame for industrial embroidery machines 224 Using the Optional Cap Frame 225 Cap frame and its accessories...225 Types of caps ...226 Fabric precautions...227 Preparing to use the cap ...
... Threads ...221 Stabilizers (backing) ...221 Hooping techniques...222 Fabric/stabilizer compatibility chart ...223 OPTIONAL ACCESSORIES 224 Attaching an optional embroidery frame for industrial embroidery machines 224 Using the Optional Cap Frame 225 Cap frame and its accessories...225 Types of caps ...226 Fabric precautions...227 Preparing to use the cap ...
Users Manual - English
Page 19
... thread paths of the upper threads 248 Oiling the machine ...250 About the maintenance message...251 Troubleshooting ...252 On-screen troubleshooting ...252 Troubleshooting...253 Error messages ...261 If the machine does not respond when a key is pressed 269 Specifications ...270 Embroidery machine specifications...270 Upgrading Your Machine's Software 271 Upgrade procedure using USB media ...271...
... thread paths of the upper threads 248 Oiling the machine ...250 About the maintenance message...251 Troubleshooting ...252 On-screen troubleshooting ...252 Troubleshooting...253 Error messages ...261 If the machine does not respond when a key is pressed 269 Specifications ...270 Embroidery machine specifications...270 Upgrading Your Machine's Software 271 Upgrade procedure using USB media ...271...

Users Manual - English
Page 21
... Accessories...22 Included accessories 22 Optional accessories 23 Setting Up the Machine 24 Setup and transporting precautions 24 Setup location...25 Setting up . 1 GETTING READY After unpacking the machine, first refer to sew are included, the embroidery machine can be set up the machine 26 Adjusting the operation panel position 27 Preparing the thread guide...
... Accessories...22 Included accessories 22 Optional accessories 23 Setting Up the Machine 24 Setup and transporting precautions 24 Setup location...25 Setting up . 1 GETTING READY After unpacking the machine, first refer to sew are included, the embroidery machine can be set up the machine 26 Adjusting the operation panel position 27 Preparing the thread guide...

Users Manual - English
Page 25
...set (Refer to page 225.) PRCF3 the touch pen holder on the country/area where the machine was purchased. ● Embroidery cards sold overseas are not compatible with this machine. ● All specifications are available as optional accessories. 1. 7 Flat frame 8 Bobbin ... on the back of printing. Memo ● Always use accessories recommended for this embroidery machine. ● Visit your nearest authorized dealer for a complete listing of optional accessories and embroidery cards available for your machine. 6. 7. 8. 9. 10. 11. 12. Please be stored in 1 Advanced...
...set (Refer to page 225.) PRCF3 the touch pen holder on the country/area where the machine was purchased. ● Embroidery cards sold overseas are not compatible with this machine. ● All specifications are available as optional accessories. 1. 7 Flat frame 8 Bobbin ... on the back of printing. Memo ● Always use accessories recommended for this embroidery machine. ● Visit your nearest authorized dealer for a complete listing of optional accessories and embroidery cards available for your machine. 6. 7. 8. 9. 10. 11. 12. Please be stored in 1 Advanced...
Users Manual - English
Page 26
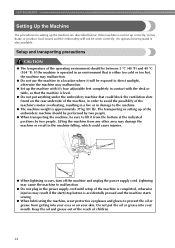
... put the oil or grease into your mouth. If the machine is operated in an environment that is either too cold or too hot, the machine may damage the machine or result in order to avoid the possibility of the embroidery machine should be between 5 °C (40 °F) and 40...24 Lifting the machine from getting into your eyes or on the rear underside of the machine, in the machine falling, which could block the ventilation slots found on your skin. If the machine is also available. Do not put anything under the embroidery machine that the machine is approximately 37...
... put the oil or grease into your mouth. If the machine is operated in an environment that is either too cold or too hot, the machine may damage the machine or result in order to avoid the possibility of the embroidery machine should be between 5 °C (40 °F) and 40...24 Lifting the machine from getting into your eyes or on the rear underside of the machine, in the machine falling, which could block the ventilation slots found on your skin. If the machine is also available. Do not put anything under the embroidery machine that the machine is approximately 37...
Users Manual - English
Page 28
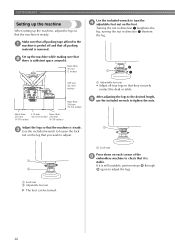
...to tighten the nuts. 1 Lock nut Press down on each corner of the 6 embroidery machine to check that it . turning the nut in direction 1 lengthens the leg; Make sure that all packing tape affixed to the 1 machine is peeled off and that all four legs so that they securely contact the desk... loosen the lock nut on the foot. More than 250 mm (20-5/32 inches) 250 mm (9-7/8 inches) (9-7/8 inches) Adjust the legs so that the machine is removed. If it is sufficient space around it is steady. 3 Use the included wrench to adjust. 1 Adjustable foot nut • Adjust all packing ...
...to tighten the nuts. 1 Lock nut Press down on each corner of the 6 embroidery machine to check that it . turning the nut in direction 1 lengthens the leg; Make sure that all packing tape affixed to the 1 machine is peeled off and that all four legs so that they securely contact the desk... loosen the lock nut on the foot. More than 250 mm (20-5/32 inches) 250 mm (9-7/8 inches) (9-7/8 inches) Adjust the legs so that the machine is removed. If it is sufficient space around it is steady. 3 Use the included wrench to adjust. 1 Adjustable foot nut • Adjust all packing ...
Users Manual - English
Page 33
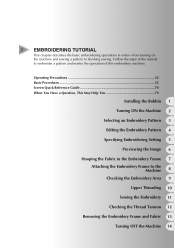
... the Embroidery 11 Checking the Thread Tension 12 Removing the Embroidery Frame and Fabric 13 Turning OFF the Machine 14 2 EMBROIDERING TUTORIAL This chapter describes the basic embroidering operations in the Embroidery Frame 7 Attaching the Embroidery Frame to finishing sewing. Follow the steps of the tutorial to embroider a pattern and master the operation of this embroidery machine.
... the Embroidery 11 Checking the Thread Tension 12 Removing the Embroidery Frame and Fabric 13 Turning OFF the Machine 14 2 EMBROIDERING TUTORIAL This chapter describes the basic embroidering operations in the Embroidery Frame 7 Attaching the Embroidery Frame to finishing sewing. Follow the steps of the tutorial to embroider a pattern and master the operation of this embroidery machine.
Users Manual - English
Page 34
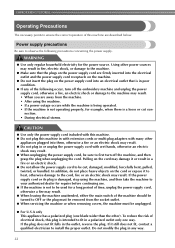
... the power supply cord to be sure to first turn off the machine, and then grasp the plug when unplugging the cord. Power supply precautions Be sure to observe the following occur, turn off the embroidery machine and unplug the power supply cord, otherwise a fire, an electric... shock or damage to the machine may result. ● When unplugging the power supply cord, be cut connection. • During...
... the power supply cord to be sure to first turn off the machine, and then grasp the plug when unplugging the cord. Power supply precautions Be sure to observe the following occur, turn off the embroidery machine and unplug the power supply cord, otherwise a fire, an electric... shock or damage to the machine may result. ● When unplugging the power supply cord, be cut connection. • During...

Users Manual - English
Page 36
... reach its normal level of the backlight and is not a malfunction. Be sure to sit in Japan)). Note ● Your machine can embroider fabric that the fabric is up to observe the following recommendations concerning the use a mechanical pencil, screwdriver or any other... information.) ● When embroidering large pieces of the display while using it is recommended that rayon or polyester embroidery thread be dark immediately after the embroidery machine is turned on page 90 for the needle to observe the following recommendations concerning the upper thread. Note ●...
... reach its normal level of the backlight and is not a malfunction. Be sure to sit in Japan)). Note ● Your machine can embroider fabric that the fabric is up to observe the following recommendations concerning the use a mechanical pencil, screwdriver or any other... information.) ● When embroidering large pieces of the display while using it is recommended that rayon or polyester embroidery thread be dark immediately after the embroidery machine is turned on page 90 for the needle to observe the following recommendations concerning the upper thread. Note ●...
Users Manual - English
Page 37
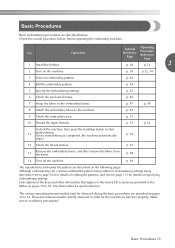
... Make sure to embroider the pattern are provided on the machine. Check the overall procedure below . p. 46 7 Hoop the fabric in the tables on pages 70 to 34. p. 49 9 Check the embroidery area. p. 69 The operations to read these tables for...precautions that appear in the main LCD screens are described below , before operating the embroidery machine. p. 38 p.32, 34 3 Select an embroidery pattern. Basic Procedures Basic embroidering procedures are provided in the embroidery frame. p. 44 5 Specify the embroidering settings. p. 51 10 Thread the ...
... Make sure to embroider the pattern are provided on the machine. Check the overall procedure below . p. 46 7 Hoop the fabric in the tables on pages 70 to 34. p. 49 9 Check the embroidery area. p. 69 The operations to read these tables for...precautions that appear in the main LCD screens are described below , before operating the embroidery machine. p. 38 p.32, 34 3 Select an embroidery pattern. Basic Procedures Basic embroidering procedures are provided in the embroidery frame. p. 44 5 Specify the embroidering settings. p. 51 10 Thread the ...

Users Manual - English
Page 38
...Cleaning the bobbin case" on page 250. Insert a bobbin wound with a bobbin-winder. For details on cleaning the bobbin case, refer to "Oiling the machine" on page 247. Use pre-wound (L type) bobbins. ● The optional bobbin winder (stand-alone type) and optional metal bobbins can only be...hook cover. 1 Pull the hook cover toward front. Do not pull it with extreme force. 36 Installing the bobbin Memo ● This embroidery machine is enough bobbin thread for embroidering. The race should be used to hold the thread when beginning to page 33. Installing the Bobbin When ...
...Cleaning the bobbin case" on page 250. Insert a bobbin wound with a bobbin-winder. For details on cleaning the bobbin case, refer to "Oiling the machine" on page 247. Use pre-wound (L type) bobbins. ● The optional bobbin winder (stand-alone type) and optional metal bobbins can only be...hook cover. 1 Pull the hook cover toward front. Do not pull it with extreme force. 36 Installing the bobbin Memo ● This embroidery machine is enough bobbin thread for embroidering. The race should be used to hold the thread when beginning to page 33. Installing the Bobbin When ...
Users Manual - English
Page 40
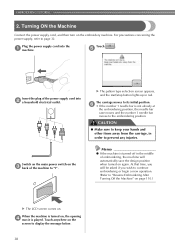
... the screen to "I". For precautions concerning the power supply, refer to "Resume Embroidering After Turning Off the Machine" on page 110.) X The LCD screen comes on the embroidery machine. Touch anywhere on the 3 back of embroidering, the machine will be asked if you wish to continue embroidering or begin a new operation. (Refer to page...
... the screen to "I". For precautions concerning the power supply, refer to "Resume Embroidering After Turning Off the Machine" on page 110.) X The LCD screen comes on the embroidery machine. Touch anywhere on the 3 back of embroidering, the machine will be asked if you wish to continue embroidering or begin a new operation. (Refer to page...

Users Manual - English
Page 41
Display 1 Key Name Home key Function Touch this key to cancel all operations previously performed and return to change the embroidery machine settings. p. 61 6 Settings key Touch this manual. Reference Page 2 Pattern display area This area displays the selected pattern....turned on and is available in any screen. Turning ON the Machine 39 key p.206 5 Needle bar move or thread a selected needle bar. Machine 4 operations guide Touch this key to page 34. 1 2 2 3 4 6 5 No. The embroidery frame indications, area line the grid lines and other display settings...
Display 1 Key Name Home key Function Touch this key to cancel all operations previously performed and return to change the embroidery machine settings. p. 61 6 Settings key Touch this manual. Reference Page 2 Pattern display area This area displays the selected pattern....turned on and is available in any screen. Turning ON the Machine 39 key p.206 5 Needle bar move or thread a selected needle bar. Machine 4 operations guide Touch this key to page 34. 1 2 2 3 4 6 5 No. The embroidery frame indications, area line the grid lines and other display settings...
Users Manual - English
Page 43
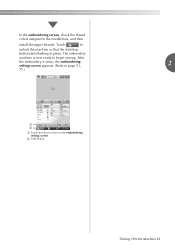
In the embroidering screen, check the thread colors assigned to unlock the machine so that the start/stop button starts flashing in green. Touch to the needle bars, and then install the upper threads. The embroidery machine is sewn, the embroidering settings screen appears. (Refer to page 53, 2 77.) 1 2 1 Touch this key to return to begin sewing. After the embroidery is now ready to the embroidering settings screen. 2 Unlock key Turning ON the Machine 41
In the embroidering screen, check the thread colors assigned to unlock the machine so that the start/stop button starts flashing in green. Touch to the needle bars, and then install the upper threads. The embroidery machine is sewn, the embroidering settings screen appears. (Refer to page 53, 2 77.) 1 2 1 Touch this key to return to begin sewing. After the embroidery is now ready to the embroidering settings screen. 2 Unlock key Turning ON the Machine 41
Users Manual - English
Page 50
...; Firmly clamp together the inner and outer frames so that there are no wrinkles in the fabric after it is stretched in the small embroidery frame is used with the right side up on top 3 of the outer frame. 1 Screw Place the fabric with the optional cap .... EMBROIDERING TUTORIAL ■ Hooping fabric in the small embroidery frame The procedure for hooping fabric in the embroidery frame. Try various methods to achieve the best embroidering results. (Refer to "Hooping techniques" on page 222.) Memo ● This embroidery machine can be used to "Hooping the Fabric" on page...
...; Firmly clamp together the inner and outer frames so that there are no wrinkles in the fabric after it is stretched in the small embroidery frame is used with the right side up on top 3 of the outer frame. 1 Screw Place the fabric with the optional cap .... EMBROIDERING TUTORIAL ■ Hooping fabric in the small embroidery frame The procedure for hooping fabric in the embroidery frame. Try various methods to achieve the best embroidering results. (Refer to "Hooping techniques" on page 222.) Memo ● This embroidery machine can be used to "Hooping the Fabric" on page...
Users Manual - English
Page 51
... is too tight, please use the included disc-shaped screwdriver. 1 Left arm of embroidery frame holder Move the arm of the embroidery frame holder to the embroidery machine. Insert the embroidery frame into the clips on the embroidery frame holder. 3 Positioning pin 4 Holes 5 Positioning slots 1 Left arm 2 Thumb screws X The left or right to adjust it...
... is too tight, please use the included disc-shaped screwdriver. 1 Left arm of embroidery frame holder Move the arm of the embroidery frame holder to the embroidery machine. Insert the embroidery frame into the clips on the embroidery frame holder. 3 Positioning pin 4 Holes 5 Positioning slots 1 Left arm 2 Thumb screws X The left or right to adjust it...


