
Use and Care Manual
Page 2
... (some models 26 About the Warming Drawer 26 Operation 27 Getting the Most Out of Your Appliance 29 Getting the Most Out of Your Cooktop 29 Getting the Most Out of Your Oven 30 Getting the Most Out of Contents About This Manual 1 How This Manual Is Organized 1 Safety... 2 Important Safety Instructions 2 Getting Started 7 Parts and Accessories 7 Control (Panel 15 Before Using the Appliance for the First Time 19 Operation - Drawers (Storage...
... (some models 26 About the Warming Drawer 26 Operation 27 Getting the Most Out of Your Appliance 29 Getting the Most Out of Your Cooktop 29 Getting the Most Out of Your Oven 30 Getting the Most Out of Contents About This Manual 1 How This Manual Is Organized 1 Safety... 2 Important Safety Instructions 2 Getting Started 7 Parts and Accessories 7 Control (Panel 15 Before Using the Appliance for the First Time 19 Operation - Drawers (Storage...
Use and Care Manual
Page 3
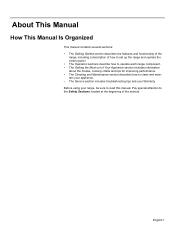
... to set up the range and operate the control panel. • The Operation sections describe how to read this manual. Before using your Warranty. Pay special attention to the Safety Sections located at the beginning of Your Appliance section includes information about the... modes, cooking charts and tips for improving performance. • The Cleaning and Maintenance section describes how to clean and maintain your appliance. • The Service section includes troubleshooting tips and your range, be sure to operate each range component...
... to set up the range and operate the control panel. • The Operation sections describe how to read this manual. Before using your Warranty. Pay special attention to the Safety Sections located at the beginning of Your Appliance section includes information about the... modes, cooking charts and tips for improving performance. • The Cleaning and Maintenance section describes how to clean and maintain your appliance. • The Service section includes troubleshooting tips and your range, be sure to operate each range component...

Use and Care Manual
Page 4
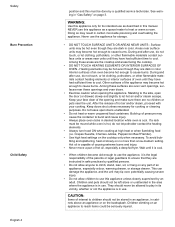
...inside an oven or warming drawer should not be certain that they extend beyond the bottom of an appliance, especially surface unit drip bowls or oven bottom. Safety Important Safety Instructions READ AND SAVE THESE INSTRUCTIONS...oils slowly on fan or filter. c) Clean ventilating fans frequently. d) Use proper pan size. Turn off the appliance and disconnect the circuit at high heat or when flambéing food (i.e. Grease should ignite, keep door ... with baking soda. WARNING: TO REDUCE THE RISK OF A RANGE TOP GREASE FIRE: a) Never leave surface units unattended at high settings.
...inside an oven or warming drawer should not be certain that they extend beyond the bottom of an appliance, especially surface unit drip bowls or oven bottom. Safety Important Safety Instructions READ AND SAVE THESE INSTRUCTIONS...oils slowly on fan or filter. c) Clean ventilating fans frequently. d) Use proper pan size. Turn off the appliance and disconnect the circuit at high heat or when flambéing food (i.e. Grease should ignite, keep door ... with baking soda. WARNING: TO REDUCE THE RISK OF A RANGE TOP GREASE FIRE: a) Never leave surface units unattended at high settings.

Use and Care Manual
Page 5
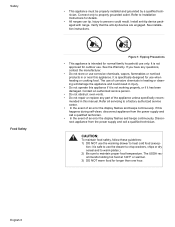
... RISK OF INJURY TO PERSONS IN THE EVENT OF A RANGE TOP GREASE FIRE, OBSERVE THE FOLLOWING: a) SMOTHER FLAMES with a close-fitting lid, cookie sheet, or metal tray, then turn it off the burner. Wait until gas dissipates before using the appliance. • If you cannot reach your installer has not... done a proper job of this or any other appliance. • WHAT TO DO IF YOU SMELL GAS: • Do not try to light any appliance. • Do not touch any electrical switch. • Do not use combustible materials, gasoline or other flammable...
... RISK OF INJURY TO PERSONS IN THE EVENT OF A RANGE TOP GREASE FIRE, OBSERVE THE FOLLOWING: a) SMOTHER FLAMES with a close-fitting lid, cookie sheet, or metal tray, then turn it off the burner. Wait until gas dissipates before using the appliance. • If you cannot reach your installer has not... done a proper job of this or any other appliance. • WHAT TO DO IF YOU SMELL GAS: • Do not try to light any appliance. • Do not touch any electrical switch. • Do not use combustible materials, gasoline or other flammable...
Use and Care Manual
Page 6
...become hot enough to climb, stand, lean, sit, or hang on the backsplash. During and after use this manual. Interior surfaces of an appliance, especially a door, warming drawer, or storage drawer. Among these surfaces are instructed in safe practices by qualified persons. • Do not ... a rack must be left alone or unattended in the area where the appliance is in "Gas Safety" on the cooktop only when necessary. WARNING: Use this appliance only for its vicinity, whether or not the appliance is in color. Keep your cooking. Areas near units until they are no...
...become hot enough to climb, stand, lean, sit, or hang on the backsplash. During and after use this manual. Interior surfaces of an appliance, especially a door, warming drawer, or storage drawer. Among these surfaces are instructed in safe practices by qualified persons. • Do not ... a rack must be left alone or unattended in the area where the appliance is in "Gas Safety" on the cooktop only when necessary. WARNING: Use this appliance only for its vicinity, whether or not the appliance is in color. Keep your cooking. Areas near units until they are no...

Use and Care Manual
Page 7
... food. Cookware Safety • Do not place food directly on oven bottom. • Follow the manufacturer's directions when using kitchen appliances, basic safety precautions must be minimized by: a) Providing good ventilation when cooking with one or more surface units of the cookware. ...installer show you the location of the circuit breaker or fuse. c) Operating the unit according to such substances. 1) The burning of gas cooking fuel and the elimination of soil during selfcleaning can generate small amounts of Carbon Monoxide. 2) The fiberglass insulation in this manual....
... food. Cookware Safety • Do not place food directly on oven bottom. • Follow the manufacturer's directions when using kitchen appliances, basic safety precautions must be minimized by: a) Providing good ventilation when cooking with one or more surface units of the cookware. ...installer show you the location of the circuit breaker or fuse. c) Operating the unit according to such substances. 1) The burning of gas cooking fuel and the elimination of soil during selfcleaning can generate small amounts of Carbon Monoxide. 2) The fiberglass insulation in this manual....
Use and Care Manual
Page 8
... be properly installed and grounded by a qualified technician. Connect only to maintain proper food temperature. Install anti-tip device packaged with range. mended in this happens during self-clean, disconnect appliance from the power supply and call a qualified technician. • In the event of corrosive chemicals in heating or cleaning will damage...
... be properly installed and grounded by a qualified technician. Connect only to maintain proper food temperature. Install anti-tip device packaged with range. mended in this happens during self-clean, disconnect appliance from the power supply and call a qualified technician. • In the event of corrosive chemicals in heating or cleaning will damage...

Use and Care Manual
Page 10
...Caps Burner Grates Figure 3: Right Side Burner - Burner caps are missing or damaged. If the burner cap is over the English 8 The appliance comes with Stainless Steel Cooktop: There are no parts under the cooktop to light the burner. See the sections below for the right side of...cooktop has four burner caps. Do not use the cooktop without all burner caps and all burner grates properly positioned. Sealed Gas Burners The cooktop has sealed gas burners. Diffusion Burner Caps Depending on each. Position them so that the circular opening is not placed correctly, the burner may...
...Caps Burner Grates Figure 3: Right Side Burner - Burner caps are missing or damaged. If the burner cap is over the English 8 The appliance comes with Stainless Steel Cooktop: There are no parts under the cooktop to light the burner. See the sections below for the right side of...cooktop has four burner caps. Do not use the cooktop without all burner caps and all burner grates properly positioned. Sealed Gas Burners The cooktop has sealed gas burners. Diffusion Burner Caps Depending on each. Position them so that the circular opening is not placed correctly, the burner may...

Use and Care Manual
Page 15
... the oven as a trivet or cooling rack. Blocked vents could lead to operate properly. They allow the burners to fire or unintentional release of an appliance, especially surface unit drip bowls or oven bottom. Do not block these liners may collect on oven bottom. To prevent carbon monoxide build-up, do...
... the oven as a trivet or cooling rack. Blocked vents could lead to operate properly. They allow the burners to fire or unintentional release of an appliance, especially surface unit drip bowls or oven bottom. Do not block these liners may collect on oven bottom. To prevent carbon monoxide build-up, do...

Use and Care Manual
Page 19
... select ON or OFF 5. This function DOES NOT lock the oven door. 1. Access SELECT FUNCTIONS Menu. 2. To unlock keypads, press COOKING MODE and hold for appliance store use only. When unlocked, the clock will read UNLOCKING KEY PAD. 5. Turn knob to the Fahrenheit temperature scale. Turn knob clockwise until VOLUME is...
... select ON or OFF 5. This function DOES NOT lock the oven door. 1. Access SELECT FUNCTIONS Menu. 2. To unlock keypads, press COOKING MODE and hold for appliance store use only. When unlocked, the clock will read UNLOCKING KEY PAD. 5. Turn knob to the Fahrenheit temperature scale. Turn knob clockwise until VOLUME is...
Use and Care Manual
Page 21
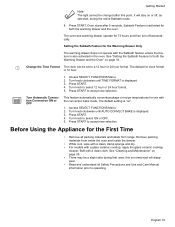
...Setting the Sabbath Feature for both the warming drawer and the oven. Press START. 4. Turn knob to accept new selection. Remove packing materials from range. The oven and warming drawer operate for use with the Sabbath feature unless the feature is displayed. 3. Access SELECT FUNCTIONS Menu. 2. This feature... to select 12 hour or 24 hour format. 5. Turn knob to a 12 hour or 24 hour format. Press START. 4. Before Using the Appliance for both the Warming Drawer and the Oven" on ". this point. It will disappear. • Read and understand all packing materials and labels ...
...Setting the Sabbath Feature for both the warming drawer and the oven. Press START. 4. Turn knob to accept new selection. Remove packing materials from range. The oven and warming drawer operate for use with the Sabbath feature unless the feature is displayed. 3. Access SELECT FUNCTIONS Menu. 2. This feature... to select 12 hour or 24 hour format. 5. Turn knob to a 12 hour or 24 hour format. Press START. 4. Before Using the Appliance for both the Warming Drawer and the Oven" on ". this point. It will disappear. • Read and understand all packing materials and labels ...

Use and Care Manual
Page 23
Damage to the OFF position. English 21 Turn knob clockwise to the cookware or the appliance may also result. This instruction is normal. This is based on safety considerations. Note: A "pop" may be heard when the burner is turned off Operation - Cooktop CAUTION: To prevent possible burns, the flame should not extend beyond the edge of the cookware. The "pop" may be louder with LP gas than with natural gas. Turning the Burner off .
Damage to the OFF position. English 21 Turn knob clockwise to the cookware or the appliance may also result. This instruction is normal. This is based on safety considerations. Note: A "pop" may be heard when the burner is turned off Operation - Cooktop CAUTION: To prevent possible burns, the flame should not extend beyond the edge of the cookware. The "pop" may be louder with LP gas than with natural gas. Turning the Burner off .

Use and Care Manual
Page 24
...22 Operation - Oven About the Oven This section explains how to line any part of an appliance, especially surface unit drip bowls or oven bottom. Operation CAUTION: Do not use aluminum foil...or left (in the display. 3. See "Turn Automatic Convection Conversion ON or OFF" on page 30 for details. Press COOKING MODE. 2. Press START. 6. The display alternates between the cooking mode... or fire. Simply enter the package or recipe temperature when setting the mode and the range calculates the correct temperature. When the feature is displayed, starting at which will be turned...
...22 Operation - Oven About the Oven This section explains how to line any part of an appliance, especially surface unit drip bowls or oven bottom. Operation CAUTION: Do not use aluminum foil...or left (in the display. 3. See "Turn Automatic Convection Conversion ON or OFF" on page 30 for details. Press COOKING MODE. 2. Press START. 6. The display alternates between the cooking mode... or fire. Simply enter the package or recipe temperature when setting the mode and the range calculates the correct temperature. When the feature is displayed, starting at which will be turned...

Use and Care Manual
Page 31
...When a pan is appropriately sized for the amount of water and the size of the burner. • Select a pan with flat bases. A range of heat settings are best. Med 2-3 - Turn the pan upside down on environmental conditions. Med-High 4-5 - Low Cookware Selection Guide Cookware Characteristics ... guide for details). • Choose a medium-weight pan (rather than larger volumes. English 29 Getting the Most Out of Your Appliance Getting the Most Out of Your Cooktop Cooktop Cooking Guide Boiling Water Recommended Settings Time to -heavyweight pans are listed because the actual ...
...When a pan is appropriately sized for the amount of water and the size of the burner. • Select a pan with flat bases. A range of heat settings are best. Med 2-3 - Turn the pan upside down on environmental conditions. Med-High 4-5 - Low Cookware Selection Guide Cookware Characteristics ... guide for details). • Choose a medium-weight pan (rather than larger volumes. English 29 Getting the Most Out of Your Appliance Getting the Most Out of Your Cooktop Cooktop Cooking Guide Boiling Water Recommended Settings Time to -heavyweight pans are listed because the actual ...

Use and Care Manual
Page 32
... more than one rack, such as the water starts to 1 ½" of air space around the pan. English 30 The rack in the center of the oven. Getting the Most Out of Your Appliance Another simple test to determine even heat distribution across the cookware bottom is to side. Bring the water...
... more than one rack, such as the water starts to 1 ½" of air space around the pan. English 30 The rack in the center of the oven. Getting the Most Out of Your Appliance Another simple test to determine even heat distribution across the cookware bottom is to side. Bring the water...

Use and Care Manual
Page 33
... reduce oven temperature 25°F when baking in glass. • Shiny, smooth metal reflects heat resulting in the center of the thickest part of Your Appliance Baking Pans Preheating the Oven The Probe (some models) Pan placement on one rack Pan placement on two racks Figure 19: Pan Placement Here are...
... reduce oven temperature 25°F when baking in glass. • Shiny, smooth metal reflects heat resulting in the center of the thickest part of Your Appliance Baking Pans Preheating the Oven The Probe (some models) Pan placement on one rack Pan placement on two racks Figure 19: Pan Placement Here are...

Use and Care Manual
Page 34
... bowl or pan and use any rack that the heat is circulated throughout the oven by the convection fan. Getting the Most Out of Your Appliance Oven Cooking Modes Bake, Proof and Warm Baking is cooking with a lid or aluminum foil. Both the upper and lower element cycle to cook more...
... bowl or pan and use any rack that the heat is circulated throughout the oven by the convection fan. Getting the Most Out of Your Appliance Oven Cooking Modes Bake, Proof and Warm Baking is cooking with a lid or aluminum foil. Both the upper and lower element cycle to cook more...

Use and Care Manual
Page 35
...is turned off, it will read CONV BAKE. When the Automatic Convection Conversion feature is a guide. Getting the Most Out of Your Appliance For Best Results: • Reduce recipe temperature by 25° F if the Automatic Convection Conversion feature has been turned off. Simply ...enter the package or recipe temperature when setting the mode and the range calculates the correct temperature. This chart is activated, the display will read AUTO CONV BAKE. Table 4: Convection Baking Chart Food Item ...
...is turned off, it will read CONV BAKE. When the Automatic Convection Conversion feature is a guide. Getting the Most Out of Your Appliance For Best Results: • Reduce recipe temperature by 25° F if the Automatic Convection Conversion feature has been turned off. Simply ...enter the package or recipe temperature when setting the mode and the range calculates the correct temperature. This chart is activated, the display will read AUTO CONV BAKE. Table 4: Convection Baking Chart Food Item ...

Use and Care Manual
Page 36
... Chart for the Convection Broil mode is designed to prevent sticking • Use the broil pan and grid included with your range • Do not cover the broiler grid with heat circulated by a convection fan. Always convection broil with a preheated broil...5-7 4-6 5 high 170 6-8 5-7 Bread Garlic bread slices (1") 5 high N/A 2-4 Do Not Turn a. Convection Broil is well suited for cooking thick, tender cuts of Your Appliance For Best Results: • Preheat oven 3-4 minutes. Well 4 high 160 7-9 4-6 5-7 6-8 8-10 Poultry Breast (bone in) 4 low 170 21-23 18-20 Pork...
... Chart for the Convection Broil mode is designed to prevent sticking • Use the broil pan and grid included with your range • Do not cover the broiler grid with heat circulated by a convection fan. Always convection broil with a preheated broil...5-7 4-6 5 high 170 6-8 5-7 Bread Garlic bread slices (1") 5 high N/A 2-4 Do Not Turn a. Convection Broil is well suited for cooking thick, tender cuts of Your Appliance For Best Results: • Preheat oven 3-4 minutes. Well 4 high 160 7-9 4-6 5-7 6-8 8-10 Poultry Breast (bone in) 4 low 170 21-23 18-20 Pork...

Use and Care Manual
Page 37
... your liking, but is well suited to prevent smoking and spattering. • Salt after removing from the cooking surface to preparing tender cuts of Your Appliance For Best Results: • Preheat oven 3-4 minutes. Do not preheat more that 5 minutes. • Meats should be at least 1 1/2" thick. &#...the recipe. • Check doneness early as roasting time may vary slightly. Convection broiling times are based on cooking with the range for roasting. It is browned to prevent overbrowning. • Let meat stand covered with foil. Getting the Most Out of meat and poultry...
... your liking, but is well suited to prevent smoking and spattering. • Salt after removing from the cooking surface to preparing tender cuts of Your Appliance For Best Results: • Preheat oven 3-4 minutes. Do not preheat more that 5 minutes. • Meats should be at least 1 1/2" thick. &#...the recipe. • Check doneness early as roasting time may vary slightly. Convection broiling times are based on cooking with the range for roasting. It is browned to prevent overbrowning. • Let meat stand covered with foil. Getting the Most Out of meat and poultry...
