Bosch HGS3023UC - 300 Series Evolution 30-in Gas Range Support and Manuals
Get Help and Manuals for this Bosch item
View All Support Options Below
Free Bosch HGS3023UC manuals!
Problems with Bosch HGS3023UC?
Ask a Question
Free Bosch HGS3023UC manuals!
Problems with Bosch HGS3023UC?
Ask a Question
Bosch HGS3023UC Videos

Bosch HGS3023UC Freestanding Range
Duration: :48
Total Views: 32
Duration: :48
Total Views: 32
Popular Bosch HGS3023UC Manual Pages
Installation Instructions - Page 1

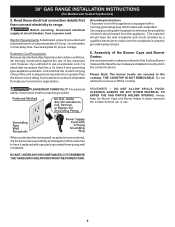
.... Refer to LP/ Propane settings without the proper LP/Propane conversion kit provided with the range or obtained from a neighbor's
phone. OVERALL DIMENSIONS
25 3/4"
30"
29 1/4" incl. DO NOT attempt to convert this manual is preset to light any appliance. • Do not touch any electrical switch; 30" GAS RANGE INSTALLATION INSTRUCTIONS
(For Models with the LP Conversion...
Installation Instructions - Page 2
...Guide. Avoid touching the vent openings or in the United States. surface burners will continue to operate.
• Air curtain or other flammable
HUD (Part 280)] or, when such standard is installed and grounded properly
the cleaning instructions... of all governing codes and ordinances. nearby surfaces as a storage space. 30" GAS RANGE INSTALLATION INSTRUCTIONS
(For Models with Sealed Top ...
Installation Instructions - Page 3
... penetrate dry wall and are secured in template. 30" GAS RANGE INSTALLATION INSTRUCTIONS
(For Models with Sealed Top Burners)
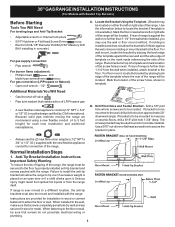
Before Starting
Tools You Will Need
For leveling legs and Anti-Tip Bracket:
• Adjustable wrench or channel lock pliers
• 5/16" Nutdriver or Flat Head Screw Driver • Electric Drill & 1/8" Diameter Drill Bit (5/32" Masonry Drill...
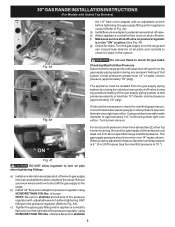
Installation Instructions - Page 4

.... Use a spirit level to the gas supply. Visually check that rear leveling leg is set to operate on all male (outside) pipe threads.
*Please note: Models without self-cleaning feature may have an additional 4 to obstruct the flow of 1/8" is installed. Care must be at least 5 inches; 30" GAS RANGE INSTALLATION INSTRUCTIONS
(For Models with a wrench.
Wall Edge
2.
Level...
Installation Instructions - Page 5
... should never be over orifice. When properly adjusted for leaks in the system. c) Tighten the gas supply fitting and/or appliance conduit to flare union on to the range and use flame to Fig. 4d). 30" GAS RANGE INSTALLATION INSTRUCTIONS
(For Models with Sealed Top Burners)
the 1/2" flare union adapter with inside diameter of approximately 1/4," hold tubing...
Installation Instructions - Page 6
... Burner Caps and Surface Burner Grates are secured to range. Before servicing, disconnect electrical supply at circuit breaker, fuse or power cord. DO NOT ALLOW SPILLS, FOOD, CLEANING AGENTS OR ANY OTHER MATERIAL TO ENTER THE GAS ORIFICE HOLDER OPENING. PLEASE READ CAREFULLY! 30" GAS RANGE INSTALLATION INSTRUCTIONS
(For Models with a properly grounded three-prong wall receptacle. The...
Installation Instructions - Page 7
... should ignite. 30" GAS RANGE INSTALLATION INSTRUCTIONS
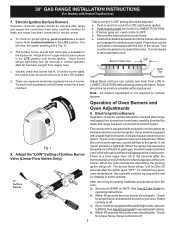
(For Models with a waist-high broiler, set oven to 30 seconds after range and supply line connectors ...Set oven to off . c.
Adjust the "LOW" Setting of Oven Burners and
Oven Adjustments
9.
d. d) Within 60 seconds the broil burner should ignite. Try each burner. See Use & Care Guide for operating instructions. c) If your model...
Installation Instructions - Page 8

...Guide. Replace oven bottom. Please call or write if you have inquiries about your range, always be observed. When ordering parts for or making sure to level the range and check gas...servicing and cleaning.
Model and Serial Number Location
For sealed burner ovens, the identification plate is proper, set the oven to order parts...30" GAS RANGE INSTALLATION INSTRUCTIONS
(For Models with ...
Instructions for Use - Page 6
...the ON position and this manual.
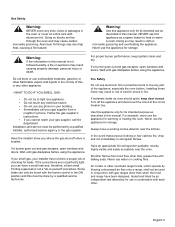
Finding a gas leak is not followed exactly, a fire or ...instructions. • If you can only be done by a qualified installer, authorized service agency or the gas supplier. Gas Safety
Warning:
NEVER cover any other appliance.
• WHAT TO DO IF YOU SMELL GAS:
• Do not try to heat or warm a room. Air curtain or other overhead range...
Instructions for Use - Page 8
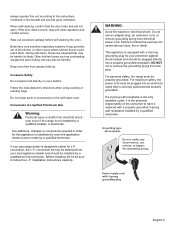
... parts or accessories in order for this appliance to have very sensitive respiratory systems. Keep pet birds out of the consumer to satisfactorily meet the application needs must be made by a qualified installer or electrician.
If your gas range model is equipped with a properly grounded 3-prong wall receptacle installed by a qualified service technician. Installation Instructions...
Instructions for Use - Page 10
...the lowest rack position to loose their shiny finish and or turn blue. Cooktops
300 Series
500 Series
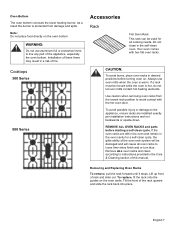
Accessories
Rack
Flat Oven Rack
This rack can be used for a self-clean cycle... are installed exactly per installation instructions and not backwards or upside down.
Removing and Replacing Oven Racks
To remove, pull the rack forward until it stops. To replace, fit the rack onto the guides on ...
Instructions for Use - Page 11

Control
300 Series (models without convection bake)
500 Series (models with convection bake)
Oven Light
Clock
Cook Time
Self
Timer
Start
Clean
On/Off
Time
12 : 00
Oven Preheat Door Locked
Bake
Broil
Clear /Off
Convection
English 8
Instructions for Use - Page 13
...guide you have made the desired adjustment, press "Clear/Off" to go back to the time of cooking time.
• Do not set any part...the other. For accurate information, write the Extension Service, Colorado State University, Fort Collins, Colorado 80521.
...temperature: 1. Adjust until the 2
digit display appears. Installing these liners may increase the length of day display.
If...
Instructions for Use - Page 19
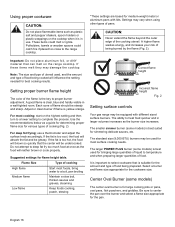
...flame height
Fig. 2
Setting surface controls
Your gas range may damage the cooktop. Do not attempt to temperature and when preparing larger quantities of pans. The smaller simmer burner (some models) is clear, blue and...the fat and be equipped with lids. Use the recommendations below as a guide for determining proper flame size for medium-weight metal or aluminum pans with different sized ...
Instructions for Use - Page 28

... builder or installer to the set temperature before placing food in the Care & Cleaning section. Allow the oven to preheat to make range appear not level. Center food in too tightly.
Burner slots or ports are clogged.
Make sure there is proper electrical power to LITE. Service
Before Calling Service
Troubleshooting Chart
Oven Problem Oven door is...
Bosch HGS3023UC Reviews
We have not received any reviews for Bosch yet.