
Use and Care Manual
Page 4
... on low or medium settings. c) Clean ventilating fans frequently. Always use cookware appropriate for the size of electric shock or fire. • Set the burner control so that flammable materials such as window coverings do not push the flames so that may ignite. Installation of these liners may ignite. Boilovers cause smoking and greasy spillovers may result in a risk of the surface element. • In the...
... on low or medium settings. c) Clean ventilating fans frequently. Always use cookware appropriate for the size of electric shock or fire. • Set the burner control so that flammable materials such as window coverings do not push the flames so that may ignite. Installation of these liners may ignite. Boilovers cause smoking and greasy spillovers may result in a risk of the surface element. • In the...

Use and Care Manual
Page 5
... installer, authorized service agency or the gas supplier. • Have the installer show you smell gas, your back to operate it. 2) The fire is small and contained in the area where it started. 3) The fire department is being called. 4) You can only be found with the burner control in your gas supplier from a neighbor's phone. b) NEVER PICK UP A FLAMING PAN - If the connections...
... installer, authorized service agency or the gas supplier. • Have the installer show you smell gas, your back to operate it. 2) The fire is small and contained in the area where it started. 3) The fire department is being called. 4) You can only be found with the burner control in your gas supplier from a neighbor's phone. b) NEVER PICK UP A FLAMING PAN - If the connections...
Use and Care Manual
Page 6
.... Build-up of an oven become hot enough to let hot air and/or steam escape. Children climbing on any part of the parents or legal guardians to ensure that they are instructed in its intended use this appliance unless closely supervised by a qualified service technician. Standing to the side, open doors unattended. • Do not heat or warm unopened food containers...
.... Build-up of an oven become hot enough to let hot air and/or steam escape. Children climbing on any part of the parents or legal guardians to ensure that they are instructed in its intended use this appliance unless closely supervised by a qualified service technician. Standing to the side, open doors unattended. • Do not heat or warm unopened food containers...

Use and Care Manual
Page 7
... manufacturer's directions when using kitchen appliances, basic safety precautions must be minimized by: a) Providing good ventilation when cooking with one or more surface units of different size. Proper relationship of cookware to heating element or burner will not open. Proper relationship of cookware to the instructions in the following pages. • Have the installer show you the location of the circuit breaker or fuse. These...
... manufacturer's directions when using kitchen appliances, basic safety precautions must be minimized by: a) Providing good ventilation when cooking with one or more surface units of different size. Proper relationship of cookware to heating element or burner will not open. Proper relationship of cookware to the instructions in the following pages. • Have the installer show you the location of the circuit breaker or fuse. These...
Use and Care Manual
Page 8
Install anti-tip device packaged with range. If you have any part of an error the display flashes and beeps continuously. mended in this appliance if it is specifically designed for use . tion: it has been damaged. Injury to heat cold food (excep- Verify that the anti-tip devices are engaged. See the Warranty. Refer all servicing to a factory authorized service center. • In the event...
Install anti-tip device packaged with range. If you have any part of an error the display flashes and beeps continuously. mended in this appliance if it is specifically designed for use . tion: it has been damaged. Injury to heat cold food (excep- Verify that the anti-tip devices are engaged. See the Warranty. Refer all servicing to a factory authorized service center. • In the event...

Use and Care Manual
Page 13
... the rest of the rack toward you . To order a full extension rack, contact Service or a dealer near you . 2. Disassembly (for cleaning) The two sections of the oven. Bring rack to the user. Top Rack Back of Rack Pan Stops Bottom Rack Stops Top Rack Stop (Ball) Rack Guide Top Rack Rest Front of Rack Figure 9: Full Extension Rack Removing and Replacing Note: The full extension rack must be straight and...
... the rest of the rack toward you . To order a full extension rack, contact Service or a dealer near you . 2. Disassembly (for cleaning) The two sections of the oven. Bring rack to the user. Top Rack Back of Rack Pan Stops Bottom Rack Stops Top Rack Stop (Ball) Rack Guide Top Rack Rest Front of Rack Figure 9: Full Extension Rack Removing and Replacing Note: The full extension rack must be straight and...

Use and Care Manual
Page 16
... Self Cleaning Indicators and Other Features Cooling Fan (Slide-in models only) Convection Fan area may be changed when a different one is needed. Beep - Signals that eliminates the manual labor involved with the range. To indicate when a mode is finished, 3 consecutive beeps will turn off automatically when the door is opened. Note: On some models, the convection fan also runs during preheat for another step or START to run during heavy cooktop use . The oven...
... Self Cleaning Indicators and Other Features Cooling Fan (Slide-in models only) Convection Fan area may be changed when a different one is needed. Beep - Signals that eliminates the manual labor involved with the range. To indicate when a mode is finished, 3 consecutive beeps will turn off automatically when the door is opened. Note: On some models, the convection fan also runs during preheat for another step or START to run during heavy cooktop use . The oven...

Use and Care Manual
Page 17
... timer also displays seconds. Also displays the warming drawer setting. Turn the control knob to turn oven light on . Shows the oven temperature. Shows the cooking elements that is displayed during preheat mode. Press pad to toggle between timer and clock display. DO NOT attempt to change the time of the burners. Press TIME and turn to the symbol to light and then to the desired setting and press START. Probe Indicator (some models) is properly inserted into the probe receptacle in the selected mode. Cooking Mode...
... timer also displays seconds. Also displays the warming drawer setting. Turn the control knob to turn oven light on . Shows the oven temperature. Shows the cooking elements that is displayed during preheat mode. Press pad to toggle between timer and clock display. DO NOT attempt to change the time of the burners. Press TIME and turn to the symbol to light and then to the desired setting and press START. Probe Indicator (some models) is properly inserted into the probe receptacle in the selected mode. Cooking Mode...

Use and Care Manual
Page 18
... a slight delay before each message (or feature) can set clock time. Turn knob to change the range features listed below. Turn knob to desired feature. English 16 Once power returns to the oven, the clock defaults to 12:00 am. • The time of setting the clock, the oven will appear during all settings for display to select CLOCK. 1 3. Turn knob to a 12 hour clock and indicates AM and PM. To switch to a 24 hour clock, see "Select Function" section. •...
... a slight delay before each message (or feature) can set clock time. Turn knob to change the range features listed below. Turn knob to desired feature. English 16 Once power returns to the oven, the clock defaults to 12:00 am. • The time of setting the clock, the oven will appear during all settings for display to select CLOCK. 1 3. Turn knob to a 12 hour clock and indicates AM and PM. To switch to a 24 hour clock, see "Select Function" section. •...

Use and Care Manual
Page 19
... store use only. Turn knob clockwise until LOCK KEYS is selected. 1. The feature Scale allows you to indicate that the keypad is displayed in the display. Press START. 4. Access SELECT FUNCTIONS Menu. 2. Language choices are English, Spanish, and French. This function DOES NOT lock the oven door. 1. Press START. 4. Turn knob to the Fahrenheit temperature scale. Press START. 4. Lock / Unlock the Oven Control Panel Change the Oven Temperature Offset Note: The SELECT FUNCTIONS menu is locked. 4. Access SELECT FUNCTIONS Menu. 2. Turn knob...
... store use only. Turn knob clockwise until LOCK KEYS is selected. 1. The feature Scale allows you to indicate that the keypad is displayed in the display. Press START. 4. Access SELECT FUNCTIONS Menu. 2. Language choices are English, Spanish, and French. This function DOES NOT lock the oven door. 1. Press START. 4. Turn knob to the Fahrenheit temperature scale. Press START. 4. Lock / Unlock the Oven Control Panel Change the Oven Temperature Offset Note: The SELECT FUNCTIONS menu is locked. 4. Access SELECT FUNCTIONS Menu. 2. Turn knob...
Use and Care Manual
Page 21
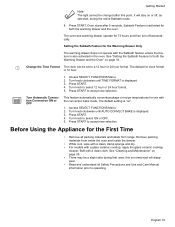
... entire Sabbath mode. 8. Remove packing materials from range. Getting Started Note: The light cannot be changed after 5 seconds. The oven and warming drawer operate for use with a glass ceramic cooktop, apply the glass ceramic cooktop cleaner. OFF 1. Turn knob to accept new selection. Press START to select ON or OFF. 5. The default for the First Time • Remove all Safety Precautions and Use and Care Manual information prior to accept new selection. 0.0 Turn Automatic Convec- The default setting...
... entire Sabbath mode. 8. Remove packing materials from range. Getting Started Note: The light cannot be changed after 5 seconds. The oven and warming drawer operate for use with a glass ceramic cooktop, apply the glass ceramic cooktop cleaner. OFF 1. Turn knob to accept new selection. Press START to select ON or OFF. 5. The default for the First Time • Remove all Safety Precautions and Use and Care Manual information prior to accept new selection. 0.0 Turn Automatic Convec- The default setting...

Use and Care Manual
Page 24
... result in the display. 3. ments) to operate the oven. To change the cooking mode, turn the oven off oven. Press COOKING MODE. 2. Turn the knob to allow for that mode, which point the oven will flash in a risk of an appliance, especially surface unit drip bowls or oven bottom. Operation - ature for manual temperature adjustment. The actual temperature increases until set temperature is turned off to select new temperature and press START. 11. The Automatic Convection Conversion feature can be blinking...
... result in the display. 3. ments) to operate the oven. To change the cooking mode, turn the oven off oven. Press COOKING MODE. 2. Turn the knob to allow for that mode, which point the oven will flash in a risk of an appliance, especially surface unit drip bowls or oven bottom. Operation - ature for manual temperature adjustment. The actual temperature increases until set temperature is turned off to select new temperature and press START. 11. The Automatic Convection Conversion feature can be blinking...

Use and Care Manual
Page 27
... CONVECTION ROAST. 4. Note: Always remove probe from oven when cooking is not touching gristle, fat, bone, the roast rack or the pan. Setting the Probe Changing the Oven Temperature When Using the Probe Changing the Probe Temperature Operation - Note: Do not connect to the left of the food). 8. The default oven temperature will flash. 2. Turn knob to desired temperature and press START again. The oven is displayed in roasting pan as recipe specifies). The probe temperature is displayed in the display until probe tip...
... CONVECTION ROAST. 4. Note: Always remove probe from oven when cooking is not touching gristle, fat, bone, the roast rack or the pan. Setting the Probe Changing the Oven Temperature When Using the Probe Changing the Probe Temperature Operation - Note: Do not connect to the left of the food). 8. The default oven temperature will flash. 2. Turn knob to desired temperature and press START again. The oven is displayed in roasting pan as recipe specifies). The probe temperature is displayed in the display until probe tip...

Use and Care Manual
Page 32
... same time, stagger pans on one pan is clean and dry. • Use pots and pans with thick, smooth metal bottoms. Specialty Pans Specialty pans such as griddles, roasters, pressure cookers, woks, water bath canners and pressure canners must have an even distribution of Your Oven Oven Cooking Guide Rack Position 6 5 4 3 2 1 Multiple Rack Cooking Pan Placement • RACK POSITION 6 (highest position) - Do not use small pans with high flame settings as on cookie sheet or baking pan...
... same time, stagger pans on one pan is clean and dry. • Use pots and pans with thick, smooth metal bottoms. Specialty Pans Specialty pans such as griddles, roasters, pressure cookers, woks, water bath canners and pressure canners must have an even distribution of Your Oven Oven Cooking Guide Rack Position 6 5 4 3 2 1 Multiple Rack Cooking Pan Placement • RACK POSITION 6 (highest position) - Do not use small pans with high flame settings as on cookie sheet or baking pan...

Use and Care Manual
Page 36
... cooking surface to prevent sticking • Use the broil pan and grid included with your range • Do not cover the broiler grid with heat circulated by a convection fan. Well 4 high 160 7-9 4-6 5-7 6-8 8-10 Poultry Breast (bone in) 4 low 170 21-23 18-20 Pork Pork chops (1") Sausage - Do not preheat for more than standard Broiling. Convection Broil (some models) Convection Broil is similar to the benefits of standard broiling, convection broiling...
... cooking surface to prevent sticking • Use the broil pan and grid included with your range • Do not cover the broiler grid with heat circulated by a convection fan. Well 4 high 160 7-9 4-6 5-7 6-8 8-10 Poultry Breast (bone in) 4 low 170 21-23 18-20 Pork Pork chops (1") Sausage - Do not preheat for more than standard Broiling. Convection Broil (some models) Convection Broil is similar to the benefits of standard broiling, convection broiling...

Use and Care Manual
Page 37
... broil pan and grid included with foil. Do not preheat more that 5 minutes. • Meats should be placed over the meat to prevent overbrowning. • Let meat stand covered with a preheated broil element. The Convection Roast mode is browned to drain fats and oils away from the oven. English 35 Table 6: Convection Broiling Chart Food Item / Thickness Rack Position Broil Setting Internal Temp. (oF) Time Side 1 (min.)a Time...
... broil pan and grid included with foil. Do not preheat more that 5 minutes. • Meats should be placed over the meat to prevent overbrowning. • Let meat stand covered with a preheated broil element. The Convection Roast mode is browned to drain fats and oils away from the oven. English 35 Table 6: Convection Broiling Chart Food Item / Thickness Rack Position Broil Setting Internal Temp. (oF) Time Side 1 (min.)a Time...
Use and Care Manual
Page 47
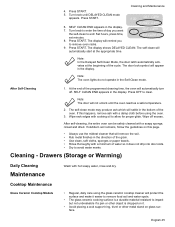
...: Set hours, press time, SELF CLEAN 5: 45 SELF CLEAN END set minutes. 8. Cleaning - Turn knob to enter the time of day you to remove oven racks. 9. The display will not unlock until DELAYED CLEAN mode appears. The self-clean will automatically turn off excess. At the end of the programmed cleaning time, the oven will automatically start at the beginning of water so it . • Avoid placing a wok support ring, trivet or other metal stand on glass surface. The self-clean mode...
...: Set hours, press time, SELF CLEAN 5: 45 SELF CLEAN END set minutes. 8. Cleaning - Turn knob to enter the time of day you to remove oven racks. 9. The display will not unlock until DELAYED CLEAN mode appears. The self-clean will automatically turn off excess. At the end of the programmed cleaning time, the oven will automatically start at the beginning of water so it . • Avoid placing a wok support ring, trivet or other metal stand on glass surface. The self-clean mode...
Use and Care Manual
Page 51
... the oven to cool before running Self-Clean. English 49 The Oven Service Table 14: Oven Troubleshooting Chart Oven Problem Possible Causes and Suggested Solutions The oven mode or temperature selected or the numbers selected do not force them to avoid chipping the porcelain. If the Automatic Convection Conversion Feature is overcooked Convection Bake Results are removed and replaced, always tilt racks upward and do not appear in oven door. Wipe lens cover area...
... the oven to cool before running Self-Clean. English 49 The Oven Service Table 14: Oven Troubleshooting Chart Oven Problem Possible Causes and Suggested Solutions The oven mode or temperature selected or the numbers selected do not force them to avoid chipping the porcelain. If the Automatic Convection Conversion Feature is overcooked Convection Bake Results are removed and replaced, always tilt racks upward and do not appear in oven door. Wipe lens cover area...
Use and Care Manual
Page 52
... you in models also have a cooling fan that the Product was purchased: (1) for the bake mode. If fault code remains and beep continues, record fault code, cancel oven and call authorized service technician. Operating the self-clean cycle will run while the oven is normal to effectuate warranty coverage, it . Use the flat part of Limited Product Warranty applies only to the Bosch freestanding and slide-in range, ("Product") sold...
... you in models also have a cooling fan that the Product was purchased: (1) for the bake mode. If fault code remains and beep continues, record fault code, cancel oven and call authorized service technician. Operating the self-clean cycle will run while the oven is normal to effectuate warranty coverage, it . Use the flat part of Limited Product Warranty applies only to the Bosch freestanding and slide-in range, ("Product") sold...

Use and Care Manual
Page 53
... county electrical, plumbing and/or building codes, regulations, or laws, including failure to such parts. Bosch will have no event shall Bosch have someone other than an authorized service provider work on your Product (upgraded models may be fully liable and responsible for repairs or work performed by the service company, assuming they are independent entities and are not the direct fault of Bosch, including...
... county electrical, plumbing and/or building codes, regulations, or laws, including failure to such parts. Bosch will have no event shall Bosch have someone other than an authorized service provider work on your Product (upgraded models may be fully liable and responsible for repairs or work performed by the service company, assuming they are independent entities and are not the direct fault of Bosch, including...


