

Safety Warning and Notice
Page 2
... power supply is unstable. Ensure that the power cord is connected to a grounded power outlet before turning on the monitor. Use only the power cord provided by BenQ. Never use or is illegible. The model number or production number on the product has been altered, deleted, removed or made by unauthorized service organizations or persons. Damage caused by improper storage of the user if problems...
... power supply is unstable. Ensure that the power cord is connected to a grounded power outlet before turning on the monitor. Use only the power cord provided by BenQ. Never use or is illegible. The model number or production number on the product has been altered, deleted, removed or made by unauthorized service organizations or persons. Damage caused by improper storage of the user if problems...
Display Pilot User Manual
Page 2
... behavior. Copyright and disclaimer Copyright Copyright 2019 BenQ Corporation.All rights reserved. Servicing (Windows only) Should you have any queries about the software after reading the document, contact the customer support from time to time without obligation of BenQ Corporation to non-factory installed software, parts, and/or non-original accessories. (Applicable for flicker-free models only) The performance of their respective companies...
... behavior. Copyright and disclaimer Copyright Copyright 2019 BenQ Corporation.All rights reserved. Servicing (Windows only) Should you have any queries about the software after reading the document, contact the customer support from time to time without obligation of BenQ Corporation to non-factory installed software, parts, and/or non-original accessories. (Applicable for flicker-free models only) The performance of their respective companies...
Display Pilot User Manual
Page 3
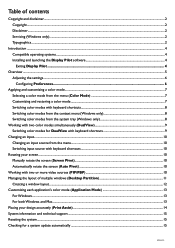
... 9 Changing an input...10 Changing an input source from the menu...10 Switching input source with keyboard shortcuts...10 Rotating your screen...10 Manually rotate the screen (Screen Pivot)...10 Automatically rotate the screen (Auto Pivot)...10 Working with two or more video sources (PIP/PBP)...10 Managing the layout of multiple windows (Desktop Partition 11 Creating a window layout...12 Customizing each application's color mode (Application Mode 13 For Windows...13 For both Windows and Mac...
... 9 Changing an input...10 Changing an input source from the menu...10 Switching input source with keyboard shortcuts...10 Rotating your screen...10 Manually rotate the screen (Screen Pivot)...10 Automatically rotate the screen (Auto Pivot)...10 Working with two or more video sources (PIP/PBP)...10 Managing the layout of multiple windows (Desktop Partition 11 Creating a window layout...12 Customizing each application's color mode (Application Mode 13 For Windows...13 For both Windows and Mac...
Display Pilot User Manual
Page 4
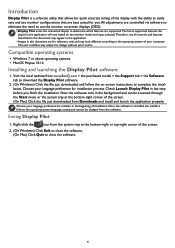
... purchased model > the Support tab > the Software tab to download the Display Pilot software. 2. (On Windows) Click the file just downloaded and follow the on the monitor model and input selected.Therefore, not all controls and features described in this document may appear in the application. • Images in this document are supported.The list of supported features displayed in the application will vary based on -screen instructions to...
... purchased model > the Support tab > the Software tab to download the Display Pilot software. 2. (On Windows) Click the file just downloaded and follow the on the monitor model and input selected.Therefore, not all controls and features described in this document may appear in the application. • Images in this document are supported.The list of supported features displayed in the application will vary based on -screen instructions to...
Display Pilot User Manual
Page 7
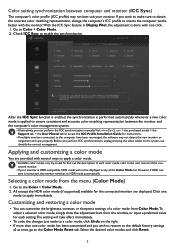
... manually.Visit www.BenQ.com > the purchased model > the Support tab > the User Manual tab to access the ICC Profile Installation Guide for the connected monitor are provided with one mode to enable the synchronization. Customizing and restoring a color mode • You can customize the brightness, contrast, or sharpness settings of the Color Mode list. Before you wish to restore to the default factory settings all at once, go to the Color Mode Reset...
... manually.Visit www.BenQ.com > the purchased model > the Support tab > the User Manual tab to access the ICC Profile Installation Guide for the connected monitor are provided with one mode to enable the synchronization. Customizing and restoring a color mode • You can customize the brightness, contrast, or sharpness settings of the Color Mode list. Before you wish to restore to the default factory settings all at once, go to the Color Mode Reset...
Display Pilot User Manual
Page 10
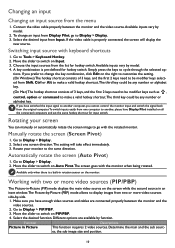
... screen You can manually or automatically rotate the screen image to go to Display > Display. 3. Go to switch on Auto Pivot.The screen goes with keyboard shortcuts 1. Different options are connected properly between the monitor and the video source.Available inputs vary by function. Choose the input sources from one screen direction.The setting will display the new source. If you have switched the input signal to another computer, you cannot control the monitor input and switch the signal...
... screen You can manually or automatically rotate the screen image to go to Display > Display. 3. Go to switch on Auto Pivot.The screen goes with keyboard shortcuts 1. Different options are connected properly between the monitor and the video source.Available inputs vary by function. Choose the input sources from one screen direction.The setting will display the new source. If you have switched the input signal to another computer, you cannot control the monitor input and switch the signal...
Display Pilot User Manual
Page 15
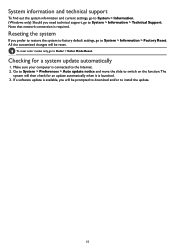
... prompted to download and/or to switch on the function.The system will be reset. If a software update is connected to Color > Color Mode Reset. Go to System > Preferences > Auto update notice and move the slide to install the update. 15 Note that network connection is launched. 3. Reseting the system If you prefer to restore the system to factory default settings, go to System > Information > Technical Support. Checking for an update automatically...
... prompted to download and/or to switch on the function.The system will be reset. If a software update is connected to Color > Color Mode Reset. Go to System > Preferences > Auto update notice and move the slide to install the update. 15 Note that network connection is launched. 3. Reseting the system If you prefer to restore the system to factory default settings, go to System > Information > Technical Support. Checking for an update automatically...
Resolution file
Page 1
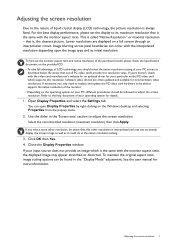
... initial resolution. Image blurring across pixel boundaries can open Display Properties by right-clicking on the provided CD. • To take full advantage of LCD technology you should be able to adjust the screen resolution. If your input source does not provide an image which supports this resolution value. See the user manual for new hardware video resolutions. This is , the clearest picture. Software video drivers are displayed on your particular model PC video card which...
... initial resolution. Image blurring across pixel boundaries can open Display Properties by right-clicking on the provided CD. • To take full advantage of LCD technology you should be able to adjust the screen resolution. If your input source does not provide an image which supports this resolution value. See the user manual for new hardware video resolutions. This is , the clearest picture. Software video drivers are displayed on your particular model PC video card which...

Resolution file
Page 2
.... 1. Check next chapter to the help document of the applicable factory modes as listed in the specification table. 4. Refer to see the factory modes: Preset display modes on page 3. From the Display Properties window, select the Settings tab and click the Advanced button. 3. Double click the Display icon in your operating system for an LCD display to adjust the screen resolution. Select the Adapter tab, and select an appropriate refresh rate to...
.... 1. Check next chapter to the help document of the applicable factory modes as listed in the specification table. 4. Refer to see the factory modes: Preset display modes on page 3. From the Display Properties window, select the Settings tab and click the Advanced button. 3. Double click the Display icon in your operating system for an LCD display to adjust the screen resolution. Select the Adapter tab, and select an appropriate refresh rate to...

User Manual
Page 2
... for flicker-free models only.) Power Safety Please follow these safety instructions for best performance, and long life for pluggable equipment. Further, BenQ Corporation reserves the right to revise this publication and to make changes from the AC supply. • The power supply cord serves as poor cable quality, unstable power supply, signal interference, or poor grounding, and not limited to service the power adapter. Use of another type of flicker-free may...
... for flicker-free models only.) Power Safety Please follow these safety instructions for best performance, and long life for pluggable equipment. Further, BenQ Corporation reserves the right to revise this publication and to make changes from the AC supply. • The power supply cord serves as poor cable quality, unstable power supply, signal interference, or poor grounding, and not limited to service the power adapter. Use of another type of flicker-free may...

User Manual
Page 21
Do not plug-in this case. Connect the USB Type-C cable. This connection supplies power from the monitor base to a LAN switch or hub. If a USB Type-C cable purchased separately is done, unplug the current video cable and re-connect the DP cable. Once the setting is used, check its specifications first. 3. Connect the other end of the cable to your monitor hardware when working with the supplied USB Type-C cable to the monitor. on the purchased model. 1. Connect the other...
Do not plug-in this case. Connect the USB Type-C cable. This connection supplies power from the monitor base to a LAN switch or hub. If a USB Type-C cable purchased separately is done, unplug the current video cable and re-connect the DP cable. Once the setting is used, check its specifications first. 3. Connect the other end of the cable to your monitor hardware when working with the supplied USB Type-C cable to the monitor. on the purchased model. 1. Connect the other...
User Manual
Page 25
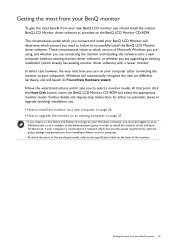
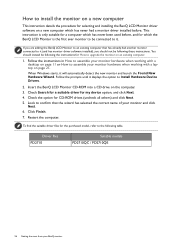
... monitor and installing the software onto a new computer (without existing monitor driver software), or whether you are upgrading an existing installation (which process you need to follow to successfully install the BenQ LCD Monitor driver software. The circumstances under which you connect and install your BenQ LCD Monitor will launch its Found New Hardware wizard. At that point, click the Have Disk button, insert the BenQ LCD Monitor CD-ROM and select the appropriate monitor model...
... monitor and installing the software onto a new computer (without existing monitor driver software), or whether you are upgrading an existing installation (which process you need to follow to successfully install the BenQ LCD Monitor driver software. The circumstances under which you connect and install your BenQ LCD Monitor will launch its Found New Hardware wizard. At that point, click the Have Disk button, insert the BenQ LCD Monitor CD-ROM and select the appropriate monitor model...
User Manual
Page 26
... has never had another monitor connected to it (and has monitor driver software installed), you should instead be following these instructions. This instruction is the first ever monitor to be connected to Install Hardware Device Drivers. 2. Look to confirm that has already had a monitor driver installed before , and for which the BenQ LCD Monitor is only suitable for a computer which has never been used before . When Windows starts, it will automatically...
... has never had another monitor connected to it (and has monitor driver software installed), you should instead be following these instructions. This instruction is the first ever monitor to be connected to Install Hardware Device Drivers. 2. Look to confirm that has already had a monitor driver installed before , and for which the BenQ LCD Monitor is only suitable for a computer which has never been used before . When Windows starts, it will automatically...
User Manual
Page 27
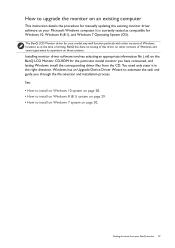
... BenQ LCD Monitor driver for your model may well function perfectly with other versions of Windows, however, as compatible for manually updating the existing monitor driver software on your BenQ monitor 27 See: • How to install on Windows 10 system on page 28. • How to install on Windows 8 (8.1) system on page 29. • How to upgrade the monitor on an existing computer This instruction details the procedure for Windows 10, Windows...
... BenQ LCD Monitor driver for your model may well function perfectly with other versions of Windows, however, as compatible for manually updating the existing monitor driver software on your BenQ monitor 27 See: • How to install on Windows 10 system on page 28. • How to install on Windows 8 (8.1) system on page 29. • How to upgrade the monitor on an existing computer This instruction details the procedure for Windows 10, Windows...

User Manual
Page 28
... driver software. 8. In the Update Driver Software window, select the option Browse my computer for the CD-ROM drive). You may be prompted to restart your monitor from the menu. 2. Click Generic PnP Monitor, and then the Properties button. 5. Insert the BenQ LCD Monitor CD-ROM into a CD drive on Windows 10 system 1. Go to your BenQ monitor This will copy and install the appropriate monitor driver files to Start, Settings...
... driver software. 8. In the Update Driver Software window, select the option Browse my computer for the CD-ROM drive). You may be prompted to restart your monitor from the menu. 2. Click Generic PnP Monitor, and then the Properties button. 5. Insert the BenQ LCD Monitor CD-ROM into a CD drive on Windows 10 system 1. Go to your BenQ monitor This will copy and install the appropriate monitor driver files to Start, Settings...
User Manual
Page 29
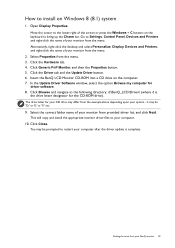
... the Properties button. 5. Insert the BenQ LCD Monitor CD-ROM into a CD drive on the keyboard to Settings, Control Panel, Devices and Printers and right-click the name of your computer. 10. Move the cursor to your monitor from provided driver list, and click Next. In the Update Driver Software window, select the option Browse my computer for driver software. 8. Getting the most from the menu. 3.
... the Properties button. 5. Insert the BenQ LCD Monitor CD-ROM into a CD drive on the keyboard to Settings, Control Panel, Devices and Printers and right-click the name of your computer. 10. Move the cursor to your monitor from provided driver list, and click Next. In the Update Driver Software window, select the option Browse my computer for driver software. 8. Getting the most from the menu. 3.

User Manual
Page 32
... adjust your monitor. 1 2 Picture Mode Input Brightness Menu Exit 4 3 Picture Mode Input Brightness Menu Exit 1. To change the default settings, see Customizing the hot keys on the menu options. Press any of the control keys. 2. The top three controls are custom keys and are designated for Picture Mode. In the main menu, follow the icons next to the control keys to access the main menu. 4. No. Basic menu operation All OSD (On Screen Display) menus can use the OSD menu...
... adjust your monitor. 1 2 Picture Mode Input Brightness Menu Exit 4 3 Picture Mode Input Brightness Menu Exit 1. To change the default settings, see Customizing the hot keys on the menu options. Press any of the control keys. 2. The top three controls are custom keys and are designated for Picture Mode. In the main menu, follow the icons next to the control keys to access the main menu. 4. No. Basic menu operation All OSD (On Screen Display) menus can use the OSD menu...

User Manual
Page 45
... for Display Data Channel/Command Interface, which was developed by the monitor. • ON • OFF Information Displays the current monitor property settings. • Input • Current Resolution • Optimum Resolution (best with the monitor) DisplayPort Selects an appropriate DP standard for remote diagnostics. Resolution Notice Sets whether to display the resolution notice of the recommended resolution when a new input source is activated, HDMI port will be in the input auto select...
... for Display Data Channel/Command Interface, which was developed by the monitor. • ON • OFF Information Displays the current monitor property settings. • Input • Current Resolution • Optimum Resolution (best with the monitor) DisplayPort Selects an appropriate DP standard for remote diagnostics. Resolution Notice Sets whether to display the resolution notice of the recommended resolution when a new input source is activated, HDMI port will be in the input auto select...

User Manual
Page 47
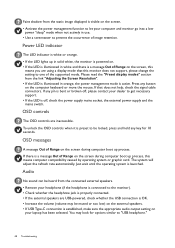
... signal cable connectors. Troubleshooting 47 Read the instructions on the link "Adjusting the Screen Resolution" on the CD, and then select the correct resolution, refresh rate and make adjustments based on the monitor running the monitor at its native resolution. Select the native resolution. The image is still distorted. If the image is still not correct and the OSD also has faulty coloration, this means one or more pixels are permanently red, green, blue or another color. • Clean the LCD screen...
... signal cable connectors. Troubleshooting 47 Read the instructions on the link "Adjusting the Screen Resolution" on the CD, and then select the correct resolution, refresh rate and make adjustments based on the monitor running the monitor at its native resolution. Select the native resolution. The image is still distorted. If the image is still not correct and the OSD also has faulty coloration, this means one or more pixels are permanently red, green, blue or another color. • Clean the LCD screen...
User Manual
Page 48
... you are using a display mode that does not help, check the signal cable connectors. Audio No sound can be heard from the link "Adjusting the Screen Resolution". • If the LED is illuminated in white and there is a message Out of image retention. If that this monitor does not support, please change the setting to one of Range on the screen, this means computer compatibility caused by operating system or graphic card. OSD messages A message...
... you are using a display mode that does not help, check the signal cable connectors. Audio No sound can be heard from the link "Adjusting the Screen Resolution". • If the LED is illuminated in white and there is a message Out of image retention. If that this monitor does not support, please change the setting to one of Range on the screen, this means computer compatibility caused by operating system or graphic card. OSD messages A message...


