

Safety Warning and Notice
Page 2
... not dissemble or repair the monitor. 8. Cleaning Ensure that the power is connected to clean your nearest BenQ service center for warranty services have been altered by unauthorized use the original accessories (e.g. power cable) only with local technical standards if the user brings the monitor out of the user if problems (such as data loss and system failure) occurred due to non-factory provided software, parts, and/or...
... not dissemble or repair the monitor. 8. Cleaning Ensure that the power is connected to clean your nearest BenQ service center for warranty services have been altered by unauthorized use the original accessories (e.g. power cable) only with local technical standards if the user brings the monitor out of the user if problems (such as data loss and system failure) occurred due to non-factory provided software, parts, and/or...
Resolution file
Page 1
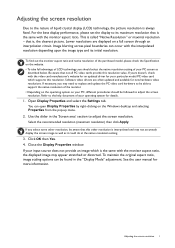
... is called "Native Resolution" or maximal resolution - Close the Display Properties window. Adjusting the screen resolution 1 For the best display performance, please set the display to adjust the screen resolution. Open Display Properties and select the Settings tab. Use the slider in the "Display Mode" adjustment. See the user manual for new hardware video resolutions. that not all PC video cards provide this resolution. To find out the monitor aspect ratio and native resolution of the purchased model, please check the Specification on the website...
... is called "Native Resolution" or maximal resolution - Close the Display Properties window. Adjusting the screen resolution 1 For the best display performance, please set the display to adjust the screen resolution. Open Display Properties and select the Settings tab. Use the slider in the "Display Mode" adjustment. See the user manual for new hardware video resolutions. that not all PC video cards provide this resolution. To find out the monitor aspect ratio and native resolution of the purchased model, please check the Specification on the website...
Resolution file
Page 2
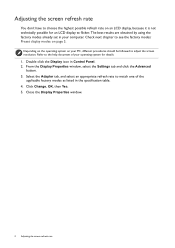
... an LCD display to the help document of the applicable factory modes as listed in the specification table. 4. Select the Adapter tab, and select an appropriate refresh rate to adjust the screen resolution. Depending on the operating system on page 3. Close the Display Properties window. 2 Adjusting the screen refresh rate Check next chapter to see the factory modes: Preset display modes on your computer. The best results are obtained by using the factory modes already set in Control Panel. 2. Double...
... an LCD display to the help document of the applicable factory modes as listed in the specification table. 4. Select the Adapter tab, and select an appropriate refresh rate to adjust the screen resolution. Depending on the operating system on page 3. Close the Display Properties window. 2 Adjusting the screen refresh rate Check next chapter to see the factory modes: Preset display modes on your computer. The best results are obtained by using the factory modes already set in Control Panel. 2. Double...
Resolution file
Page 4
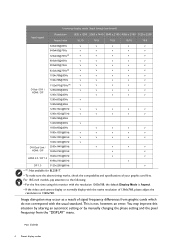
... make sure the above timing works, check the compatibility and specifications of 1366x768, please adjust the resolution to the following: • For the first time using this situation by altering an automatic setting or by manually changing the phase setting and the pixel frequency from the "DISPLAY" menu. You may occur as a result of signal frequency differences from graphic cards which do not correspond with the native resolution of your graphic card...
... make sure the above timing works, check the compatibility and specifications of 1366x768, please adjust the resolution to the following: • For the first time using this situation by altering an automatic setting or by manually changing the phase setting and the pixel frequency from the "DISPLAY" menu. You may occur as a result of signal frequency differences from graphic cards which do not correspond with the native resolution of your graphic card...
User Manual
Page 5
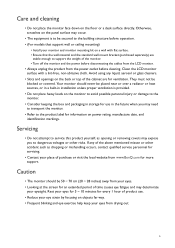
... power outlet before operation. • (For models that support wall or ceiling mounting) • Install your place of the above mentioned misuse or other risks. Clean the LCD monitor surface with flat surface. • Ensure that the wall material and the standard wall mount bracket (purchased separately) are for ventilation. Caution • The monitor should never be placed near or over a radiator or heat sources...
... power outlet before operation. • (For models that support wall or ceiling mounting) • Install your place of the above mentioned misuse or other risks. Clean the LCD monitor surface with flat surface. • Ensure that the wall material and the standard wall mount bracket (purchased separately) are for ventilation. Caution • The monitor should never be placed near or over a radiator or heat sources...
User Manual
Page 6
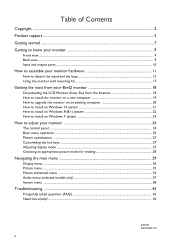
... ...2 Product support ...3 Getting started ...7 Getting to know your monitor 9 Front view...9 Back view ...9 Input and output ports...10 How to assemble your monitor hardware 11 How to detach the stand and the base 15 Using the monitor wall mounting kit 17 Getting the most from your BenQ monitor 18 Downloading the LCD Monitor driver files from the Internet 18 How to install the monitor on a new computer 19 How to upgrade the monitor on an...
... ...2 Product support ...3 Getting started ...7 Getting to know your monitor 9 Front view...9 Back view ...9 Input and output ports...10 How to assemble your monitor hardware 11 How to detach the stand and the base 15 Using the monitor wall mounting kit 17 Getting the most from your BenQ monitor 18 Downloading the LCD Monitor driver files from the Internet 18 How to install the monitor on a new computer 19 How to upgrade the monitor on an...
User Manual
Page 13
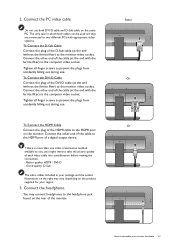
... monitor. Connect the other end of a digital output device. Either Or Or How to the HDMI port of the cable to assemble your region. 3. Tighten all finger screws to take the picture quality of the cable (at the end without the ferrite filter) to the computer video socket. Connect the headphone. Tighten all finger screws to prevent the plugs from accidently falling out during use...
... monitor. Connect the other end of a digital output device. Either Or Or How to the HDMI port of the cable to assemble your region. 3. Tighten all finger screws to take the picture quality of the cable (at the end without the ferrite filter) to the computer video socket. Connect the headphone. Tighten all finger screws to prevent the plugs from accidently falling out during use...
User Manual
Page 14
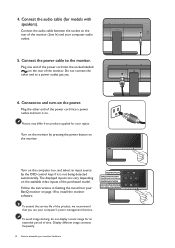
... the power button on the power. Picture may differ from your region. Do not connect the other end of the product, we recommend that you use your monitor hardware Plug one end of the power cord into a power outlet and turn -on the monitor. Connect the audio cable between the socket on the available video inputs of time. To avoid image sticking, do not display a static image for models with speakers). The displayed input icons...
... the power button on the power. Picture may differ from your region. Do not connect the other end of the product, we recommend that you use your monitor hardware Plug one end of the power cord into a power outlet and turn -on the monitor. Connect the audio cable between the socket on the available video inputs of time. To avoid image sticking, do not display a static image for models with speakers). The displayed input icons...
User Manual
Page 17
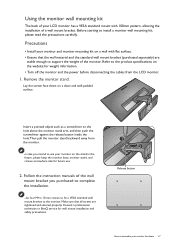
... a VESA standard mount with flat surface. • Ensure that all screws are stable enough to install a monitor wall mounting kit, please read the precautions carefully. Follow the instruction manuals of the wall mount bracket you intend to the product specifications on the stand in the future, please keep the monitor base, monitor stand, and screws somewhere safe for weight information. • Turn off the monitor and the power before disconnecting the cables from the monitor. Make...
... a VESA standard mount with flat surface. • Ensure that all screws are stable enough to install a monitor wall mounting kit, please read the precautions carefully. Follow the instruction manuals of the wall mount bracket you intend to the product specifications on the stand in the future, please keep the monitor base, monitor stand, and screws somewhere safe for weight information. • Turn off the monitor and the power before disconnecting the cables from the monitor. Make...
User Manual
Page 18
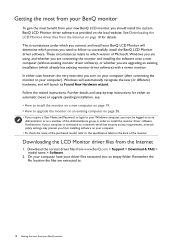
... Microsoft Windows you are using, and whether you are connecting the monitor and installing the software onto a new computer (without existing monitor driver software), or whether you are extracted to. 18 Getting the most benefit from your new BenQ LCD monitor, you turn on your computer (after connecting the monitor to successfully install the BenQ LCD Monitor driver software. Downloading the LCD Monitor driver files from www.BenQ.com > Support > Download & FAQ > model name > Software. 2. Getting the most from your BenQ monitor...
... Microsoft Windows you are using, and whether you are connecting the monitor and installing the software onto a new computer (without existing monitor driver software), or whether you are extracted to. 18 Getting the most benefit from your new BenQ LCD monitor, you turn on your computer (after connecting the monitor to successfully install the BenQ LCD Monitor driver software. Downloading the LCD Monitor driver files from www.BenQ.com > Support > Download & FAQ > model name > Software. 2. Getting the most from your BenQ monitor...
User Manual
Page 19
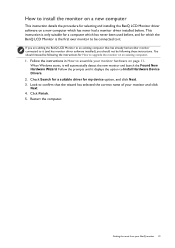
... a monitor driver installed before , and for selecting and installing the BenQ LCD Monitor driver software on page 11. If you should instead be connected to it . Follow the instructions in How to upgrade the monitor on a new computer This instruction details the procedure for which the BenQ LCD Monitor is only suitable for a computer which has never had another monitor connected to it (and has monitor driver software installed), you are adding the BenQ LCD Monitor...
... a monitor driver installed before , and for selecting and installing the BenQ LCD Monitor driver software on page 11. If you should instead be connected to it . Follow the instructions in How to upgrade the monitor on a new computer This instruction details the procedure for which the BenQ LCD Monitor is only suitable for a computer which has never had another monitor connected to it (and has monitor driver software installed), you are adding the BenQ LCD Monitor...
User Manual
Page 20
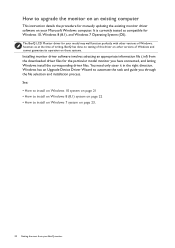
... the most from the downloaded driver files for manually updating the existing monitor driver software on an existing computer This instruction details the procedure for the particular model monitor you through the file selection and installation process. How to automate the task and guide you have connected, and letting Windows install the corresponding driver files. Windows has an Upgrade Device Driver Wizard to upgrade the monitor on your model may well function...
... the most from the downloaded driver files for manually updating the existing monitor driver software on an existing computer This instruction details the procedure for the particular model monitor you through the file selection and installation process. How to automate the task and guide you have connected, and letting Windows install the corresponding driver files. Windows has an Upgrade Device Driver Wizard to upgrade the monitor on your model may well function...
User Manual
Page 21
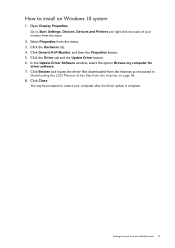
... the driver files downloaded from the Internet as instructed in Downloading the LCD Monitor driver files from the menu. 2. Getting the most from the menu. 3. You may be prompted to restart your monitor from the Internet on Windows 10 system 1. How to install on page 18. 8. Click Generic PnP Monitor, and then the Properties button. 5. Open Display Properties. Select Properties from your BenQ monitor 21 Go to Start, Settings, Devices...
... the driver files downloaded from the Internet as instructed in Downloading the LCD Monitor driver files from the menu. 2. Getting the most from the menu. 3. You may be prompted to restart your monitor from the Internet on Windows 10 system 1. How to install on page 18. 8. Click Generic PnP Monitor, and then the Properties button. 5. Open Display Properties. Select Properties from your BenQ monitor 21 Go to Start, Settings, Devices...
User Manual
Page 22
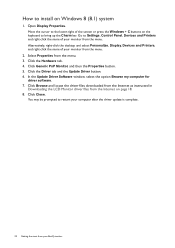
Click Browse and locate the driver files downloaded from the Internet as instructed in Downloading the LCD Monitor driver files from the menu. 2. Open Display Properties. Click Generic PnP Monitor, and then the Properties button. 5. Alternatively, right-click the desktop and select Personalize, Display, Devices and Printers, and right-click the name of your monitor from the Internet on Windows 8 (8.1) system 1. Click Close. Select Properties from...
Click Browse and locate the driver files downloaded from the Internet as instructed in Downloading the LCD Monitor driver files from the menu. 2. Open Display Properties. Click Generic PnP Monitor, and then the Properties button. 5. Alternatively, right-click the desktop and select Personalize, Display, Devices and Printers, and right-click the name of your monitor from the Internet on Windows 8 (8.1) system 1. Click Close. Select Properties from...

User Manual
Page 25
... control keys to adjust all the settings on your monitor 25 The hot key menu is the hot key for particular functions. 3. Basic menu operation All OSD (On Screen Display) menus can use the OSD menu to make adjustments or selection. See Navigating the main menu on page 29 for details on page 27. • For Up/Increase adjustment. Press any of the control keys. 2. To change the default settings...
... control keys to adjust all the settings on your monitor 25 The hot key menu is the hot key for particular functions. 3. Basic menu operation All OSD (On Screen Display) menus can use the OSD menu to make adjustments or selection. See Navigating the main menu on page 29 for details on page 27. • For Up/Increase adjustment. Press any of the control keys. 2. To change the default settings...

User Manual
Page 27
... displayed image to Display and Auto Adjustment. 4. Go to the screen. You can be disabled, because the monitor will automatically display the best image. How to access 3. Please ensure that can change . 4. As you use the Auto Adjustment function. Press any of the control keys to bring up the hot key menu. If you connect a digital input signal using geometry menu items. To assist you can adjust the display mode on your computer is set to the native resolution...
... displayed image to Display and Auto Adjustment. 4. Go to the screen. You can be disabled, because the monitor will automatically display the best image. How to access 3. Please ensure that can change . 4. As you use the Auto Adjustment function. Press any of the control keys to bring up the hot key menu. If you connect a digital input signal using geometry menu items. To assist you can adjust the display mode on your computer is set to the native resolution...

User Manual
Page 36
... input image to be different depending on the product supplied for your image. Determines the color space (RGB or YUV) based on the monitor screen do not display properly. You might need to manually set the Color Format if colors shown on the detected video signal. Determines the range of Picture Mode, different Display Mode option is provided to hide annoying edge noise if present around your region. 36 Navigating the main menu...
... input image to be different depending on the product supplied for your image. Determines the color space (RGB or YUV) based on the monitor screen do not display properly. You might need to manually set the Color Format if colors shown on the detected video signal. Determines the range of Picture Mode, different Display Mode option is provided to hide annoying edge noise if present around your region. 36 Navigating the main menu...

User Manual
Page 40
... settings. • Input • Current Resolution • Optimum Resolution (best with the monitor) • Model Name 40 Navigating the main menu Resolution Notice Sets whether to display the resolution notice of the recommended resolution when a new input source is activated, HDMI port will be sent via the software for Display Data Channel/Command Interface, which was developed by Video Electronics Standards Association (VESA). DDC/CI capability allows monitor controls to be in Off power saving mode...
... settings. • Input • Current Resolution • Optimum Resolution (best with the monitor) • Model Name 40 Navigating the main menu Resolution Notice Sets whether to display the resolution notice of the recommended resolution when a new input source is activated, HDMI port will be sent via the software for Display Data Channel/Command Interface, which was developed by Video Electronics Standards Association (VESA). DDC/CI capability allows monitor controls to be in Off power saving mode...

User Manual
Page 42
... can minimize these instructions. Select the native resolution. See Display Mode on page 3). Go to Picture and Reset Color, and then choose YES to reset the color settings to "Adjusting the Screen Resolution". The image is used, remove the extension cable for the input sources. Download Resolution file from the website (see Product support on these losses by using an extension cable with better conduction quality or with a built-in extension cables. Pixel errors can use the Display Mode function to...
... can minimize these instructions. Select the native resolution. See Display Mode on page 3). Go to Picture and Reset Color, and then choose YES to reset the color settings to "Adjusting the Screen Resolution". The image is used, remove the extension cable for the input sources. Download Resolution file from the website (see Product support on these losses by using an extension cable with better conduction quality or with a built-in extension cables. Pixel errors can use the Display Mode function to...

User Manual
Page 43
... off , check the power supply mains socket, the external power supply and the mains switch. Just wait until the operating system is preset to "Adjusting the Screen Resolution". Faint shadow from the connected external speakers. • Remove your headphone (if the headphone is connected to "Adjusting the Screen Resolution". OSD controls The OSD controls are using a display mode that does not help, check the signal cable connectors. Audio No sound can be locked, press and hold any button on the screen during computer...
... off , check the power supply mains socket, the external power supply and the mains switch. Just wait until the operating system is preset to "Adjusting the Screen Resolution". Faint shadow from the connected external speakers. • Remove your headphone (if the headphone is connected to "Adjusting the Screen Resolution". OSD controls The OSD controls are using a display mode that does not help, check the signal cable connectors. Audio No sound can be locked, press and hold any button on the screen during computer...


