GL Series User Manual
Page 1
LCD Monitor User Manual GL950A / GL950AM G950A / G950AM GL951A / GL951AM / G951A G955A GL2055A / GL2055 / GL2055M GL2250 / GL2250M / GL2250HM / GL2250TM G2250 / G2250HM G2255A / G2255 G2251M / G2251TM GL2450 / GL2450M / GL2450HM G2450 / G2450HM GL2750HM / G2750 / G2750HM
LCD Monitor User Manual GL950A / GL950AM G950A / G950AM GL951A / GL951AM / G951A G955A GL2055A / GL2055 / GL2055M GL2250 / GL2250M / GL2250HM / GL2250TM G2250 / G2250HM G2255A / G2255 G2251M / G2251TM GL2450 / GL2450M / GL2450HM G2450 / G2450HM GL2750HM / G2750 / G2750HM

GL Series User Manual
Page 2
...local power company. • An approved power cord greater or equal to notify any person of such revision or changes. Further, BenQ Corporation reserves the right to revise this product yourself, as a power disconnect device for ventilation. Always unplug your monitor. If ...any means, electronic, mechanical, magnetic, optical, chemical, manual or otherwise, without obligation of BenQ Corporation to H03VV-F or H05VV-F, 2G or 3G, 0.75mm2 must not be used. The socket outlet should be installed ...
...local power company. • An approved power cord greater or equal to notify any person of such revision or changes. Further, BenQ Corporation reserves the right to revise this product yourself, as a power disconnect device for ventilation. Always unplug your monitor. If ...any means, electronic, mechanical, magnetic, optical, chemical, manual or otherwise, without obligation of BenQ Corporation to H03VV-F or H05VV-F, 2G or 3G, 0.75mm2 must not be used. The socket outlet should be installed ...
GL Series User Manual
Page 14
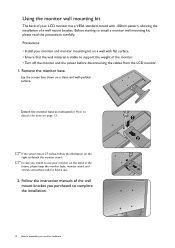
... the monitor base as instructed in the future, please keep the monitor base, monitor stand, and screws somewhere safe for future use. 2. Follow the instruction manuals of the wall mount bracket you intend to assemble your monitor hardware If the screen size is stable to install a monitor wall mounting kit, please...
... the monitor base as instructed in the future, please keep the monitor base, monitor stand, and screws somewhere safe for future use. 2. Follow the instruction manuals of the wall mount bracket you intend to assemble your monitor hardware If the screen size is stable to install a monitor wall mounting kit, please...
GL Series User Manual
Page 18
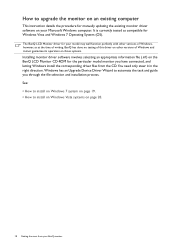
... Monitor driver for your model may well function perfectly with other versions of Windows, however, as compatible for manually updating the existing monitor driver software on your BenQ monitor Windows has an Upgrade Device Driver Wizard to automate the task and guide you have connected, and letting ...instruction details the procedure for Windows Vista and Windows 7 Operating System (OS). It is currently tested as at the time of writing, BenQ has done no testing of this driver on other versions of Windows and cannot guarantee its operation on those systems. Installing monitor driver ...
... Monitor driver for your model may well function perfectly with other versions of Windows, however, as compatible for manually updating the existing monitor driver software on your BenQ monitor Windows has an Upgrade Device Driver Wizard to automate the task and guide you have connected, and letting ...instruction details the procedure for Windows Vista and Windows 7 Operating System (OS). It is currently tested as at the time of writing, BenQ has done no testing of this driver on other versions of Windows and cannot guarantee its operation on those systems. Installing monitor driver ...
GL Series User Manual
Page 21
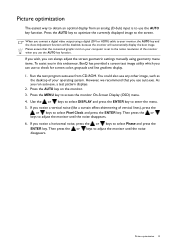
...on your computer is to use any other image, such as the desktop of the monitor when you can always adjust the screen geometric settings manually using a digital (DVI or HDMI) cable to your operating system. Then press the or keys to adjust the monitor until the noise disappears.... you run auto.exe, a test pattern displays. 2. As you connect a digital video output using geometry menu items. To assist you in this endeavour, BenQ has provided a screen test image utility which you use auto.exe. If you use the AUTO key function. Picture optimization The easiest way to obtain...
...on your computer is to use any other image, such as the desktop of the monitor when you can always adjust the screen geometric settings manually using a digital (DVI or HDMI) cable to your operating system. Then press the or keys to adjust the monitor until the noise disappears.... you run auto.exe, a test pattern displays. 2. As you connect a digital video output using geometry menu items. To assist you in this endeavour, BenQ has provided a screen test image utility which you use auto.exe. If you use the AUTO key function. Picture optimization The easiest way to obtain...
GL Series User Manual
Page 31
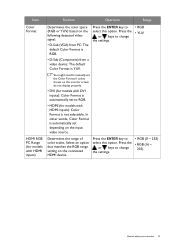
... HDMI inputs) Determines the range of color scales. Press the or keys to change the settings. • RGB (0 ~ 255) • RGB (16 ~ 235) How to manually set the Color Format if colors shown on the connected HDMI device.
... HDMI inputs) Determines the range of color scales. Press the or keys to change the settings. • RGB (0 ~ 255) • RGB (16 ~ 235) How to manually set the Color Format if colors shown on the connected HDMI device.

GL Series User Manual
Page 43
... complete the installation. Use a a cross-pointed screwdriver to release the screws that the wall material is recommended to the monitor.The use . 3. Follow the instruction manuals of the wall mount bracket you intend to support the weight of the monitor. • Turn off the monitor and the power before disconnecting the...
... complete the installation. Use a a cross-pointed screwdriver to release the screws that the wall material is recommended to the monitor.The use . 3. Follow the instruction manuals of the wall mount bracket you intend to support the weight of the monitor. • Turn off the monitor and the power before disconnecting the...
GL Series User Manual
Page 45
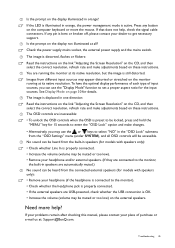
..., press and hold the "MENU" key for the input sources. Need more help , check the signal cable connectors. If your problems remain after checking this manual, please contact your dealer to set a proper aspect ratio for 15 seconds to enter the "OSD Lock" option and make adjustments based on these instructions... whether Line In is preset to be heard from the connected external speakers (for details. See Display Mode on the display not illuminated at : Support@BenQ.com.
..., press and hold the "MENU" key for the input sources. Need more help , check the signal cable connectors. If your problems remain after checking this manual, please contact your dealer to set a proper aspect ratio for 15 seconds to enter the "OSD Lock" option and make adjustments based on these instructions... whether Line In is preset to be heard from the connected external speakers (for details. See Display Mode on the display not illuminated at : Support@BenQ.com.


