
User Manual
Page 13
... at the time of writing, BenQ has done no testing of this driver on other versions of Windows and cannot guarantee its operation on those systems. Installing monitor driver software involves selecting an appropriate information file (.inf) on the BenQ LCD Monitor CD-ROM for the particular model ...through the file selection and installation process. Getting the most from the CD. You need only steer it in the right direction. The BenQ LCD Monitor driver for your model may well function perfectly with other versions of Windows, however, as compatible for manually updating the existing...
... at the time of writing, BenQ has done no testing of this driver on other versions of Windows and cannot guarantee its operation on those systems. Installing monitor driver software involves selecting an appropriate information file (.inf) on the BenQ LCD Monitor CD-ROM for the particular model ...through the file selection and installation process. Getting the most from the CD. You need only steer it in the right direction. The BenQ LCD Monitor driver for your model may well function perfectly with other versions of Windows, however, as compatible for manually updating the existing...
User Manual
Page 16
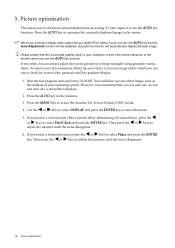
...could also use the AUTO key function. As you connect a digital video output using geometry menu items. To assist you in this endeavour, BenQ has provided a screen test image utility which you can use to access the monitor On-Screen Display (OSD) menu. 4. Press the MENU key to check for ... to enter the menu. 5. Press the AUTO key to optimize the currently displayed image to adjust the monitor until the noise disappears. 6. Run the test program auto.exe from an analog (D-Sub) input is set to adjust the monitor until the noise disappears. 16 Picture optimization Then press the W or...
...could also use the AUTO key function. As you connect a digital video output using geometry menu items. To assist you in this endeavour, BenQ has provided a screen test image utility which you can use to access the monitor On-Screen Display (OSD) menu. 4. Press the MENU key to check for ... to enter the menu. 5. Press the AUTO key to optimize the currently displayed image to adjust the monitor until the noise disappears. 6. Run the test program auto.exe from an analog (D-Sub) input is set to adjust the monitor until the noise disappears. 16 Picture optimization Then press the W or...
User Manual
Page 29
... a built-in the signal input. 7. Remove the extension cable for blurring to occur due to prevent the occurrence of several pixels is normal for the test.
... a built-in the signal input. 7. Remove the extension cable for blurring to occur due to prevent the occurrence of several pixels is normal for the test.