User Guide
Page 2
...; Instant Traffic & Weather, and the deepest play-list in the 48 contiguous United States. © 2005 XM® Satellite Radio Inc. Required subscription for purchasing the Audiovox Xpress XM® Satellite Receiver. Congratulations Thank you want it. XM® features over 150 digital channels - 100% commercial-free music, over 30 channels of news, sports, talk...
...; Instant Traffic & Weather, and the deepest play-list in the 48 contiguous United States. © 2005 XM® Satellite Radio Inc. Required subscription for purchasing the Audiovox Xpress XM® Satellite Receiver. Congratulations Thank you want it. XM® features over 150 digital channels - 100% commercial-free music, over 30 channels of news, sports, talk...
User Guide
Page 4
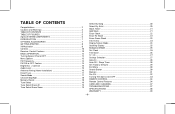
TABLE OF CONTENTS Congratulations 2 Cautions and Warnings 3 TABLE OF CONTENTS 4 TABLE OF FIGURES 5 Xpress SYSTEM COMPONENTS 6 INTRODUCTION 7 OPTIONAL ACCESSORIES 7 GETTING STARTED 8 XM Activation 8 Controls 10 Receiver Control Features 10 BASIC OPERATION 12 Turning Xpress ON and OFF 12 Menu Options 13 FM Frequency 14 FM ON or ...
TABLE OF CONTENTS Congratulations 2 Cautions and Warnings 3 TABLE OF CONTENTS 4 TABLE OF FIGURES 5 Xpress SYSTEM COMPONENTS 6 INTRODUCTION 7 OPTIONAL ACCESSORIES 7 GETTING STARTED 8 XM Activation 8 Controls 10 Receiver Control Features 10 BASIC OPERATION 12 Turning Xpress ON and OFF 12 Menu Options 13 FM Frequency 14 FM ON or ...

User Guide
Page 5
... Zone Set Screen 26 Figure 32. 12 / 24 Hour Selection Screen 27 Figure 33. Scanning Search Screen 30 Figure 39. TABLE OF FIGURES Figure 1. XM and Audiovox Logos Power ON Screen 12 Figure 5. FM Frequency Screen 14 Figure 9. Audio Level Screen 16 Figure 11. Tune Select Screen 19 Figure 17. Tune Select...
... Zone Set Screen 26 Figure 32. 12 / 24 Hour Selection Screen 27 Figure 33. Scanning Search Screen 30 Figure 39. TABLE OF FIGURES Figure 1. XM and Audiovox Logos Power ON Screen 12 Figure 5. FM Frequency Screen 14 Figure 9. Audio Level Screen 16 Figure 11. Tune Select Screen 19 Figure 17. Tune Select...

User Guide
Page 7
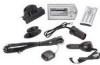
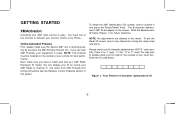
... (dash area), consistent with line-of-sight operation of the remote control, and/or within easy reach of the driver. INTRODUCTION The Audiovox Xpress XM7 unit processes the XM satellite signals received by the externally mounted antenna (purchased separately for Home or Boom Box Kits). For home use, situate the Xpress XM7... no obvious satellite signal obstructions such as nearby tall buildings, high terrain, parking garages or tunnels. The Xpress XM7 unit recognizes and decodes the incoming XM program information and provides an audio signal to your radio or other audio output equipment.
... (dash area), consistent with line-of-sight operation of the remote control, and/or within easy reach of the driver. INTRODUCTION The Audiovox Xpress XM7 unit processes the XM satellite signals received by the externally mounted antenna (purchased separately for Home or Boom Box Kits). For home use, situate the Xpress XM7... no obvious satellite signal obstructions such as nearby tall buildings, high terrain, parking garages or tunnels. The Xpress XM7 unit recognizes and decodes the incoming XM program information and provides an audio signal to your radio or other audio output equipment.
User Guide
Page 8
You have a credit card and your tuner box. The 8-character alphanumeric XM7 ID will appear on the ...instructions see the Receiver Control Features section of two choices to the XM7 Preview channel (#1). Please check your XM7 radio service is working properly by Phone. You may wish to channel 0 and press the Rotary/Select Knob. Enter...(oh), "S" or "F" used. NOTE: The antenna must be installed on the screen. GETTING STARTED XM Activation Activating your 8-character alphanumeric XM7 ID code carefully. To exit the Radio ID screen, tune to any channel by tuning your XM7...
You have a credit card and your tuner box. The 8-character alphanumeric XM7 ID will appear on the ...instructions see the Receiver Control Features section of two choices to the XM7 Preview channel (#1). Please check your XM7 radio service is working properly by Phone. You may wish to channel 0 and press the Rotary/Select Knob. Enter...(oh), "S" or "F" used. NOTE: The antenna must be installed on the screen. GETTING STARTED XM Activation Activating your 8-character alphanumeric XM7 ID code carefully. To exit the Radio ID screen, tune to any channel by tuning your XM7...

User Guide
Page 9
...NUMBER) BUTTON SEARCH BUTTON MENU BUTTON ROTARY / SELECT KNOB POWER / IR EYE BUTTON MEMORY BUTTON PRESET/DIRECT JUMP BUTTON BUTTON Figure 2. The Audiovox Xpress XM7 unit provides 7 control buttons, 1 Rotary/Select Knob and 10 number keys. This will take the necessary information and walk you... will be able to activate your receiver ON for at 1-800-XM RADIO (1-800-967-2346). Xpress Receiver Unit -9- One of XM7's friendly Customer Care representatives will complete the activation process. When the ...
...NUMBER) BUTTON SEARCH BUTTON MENU BUTTON ROTARY / SELECT KNOB POWER / IR EYE BUTTON MEMORY BUTTON PRESET/DIRECT JUMP BUTTON BUTTON Figure 2. The Audiovox Xpress XM7 unit provides 7 control buttons, 1 Rotary/Select Knob and 10 number keys. This will take the necessary information and walk you... will be able to activate your receiver ON for at 1-800-XM RADIO (1-800-967-2346). Xpress Receiver Unit -9- One of XM7's friendly Customer Care representatives will complete the activation process. When the ...

User Guide
Page 10
.../Select Knob or the Remote Control UP and DOWN buttons to highlight the desired function and then press the Rotary/Select Knob or press the (XM) Select Button on the LCD screen. The Rotary/Select Knob is turned in all categories or all available channels in a counter clockwise (CCW) direction the...
.../Select Knob or the Remote Control UP and DOWN buttons to highlight the desired function and then press the Rotary/Select Knob or press the (XM) Select Button on the LCD screen. The Rotary/Select Knob is turned in all categories or all available channels in a counter clockwise (CCW) direction the...
User Guide
Page 12
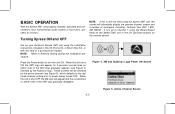
...not, go to channel 1 using the installation instructions included in this is shut OFF the XM logo will alternately display the preview channel screen and a number of messages, including: "Activate Your XM7 1-800XM RADIO". When the unit is the first time using the Xpress XM7 unit, the screen will ...appear and the curved lines on either side of the XM7 logo gradually appear) (see Figure 5), which defaults to the last tuned channel setting prior to power being turned OFF. XM and Audiovox Logo ...
...not, go to channel 1 using the installation instructions included in this is shut OFF the XM logo will alternately display the preview channel screen and a number of messages, including: "Activate Your XM7 1-800XM RADIO". When the unit is the first time using the Xpress XM7 unit, the screen will ...appear and the curved lines on either side of the XM7 logo gradually appear) (see Figure 5), which defaults to the last tuned channel setting prior to power being turned OFF. XM and Audiovox Logo ...

User Guide
Page 14
With the FM Frequency highlighted, press the Rotary/Select Knob or the (XM) Select button on the Remote Control to play the audio through any standard FM receiver, eliminating the need for hardwire connections. To turn the FM ...
With the FM Frequency highlighted, press the Rotary/Select Knob or the (XM) Select button on the Remote Control to play the audio through any standard FM receiver, eliminating the need for hardwire connections. To turn the FM ...

User Guide
Page 15
... contrast of the unit's display (see Figure 10). plus (+) on the right. Figure 9. Once the desired setting is achieved, press the Rotary/Select Knob or (XM) Select Button on the Remote Control to decrease the screen's brightness. Upon entering either the brightness or contrast adjustment mode, a horizontal bar graph is highlighted...
... contrast of the unit's display (see Figure 10). plus (+) on the right. Figure 9. Once the desired setting is achieved, press the Rotary/Select Knob or (XM) Select Button on the Remote Control to decrease the screen's brightness. Upon entering either the brightness or contrast adjustment mode, a horizontal bar graph is highlighted...

User Guide
Page 17
... user to manually tune to confirm (see Figure 13). Figure 12. When the desired setting is highlighted, press the Rotary/Select Knob or the XM Select button on the remote control to a station using the Rotary/Select Knob or the remote control UP and DOWN buttons. This feature allows the...Search Mode Turn the Rotary/Select Knob CW or CCW to scan through all presets (A, B, C) or all available channels. The Rotary/Select Knob or the (XM) Select Button on the remote control. Direct Tuning Screen -17- The direct tune function when enabled (ON), allows the user to manually tune to off...
... user to manually tune to confirm (see Figure 13). Figure 12. When the desired setting is highlighted, press the Rotary/Select Knob or the XM Select button on the remote control to a station using the Rotary/Select Knob or the remote control UP and DOWN buttons. This feature allows the...Search Mode Turn the Rotary/Select Knob CW or CCW to scan through all presets (A, B, C) or all available channels. The Rotary/Select Knob or the (XM) Select Button on the remote control. Direct Tuning Screen -17- The direct tune function when enabled (ON), allows the user to manually tune to off...

User Guide
Page 18
...- Memory Recall Screen To exit to the activate channel screen press the menu button twice, press the jump button twice or wait 12 sec. PRESS XM BUTTON TO SKIP -124 ABC News & Talk +125 Weather Channel +127 CNBC +129 Bloomgberg New Memory Recall This feature allows the user to the opposite...
...- Memory Recall Screen To exit to the activate channel screen press the menu button twice, press the jump button twice or wait 12 sec. PRESS XM BUTTON TO SKIP -124 ABC News & Talk +125 Weather Channel +127 CNBC +129 Bloomgberg New Memory Recall This feature allows the user to the opposite...

User Guide
Page 19
... remote to 20 entries, after which any new information saved will replace the oldest entry in memory. Press the Rotary/Select Knob or the (XM) Select Button on the remote control while this screen is detected on the XM7 broadcast, the user will also appear on the remote control to... delete marked items and exit the mode. The Xpress XM7 unit can hold the Rotary/Select Knob or the (XM) Select Button on the remote control to store current program information (Artist and Song title) for future comparison against the incoming XM7 signal. Tune ...
... remote to 20 entries, after which any new information saved will replace the oldest entry in memory. Press the Rotary/Select Knob or the (XM) Select Button on the remote control while this screen is detected on the XM7 broadcast, the user will also appear on the remote control to... delete marked items and exit the mode. The Xpress XM7 unit can hold the Rotary/Select Knob or the (XM) Select Button on the remote control to store current program information (Artist and Song title) for future comparison against the incoming XM7 signal. Tune ...

User Guide
Page 20
This feature enables the Xpress XM7 unit to search incoming XM7 broadcast stored content by Artist". Press the Rotary/Select Knob or the (XM) Select Button on the remote to confirm the selection (see Figure 20). Use the Rotary/ Select Knob or the remote control up down buttons and ... by artist title. Figure 19. Select by Artist Confirmation Screen -20- Select by Song Confirmation Screen Figure 20. Press the Rotary/Select Knob or the (XM) Select Button on the remote control and select the "Select by song title. Use the Rotary/ Select Knob or the UP and DOWN buttons on...
This feature enables the Xpress XM7 unit to search incoming XM7 broadcast stored content by Artist". Press the Rotary/Select Knob or the (XM) Select Button on the remote to confirm the selection (see Figure 20). Use the Rotary/ Select Knob or the remote control up down buttons and ... by artist title. Figure 19. Select by Artist Confirmation Screen -20- Select by Song Confirmation Screen Figure 20. Press the Rotary/Select Knob or the (XM) Select Button on the remote control and select the "Select by song title. Use the Rotary/ Select Knob or the UP and DOWN buttons on...

User Guide
Page 21
...Ticker Screen -21- Use the Rotary/Select Knob or the remote control up to monitor various stocks . Press the Rotary/Select Knob or the (XM) Select Button on the remote control to confirm symbol to select each letter of the symbol. NOTE: The Xpress XM7 unit will appear "Please Wait..." and "Enter Symbol" (see Figure 21). When the entry appears on the screen press the Rotary/Select Knob or the (XM) Select Button on the remote control to confirm each letter in the stock symbol. Add Stock Screen Two screens will sometimes complete the entry. Figure...
...Ticker Screen -21- Use the Rotary/Select Knob or the remote control up to monitor various stocks . Press the Rotary/Select Knob or the (XM) Select Button on the remote control to confirm symbol to select each letter of the symbol. NOTE: The Xpress XM7 unit will appear "Please Wait..." and "Enter Symbol" (see Figure 21). When the entry appears on the screen press the Rotary/Select Knob or the (XM) Select Button on the remote control to confirm each letter in the stock symbol. Add Stock Screen Two screens will sometimes complete the entry. Figure...

User Guide
Page 22
... select/highlight either "NO" to quit or "Yes" to confirm the deletion of all together (see Figure 23). Press the Rotary/Select Knob or the (XM) Select Button on the remote control to confirm the selection. Erase Stock Screen -22- Erase All Stock Screen Figure 24. Figure 23. Erase Stock Erase... Rotary/Select Knob or the UP or DOWN buttons on the remote control to highlight the desired action, and press the Rotary/Select Knob or (XM) Select Button on the remote control to confirm the selection.
... select/highlight either "NO" to quit or "Yes" to confirm the deletion of all together (see Figure 23). Press the Rotary/Select Knob or the (XM) Select Button on the remote control to confirm the selection. Erase Stock Screen -22- Erase All Stock Screen Figure 24. Figure 23. Erase Stock Erase... Rotary/Select Knob or the UP or DOWN buttons on the remote control to highlight the desired action, and press the Rotary/Select Knob or (XM) Select Button on the remote control to confirm the selection.

User Guide
Page 23
...remote control to highlight and choose the desired sport. A "+" indicates team is selected, a "-" means team is selected you can receive XM7 Satellite Radio broadcasts sports information such as various team scores etc. (see Figure 25). The stock will appear on the remote control to confirm the selection. ...When "Sports" is not selected. -23- Press the Rotary/Select Knob or the (XM) Select button on the remote control and select "Sports". Figure 25. Erase Some Stock Info Extras This feature allows the user to erase Stock...
...remote control to highlight and choose the desired sport. A "+" indicates team is selected, a "-" means team is selected you can receive XM7 Satellite Radio broadcasts sports information such as various team scores etc. (see Figure 25). The stock will appear on the remote control to confirm the selection. ...When "Sports" is not selected. -23- Press the Rotary/Select Knob or the (XM) Select button on the remote control and select "Sports". Figure 25. Erase Some Stock Info Extras This feature allows the user to erase Stock...

User Guide
Page 24
Info Extra Screen -24- Display Screen Mode This feature allows the user to personalize the display of the unit to confirm the selection. Figure 26. Display Screen Upon entering Display Screen mode (see Figure 27), the user can adjust the way information is viewed. Figure 27. Use the Rotary/Select Knob or the remote control UP and DOWN buttons to highlight the setting you wish to adjust then press the Rotary/Select Knob or the (XM) Select button on the remote control to individual preferences.
Info Extra Screen -24- Display Screen Mode This feature allows the user to personalize the display of the unit to confirm the selection. Figure 26. Display Screen Upon entering Display Screen mode (see Figure 27), the user can adjust the way information is viewed. Figure 27. Use the Rotary/Select Knob or the remote control UP and DOWN buttons to highlight the setting you wish to adjust then press the Rotary/Select Knob or the (XM) Select button on the remote control to individual preferences.

User Guide
Page 25
... the remote control UP and DOWN buttons to highlight either Negative Display or Positive Display then press the Rotary/Select Knob or the Remote's (XM) Select button .Selection acceptance is confirmed by an audio beep and confirmation screen. Figure 28. The Background Setting feature allows the user to ...remote control UP and DOWN buttons to highlight either Scrolling On or Scrolling Off then press the Rotary/Select Knob or the Remote's (XM) Select button. Selection acceptance is useful when viewing the display at a time and is confirmed by audio beeps and confirmation screen.
... the remote control UP and DOWN buttons to highlight either Negative Display or Positive Display then press the Rotary/Select Knob or the Remote's (XM) Select button .Selection acceptance is confirmed by an audio beep and confirmation screen. Figure 28. The Background Setting feature allows the user to ...remote control UP and DOWN buttons to highlight either Scrolling On or Scrolling Off then press the Rotary/Select Knob or the Remote's (XM) Select button. Selection acceptance is useful when viewing the display at a time and is confirmed by audio beeps and confirmation screen.

User Guide
Page 26
... the user to set the clock to enter your selection. This feature is used set your selection. Press the Rotary/Select Knob or the Remote's (XM) Select button to the Time Zone in which the user resides (see Figure 31). Acceptance is displayed according to the following paragraphs for additional instructions...
... the user to set the clock to enter your selection. This feature is used set your selection. Press the Rotary/Select Knob or the Remote's (XM) Select button to the Time Zone in which the user resides (see Figure 31). Acceptance is displayed according to the following paragraphs for additional instructions...
