User Manual
Page 19
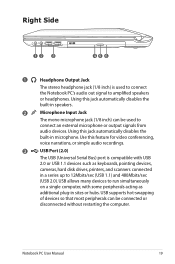
... up to 12Mbits/sec (USB 1.1) and 480Mbits/sec (USB 2.0). USB supports hot-swapping of devices so that most peripherals can be connected or disconnected without restarting the computer. Use this jack automatically disables the built-in speakers. 2 Microphone Input Jack The mono microphone jack (1/8 inch) can be used to connect the...
... up to 12Mbits/sec (USB 1.1) and 480Mbits/sec (USB 2.0). USB supports hot-swapping of devices so that most peripherals can be connected or disconnected without restarting the computer. Use this jack automatically disables the built-in speakers. 2 Microphone Input Jack The mono microphone jack (1/8 inch) can be used to connect the...
User Manual
Page 22
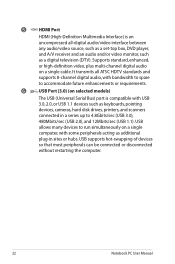
... computer, with some peripherals acting as a digital television (DTV). USB supports hot-swapping of devices so that most peripherals can be connected or disconnected without restarting the computer. 22 Notebook PC User Manual 5 HDMI HDMI Port HDMI (High-Definition Multimedia Interface) is compatible with USB 3.0, 2.0, or USB 1.1 devices such as keyboards...
... computer, with some peripherals acting as a digital television (DTV). USB supports hot-swapping of devices so that most peripherals can be connected or disconnected without restarting the computer. 22 Notebook PC User Manual 5 HDMI HDMI Port HDMI (High-Definition Multimedia Interface) is compatible with USB 3.0, 2.0, or USB 1.1 devices such as keyboards...
User Manual
Page 34
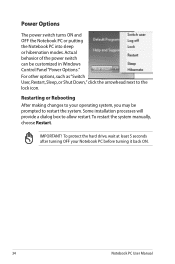
...of the power switch can be prompted to allow restart.To restart the system manually, choose Restart. IMPORTANT! Power Options The power switch turns ON and OFF the Notebook PC or putting the Notebook PC into sleep or hibernation modes. Restarting or Rebooting After making changes to your Notebook PC ...before turning it back ON. 34 Notebook PC User Manual Some installation processes will provide a dialog box to restart the system. To protect the hard drive, wait at least 5 seconds after turning OFF your operating system, you may be customized in ...
...of the power switch can be prompted to allow restart.To restart the system manually, choose Restart. IMPORTANT! Power Options The power switch turns ON and OFF the Notebook PC or putting the Notebook PC into sleep or hibernation modes. Restarting or Rebooting After making changes to your Notebook PC ...before turning it back ON. 34 Notebook PC User Manual Some installation processes will provide a dialog box to restart the system. To protect the hard drive, wait at least 5 seconds after turning OFF your operating system, you may be customized in ...
User Manual
Page 35
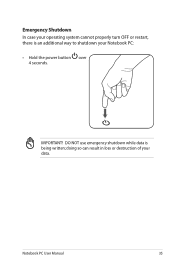
IMPORTANT! DO NOT use emergency shutdown while data is an additional way to shutdown your data. Emergency Shutdown In case your operating system cannot properly turn OFF or restart, there is being written; Notebook PC User Manual 35 doing so can result in loss or destruction of your Notebook PC: • Hold the power button over 4 seconds.
IMPORTANT! DO NOT use emergency shutdown while data is an additional way to shutdown your data. Emergency Shutdown In case your operating system cannot properly turn OFF or restart, there is being written; Notebook PC User Manual 35 doing so can result in loss or destruction of your Notebook PC: • Hold the power button over 4 seconds.
User Manual
Page 79
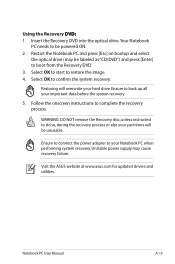
Using the Recovery D��V�D�:� 1. Select OK to be powered ON. 2. Visit the ASUS website at www.asus.com for updated drivers and utilities. Insert the Recovery DVD into the optical drive.Your Notebook PC needs to confirm the system recovery. Select OK ... be unusable. Follow the onscreen instructions to restore the image. 4. WARNING: DO NOT remove the Recovery disc, unless instructed to boot from the Recovery DVD. 3. Restart the Notebook PC and press [Esc] on bootup and select the optical drive (may cause recovery failure.
Using the Recovery D��V�D�:� 1. Select OK to be powered ON. 2. Visit the ASUS website at www.asus.com for updated drivers and utilities. Insert the Recovery DVD into the optical drive.Your Notebook PC needs to confirm the system recovery. Select OK ... be unusable. Follow the onscreen instructions to restore the image. 4. WARNING: DO NOT remove the Recovery disc, unless instructed to boot from the Recovery DVD. 3. Restart the Notebook PC and press [Esc] on bootup and select the optical drive (may cause recovery failure.

