Users Manual for English Edition
Page 3
......18 Right Side...19 Left Side...21 Front Side...22 Chapter 2: Using your Notebook PC Getting started...26 Charge your Notebook PC 26 Lift to open the display panel 28 Press the power button 28 Gestures for the touch screen panel and touchpad 29 Using touch screen panel gestures 29 Using touchpad gestures 33 Using the keyboard...40 Function keys...40 Windows® 8.1 keys...41 Multimedia control keys 42 Using the numeric keypad 43 Using the touch screen panel as a tablet 44 Notebook PC E-Manual 3
......18 Right Side...19 Left Side...21 Front Side...22 Chapter 2: Using your Notebook PC Getting started...26 Charge your Notebook PC 26 Lift to open the display panel 28 Press the power button 28 Gestures for the touch screen panel and touchpad 29 Using touch screen panel gestures 29 Using touchpad gestures 33 Using the keyboard...40 Function keys...40 Windows® 8.1 keys...41 Multimedia control keys 42 Using the numeric keypad 43 Using the touch screen panel as a tablet 44 Notebook PC E-Manual 3
Users Manual for English Edition
Page 4
... mode...68 Connecting to wired networks 69 Configuring a dynamic IP/PPPoE network connection 69 Configuring a static IP network connection 70 Turning your Notebook PC off 71 Putting your Notebook PC to sleep 71 Windows® 8.1 lock screen 72 To proceed from the lock screen 72 Customizing your lock screen 73 Chapter 4: Power-On Self-Test (POST) The Power-On Self-Test (POST 76 Using POST to access BIOS and Troubleshoot 76 BIOS...76 Accessing BIOS...76 BIOS Settings...77 Troubleshoot...87 4 Notebook PC E-Manual
... mode...68 Connecting to wired networks 69 Configuring a dynamic IP/PPPoE network connection 69 Configuring a static IP network connection 70 Turning your Notebook PC off 71 Putting your Notebook PC to sleep 71 Windows® 8.1 lock screen 72 To proceed from the lock screen 72 Customizing your lock screen 73 Chapter 4: Power-On Self-Test (POST) The Power-On Self-Test (POST 76 Using POST to access BIOS and Troubleshoot 76 BIOS...76 Accessing BIOS...76 BIOS Settings...77 Troubleshoot...87 4 Notebook PC E-Manual
Users Manual for English Edition
Page 10
Caring for your Notebook PC Disconnect the AC power and remove the battery pack (if applicable) before cleaning your Notebook PC near gas leaks. 10 Notebook PC E-Manual Do not place objects on or near your Notebook PC near liquids, rain, or moisture. Do not use or expose your Notebook PC. Do not use strong solvents such as thinners, benzene, or other...
Caring for your Notebook PC Disconnect the AC power and remove the battery pack (if applicable) before cleaning your Notebook PC near gas leaks. 10 Notebook PC E-Manual Do not place objects on or near your Notebook PC near liquids, rain, or moisture. Do not use or expose your Notebook PC. Do not use strong solvents such as thinners, benzene, or other...
Users Manual for English Edition
Page 15
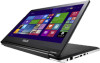
... you to operate it using your Notebook PC. This high-definition touch screen panel provides excellent viewing features for typing. It also allows you to quickly turn your Notebook PC into a tablet device, refer to the Using the touch screen panel as a tablet section in use the function keys, allows quick access to use . It allows the system to automatically adjust the brightness of ambient light in camera allows you to Windows®, and controls other multimedia...
... you to operate it using your Notebook PC. This high-definition touch screen panel provides excellent viewing features for typing. It also allows you to quickly turn your Notebook PC into a tablet device, refer to the Using the touch screen panel as a tablet section in use the function keys, allows quick access to use . It allows the system to automatically adjust the brightness of ambient light in camera allows you to Windows®, and controls other multimedia...
Users Manual for English Edition
Page 21
... the power button for about four (4) seconds until your Notebook PC. Notebook PC E-Manual 21 Left Side Windows® 8.1 button Press this button to go back to turn your Notebook PC on your Notebook PC shuts down on or off. Power button Press the power button to the Start screen. USB 2.0 ports This USB (Universal Serial Bus) port is compatible with USB 2.0 or USB 1.1 devices such as keyboards, pointing devices, flash disk drives, external HDDs, speakers, cameras and printers. You can also use the power button...
... the power button for about four (4) seconds until your Notebook PC. Notebook PC E-Manual 21 Left Side Windows® 8.1 button Press this button to go back to turn your Notebook PC on your Notebook PC shuts down on or off. Power button Press the power button to the Start screen. USB 2.0 ports This USB (Universal Serial Bus) port is compatible with USB 2.0 or USB 1.1 devices such as keyboards, pointing devices, flash disk drives, external HDDs, speakers, cameras and printers. You can also use the power button...
Users Manual for English Edition
Page 27
... the power socket. Notebook PC E-Manual 27 Read the following precautions for your Notebook PC's battery. • Only ASUS-authorized technicians should remove the battery inside the device. • The battery used in this device may have multiple rating output currents based on the available SKU. • Ensure that your Notebook PC is connected to short-circuit your Notebook PC from children. WARNING! IMPORTANT! • Locate...
... the power socket. Notebook PC E-Manual 27 Read the following precautions for your Notebook PC's battery. • Only ASUS-authorized technicians should remove the battery inside the device. • The battery used in this device may have multiple rating output currents based on the available SKU. • Ensure that your Notebook PC is connected to short-circuit your Notebook PC from children. WARNING! IMPORTANT! • Locate...
Users Manual for English Edition
Page 40
Decreases display brightness Increases display brightness Turns the display panel off Toggles the display mode NOTE: Ensure that the second display is connected to your Notebook PC's keyboard can trigger the following commands: Puts the Notebook PC into Sleep mode Turns Airplane mode on your Notebook PC. 40 Notebook PC E-Manual Using the keyboard Function keys The function keys on or off NOTE: When enabled, the Airplane mode disables all wireless connectivity.
Decreases display brightness Increases display brightness Turns the display panel off Toggles the display mode NOTE: Ensure that the second display is connected to your Notebook PC's keyboard can trigger the following commands: Puts the Notebook PC into Sleep mode Turns Airplane mode on your Notebook PC. 40 Notebook PC E-Manual Using the keyboard Function keys The function keys on or off NOTE: When enabled, the Airplane mode disables all wireless connectivity.
Users Manual for English Edition
Page 41
Enables or disables the touchpad Turns the speaker on your Notebook PC's keyboard used as below: Press this key to the last app you are two special Windows® keys on or off Turns the speaker volume down Turns the speaker volume up Windows® 8.1 keys There are already in the Start screen, press this key to go back to the Start screen. Notebook PC E-Manual 41 If you opened. Press this key to go back to simulate the right-click functions.
Enables or disables the touchpad Turns the speaker on your Notebook PC's keyboard used as below: Press this key to the last app you are two special Windows® keys on or off Turns the speaker volume down Turns the speaker volume up Windows® 8.1 keys There are already in the Start screen, press this key to go back to the Start screen. Notebook PC E-Manual 41 If you opened. Press this key to go back to simulate the right-click functions.
Users Manual for English Edition
Page 51
Notebook PC E-Manual 51 Start button Windows® 8.1 features the Start button which allows you opened. Hover your mouse pointer over the left corner of your Start button varies depending on the display settings you chose for your Start screen or any app that you to call out the Start button. The Start button may be accessed from the Start screen, while on Desktop mode, and on the Start screen NOTE: The actual color of your Start screen. Start button on any opened app to switch between the two most recent apps that is currently open onscreen.
Notebook PC E-Manual 51 Start button Windows® 8.1 features the Start button which allows you opened. Hover your mouse pointer over the left corner of your Start button varies depending on the display settings you chose for your Start screen or any app that you to call out the Start button. The Start button may be accessed from the Start screen, while on Desktop mode, and on the Start screen NOTE: The actual color of your Start screen. Start button on any opened app to switch between the two most recent apps that is currently open onscreen.
Users Manual for English Edition
Page 70
.../click OK. 70 Notebook PC E-Manual Type the IP address, Subnet mask and Default gateway from your User name, Password, and Connection name then tap/click Connect. 11. NOTE: Proceed to 5 under Configuring a dynamic IP/PPPoE network connection. 2 Tap/click Use the following IP address. 3. Type your service provider. 4. Repeat steps 1 to the next steps if you are using PPPoE connection. 7. 6. If needed, you just created. 13. Tap...
.../click OK. 70 Notebook PC E-Manual Type the IP address, Subnet mask and Default gateway from your User name, Password, and Connection name then tap/click Connect. 11. NOTE: Proceed to 5 under Configuring a dynamic IP/PPPoE network connection. 2 Tap/click Use the following IP address. 3. Type your service provider. 4. Repeat steps 1 to the next steps if you are using PPPoE connection. 7. 6. If needed, you just created. 13. Tap...
Users Manual for English Edition
Page 72
... need to key in the password to continue to your operating system. To proceed from sleep or hibernate mode. You can be customized to regulate access to the Start screen. 72 Notebook PC E-Manual Tap/click on the touchpad or press any key on your Notebook PC's keyboard. 2. (optional) If your account is password-protected, or you wake your Notebook PC is still locked. The lock screen can change its background display and access...
... need to key in the password to continue to your operating system. To proceed from sleep or hibernate mode. You can be customized to regulate access to the Start screen. 72 Notebook PC E-Manual Tap/click on the touchpad or press any key on your Notebook PC's keyboard. 2. (optional) If your account is password-protected, or you wake your Notebook PC is still locked. The lock screen can change its background display and access...
Users Manual for English Edition
Page 76
... run troubleshooting options using the function keys of your Notebook PC. Accessing BIOS Restart your Notebook PC. We strongly recommend that you can access the BIOS settings or run the BIOS Setup. • You have installed a new system component that are needed for more details. The Power-On Self-Test (POST) The Power-On Self-Test (POST) is installed as a permanent part of the Notebook PC's architecture. The software that run when you turn...
... run troubleshooting options using the function keys of your Notebook PC. Accessing BIOS Restart your Notebook PC. We strongly recommend that you can access the BIOS settings or run the BIOS Setup. • You have installed a new system component that are needed for more details. The Power-On Self-Test (POST) The Power-On Self-Test (POST) is installed as a permanent part of the Notebook PC's architecture. The software that run when you turn...
Users Manual for English Edition
Page 77
... Boot Configuration Fast Boot [Enabled] Sets the system boot order Launch CSM [Disabled] Driver Option Priorities Boot Option Priorities Boot Option #1 Add New Boot Option Delete Boot Option [Windows Boot Manager] →← : Select Screen ↑↓ : Select Item Enter: Select +/- : Change Opt. Notebook PC E-Manual 77 On the Boot screen, select Boot Option #1. You may differ by model and territory. Copyright (C) 2012 American Megatrends, Inc. F1 : General Help F9 : Optimized Defaults F10 : Save & Exit ESC : Exit Version 2.15.1226. BIOS Settings NOTE: The BIOS...
... Boot Configuration Fast Boot [Enabled] Sets the system boot order Launch CSM [Disabled] Driver Option Priorities Boot Option Priorities Boot Option #1 Add New Boot Option Delete Boot Option [Windows Boot Manager] →← : Select Screen ↑↓ : Select Item Enter: Select +/- : Change Opt. Notebook PC E-Manual 77 On the Boot screen, select Boot Option #1. You may differ by model and territory. Copyright (C) 2012 American Megatrends, Inc. F1 : General Help F9 : Optimized Defaults F10 : Save & Exit ESC : Exit Version 2.15.1226. BIOS Settings NOTE: The BIOS...
Users Manual for English Edition
Page 78
... Boot Configuration Fast Boot [Enabled] Sets the system boot order Launch CSM [Disabled] Driver Option Priorities Boot Option Priorities Boot Option #1 Boot Option #1 [WWiinnddoowwss BBoooott MMaannaaggeerr] Disabled Add New Boot Option Delete Boot Option →← : Select Screen ↑↓ : Select Item Enter: Select +/- : Change Opt. F1 : General Help F9 : Optimized Defaults F10 : Save & Exit ESC : Exit Version 2.15.1226. Copyright (C) 2012 American Megatrends, Inc. 78 Notebook PC E-Manual Copyright (C) 2012 American Megatrends, Inc. Press and select a device...
... Boot Configuration Fast Boot [Enabled] Sets the system boot order Launch CSM [Disabled] Driver Option Priorities Boot Option Priorities Boot Option #1 Boot Option #1 [WWiinnddoowwss BBoooott MMaannaaggeerr] Disabled Add New Boot Option Delete Boot Option →← : Select Screen ↑↓ : Select Item Enter: Select +/- : Change Opt. F1 : General Help F9 : Optimized Defaults F10 : Save & Exit ESC : Exit Version 2.15.1226. Copyright (C) 2012 American Megatrends, Inc. 78 Notebook PC E-Manual Copyright (C) 2012 American Megatrends, Inc. Press and select a device...
Users Manual for English Edition
Page 79
... administrator and user password of your Notebook PC's hard disk drive, input/output (I /O Interface Security System Mode state Secure Boot state Secure Boot Control Key Management NOT INSTALLED User Enabled [Enabled] →← : Select Screen ↑↓ : Select Item Enter: Select +/- : Change Opt. F1 : General Help F9 : Optimized Defaults F10 : Save & Exit ESC : Exit Version 2.15.1226. Notebook PC E-Manual 79 Aptio Setup Utility - In Setup, the User will be prompted to Setup and is a power on password and...
... administrator and user password of your Notebook PC's hard disk drive, input/output (I /O Interface Security System Mode state Secure Boot state Secure Boot Control Key Management NOT INSTALLED User Enabled [Enabled] →← : Select Screen ↑↓ : Select Item Enter: Select +/- : Change Opt. F1 : General Help F9 : Optimized Defaults F10 : Save & Exit ESC : Exit Version 2.15.1226. Notebook PC E-Manual 79 Aptio Setup Utility - In Setup, the User will be prompted to Setup and is a power on password and...
Users Manual for English Edition
Page 82
... an interface that you can also access USB Interface Security to lock or unlock ports and devices. To lock the USB interface: 1. Security USB Interface Security USB Interface [UnLock] If Locked, all USB device will be disabled External Ports [UnLock] CMOS Camera [UnLock] Card Reader Lock [UnLock] USB Interface UnLock →← : Select Screen ↑↓ : Select Item Enter: Select +/- : Change Opt. Copyright (C) 2012 American Megatrends, Inc. NOTE: Setting the USB Interface to lock then select Lock. USB Interface Security Through the I /O Interface Security...
... an interface that you can also access USB Interface Security to lock or unlock ports and devices. To lock the USB interface: 1. Security USB Interface Security USB Interface [UnLock] If Locked, all USB device will be disabled External Ports [UnLock] CMOS Camera [UnLock] Card Reader Lock [UnLock] USB Interface UnLock →← : Select Screen ↑↓ : Select Item Enter: Select +/- : Change Opt. Copyright (C) 2012 American Megatrends, Inc. NOTE: Setting the USB Interface to lock then select Lock. USB Interface Security Through the I /O Interface Security...
Users Manual for English Edition
Page 83
...when entering Setup. In Setup, the User will have Administrator rights. Set Master Password In the Security menu, you can use Set Master Password to set up the user password. To set up a password-enabled access to Power Cycle System after Setting Hard Disk Passwords*** Administrator Password Status NOT INSTALLED User Password Status NOT INSTALLED Administrator Password User Password HDD Password Status : NOT INSTALLED Set Master Password Set User Password I/O Interface Security →← : Select Screen ↑↓ : Select Item Enter: Select +/- : Change Opt. Type...
...when entering Setup. In Setup, the User will have Administrator rights. Set Master Password In the Security menu, you can use Set Master Password to set up the user password. To set up a password-enabled access to Power Cycle System after Setting Hard Disk Passwords*** Administrator Password Status NOT INSTALLED User Password Status NOT INSTALLED Administrator Password User Password HDD Password Status : NOT INSTALLED Set Master Password Set User Password I/O Interface Security →← : Select Screen ↑↓ : Select Item Enter: Select +/- : Change Opt. Type...
Users Manual for English Edition
Page 85
... the downloaded BIOS file to select and update BIOS. →← : Select Screen ↑↓ : Select Item Enter: Select +/- : Change Opt. From the BIOS menu, Select Advanced > Start Easy Flash, then press . Start Easy Flash Internal Pointing Device [Enabled] Wake on Lid Open [Enabled] Power Off Energy Saving [Enabled] SATA Configuration Graphics Configuration Intel (R) Anti-Theft Technology Corporation USB Configuration Network Stack Press Enter to run the utility to a flash disk drive. 3. Verify the Notebook PC's exact model then download the latest BIOS file...
... the downloaded BIOS file to select and update BIOS. →← : Select Screen ↑↓ : Select Item Enter: Select +/- : Change Opt. From the BIOS menu, Select Advanced > Start Easy Flash, then press . Start Easy Flash Internal Pointing Device [Enabled] Wake on Lid Open [Enabled] Power Off Energy Saving [Enabled] SATA Configuration Graphics Configuration Intel (R) Anti-Theft Technology Corporation USB Configuration Network Stack Press Enter to run the utility to a flash disk drive. 3. Verify the Notebook PC's exact model then download the latest BIOS file...
Users Manual for English Edition
Page 90
4. Type your Notebook PC stops working. 90 Notebook PC E-Manual Follow the succeeding steps to recover using a system image file. 6. NOTE: We strongly recommend that you would like to complete the system image recovery procedure. In the Advanced options screen, select System Image Recovery. 5. Choose an account you regularly backup your system to prevent data loss in an external device or DVD. 8. Select Use the latest available...
4. Type your Notebook PC stops working. 90 Notebook PC E-Manual Follow the succeeding steps to recover using a system image file. 6. NOTE: We strongly recommend that you would like to complete the system image recovery procedure. In the Advanced options screen, select System Image Recovery. 5. Choose an account you regularly backup your system to prevent data loss in an external device or DVD. 8. Select Use the latest available...
Users Manual for English Edition
Page 110
... for easy upgrades and longer lifetime through takeback policy. All ASUS products with the ENERGY STAR logo comply with the ENERGY STAR standard, and the power management feature is enabled by modes. 2. Limited use and stand-by default. Reduced solid waste through providing compatible spare parts such as batteries, power supplies, the keyboard, the memory, and if available the CD drive or DVD drive. 6. Department of...
... for easy upgrades and longer lifetime through takeback policy. All ASUS products with the ENERGY STAR logo comply with the ENERGY STAR standard, and the power management feature is enabled by modes. 2. Limited use and stand-by default. Reduced solid waste through providing compatible spare parts such as batteries, power supplies, the keyboard, the memory, and if available the CD drive or DVD drive. 6. Department of...


