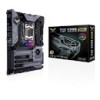
TUF X299 MARK 1 Users ManualEnglish
Page 14
... motherboard package for the following items. Motherboard Cables Accessories Application DVD Documentation ASUS TUF X299 MARK 1 motherboard 4 x Serial ATA 6.0 Gb/s cables 1 x SLI HB BRIDGE(2-WAY-M) 1 x SLI BRIDGE(3-WAY) 1 x Q-Connector 1 x M.2 vertical bracket 1 x M.2 screw package 1 x ASUS Q-Shield 1 x TUF VGA holder 1 x TUF Dongle 1 x TUF INSIDE sticker 1 x STAY COOL BE TUF sticker 1 x TUF accessory package - 3 x PCIe x16 slot dust covers - 1 x PCIe x4 slot dust...
TUF X299 MARK 1 Users ManualEnglish
Page 17
ASUS TUF X299 MARK 1 1-1 Failure to do so may cause severe damage to avoid touching the ICs on them. • Whenever you uninstall any component, place it on a grounded ...
TUF X299 MARK 1 Users ManualEnglish
Page 19
...) 9. DDR4 DIMM slots 2. Thermal sensor connector (2-pin T_SENSOR1-3) Page 1-5 1-18 1-19 1-4 1-9 1-15 1-16 1-14 1-12 1-20 1-22 1-17 1-21 1-23 1-21 1-10 1-11 1-15 1-17 ASUS TUF X299 MARK 1 1-3 CPU, CPU optional, assistant, water pump+, high amp, and chassis fan connectors (4-pin CPU_FAN; 4-pin CPU_OPT; 4-pin ASST_FAN; 4-pin W_PUMP+; 4-pin H_AMP_FAN; 4-pin CHA_FAN1-5) 3.
TUF X299 MARK 1 Users ManualEnglish
Page 21
A DDR4 module is notched differently from a DDR, DDR2, or DDR3 module. DO NOT install a DDR, DDR2, or DDR3 memory module to the DDR4 slot. Chapter 1 1.1.4 System memory The motherboard comes with eight DDR4 (Double Data Rate 4) Dual Inline Memory Modules (DIMM) slots. Recommended memory configurations Intel® Core™ X-series Processors (6-core or above) ASUS TUF X299 MARK 1 1-5
TUF X299 MARK 1 Users ManualEnglish
Page 23
Failure to do so may cause you physical injury and damage motherboard components. 1.1.5 Expansion slots Unplug the power cord before adding or removing expansion cards. Chapter 1 Slot No. 1 2 3 4 5 Slot Description PCIE 3.0/2.0 x16_1 slot PCIE 3.0/2.0 x4_1 slot PCIE 3.0/2.0 x16_2 slot PCIE 3.0/2.0 x4_2 slot PCIE 3.0/2.0 x16_3 slot ASUS TUF X299 MARK 1 1-7
TUF X299 MARK 1 Users ManualEnglish
Page 25
... default settings. • We recommend that are not compatible with ones recommended in the Memory QVL (Qualified Vendors Lists) at www.asus.com. • If you turn off the computer and unplug the power cord for about 30 seconds for the system to test...speed of failsafe settings. Replace the DIMMs with the motherboard may cause system boot failure. function. MemOK! button until the DRAM_LED starts blinking. ASUS TUF X299 MARK 1 1-9 System will appear during POST stage and the DRAM_LED near the MemOK! A message will begin automatic memory compatibility tuning and reboot for ...
TUF X299 MARK 1 Users ManualEnglish
Page 27
... a metal object or jumper cap again to clear the Real Time Clock (RTC) RAM in CMOS, which include system setup information such as system passwords. ASUS TUF X299 MARK 1 1-11 Hold down and reboot the system so the BIOS can clear the CMOS memory of date, time, and system setup parameters by erasing the...
TUF X299 MARK 1 Users ManualEnglish
Page 29
POST State LEDs The POST State LEDs provide the status of the onboard LED. The LED lights up until the problem is solved. 2. ASUS TUF X299 MARK 1 1-13 This is ON, in sleep mode, or in any motherboard component. Standby Power LED The motherboard comes with a standby power LED. Chapter 1 1.1.8 Onboard LEDs 1. ...
TUF X299 MARK 1 Users ManualEnglish
Page 31
Connect one end of the front panel audio I /O module that you to avail of up to this connector. ASUS TUF X299 MARK 1 1-15 We recommend that supports HD Audio. Chapter 1 2. Front panel audio connector (10-1 pin AAFP) This connector is for a chassis-mounted front panel audio I /O module ...
TUF X299 MARK 1 Users ManualEnglish
Page 33
Chapter 1 5. ASUS TUF X299 MARK 1 1-17 USB 2.0 connector (10-1 pin USB1314) This connector is for the thermistor cable that supports up to detect its temperature. Connect the thermistor cable and ...
TUF X299 MARK 1 Users ManualEnglish
Page 35
... is inadequate. • If you use a PSU with more power-consuming devices. Find the proper orientation and push down firmly until the connectors completely fit. 8. ASUS TUF X299 MARK 1 1-19 The system may become unstable or may overheat under heavy usage. • Ensure to connect the 8-pin power plug, or connect both the 8-pin...
TUF X299 MARK 1 Users ManualEnglish
Page 37
... supports Intel's Thunderbolt Technology, allowing you to connect a KEY module to six Thunderbolt-enabled devices and a DisplayPort-enabled display in a daisy-chain configuration. Chapter 1 10. ASUS TUF X299 MARK 1 1-21
TUF X299 MARK 1 Users ManualEnglish
Page 39
Before you install or remove any component, ensure that the ATX power supply is switched off or the power cord is for RGB LED strips. ASUS TUF X299 MARK 1 1-23 Chapter 1 The RGB header supports 5050 RGB multi-color LED strips (12V/G/R/B), with the 12V header on the motherboard. • The LED strip will ...
TUF X299 MARK 1 Users ManualEnglish
Page 41
Chapter 2: Basic Installation Basic Installation 2.1 Building your PC system 2 The diagrams in this section are for all models. 2.1.1 Motherboard installation 1. Chapter 2 ASUS TUF X299 MARK 1 2-1 Install the ASUS Q-Shield to the chassis' rear I/O panel. Place the motherboard into the chassis, ensuring that its rear I /O panel. 2. The motherboard layout may vary with models, but the installation steps are aligned to the chassis rear I /O ports are the same for reference only.
TUF X299 MARK 1 Users ManualEnglish
Page 43
Follow the instructions printed on the metal sealing hatch or the illustrations shown below in place and the hatch properly sealed down. Chapter 2 ASUS TUF X299 MARK 1 2-3 The plastic cap will pop up automatically once the CPU is in this manual. 2.1.2 CPU installation Please note the order in opening/ closing the double latch.
TUF X299 MARK 1 Users ManualEnglish
Page 45
2.1.3 CPU heatsink and fan assembly installation Apply the Thermal Interface Material to the CPU heatsink and CPU before you install the heatsink and fan, if necessary. To install the CPU heatsink and fan assembly Chapter 2 ASUS TUF X299 MARK 1 2-5
TUF X299 MARK 1 Users ManualEnglish
Page 47
ASUS TUF X299 MARK 1 2-7 2.1.5 ATX power connection Chapter 2 OR AND • DO NOT connect the 4-pin power plug only, the motherboard may overheat under heavy usage. • Ensure to connect the 8-pin power plug, or connect both the 8-pin and 4-pin power plugs.
TUF X299 MARK 1 Users ManualEnglish
Page 49
Chapter 2 2.1.7 Front I/O connector To install ASUS Q-Connector To install USB 3.1 Gen 2 connector USB 3.1 Gen 2 This connector will only fit in one orientation. To install USB 3.1 Gen 1 connector To install USB 2.0 connector USB 3.1 Gen 1 To install front panel audio connector USB 2.0 AAFP ASUS TUF X299 MARK 1 2-9 Push the connector until it clicks into place.
TUF X299 MARK 1 Users ManualEnglish
Page 51
ASUS TUF X299 MARK 1 2-11 2.1.9 M.2 installation OR Chapter 2 6 Supported M.2 type varies per motherboard.
TUF X299 MARK 1 Users ManualEnglish
Page 53
... supports USB BIOS Flashback) 3. USB 3.1 Gen 2 Type-A port E2 5. Audio I /O connection Chapter 2 Rear panel connectors 1. ASUS TUF X299 MARK 1 2-13 2.3 Motherboard rear and audio connections 2.3.1 Rear I /O ports** *and **: Refer to ports with matching data transfer rate. TUF Detective port (supports TUF Detective 2 only) 4. USB 3.1 Gen 2 Type-C™ port EC1 8. USB BIOS Flashback button 2. Intel® LAN...