
User Guide
Page 2
...SUBJECT TO CHANGE AT ANY TIME WITHOUT NOTICE, AND SHOULD NOT BE CONSTRUED AS A COMMITMENT BY ASUS. ASUS ASSUMES NO RESPONSIBILITY OR LIABILITY FOR ANY ERRORS OR INACCURACIES THAT MAY APPEAR IN THIS MANUAL, INCLUDING THE PRODUCTS AND SOFTWARE DESCRIBED IN IT. E5071 Second Edition September 2009 Copyright © ...2009 ASUSTeK COMPUTER INC. ASUS PROVIDES THIS MANUAL "AS IS" WITHOUT WARRANTY OF ANY KIND, EITHER EXPRESS OR IMPLIED, INCLUDING BUT NOT LIMITED TO THE IMPLIED WARRANTIES OR CONDITIONS...
...SUBJECT TO CHANGE AT ANY TIME WITHOUT NOTICE, AND SHOULD NOT BE CONSTRUED AS A COMMITMENT BY ASUS. ASUS ASSUMES NO RESPONSIBILITY OR LIABILITY FOR ANY ERRORS OR INACCURACIES THAT MAY APPEAR IN THIS MANUAL, INCLUDING THE PRODUCTS AND SOFTWARE DESCRIBED IN IT. E5071 Second Edition September 2009 Copyright © ...2009 ASUSTeK COMPUTER INC. ASUS PROVIDES THIS MANUAL "AS IS" WITHOUT WARRANTY OF ANY KIND, EITHER EXPRESS OR IMPLIED, INCLUDING BUT NOT LIMITED TO THE IMPLIED WARRANTIES OR CONDITIONS...

User Guide
Page 6
CDROM Drives 3-34 3.7.3 Boot Settings Configuration 3-35 3.7.4 Security 3-36 3.8 Tools menu 3-38 3.8.1 ASUS O.C. Contents 3.5.7 T.Probe [Disabled 3-28 3.6 Power menu 3-29 3.6.1 Suspend Mode [Auto 3-29 3.6.2 Repost Video on S3 Resume [No 3-... [Disabled 3-30 3.6.7 Hardware Monitor 3-32 3.7 Boot menu 3-34 3.7.1 Boot Device Priority 3-34 3.7.2 Hard Disk Drives; Profile 3-38 3.8.2 AI NET 2 3-39 3.8.3 ASUS EZ Flash 2 3-40 3.8.4 Express Gate 3-40 3.9 Exit menu 3-42 Chapter 4: Software support 4.1 Installing an operating system 4-1 4.2 Support DVD information 4-1 4.2.1 Running the...
CDROM Drives 3-34 3.7.3 Boot Settings Configuration 3-35 3.7.4 Security 3-36 3.8 Tools menu 3-38 3.8.1 ASUS O.C. Contents 3.5.7 T.Probe [Disabled 3-28 3.6 Power menu 3-29 3.6.1 Suspend Mode [Auto 3-29 3.6.2 Repost Video on S3 Resume [No 3-... [Disabled 3-30 3.6.7 Hardware Monitor 3-32 3.7 Boot menu 3-34 3.7.1 Boot Device Priority 3-34 3.7.2 Hard Disk Drives; Profile 3-38 3.8.2 AI NET 2 3-39 3.8.3 ASUS EZ Flash 2 3-40 3.8.4 Express Gate 3-40 3.9 Exit menu 3-42 Chapter 4: Software support 4.1 Installing an operating system 4-1 4.2 Support DVD information 4-1 4.2.1 Running the...

User Guide
Page 9
.... • Seek professional assistance before using , contact your local power company. • If the power supply is set to fix it , carefully read all the manuals that all cables are correctly connected and the power cables are using an adapter or extension cord. Safety information Electrical safety • To prevent electrical...
.... • Seek professional assistance before using , contact your local power company. • If the power supply is set to fix it , carefully read all the manuals that all cables are correctly connected and the power cables are using an adapter or extension cord. Safety information Electrical safety • To prevent electrical...

User Guide
Page 11
...: Information to prevent damage to the components when trying to help you perform certain tasks properly, take note of the following symbols used throughout this manual. Example: Means that you complete a task. Example: At the DOS prompt, type the command line: BUPDATER /iP7P55WSSC.ROM xi NOTE: Tips and additional information to...
...: Information to prevent damage to the components when trying to help you perform certain tasks properly, take note of the following symbols used throughout this manual. Example: Means that you complete a task. Example: At the DOS prompt, type the command line: BUPDATER /iP7P55WSSC.ROM xi NOTE: Tips and additional information to...

User Guide
Page 36
.... For effective use of accessing information from the same vendor. • Due to the memory address limitation on the motherboard, the actual usable memory for manual memory frequency adjustment. • For system stability, use a more details, refer to Intel CPU spec, DIMMs with the same CAS latency.
.... For effective use of accessing information from the same vendor. • Due to the memory address limitation on the motherboard, the actual usable memory for manual memory frequency adjustment. • For system stability, use a more details, refer to Intel CPU spec, DIMMs with the same CAS latency.

User Guide
Page 58
...MemOK! function. 2-34 Chapter 2: Hardware information switch Installing DIMMs that you download and update to the latest BIOS version from the ASUS website at www.asus.com. • If you to fine-tune performance when working on a bare or open-case system. function. • ...asus.com after using the MemOK! To stop memory tuning, turn off the computer and replace DIMMs during POST reminding you that the BIOS has been restored to its default settings. • We recommend that are incompaible with ones recommended in the Memory QVL (Qualified Vendors Lists) in this user manual...
...MemOK! function. 2-34 Chapter 2: Hardware information switch Installing DIMMs that you download and update to the latest BIOS version from the ASUS website at www.asus.com. • If you to fine-tune performance when working on a bare or open-case system. function. • ...asus.com after using the MemOK! To stop memory tuning, turn off the computer and replace DIMMs during POST reminding you that the BIOS has been restored to its default settings. • We recommend that are incompaible with ones recommended in the Memory QVL (Qualified Vendors Lists) in this user manual...

User Guide
Page 80
... options: [High Performance] [High Frequency] To obtain the best performance of the X.M.P. DIMM or 1600MHz DIMM, install only one of the preset overclocking configuration options: Manual Auto D.O.C.P X.M.P. Use the and keys to DRAM frequency, DRAM timing and DRAM voltage. Allows you to individually set the Ai Overclock Tuner item to [X.M.P.] and...
... options: [High Performance] [High Frequency] To obtain the best performance of the X.M.P. DIMM or 1600MHz DIMM, install only one of the preset overclocking configuration options: Manual Auto D.O.C.P X.M.P. Use the and keys to DRAM frequency, DRAM timing and DRAM voltage. Allows you to individually set the Ai Overclock Tuner item to [X.M.P.] and...

User Guide
Page 81
...[Auto] [4270MHz] [4800MHz] 3.4.8 OC Tuner Utility Press the key to ensure the best CPU O.C. BCLK Frequency [XXX] Allows you to [Manual], [D.O.C.P.] or [X.M.P.]. If this item to start automatic system overclocking. The OC Tuner Utility automatically adjust system parameters and reboots several times for the best...PCIE Frequency [XXX] Allows you to adjust the PCIE frequency. Selecting a very high DRAM frequency may cause the system to 500. ASUS P7P55 WS Supercomputer 3-17 The values range from 100 to 200. 3.4.6 DRAM Frequency [Auto] Allows you to adjust the value. Use the and ...
...[Auto] [4270MHz] [4800MHz] 3.4.8 OC Tuner Utility Press the key to ensure the best CPU O.C. BCLK Frequency [XXX] Allows you to [Manual], [D.O.C.P.] or [X.M.P.]. If this item to start automatic system overclocking. The OC Tuner Utility automatically adjust system parameters and reboots several times for the best...PCIE Frequency [XXX] Allows you to adjust the PCIE frequency. Selecting a very high DRAM frequency may cause the system to 500. ASUS P7P55 WS Supercomputer 3-17 The values range from 100 to 200. 3.4.6 DRAM Frequency [Auto] Allows you to adjust the value. Use the and ...

User Guide
Page 84
...default setting, type [auto] using the numeric keypad and press the key. The values range from 1.1V to set the CPU Voltage Mode item to [Manual] and allows you to 1.9V* with a 0.00625V interval. 3-20 Chapter 3: BIOS setup The values range from 0.85V to 0.50000V with a ...CPU documentation before setting the CPU Vcore voltage. The values range from 0.00625V to 2.10V* with a 0.00625V interval. Configuration options: [Offset] [Manual] Offset Voltage [Auto] This item appears only when you set a fixed CPU voltage. Different sub-items appear according to set the CPU Voltage Mode...
...default setting, type [auto] using the numeric keypad and press the key. The values range from 1.1V to set the CPU Voltage Mode item to [Manual] and allows you to 1.9V* with a 0.00625V interval. 3-20 Chapter 3: BIOS setup The values range from 0.85V to 0.50000V with a ...CPU documentation before setting the CPU Vcore voltage. The values range from 0.00625V to 2.10V* with a 0.00625V interval. Configuration options: [Offset] [Manual] Offset Voltage [Auto] This item appears only when you set a fixed CPU voltage. Different sub-items appear according to set the CPU Voltage Mode...

User Guide
Page 112
Install the Adobe® Acrobat® Reader from the Utilities menu before opening a user manual file. 4-4 Chapter 4: Software support Intel AHCI/RAID Driver Allows you to open the folder of supplementary user manuals. Click an item to create an AHCI/RAID Driver disk. 4.2.5 Manual menu The Manuals menu contains a list of the user manual. Most user manual files are in Portable Document Format (PDF). 4.2.4 Make disk menu The Make disk menu contains items to create the Intel RAID driver disk.
Install the Adobe® Acrobat® Reader from the Utilities menu before opening a user manual file. 4-4 Chapter 4: Software support Intel AHCI/RAID Driver Allows you to open the folder of supplementary user manuals. Click an item to create an AHCI/RAID Driver disk. 4.2.5 Manual menu The Manuals menu contains a list of the user manual. Most user manual files are in Portable Document Format (PDF). 4.2.4 Make disk menu The Make disk menu contains items to create the Intel RAID driver disk.
User Guide
Page 127
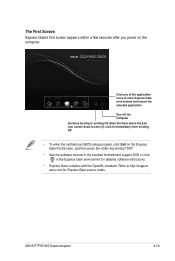
... during POST. • See the software manual in the bundled motherboard support DVD or click in the Express Gate environment for Express Gate source codes. click to immediately enter existing OS • To enter the motherboard BIOS setup program, click Exit on the computer. ASUS P7P55 WS Supercomputer 4-19 Click any of the application icons...
... during POST. • See the software manual in the bundled motherboard support DVD or click in the Express Gate environment for Express Gate source codes. click to immediately enter existing OS • To enter the motherboard BIOS setup program, click Exit on the computer. ASUS P7P55 WS Supercomputer 4-19 Click any of the application icons...

User Guide
Page 128
...to run at lower temperatures and extending their lifespan. Save BIOS settings and restart the computer. Refer to Chapter 3 of the motherboard user manual for detailed instructions of the power phase gradually levels to the center AVG (average) area. With T.Probe enabled, the temperature of BIOS settings... on your computer has an enabled Autorun feature. 2. Press during the Power-On Self Test (POST) to configure BIOS settings before using ASUS T.Probe. 1. Set the T.Probe item in real-time. With T.Probe enabled, select "Power Saving Mode" on motherboard model. 4-20 Chapter 4: Software ...
...to run at lower temperatures and extending their lifespan. Save BIOS settings and restart the computer. Refer to Chapter 3 of the motherboard user manual for detailed instructions of the power phase gradually levels to the center AVG (average) area. With T.Probe enabled, the temperature of BIOS settings... on your computer has an enabled Autorun feature. 2. Press during the Power-On Self Test (POST) to configure BIOS settings before using ASUS T.Probe. 1. Set the T.Probe item in real-time. With T.Probe enabled, select "Power Saving Mode" on motherboard model. 4-20 Chapter 4: Software ...

User Guide
Page 129
... and will find the TurboV EVO icon on the next system boot. For system stability, all changes immediately ASUS P7P55 WS Supercomputer 4-21 Refer to the software manual in realtime without applying Applies all changes made in ASUS TurboV (except for Auto Tuning) will not be saved to overclock the BCLK frequency, CPU voltage, IMC voltage...
... and will find the TurboV EVO icon on the next system boot. For system stability, all changes immediately ASUS P7P55 WS Supercomputer 4-21 Refer to the software manual in realtime without applying Applies all changes made in ASUS TurboV (except for Auto Tuning) will not be saved to overclock the BCLK frequency, CPU voltage, IMC voltage...

User Guide
Page 131
Please do not operate or manually restart the computer during the tuning process. • After restarting ... An animation appears indicating the overclocking process. Installation of hot-keys into physical overclocking buttons. Using ASUS Turbo Key ASUS Turbo Key allows the user to set a group of advanced cooling systems is correctly installed, you ...EVO to 3 times. Click the Turbo Key tab to switch to display the TurboV EVO control panel. ASUS P7P55 WS Supercomputer 4-23 You can boost performances without interrupting ongoing work or games-with just one touch! Click Stop ...
Please do not operate or manually restart the computer during the tuning process. • After restarting ... An animation appears indicating the overclocking process. Installation of hot-keys into physical overclocking buttons. Using ASUS Turbo Key ASUS Turbo Key allows the user to set a group of advanced cooling systems is correctly installed, you ...EVO to 3 times. Click the Turbo Key tab to switch to display the TurboV EVO control panel. ASUS P7P55 WS Supercomputer 4-23 You can boost performances without interrupting ongoing work or games-with just one touch! Click Stop ...

User Guide
Page 146
... cards and the motherboard layout may vary with models, but the installation steps remain the same. 1. Ensure that the connector is firmly in this user manual for the locations of the PCIEX16 slots recommended for reference only. Connect a VGA or a DVI cable to the two graphics cards separately. 6. Prepare two CrossFireX...
... cards and the motherboard layout may vary with models, but the installation steps remain the same. 1. Ensure that the connector is firmly in this user manual for the locations of the PCIEX16 slots recommended for reference only. Connect a VGA or a DVI cable to the two graphics cards separately. 6. Prepare two CrossFireX...

User Guide
Page 150
If your motherboard has more than two PCIEX16 slots, refer to the two graphics cards separately. 6. Ensure that the connector is firmly in this user manual for the locations of the PCIEX16 slots recommended for reference only. SLI bridge Goldfingers 5-6 Chapter 5: Multiple GPU technology support Connect two independent auxiliary power sources ...
If your motherboard has more than two PCIEX16 slots, refer to the two graphics cards separately. 6. Ensure that the connector is firmly in this user manual for the locations of the PCIEX16 slots recommended for reference only. SLI bridge Goldfingers 5-6 Chapter 5: Multiple GPU technology support Connect two independent auxiliary power sources ...

User Guide
Page 151
Connect three independent auxiliary power sources from the power supply to the graphics card. 3-Way SLI bridge ASUS P7P55 WS SuperComputer 5-7 Prepare three SLI-ready graphics cards. 2. Connect a VGA or a DVI cable to the three graphics cards separately. 6. Align and firmly...the three graphics card into the PCIEX16 slots. 5.2.3 Installing three SLI-ready graphics cards 1. Ensure that the connector is firmly in this user manual for the locations of the PCIEX16 slots recommended for multi-graphics card installation. 3. Ensure that the cards are properly seated on each graphics ...
Connect three independent auxiliary power sources from the power supply to the graphics card. 3-Way SLI bridge ASUS P7P55 WS SuperComputer 5-7 Prepare three SLI-ready graphics cards. 2. Connect a VGA or a DVI cable to the three graphics cards separately. 6. Align and firmly...the three graphics card into the PCIEX16 slots. 5.2.3 Installing three SLI-ready graphics cards 1. Ensure that the connector is firmly in this user manual for the locations of the PCIEX16 slots recommended for multi-graphics card installation. 3. Ensure that the cards are properly seated on each graphics ...


