

Motherboard DIY Troubleshooting Guide
Page 25
Carte mère ASUS Série P4 1-7 PWR Ground Reset Ground IDE_LED RESET PWRSW *Re*qRueiequrtireusnaenaAlTimXepnowtaetriosnupApTlyX. P4S8X-MX PS/2KBMS T: Mouse B: Keyboard COM1 KBPWR Socket 478 CPU_FAN1 Super I/O 4Mb BIOS SEC_IDE PRI_IDE FLOPPY P4S8X-MX DDR DIMM1 (64 bit,184-pin module) DDR DIMM2 (64 bit,184-pin module) PARALLEL PORT VGA USB12 ATXPWR USB34 TOP RJ...
Carte mère ASUS Série P4 1-7 PWR Ground Reset Ground IDE_LED RESET PWRSW *Re*qRueiequrtireusnaenaAlTimXepnowtaetriosnupApTlyX. P4S8X-MX PS/2KBMS T: Mouse B: Keyboard COM1 KBPWR Socket 478 CPU_FAN1 Super I/O 4Mb BIOS SEC_IDE PRI_IDE FLOPPY P4S8X-MX DDR DIMM1 (64 bit,184-pin module) DDR DIMM2 (64 bit,184-pin module) PARALLEL PORT VGA USB12 ATXPWR USB34 TOP RJ...

Motherboard DIY Troubleshooting Guide
Page 26
... PS/2KBMS T: Mouse B: Keyboard COM1 KBPWR Socket 478 CPU_FAN1 Super I/O 4Mb BIOS SEC_IDE PRI_IDE FLOPPY P4S800-MX SE DDR DIMM1 (64 bit,184-pin module) DDR DIMM2 (64 bit,184-pin module) PARALLEL PORT VGA USB1 USB2 ATXPWR USB2.0 T:USB3 B:USB4 TOP ...
... PS/2KBMS T: Mouse B: Keyboard COM1 KBPWR Socket 478 CPU_FAN1 Super I/O 4Mb BIOS SEC_IDE PRI_IDE FLOPPY P4S800-MX SE DDR DIMM1 (64 bit,184-pin module) DDR DIMM2 (64 bit,184-pin module) PARALLEL PORT VGA USB1 USB2 ATXPWR USB2.0 T:USB3 B:USB4 TOP ...

P4S8X-MX English User Manaul E1997
Page 4
... 2.1 Managing and updating your BIOS 2-2 2.1.1 Creating a bootable floppy disk 2-2 2.1.2 ASUS EZ Flash utility 2-3 2.1.3 AFUDOS utility 2-4 2.1.4 ASUS CrashFree BIOS 2 utility 2-6 2.1.5 ASUS Update utility 2-8 2.2 BIOS setup program 2-11 2.2.1 BIOS menu screen 2-12 2.2.2 Menu bar 2-12 2.2.3 Navigation keys 2-12 2.2.4 Menu items 2-13 2.2.5 Sub-menu items 2-13 2.2.6 Configuration fields 2-13 2.2.7 Pop-up window 2-13 2.2.8 Scroll bar 2-...
... 2.1 Managing and updating your BIOS 2-2 2.1.1 Creating a bootable floppy disk 2-2 2.1.2 ASUS EZ Flash utility 2-3 2.1.3 AFUDOS utility 2-4 2.1.4 ASUS CrashFree BIOS 2 utility 2-6 2.1.5 ASUS Update utility 2-8 2.2 BIOS setup program 2-11 2.2.1 BIOS menu screen 2-12 2.2.2 Menu bar 2-12 2.2.3 Navigation keys 2-12 2.2.4 Menu items 2-13 2.2.5 Sub-menu items 2-13 2.2.6 Configuration fields 2-13 2.2.7 Pop-up window 2-13 2.2.8 Scroll bar 2-...

P4S8X-MX English User Manaul E1997
Page 8
When using an FSB800 CPU with 400 MHz DDR memory, the motherboard runs at 333 MHz by default. 2. viii P4S8X-MX specifications summary CPU Chipset Front Side Bus Memory Expansion slots Graphics Storage Audio LAN Overclocking USB Special features Socket 478 for Intel® Pentium&#... Selection (SFS) from 100 MHz up to 200 MHz at 1 MHz increment AGP/PCI Asynchronous Mode with FSB ASUS C.P.R. (CPU Parameter Recall) Supports up to 8 USB 2.0 ports ASUS CrashFree BIOS 2 ASUS EZ Flash ASUS MyLogo2™ (continued on the next page) * The motherboard runs at 400 MHz. When using an FSB533 ...
When using an FSB800 CPU with 400 MHz DDR memory, the motherboard runs at 333 MHz by default. 2. viii P4S8X-MX specifications summary CPU Chipset Front Side Bus Memory Expansion slots Graphics Storage Audio LAN Overclocking USB Special features Socket 478 for Intel® Pentium&#... Selection (SFS) from 100 MHz up to 200 MHz at 1 MHz increment AGP/PCI Asynchronous Mode with FSB ASUS C.P.R. (CPU Parameter Recall) Supports up to 8 USB 2.0 ports ASUS CrashFree BIOS 2 ASUS EZ Flash ASUS MyLogo2™ (continued on the next page) * The motherboard runs at 400 MHz. When using an FSB533 ...

P4S8X-MX English User Manaul E1997
Page 9
ix P4S8X-MX specifications summary BIOS features Rear panel Internal connectors Power Requirement Form Factor Support CD contents 4 Mb Flash ROM, AMI BIOS, Green, PnP, DMI2.0, SM BIOS 2.3, WfM2.0, ACPI 2.0 1 x Parallel port 1 x LAN (RJ-45) port 4 x USB 2.0 ports 1 x VGA port 1 x Serial port (COM) 1 x PS/2 keyboard port 1 x ... 12 V plugs) ATX 12 V 2.0 compliant ATX form factor: 9.6 in x 9.6 in (24.5 cm x 24.5 cm) Device drivers ASUS PC Probe ASUS Live Update utility ASUS Screensaver Adobe Acrobat Reader Anti-virus software (OEM version) *Specifications are subject to change without notice.
ix P4S8X-MX specifications summary BIOS features Rear panel Internal connectors Power Requirement Form Factor Support CD contents 4 Mb Flash ROM, AMI BIOS, Green, PnP, DMI2.0, SM BIOS 2.3, WfM2.0, ACPI 2.0 1 x Parallel port 1 x LAN (RJ-45) port 4 x USB 2.0 ports 1 x VGA port 1 x Serial port (COM) 1 x PS/2 keyboard port 1 x ... 12 V plugs) ATX 12 V 2.0 compliant ATX form factor: 9.6 in x 9.6 in (24.5 cm x 24.5 cm) Device drivers ASUS PC Probe ASUS Live Update utility ASUS Screensaver Adobe Acrobat Reader Anti-virus software (OEM version) *Specifications are subject to change without notice.
P4S8X-MX English User Manaul E1997
Page 14
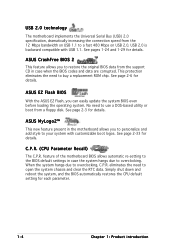
... a replacement ROM chip. Simply shut down and reboot the system, and the BIOS automatically restores the CPU default setting for details. USB 2.0 is backward compatible with customizable boot logos. ASUS EZ Flash BIOS With the ASUS EZ Flash, you to personalize and add style to a fast 480 Mbps on... USB 1.1 to your system with USB 1.1. ASUS CrashFree BIOS 2 This feature allows you to use a DOS-based utility or ...
... a replacement ROM chip. Simply shut down and reboot the system, and the BIOS automatically restores the CPU default setting for details. USB 2.0 is backward compatible with customizable boot logos. ASUS EZ Flash BIOS With the ASUS EZ Flash, you to personalize and add style to a fast 480 Mbps on... USB 1.1 to your system with USB 1.1. ASUS CrashFree BIOS 2 This feature allows you to use a DOS-based utility or ...

P4S8X-MX English User Manaul E1997
Page 16
24.5cm (9.6in) 1.5 Motherboard overview 1.5.1 Motherboard layout PS/2KBMS T: Mouse B: Keyboard COM1 KBPWR 24.5cm (9.6in) Socket 478 CPU_FAN1 Super I/O 4Mb BIOS SEC_IDE PRI_IDE FLOPPY P4S8X-MX DDR DIMM1 (64 bit,184-pin module) DDR DIMM2 (64 bit,184-pin module) PARALLEL PORT VGA USB12 ATXPWR TOP USB34 RJ-45 Top:Line ...
24.5cm (9.6in) 1.5 Motherboard overview 1.5.1 Motherboard layout PS/2KBMS T: Mouse B: Keyboard COM1 KBPWR 24.5cm (9.6in) Socket 478 CPU_FAN1 Super I/O 4Mb BIOS SEC_IDE PRI_IDE FLOPPY P4S8X-MX DDR DIMM1 (64 bit,184-pin module) DDR DIMM2 (64 bit,184-pin module) PARALLEL PORT VGA USB12 ATXPWR TOP USB34 RJ-45 Top:Line ...

P4S8X-MX English User Manaul E1997
Page 20
... Technology, visit www.intel.com/info/hyperthreading. If you are using any other operating systems, disable the Hyper-Threading Technology item in BIOS to ensure system stability and performance. • We recommend that you installed a CPU that supports Hyper-Threading Technology. 2. The item...place, push down the socket lever to secure the CPU. Reboot the computer. 1-10 Chapter 1: Product introduction When the CPU is in BIOS before installing a supported operating system. • For more information on the side tab to the motherboard. After installation, make sure that...
... Technology, visit www.intel.com/info/hyperthreading. If you are using any other operating systems, disable the Hyper-Threading Technology item in BIOS to ensure system stability and performance. • We recommend that you installed a CPU that supports Hyper-Threading Technology. 2. The item...place, push down the socket lever to secure the CPU. Reboot the computer. 1-10 Chapter 1: Product introduction When the CPU is in BIOS before installing a supported operating system. • For more information on the side tab to the motherboard. After installation, make sure that...

P4S8X-MX English User Manaul E1997
Page 27
... physical injury and damage motherboard components. 1.8.1 Installing an expansion card To install an expansion card: 1. Failure to the tables on BIOS setup. 2. Before installing the expansion card, read the documentation that they support. Align the card connector with the slot and press... system cover. 1.8.2 Configuring an expansion card After installing the expansion card, configure it and make the necessary hardware settings for later use . ASUS P4S8X-MX 1-17 Refer to do so may need to the chassis with the screw you removed earlier. 6. Keep the screw for the card. ...
... physical injury and damage motherboard components. 1.8.1 Installing an expansion card To install an expansion card: 1. Failure to the tables on BIOS setup. 2. Before installing the expansion card, read the documentation that they support. Align the card connector with the slot and press... system cover. 1.8.2 Configuring an expansion card After installing the expansion card, configure it and make the necessary hardware settings for later use . ASUS P4S8X-MX 1-17 Refer to do so may need to the chassis with the screw you removed earlier. 6. Keep the screw for the card. ...

P4S8X-MX English User Manaul E1997
Page 30
The onboard button cell battery powers the RAM data in CMOS. P4S8X-MX P4S8X-MX Clear RTC RAM CLRTC1 12 23 Clear CMOS Normal (Default) You do ...back to pins 1-2. Keep the cap on CLRTC jumper default position. Hold down and reboot the system so the BIOS can clear the CMOS memory of date, time, and system setup parameters by erasing the CMOS RTC RAM data.... Shut down the key during the boot process and enter BIOS setup to clear the Real Time Clock (RTC) RAM in CMOS, which include system setup information such as system...
The onboard button cell battery powers the RAM data in CMOS. P4S8X-MX P4S8X-MX Clear RTC RAM CLRTC1 12 23 Clear CMOS Normal (Default) You do ...back to pins 1-2. Keep the cap on CLRTC jumper default position. Hold down and reboot the system so the BIOS can clear the CMOS memory of date, time, and system setup parameters by erasing the CMOS RTC RAM data.... Shut down the key during the boot process and enter BIOS setup to clear the Real Time Clock (RTC) RAM in CMOS, which include system setup information such as system...

P4S8X-MX English User Manaul E1997
Page 32
P4S8X-MX KBPWR 12 23 +5V (Default) +5VSB P4S8X-MX Keyboard power setting 1-22 Chapter 1: Product introduction This feature requires an ATX power supply that can supply at least 500 mA on the keyboard (the default is the Space Bar). 3. Keyboard power (3-pin KBPWR) This jumper allows you press a key on the +5VSB lead, and a corresponding setting in the BIOS. Set this jumper to pins 2-3 (+5VSB) to enable or disable the keyboard wake-up the computer when you to wake up feature.
P4S8X-MX KBPWR 12 23 +5V (Default) +5VSB P4S8X-MX Keyboard power setting 1-22 Chapter 1: Product introduction This feature requires an ATX power supply that can supply at least 500 mA on the keyboard (the default is the Space Bar). 3. Keyboard power (3-pin KBPWR) This jumper allows you press a key on the +5VSB lead, and a corresponding setting in the BIOS. Set this jumper to pins 2-3 (+5VSB) to enable or disable the keyboard wake-up the computer when you to wake up feature.

P4S8X-MX English User Manaul E1997
Page 37
3 . Refer to page 2-16 for the BIOS setting and page 3-18 for Serial ATA hard disk drives. Serial ATA connectors (7-pin SATA1, SATA2) These connectors ... the standard parallel ATA with 133 MB/s (Ultra DMA/133) GND RSATA_RXN2 RSATA_RXP2 GND RSATA_TXN2 RSATA_TXP2 GND P4S8X-MX SATA2 GND RSATA_RXN1 RSATA_RXP1 GND RSATA_TXN1 RSATA_TXP1 GND P4S8X-MX SATA connectors SATA1 If you install SATA hard disk drives, you 're using the Serial ATA feature. ...ATA connectors. Serial ATA Master/Slave connectors Connector SATA1 SATA2 Setting Master Slave Use Boot disk Data disk ASUS P4S8X-MX 1-27
3 . Refer to page 2-16 for the BIOS setting and page 3-18 for Serial ATA hard disk drives. Serial ATA connectors (7-pin SATA1, SATA2) These connectors ... the standard parallel ATA with 133 MB/s (Ultra DMA/133) GND RSATA_RXN2 RSATA_RXP2 GND RSATA_TXN2 RSATA_TXP2 GND P4S8X-MX SATA2 GND RSATA_RXN1 RSATA_RXP1 GND RSATA_TXN1 RSATA_TXP1 GND P4S8X-MX SATA connectors SATA1 If you install SATA hard disk drives, you 're using the Serial ATA feature. ...ATA connectors. Serial ATA Master/Slave connectors Connector SATA1 SATA2 Setting Master Slave Use Boot disk Data disk ASUS P4S8X-MX 1-27

P4S8X-MX English User Manaul E1997
Page 42
... The speaker allows you turn on the system power, and blinks when the system is in SLEEP or SOFT-OFF mode depending on the BIOS settings. Pressing the power switch for more than four seconds while the system is ON turns the system OFF. • Reset button (Blue...pin connector is for system reboot without turning off button (Yellow 2-pin PWRSW) This connector is for the system power button. PWR Ground Reset Ground P4S8X-MX System panel connector IDE_LED RESET PWRSW * Requires an ATX power supply. Refer to the HDD. • System warning speaker (Orange 4-pin SPEAKER) ...
... The speaker allows you turn on the system power, and blinks when the system is in SLEEP or SOFT-OFF mode depending on the BIOS settings. Pressing the power switch for more than four seconds while the system is ON turns the system OFF. • Reset button (Blue...pin connector is for system reboot without turning off button (Yellow 2-pin PWRSW) This connector is for the system power button. PWR Ground Reset Ground P4S8X-MX System panel connector IDE_LED RESET PWRSW * Requires an ATX power supply. Refer to the HDD. • System warning speaker (Orange 4-pin SPEAKER) ...

P4S8X-MX English User Manaul E1997
Page 43
This chapter tells how to change the system settings through the BIOS Setup menus. Detailed descriptions of the BIOS parameters are also provided. 2 BIOS setup
This chapter tells how to change the system settings through the BIOS Setup menus. Detailed descriptions of the BIOS parameters are also provided. 2 BIOS setup

P4S8X-MX English User Manaul E1997
Page 44
...® 2000 environment To create a set of the following utilities allow you need to the corresponding sections for Windows® 2000: a. A S U S A F U D O S (Updates the BIOS in DOS mode using the ASUS Update or AFUDOS utilities. 2.1.1 Creating a bootable floppy disk 1. Click F i l e from the format options field, then click S t a r t. c. Select the 3 1/2 Floppy Drive icon. Insert...
...® 2000 environment To create a set of the following utilities allow you need to the corresponding sections for Windows® 2000: a. A S U S A F U D O S (Updates the BIOS in DOS mode using the ASUS Update or AFUDOS utilities. 2.1.1 Creating a bootable floppy disk 1. Click F i l e from the format options field, then click S t a r t. c. Select the 3 1/2 Floppy Drive icon. Insert...

P4S8X-MX English User Manaul E1997
Page 45
... so it is not found !" A "P4S8XMX.ROM not found in the floppy disk. ASUS P4S8X-MX 2-3 Press , then follow screen instructions to P 4 S 8 X M X . Visit the ASUS website (www.asus.com) to download the latest BIOS file for the motherboard and rename the same to continue. 2. Completed. Start erasing.......| Start programming...| Flashed successfully. Reading file "P4S8XMX.ROM". error...
... so it is not found !" A "P4S8XMX.ROM not found in the floppy disk. ASUS P4S8X-MX 2-3 Press , then follow screen instructions to P 4 S 8 X M X . Visit the ASUS website (www.asus.com) to download the latest BIOS file for the motherboard and rename the same to continue. 2. Completed. Start erasing.......| Start programming...| Flashed successfully. Reading file "P4S8XMX.ROM". error...

P4S8X-MX English User Manaul E1997
Page 46
... (C) 2002 American Megatrends, Inc. Copy the AFUDOS utility (afudos.exe) from the motherboard support CD to the DOS prompt after copying the current BIOS file. 2-4 Chapter 2: BIOS setup done A:\> The utility returns to the bootable floppy disk you created earlier. 2. This utility also allows you can use as shown. 1....for the extension name. Boot the system in DOS environment using the AFUDOS utility: • Make sure that you to copy the current BIOS file that the floppy disk is not write-protected and has at the prompt type: afudos /o[filename] where the [filename] is any ...
... (C) 2002 American Megatrends, Inc. Copy the AFUDOS utility (afudos.exe) from the motherboard support CD to the DOS prompt after copying the current BIOS file. 2-4 Chapter 2: BIOS setup done A:\> The utility returns to the bootable floppy disk you created earlier. 2. This utility also allows you can use as shown. 1....for the extension name. Boot the system in DOS environment using the AFUDOS utility: • Make sure that you to copy the current BIOS file that the floppy disk is not write-protected and has at the prompt type: afudos /o[filename] where the [filename] is any ...

P4S8X-MX English User Manaul E1997
Page 47
A:\>afudos /iP4S8XMX.ROM 4. The utility verifies the file and starts updating the BIOS. The utility returns to the bootable floppy disk you created earlier. 3. Reading file ..... done A:\> ASUS P4S8X-MX 2-5 Copy the AFUDOS utility (afudos.exe) from the hard disk drive. Boot the system in... DOS mode, then at the DOS prompt. 2. All rights reserved. Updating the BIOS file To update the BIOS file using the AFUDOS utility: 1....
A:\>afudos /iP4S8XMX.ROM 4. The utility verifies the file and starts updating the BIOS. The utility returns to the bootable floppy disk you created earlier. 3. Reading file ..... done A:\> ASUS P4S8X-MX 2-5 Copy the AFUDOS utility (afudos.exe) from the hard disk drive. Boot the system in... DOS mode, then at the DOS prompt. 2. All rights reserved. Updating the BIOS file To update the BIOS file using the AFUDOS utility: 1....

P4S8X-MX English User Manaul E1997
Page 48
2.1.4 ASUS CrashFree BIOS 2 utility The ASUS CrashFree BIOS 2 is an auto recovery tool that you to the floppy disk drive. 3. Turn on the system. 2. Starting BIOS recovery... The utility displays the following message and automatically checks the floppy disk for floppy... Floppy found , the utility reads the BIOS file and starts flashing the corrupted BIOS file. DO NOT...
2.1.4 ASUS CrashFree BIOS 2 utility The ASUS CrashFree BIOS 2 is an auto recovery tool that you to the floppy disk drive. 3. Turn on the system. 2. Starting BIOS recovery... The utility displays the following message and automatically checks the floppy disk for floppy... Floppy found , the utility reads the BIOS file and starts flashing the corrupted BIOS file. DO NOT...

P4S8X-MX English User Manaul E1997
Page 49
... the optical drive. 3. Checking for this motherboard. Doing so can cause system boot failure! 4. The recovered BIOS may not be the latest BIOS version for CD-ROM... ASUS P4S8X-MX 2-7 Starting BIOS recovery... Floppy not found ! Recovering the BIOS from the support CD To recover the BIOS from the floppy disk drive, then turn on the system. 2. Starting...
... the optical drive. 3. Checking for this motherboard. Doing so can cause system boot failure! 4. The recovered BIOS may not be the latest BIOS version for CD-ROM... ASUS P4S8X-MX 2-7 Starting BIOS recovery... Floppy not found ! Recovering the BIOS from the support CD To recover the BIOS from the floppy disk drive, then turn on the system. 2. Starting...


