
User Manual
Page 27
... brightness by using the hot keys. 3 Getting Started Powering ON the Notebook PC The Notebook PC's power-ON message appears on the screen prompting you to correct the conflict by running a software disk checking utility, you should be correct when you need to boot from your... This indicates that the hard disk is used to make a diagnostic check of the Notebook PC's test routine and is given during the splash screen, standard boot information such as the BIOS version can also select "Scan ... Self Monitoring and Reporting Technology The S.M.A.R.T. (Self Monitoring and Reporting ...
... brightness by using the hot keys. 3 Getting Started Powering ON the Notebook PC The Notebook PC's power-ON message appears on the screen prompting you to correct the conflict by running a software disk checking utility, you should be correct when you need to boot from your... This indicates that the hard disk is used to make a diagnostic check of the Notebook PC's test routine and is given during the splash screen, standard boot information such as the BIOS version can also select "Scan ... Self Monitoring and Reporting Technology The S.M.A.R.T. (Self Monitoring and Reporting ...

User Manual
Page 28
... icon with power adapter. A new battery pack must continued to be warned when battery power is not the same as the Notebook PC is depleted. Screen captures shown here are examples only and may not reflect what you will be charged every three months to extend recovery capacity or else it...
... icon with power adapter. A new battery pack must continued to be warned when battery power is not the same as the Notebook PC is depleted. Screen captures shown here are examples only and may not reflect what you will be charged every three months to extend recovery capacity or else it...

User Manual
Page 31
The Hot Key locations on the function keys may vary depending on the Notebook PC's keyboard. stretches the screen area to fill the entire display when using low resolution modes.) LCD/Monitor Icons (F8): Toggles between the Notebook PC's LCD display and an ... the display brightness LCD Icon (F7): Toggles the display panel ON and OFF. (On certain models; Windows software settings are necessary to -Disk depending on -screen-display. Radio Tower (F2): Wireless Models Only: Toggles the internal wireless LAN or Bluetooth (on selected models) ON or OFF with a colored command. Crossed ...
The Hot Key locations on the function keys may vary depending on the Notebook PC's keyboard. stretches the screen area to fill the entire display when using low resolution modes.) LCD/Monitor Icons (F8): Toggles between the Notebook PC's LCD display and an ... the display brightness LCD Icon (F7): Toggles the display panel ON and OFF. (On certain models; Windows software settings are necessary to -Disk depending on -screen-display. Radio Tower (F2): Wireless Models Only: Toggles the internal wireless LAN or Bluetooth (on selected models) ON or OFF with a colored command. Crossed ...

User Manual
Page 32
...Fn+A: Toggles the Light Sensor ON or OFF. Fn+V: Toggles "Life Frame" software application. You can see the current mode through the on -screen display (OSD). Allows you to use a larger portion of the Notebook PC to improve contrast, brightness, skin tone, and color saturation for ...or removing the power adapter will automatically switch the system between various power saving modes. You can see the current mode through the on -screen display (OSD). Power4Gear eXtreme (Fn+Space Bar): This key toggles power savings between AC mode and battery mode. Fn+C: Toggles "Splendid Video...
...Fn+A: Toggles the Light Sensor ON or OFF. Fn+V: Toggles "Life Frame" software application. You can see the current mode through the on -screen display (OSD). Allows you to use a larger portion of the Notebook PC to improve contrast, brightness, skin tone, and color saturation for ...or removing the power adapter will automatically switch the system between various power saving modes. You can see the current mode through the on -screen display (OSD). Power4Gear eXtreme (Fn+Space Bar): This key toggles power savings between AC mode and battery mode. Fn+C: Toggles "Splendid Video...
User Manual
Page 40
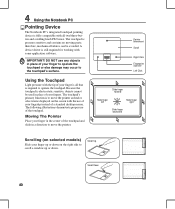
... the pointer. Scroll Up Scroll Down 40 Using the Touchpad Light pressure with all that is required to scroll a window up or down on the screen with some application software. therefore, mechanical failures can be used in the center of your finger to operate the touchpad or else damage may occur...
... the pointer. Scroll Up Scroll Down 40 Using the Touchpad Light pressure with all that is required to scroll a window up or down on the screen with some application software. therefore, mechanical failures can be used in the center of your finger to operate the touchpad or else damage may occur...

User Manual
Page 41
... long, the operation will change color. You can move the pointer over the icon you wish. Lightly strike the touchpad twice, sliding finger on the screen you wish to execute, press the left button depressed, moving the pointer to touch the touchpad lightly, keeping your fingertip. Move the pointer over the...
... long, the operation will change color. You can move the pointer over the icon you wish. Lightly strike the touchpad twice, sliding finger on the screen you wish to execute, press the left button depressed, moving the pointer to touch the touchpad lightly, keeping your fingertip. Move the pointer over the...

User Manual
Page 55
... adapter is available on selected models only and will vary by location depending on distance from a paid services. Cable distribution system should include bonding the screen of a Coaxial Cable - The Notebook PC must be used indoors when using the cable adapter. Cable service connection can only receive digital TV signals broadcasted...
... adapter is available on selected models only and will vary by location depending on distance from a paid services. Cable distribution system should include bonding the screen of a Coaxial Cable - The Notebook PC must be used indoors when using the cable adapter. Cable service connection can only receive digital TV signals broadcasted...

User Manual
Page 66
... ON or WLAN & Bluetooth ON is shown. 2b. Select Add a Bluetooth Device on the bottom of the Bluetooth mouse. Or Launch Bluetooth Devices from this screen. Prepare the Bluetooth mouse. • Install two "AA" batteries. • Turn ON the power switch on the taskbar menu. 3b. A Appendix Bluetooth Mouse Setup (optional...
... ON or WLAN & Bluetooth ON is shown. 2b. Select Add a Bluetooth Device on the bottom of the Bluetooth mouse. Or Launch Bluetooth Devices from this screen. Prepare the Bluetooth mouse. • Install two "AA" batteries. • Turn ON the power switch on the taskbar menu. 3b. A Appendix Bluetooth Mouse Setup (optional...

User Manual
Page 69
Type in a password and press [Enter]. 3. Re-type the password and press [Enter]. 1. On the Boot screen, select Boot Device Priority. 2. On the Security screen, select Change Supervisor or Change User Password. System BIOS Settings Boot Device A Appendix 1. Select each item and press [Enter] to select a device. Password is then set. 2. Password is then cleared. Security Setting 1. A-7 Leave the password field blank and press [Enter]. 4. To clear the password: 2.
Type in a password and press [Enter]. 3. Re-type the password and press [Enter]. 1. On the Boot screen, select Boot Device Priority. 2. On the Security screen, select Change Supervisor or Change User Password. System BIOS Settings Boot Device A Appendix 1. Select each item and press [Enter] to select a device. Password is then set. 2. Password is then cleared. Security Setting 1. A-7 Leave the password field blank and press [Enter]. 4. To clear the password: 2.
User Manual
Page 73
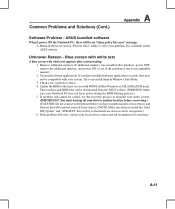
... Check your local service center and ask an engineer for viruses. 4. If the problem still exist, contact your system for assistance. A-11 ASUS bundled software When I power ON the Notebook PC, there will be downloaded from viruses.) (NOTE: Make sure that you have installed software ..."Intel INF Update" and "ATKACPI" drivers first so that hardware devices can be an "Open policy file error" message. Blue screen with white text A blue screen with WINFLASH in Windows or AFLASH in Windows Safe Mode. 3. Remove additional memory. A. Unknown Reason - These utilities and BIOS ...
... Check your local service center and ask an engineer for viruses. 4. If the problem still exist, contact your system for assistance. A-11 ASUS bundled software When I power ON the Notebook PC, there will be downloaded from viruses.) (NOTE: Make sure that you have installed software ..."Intel INF Update" and "ATKACPI" drivers first so that hardware devices can be an "Open policy file error" message. Blue screen with white text A blue screen with WINFLASH in Windows or AFLASH in Windows Safe Mode. 3. Remove additional memory. A. Unknown Reason - These utilities and BIOS ...

User Manual
Page 77
... as drive "C". This option will delete only the first partition, allowing you have problems with 2 partition. Read the "ASUS Preload Wizard" screen and click Next. 4. Select a partition option and click Next. Recover Windows to entire HD with the recovery process. Please visit ...www.asus.com for updated drivers and utilities. The Recovery Partition provides a comprehensive recovery solution that quickly restores your ...
... as drive "C". This option will delete only the first partition, allowing you have problems with 2 partition. Read the "ASUS Preload Wizard" screen and click Next. 4. Select a partition option and click Next. Recover Windows to entire HD with the recovery process. Please visit ...www.asus.com for updated drivers and utilities. The Recovery Partition provides a comprehensive recovery solution that quickly restores your ...
User Manual
Page 78
...be powered ON). 2. Recover Windows to first partition only. Remove the optional secondary hard disk drive before performing system recovery on -screen instructions to complete the recovery process. Select a partition option and click Next. WARNING: Do not remove the Recovery disc (unless ...to Microsoft, you may be labeled as drive "C". This option will delete all partitions from the Recovery DVD. 3. Please visit www.asus.com for more details. According to a network drive and make note of any customized configuration settings (such as drive "C". The Recovery...
...be powered ON). 2. Recover Windows to first partition only. Remove the optional secondary hard disk drive before performing system recovery on -screen instructions to complete the recovery process. Select a partition option and click Next. WARNING: Do not remove the Recovery disc (unless ...to Microsoft, you may be labeled as drive "C". This option will delete all partitions from the Recovery DVD. 3. Please visit www.asus.com for more details. According to a network drive and make note of any customized configuration settings (such as drive "C". The Recovery...


