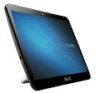
ASUS A4110 users manual for English
Page 2
SPECIFICATIONS AND INFORMATION CONTAINED IN THIS MANUAL ARE FURNISHED FOR INFORMATIONAL USE ONLY, AND ARE SUBJECT TO CHANGE AT ANY TIME WITHOUT NOTICE, AND SHOULD NOT BE CONSTRUED AS A COMMITMENT BY ASUS. LIMITATION OF LIABILITY Circumstances may arise where because of a default on which ASUS, its reseller. It is liable for no more than damages for identification or...
SPECIFICATIONS AND INFORMATION CONTAINED IN THIS MANUAL ARE FURNISHED FOR INFORMATIONAL USE ONLY, AND ARE SUBJECT TO CHANGE AT ANY TIME WITHOUT NOTICE, AND SHOULD NOT BE CONSTRUED AS A COMMITMENT BY ASUS. LIMITATION OF LIABILITY Circumstances may arise where because of a default on which ASUS, its reseller. It is liable for no more than damages for identification or...
ASUS A4110 users manual for English
Page 3
... Fan Warning...11 Package contents...12 Chapter 1: Hardware Setup Getting to know your ASUS All-in-One PC 13 Front view...13 Rear view...15 Top view...18 Left side view...19 Right side view...19 Chapter 2: Using your ASUS All-in-One PC Positioning your ASUS All-in-One PC 21 Connecting a wired keyboard and mouse 22 Connecting a wireless keyboard and mouse (optional 23 Mounting your ASUS...
... Fan Warning...11 Package contents...12 Chapter 1: Hardware Setup Getting to know your ASUS All-in-One PC 13 Front view...13 Rear view...15 Top view...18 Left side view...19 Right side view...19 Chapter 2: Using your ASUS All-in-One PC Positioning your ASUS All-in-One PC 21 Connecting a wired keyboard and mouse 22 Connecting a wireless keyboard and mouse (optional 23 Mounting your ASUS...

ASUS A4110 users manual for English
Page 4
... Start menu...34 Launching the Start menu 35 Opening programs from the Start menu 35 Windows® apps...36 Working with Windows® apps 37 Customizing Windows® apps 37 Task view...40 Snap feature...41 Snap hotspots...41 Action Center...43 Other keyboard shortcuts 44 Connecting to wireless networks 46 Wi-Fi...46 Bluetooth ...47 Connecting to wired networks 48 Configuring a dynamic IP/PPPoE network connection 48 Configuring a static IP network connection 49 Turning your ASUS...
... Start menu...34 Launching the Start menu 35 Opening programs from the Start menu 35 Windows® apps...36 Working with Windows® apps 37 Customizing Windows® apps 37 Task view...40 Snap feature...41 Snap hotspots...41 Action Center...43 Other keyboard shortcuts 44 Connecting to wireless networks 46 Wi-Fi...46 Bluetooth ...47 Connecting to wired networks 48 Configuring a dynamic IP/PPPoE network connection 48 Configuring a static IP network connection 49 Turning your ASUS...
ASUS A4110 users manual for English
Page 8
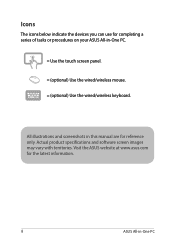
All illustrations and screenshots in -One PC Visit the ASUS website at www.asus.com for the latest information. 8 ASUS All-in this manual are for completing a series of tasks or procedures on your ASUS All-in-One PC. = Use the touch screen panel. = (optional) Use the wired/wireless mouse. = (optional) Use the wired/wireless keyboard. Actual product specifications and software screen images may vary with territories. Icons The icons below indicate the devices you can use for reference only.
All illustrations and screenshots in -One PC Visit the ASUS website at www.asus.com for the latest information. 8 ASUS All-in this manual are for completing a series of tasks or procedures on your ASUS All-in-One PC. = Use the touch screen panel. = (optional) Use the wired/wireless mouse. = (optional) Use the wired/wireless keyboard. Actual product specifications and software screen images may vary with territories. Icons The icons below indicate the devices you can use for reference only.

ASUS A4110 users manual for English
Page 9
...; If you operate your system • Read and follow all instructions in -One PC 9 Always unplug all power, modem, and network cables from the power outlets before you use • Do not walk on the chassis are for information technology equipment. Do not block or cover these openings. ASUS All-in the documentation before cleaning the system. Setting up the system...
...; If you operate your system • Read and follow all instructions in -One PC 9 Always unplug all power, modem, and network cables from the power outlets before you use • Do not walk on the chassis are for information technology equipment. Do not block or cover these openings. ASUS All-in the documentation before cleaning the system. Setting up the system...
ASUS A4110 users manual for English
Page 10
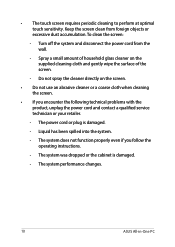
... on the supplied cleaning cloth and gently wipe the surface of household glass cleaner on the screen. • Do not use an abrasive cleaner or a coarse cloth when cleaning the screen. • If you follow the operating instructions. - Keep the screen clean from the wall. - Spray a small amount of the screen. - Turn off the system and disconnect the power cord...
... on the supplied cleaning cloth and gently wipe the surface of household glass cleaner on the screen. • Do not use an abrasive cleaner or a coarse cloth when cleaning the screen. • If you follow the operating instructions. - Keep the screen clean from the wall. - Spray a small amount of the screen. - Turn off the system and disconnect the power cord...

ASUS A4110 users manual for English
Page 16
... LAN port supports a standard Ethernet cable for file sharing or extending your VivoMini to connect devices that have serial ports such as keyboards, pointing devices, flash disk drives, external HDDs, speakers, cameras and printers. 16 ASUS All-in -One PC to another HDMI-compatible device for connection to turn off display Press this button to a local network. USB 2.0 port This USB (Universal Serial Bus) port is compatible with USB 2.0 or USB 1.1 devices such as mouse, modem, or printers. VGA port This port allows you to connect your display monitor. HDMI output port...
... LAN port supports a standard Ethernet cable for file sharing or extending your VivoMini to connect devices that have serial ports such as keyboards, pointing devices, flash disk drives, external HDDs, speakers, cameras and printers. 16 ASUS All-in -One PC to another HDMI-compatible device for connection to turn off display Press this button to a local network. USB 2.0 port This USB (Universal Serial Bus) port is compatible with USB 2.0 or USB 1.1 devices such as mouse, modem, or printers. VGA port This port allows you to connect your display monitor. HDMI output port...

ASUS A4110 users manual for English
Page 18
Drive activity indicator This indicator lights up when the ASUS Allin-One PC is turned on. 18 ASUS All-in -One PC is accessing the internal storage drives. Power indicator This LED power indicator lights up when your ASUS All-in -One PC Top view NOTE: The descriptions of these items are in the section Rear View.
Drive activity indicator This indicator lights up when the ASUS Allin-One PC is turned on. 18 ASUS All-in -One PC is accessing the internal storage drives. Power indicator This LED power indicator lights up when your ASUS All-in -One PC Top view NOTE: The descriptions of these items are in the section Rear View.

ASUS A4110 users manual for English
Page 19
ASUS All-in -One PC using Kensington® compatible security products. Microphone jack The microphone jack is designed to connect to secure your ASUS All-in -One PC 19 Left side view Right side view Kensington® security slot The Kensington® security slot allows you to connect amplified speakers or headphones. Headphone jack This port allows you to a microphone used for video conferencing, voice narrations, or simple audio recordings.
ASUS All-in -One PC using Kensington® compatible security products. Microphone jack The microphone jack is designed to connect to secure your ASUS All-in -One PC 19 Left side view Right side view Kensington® security slot The Kensington® security slot allows you to connect amplified speakers or headphones. Headphone jack This port allows you to a microphone used for video conferencing, voice narrations, or simple audio recordings.

ASUS A4110 users manual for English
Page 22
NOTE: We recommend to the USB ports on the rear panel. Connecting a wired keyboard and mouse Connect the keyboard and the mouse to use the USB 2.0 port for keyboard and mouse. 22 ASUS All-in-One PC
NOTE: We recommend to the USB ports on the rear panel. Connecting a wired keyboard and mouse Connect the keyboard and the mouse to use the USB 2.0 port for keyboard and mouse. 22 ASUS All-in-One PC

ASUS A4110 users manual for English
Page 23
... and specifications of the optional wired or wireless keyboard and mouse may vary. Connecting a wireless keyboard and mouse (optional) 1. NOTES: • Reconnect the wireless keyboard and mouse with the wireless dongle if they lose connection. Avoid using the wireless keyboard and mouse. NOTE: We recommend to a USB port on the rear panel. Connect the wireless dongle for keyboard and mouse to use the USB 2.0 port for reference only. Install batteries into the wireless keyboard and mouse. 2. Position the mouse and keyboard at least 20 cm away from other wireless devices. ASUS...
... and specifications of the optional wired or wireless keyboard and mouse may vary. Connecting a wireless keyboard and mouse (optional) 1. NOTES: • Reconnect the wireless keyboard and mouse with the wireless dongle if they lose connection. Avoid using the wireless keyboard and mouse. NOTE: We recommend to a USB port on the rear panel. Connect the wireless dongle for keyboard and mouse to use the USB 2.0 port for reference only. Install batteries into the wireless keyboard and mouse. 2. Position the mouse and keyboard at least 20 cm away from other wireless devices. ASUS...

ASUS A4110 users manual for English
Page 27
Doing so may damage the power adapter. NOTE: For details on the system. ASUS All-in-One PC 27 DO NOT connect the power adapter to an AC outlet prior to connecting the DC plug to the section Turning your ASUS All-in-One PC off your ASUS All-in-One PC, refer to the system. WARNING! Powering on your ASUS All-in-One PC Connect the supplied power adapter to the DC IN jack on the rear panel (1 and 2) and then press the Power button on the top of the rear panel (3) of the ASUS All-in-One PC to power on turning off in Working with Windows® 10.
Doing so may damage the power adapter. NOTE: For details on the system. ASUS All-in-One PC 27 DO NOT connect the power adapter to an AC outlet prior to connecting the DC plug to the section Turning your ASUS All-in-One PC off your ASUS All-in-One PC, refer to the system. WARNING! Powering on your ASUS All-in-One PC Connect the supplied power adapter to the DC IN jack on the rear panel (1 and 2) and then press the Power button on the top of the rear panel (3) of the ASUS All-in-One PC to power on turning off in Working with Windows® 10.
ASUS A4110 users manual for English
Page 33
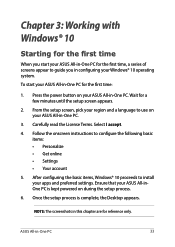
.... 4. After configuring the basic items, Windows® 10 proceeds to install your ASUS All-in-One PC for the first time: 1. Chapter 3: Working with Windows® 10 Starting for the first time When you start your ASUS All-in-One PC for the first time, a series of screens appear to guide you in configuring your Windows® 10 operating system. To start your apps and preferred settings.
.... 4. After configuring the basic items, Windows® 10 proceeds to install your ASUS All-in-One PC for the first time: 1. Chapter 3: Working with Windows® 10 Starting for the first time When you start your ASUS All-in-One PC for the first time, a series of screens appear to guide you in configuring your Windows® 10 operating system. To start your apps and preferred settings.

ASUS A4110 users manual for English
Page 46
... icon from the list of available WiFi connections. 4. or 3. NOTE: You may be prompted to enter a security key to activate the Wi-Fi connection. 46 ASUS All-in -One PC's Wi-Fi connection. Select the icon to start the network connection. Connecting to wireless networks Wi-Fi Access emails, surf the Internet, and share applications via social networking sites using the following steps: 1. Connecting Wi-Fi Connect your ASUS All-in...
... icon from the list of available WiFi connections. 4. or 3. NOTE: You may be prompted to enter a security key to activate the Wi-Fi connection. 46 ASUS All-in -One PC's Wi-Fi connection. Select the icon to start the network connection. Connecting to wireless networks Wi-Fi Access emails, surf the Internet, and share applications via social networking sites using the following steps: 1. Connecting Wi-Fi Connect your ASUS All-in...

ASUS A4110 users manual for English
Page 47
... the device. or 3. Launch Settings from the list. If they are the same, select Yes to successfully pair your chosen device. Select a device from the Start menu. 2. Connect your ASUS All-inOne PC. NOTE: For some Bluetooth-enabled devices, you may be prompted to key in -One PC 47 Select Devices, then select Bluetooth to search for Bluetooth-enabled devices. Bluetooth Use Bluetooth to facilitate wireless data...
... the device. or 3. Launch Settings from the list. If they are the same, select Yes to successfully pair your chosen device. Select a device from the Start menu. 2. Connect your ASUS All-inOne PC. NOTE: For some Bluetooth-enabled devices, you may be prompted to key in -One PC 47 Select Devices, then select Bluetooth to search for Bluetooth-enabled devices. Bluetooth Use Bluetooth to facilitate wireless data...

ASUS A4110 users manual for English
Page 48
... a network cable is connected between your ASUS All-in-One PC's LAN port and a local area network before performing the following procedures. Configuring a dynamic IP/PPPoE network connection 1. NOTE: Contact your Internet Service Provider (ISP) for details or your settings, refer to the following actions. Select your Internet connection. Launch Settings. 2. Connecting to wired networks You can also connect to the next steps if you are using your ASUS All-in setting up...
... a network cable is connected between your ASUS All-in-One PC's LAN port and a local area network before performing the following procedures. Configuring a dynamic IP/PPPoE network connection 1. NOTE: Contact your Internet Service Provider (ISP) for details or your settings, refer to the following actions. Select your Internet connection. Launch Settings. 2. Connecting to wired networks You can also connect to the next steps if you are using your ASUS All-in setting up...

ASUS A4110 users manual for English
Page 49
... Center window then select Set up a new connection or network. 8. Select Broadband (PPPoE). 10. Configuring a static IP network connection 1. Type the IP address, Subnet mask and Default gateway from your User name, Password, and Connection name then select Connect. 11. If needed, you just created. 13. ASUS All-in-One PC 49 Type your service provider. 4. Select on the taskbar then select the connection you can also type the preferred DNS server...
... Center window then select Set up a new connection or network. 8. Select Broadband (PPPoE). 10. Configuring a static IP network connection 1. Type the IP address, Subnet mask and Default gateway from your User name, Password, and Connection name then select Connect. 11. If needed, you just created. 13. ASUS All-in-One PC 49 Type your service provider. 4. Select on the taskbar then select the connection you can also type the preferred DNS server...
ASUS A4110 users manual for English
Page 53
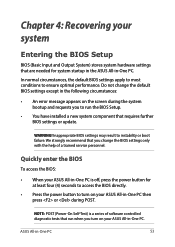
... your ASUS All-in -One PC 53 Do not change the BIOS settings only with the help of software controlled diagnostic tests that run the BIOS Setup. • You have installed a new system component that are needed for at least four (4) seconds to access the BIOS directly. • Press the power button to turn on the screen during POST. In normal circumstances, the default BIOS settings apply to most conditions to instability or boot failure.
... your ASUS All-in -One PC 53 Do not change the BIOS settings only with the help of software controlled diagnostic tests that run the BIOS Setup. • You have installed a new system component that are needed for at least four (4) seconds to access the BIOS directly. • Press the power button to turn on the screen during POST. In normal circumstances, the default BIOS settings apply to most conditions to instability or boot failure.

ASUS A4110 users manual for English
Page 54
... PC This option resets your ASUS All-in -One PC to its default settings and delete other installed apps. • Remove everything - Windows® 10 allows you refresh your ASUS All-inOne PC without affecting personal files (photos, music, videos, documents). Recovering your system Using recovery options on your ASUS All-in-One PC. • Note down important customized settings such as network settings, user names, and passwords to...
... PC This option resets your ASUS All-in -One PC to its default settings and delete other installed apps. • Remove everything - Windows® 10 allows you refresh your ASUS All-inOne PC without affecting personal files (photos, music, videos, documents). Recovering your system Using recovery options on your ASUS All-in-One PC. • Note down important customized settings such as network settings, user names, and passwords to...

ASUS A4110 users manual for English
Page 55
Using a USB drive, network connection or Windows recovery DVD to perform other advanced recovery options on your ASUS All-in -One PC. 1. ASUS All-in -One PC. - • Go back to enable any of these advanced recovery options: System Restore, System Image Recovery, Startup Repair, Command Prompt, UEFI Firmware Settings, and Startup Settings. Using this build is not working for your ASUS All-in -One PC 55 Launch Settings and select Update and security. This option allows you want to an...
Using a USB drive, network connection or Windows recovery DVD to perform other advanced recovery options on your ASUS All-in -One PC. 1. ASUS All-in -One PC. - • Go back to enable any of these advanced recovery options: System Restore, System Image Recovery, Startup Repair, Command Prompt, UEFI Firmware Settings, and Startup Settings. Using this build is not working for your ASUS All-in -One PC 55 Launch Settings and select Update and security. This option allows you want to an...


