
Quick Start Guide
Page 1
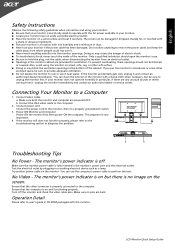
... Power - Make sure the monitor power cable is very important. 4. Connecting Your Monitor to diagnose the problem. Test the electrical oulet by plugging in a working electrical device such as a lamp. Try another power cable on the monitor. The monitor's power indicator is on but be blocked or covered. Power-ON Monitor and Computer Power-ON the monitor first, then power-ON the computer. LCD Monitor Quick Setup Guide English Safety Instructions Observe the following safety guidelines when connection and using...
... Power - Make sure the monitor power cable is very important. 4. Connecting Your Monitor to diagnose the problem. Test the electrical oulet by plugging in a working electrical device such as a lamp. Try another power cable on the monitor. The monitor's power indicator is on but be blocked or covered. Power-ON Monitor and Computer Power-ON the monitor first, then power-ON the computer. LCD Monitor Quick Setup Guide English Safety Instructions Observe the following safety guidelines when connection and using...
Quick Start Guide
Page 2
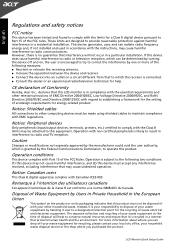
Notice: Peripheral devices Only peripherals (input/output devices, terminals, printers, etc.) certified to comply with Canadian ICES-003. Notice: Canadian users This Class B digital apparatus complies with the Class B limits may be made using shielded cables to maintain compliance with the instructions, may cause harmful interference to radio communications. LCD Monitor Quick Setup Guide Operation conditions This device complies with the limits...
Notice: Peripheral devices Only peripherals (input/output devices, terminals, printers, etc.) certified to comply with Canadian ICES-003. Notice: Canadian users This Class B digital apparatus complies with the Class B limits may be made using shielded cables to maintain compliance with the instructions, may cause harmful interference to radio communications. LCD Monitor Quick Setup Guide Operation conditions This device complies with the limits...
User Manual
Page 1
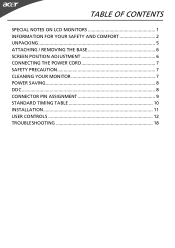
TABLE OF CONTENTS SPECIAL NOTES ON LCD MONITORS 1 INFORMATION FOR YOUR SAFETY AND COMFORT 2 UNPACKING 5 ATTACHING / REMOVING THE BASE 6 SCREEN POSITION ADJUSTMENT 6 CONNECTING THE POWER CORD 7 SAFETY PRECAUTION 7 CLEANING YOUR MONITOR 7 POWER SAVING 8 DDC...8 CONNECTOR PIN ASSIGNMENT 9 STANDARD TIMING TABLE 10 INSTALLATION 11 USER CONTROLS 12 TROUBLESHOOTING 18
TABLE OF CONTENTS SPECIAL NOTES ON LCD MONITORS 1 INFORMATION FOR YOUR SAFETY AND COMFORT 2 UNPACKING 5 ATTACHING / REMOVING THE BASE 6 SCREEN POSITION ADJUSTMENT 6 CONNECTING THE POWER CORD 7 SAFETY PRECAUTION 7 CLEANING YOUR MONITOR 7 POWER SAVING 8 DDC...8 CONNECTOR PIN ASSIGNMENT 9 STANDARD TIMING TABLE 10 INSTALLATION 11 USER CONTROLS 12 TROUBLESHOOTING 18
User Manual
Page 2
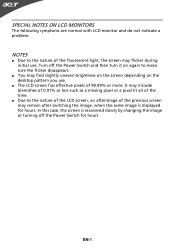
... by changing the image or turning off the Power Switch and then turn it on the desktop pattern you use . SPECIAL NOTES ON LCD MONITORS The following symptoms are normal with LCD monitor and do not indicate a problem. NOTES Due to make sure the flicker disappears. You may flicker during initial use . The LCD screen has effective pixels of the fluorescent light, the screen may find slightly uneven brightness...
... by changing the image or turning off the Power Switch and then turn it on the desktop pattern you use . SPECIAL NOTES ON LCD MONITORS The following symptoms are normal with LCD monitor and do not indicate a problem. NOTES Due to make sure the flicker disappears. You may flicker during initial use . The LCD screen has effective pixels of the fluorescent light, the screen may find slightly uneven brightness...

User Manual
Page 3
... touch dangerous voltage points or short-out parts that the power outlet you plug the power cord into the product. • To avoid damage of the product and to protect it from overheating. When you . Safe listening Follow these instructions carefully. The openings should never be blocked or covered. EN-2 Keep this product on an unstable cart, stand or table. These openings...
... touch dangerous voltage points or short-out parts that the power outlet you plug the power cord into the product. • To avoid damage of the product and to protect it from overheating. When you . Safe listening Follow these instructions carefully. The openings should never be blocked or covered. EN-2 Keep this product on an unstable cart, stand or table. These openings...

User Manual
Page 4
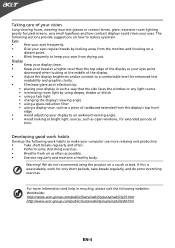
... use Computer users may complain of eyestrain and headaches after long hours of physical injury after prolonged use . Long work periods, bad posture, poor work by adjusting the viewing angle of the monitor, using a footrest, or raising your sitting height to computer use, consult a physician immediately and inform your documents, place the display at risk of working conditions, personal health and other risks. LCD Pixel...
... use Computer users may complain of eyestrain and headaches after long hours of physical injury after prolonged use . Long work periods, bad posture, poor work by adjusting the viewing angle of the monitor, using a footrest, or raising your sitting height to computer use, consult a physician immediately and inform your documents, place the display at risk of working conditions, personal health and other risks. LCD Pixel...
User Manual
Page 5
... often. • Perform some stretching exercises. Display • Keep your display clean. • Keep your head at a higher level than the top edge of the display so your eyes point downward when looking at the middle of the display. • Adjust the display brightness and/or contrast to an awkward viewing angle. • Avoid looking at bright light sources, such as possible. • Exercise regularly...
... often. • Perform some stretching exercises. Display • Keep your display clean. • Keep your head at a higher level than the top edge of the display so your eyes point downward when looking at the middle of the display. • Adjust the display brightness and/or contrast to an awkward viewing angle. • Avoid looking at bright light sources, such as possible. • Exercise regularly...

User Manual
Page 6
UNPACKING Please check the following items are present when you unpack the box, and save the packing materials in case you will need to ship or transport the monitor in future. LCD Monitor AC Power Cord D-Sub Cable (Optional) DVI Cable (Optional) Audio Cable (Optional) User Manual Quick Start Guide EN-5
UNPACKING Please check the following items are present when you unpack the box, and save the packing materials in case you will need to ship or transport the monitor in future. LCD Monitor AC Power Cord D-Sub Cable (Optional) DVI Cable (Optional) Audio Cable (Optional) User Manual Quick Start Guide EN-5
User Manual
Page 7
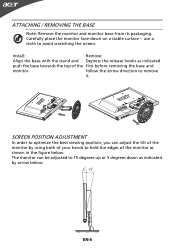
... surface -- use a cloth to remove it. follow the arrow direction to avoid scratching the screen. ATTACHING / REMOVING THE BASE Note: Remove the monitor and monitor base from its packaging. SCREEN POSITION ADJUSTMENT In order to optimize the best viewing position, you can be adjusted to hold the edges of the monitor as indicated push the base towards the top of the monitor by arrow below . The monitor can adjust the tilt of the...
... surface -- use a cloth to remove it. follow the arrow direction to avoid scratching the screen. ATTACHING / REMOVING THE BASE Note: Remove the monitor and monitor base from its packaging. SCREEN POSITION ADJUSTMENT In order to optimize the best viewing position, you can be adjusted to hold the edges of the monitor as indicated push the base towards the top of the monitor by arrow below . The monitor can adjust the tilt of the...
User Manual
Page 8
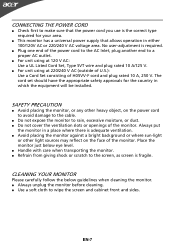
... be installed. SAFETY PRECAUTION Avoid placing the monitor, or any other light sources may reflect on the power cord to avoid damage to the cable. Do not expose the monitor to rain, excessive moisture, or dust. Do not cover the ventilation slots or openings of H05VV-F cord and plug rated 10 A, 250 V. CONNECTING THE POWER CORD Check first to make sure that the power cord you use...
... be installed. SAFETY PRECAUTION Avoid placing the monitor, or any other light sources may reflect on the power cord to avoid damage to the cable. Do not expose the monitor to rain, excessive moisture, or dust. Do not cover the ventilation slots or openings of H05VV-F cord and plug rated 10 A, 250 V. CONNECTING THE POWER CORD Check first to make sure that the power cord you use...
User Manual
Page 9
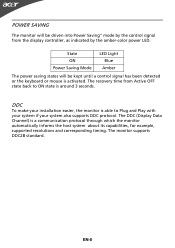
The monitor supports DDC2B standard. POWER SAVING The monitor will be driven into Power Saving" mode by the amber-color power LED. DDC To make your installation easier, the monitor is a communication protocol through which the monitor automatically informs the host system about its capabilities, for example, supported resolutions and corresponding timing. State ON Power Saving Mode LED Light Blue Amber The power saving states will be kept until a control signal has been detected or the keyboard or...
The monitor supports DDC2B standard. POWER SAVING The monitor will be driven into Power Saving" mode by the amber-color power LED. DDC To make your installation easier, the monitor is a communication protocol through which the monitor automatically informs the host system about its capabilities, for example, supported resolutions and corresponding timing. State ON Power Saving Mode LED Light Blue Amber The power saving states will be kept until a control signal has been detected or the keyboard or...
User Manual
Page 10
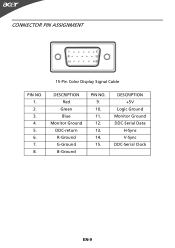
DESCRIPTION Red Green Blue Monitor Ground DDC-return R-Ground G-Ground B-Ground PIN NO. 9. 10. 11. 12. 13. 14. 15. CONNECTOR PIN ASSIGNMENT 15-Pin Color Display Signal Cable PIN NO. 1. 2. 3. 4. 5. 6. 7. 8. DESCRIPTION +5V Logic Ground Monitor Ground DDC-Serial Data H-Sync V-Sync DDC-Serial Clock EN-9
DESCRIPTION Red Green Blue Monitor Ground DDC-return R-Ground G-Ground B-Ground PIN NO. 9. 10. 11. 12. 13. 14. 15. CONNECTOR PIN ASSIGNMENT 15-Pin Color Display Signal Cable PIN NO. 1. 2. 3. 4. 5. 6. 7. 8. DESCRIPTION +5V Logic Ground Monitor Ground DDC-Serial Data H-Sync V-Sync DDC-Serial Clock EN-9
User Manual
Page 12
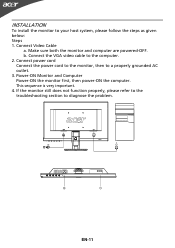
... powered-OFF. If the monitor still does not function properly, please refer to the troubleshooting section to the computer. 2. Connect the VGA video cable to diagnose the problem. Connect power cord Connect the power cord to the monitor, then to your host system, please follow the steps as given below: Steps 1. INSTALLATION To install the monitor to a properly grounded AC outlet. 3. Connect Video Cable a. b. Power-ON Monitor and Computer Power-ON the monitor first, then power...
... powered-OFF. If the monitor still does not function properly, please refer to the troubleshooting section to the computer. 2. Connect the VGA video cable to diagnose the problem. Connect power cord Connect the power cord to the monitor, then to your host system, please follow the steps as given below: Steps 1. INSTALLATION To install the monitor to a properly grounded AC outlet. 3. Connect Video Cable a. b. Power-ON Monitor and Computer Power-ON the monitor first, then power...
User Manual
Page 13
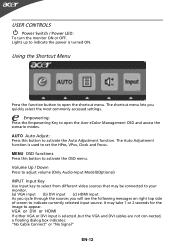
... screen to your monitor. (a) VGA input (b) DVI input (c) HDMI input As you cycle through the sources you quickly select the most commonly accessed settings. Volume Up / Down Press to adjust volume (Only Audio-Input Model)(Optional) INPUT Input Key Use Input key to select from different video sources that may take 1 or 2 seconds for the image to activate the Auto Adjustment function. USER CONTROLS Power Switch / Power LED: To turn the monitor ON or OFF. VGA or DVI or HDMI If either VGA or DVI input is used to open the shortcut menu...
... screen to your monitor. (a) VGA input (b) DVI input (c) HDMI input As you cycle through the sources you quickly select the most commonly accessed settings. Volume Up / Down Press to adjust volume (Only Audio-Input Model)(Optional) INPUT Input Key Use Input key to select from different video sources that may take 1 or 2 seconds for the image to activate the Auto Adjustment function. USER CONTROLS Power Switch / Power LED: To turn the monitor ON or OFF. VGA or DVI or HDMI If either VGA or DVI input is used to open the shortcut menu...
User Manual
Page 14
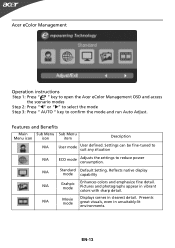
... native display mode capability N/A Grahpic mode Enhances colors and emphasize fine detail. Acer eColor Management Operation instructions Step 1: Press " " key to open the Acer eColor Management OSD and access the scenario modes Step 2: Press "" or "" to select the mode Step 3: Press " AUTO " key to reduce power consumption. Settings can be fine-tuned to suit any situation N/A ECO mode Adjusts the settings to confirm the mode and run Auto Adjust...
... native display mode capability N/A Grahpic mode Enhances colors and emphasize fine detail. Acer eColor Management Operation instructions Step 1: Press " " key to open the Acer eColor Management OSD and access the scenario modes Step 2: Press "" or "" to select the mode Step 3: Press " AUTO " key to reduce power consumption. Settings can be fine-tuned to suit any situation N/A ECO mode Adjusts the settings to confirm the mode and run Auto Adjust...
User Manual
Page 15
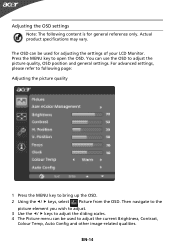
... the picture element you wish to adjust. 3 Use the / keys to adjust the sliding scales. 4 The Picture menu can be used to open the OSD. EN-14 Actual product specifications may vary. The OSD can use the OSD to bring up the OSD. 2 Using the / keys, select Picture from the OSD. Press the MENU key to adjust the current Brightness, Contrast, Colour Temp, Auto Config and other image-related...
... the picture element you wish to adjust. 3 Use the / keys to adjust the sliding scales. 4 The Picture menu can be used to open the OSD. EN-14 Actual product specifications may vary. The OSD can use the OSD to bring up the OSD. 2 Using the / keys, select Picture from the OSD. Press the MENU key to adjust the current Brightness, Contrast, Colour Temp, Auto Config and other image-related...

User Manual
Page 17
EN-16 Then navigate to the feature you wish to adjust. 3 The Setting menu can be used to bring up the OSD. 2 Using the / keys, select Setting from the OSD. Adjusting the setting 1 Press the MENU key to adjust the screen Menu Language and other important settings.
EN-16 Then navigate to the feature you wish to adjust. 3 The Setting menu can be used to bring up the OSD. 2 Using the / keys, select Setting from the OSD. Adjusting the setting 1 Press the MENU key to adjust the screen Menu Language and other important settings.
User Manual
Page 19
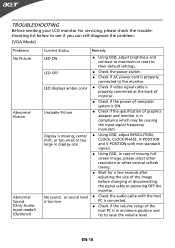
... the problem. (VGA Mode) Problems No Picture Abnormal Picture Abnormal Sound (Only AudioInput model) (Optional) Current Status Remedy LED ON Using OSD, adjust brightness and contrast to maximum or reset to their default settings. EN-18 No sound, or sound level Check the audio cable with non-standard signals. Using OSD, in minimum position and try to the monitor. TROUBLESHOOTING Before sending your LCD monitor for a few seconds after adjusting the size of the image before changing or disconnecting the signal cable or powering...
... the problem. (VGA Mode) Problems No Picture Abnormal Picture Abnormal Sound (Only AudioInput model) (Optional) Current Status Remedy LED ON Using OSD, adjust brightness and contrast to maximum or reset to their default settings. EN-18 No sound, or sound level Check the audio cable with non-standard signals. Using OSD, in minimum position and try to the monitor. TROUBLESHOOTING Before sending your LCD monitor for a few seconds after adjusting the size of the image before changing or disconnecting the signal cable or powering...
User Manual
Page 20
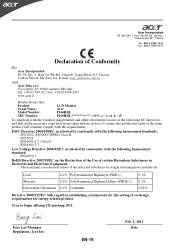
... 40, 20020 Lainate (MI) Italy Tel: +39-02-939-921, Fax: +39-02 9399-2913 www.acer.it Hereby declare that: Product: Trade Name: Model Number: SKU Number: LCD Monitor Acer P166HQL P166HQL 0~9, a ~ z, or A ~ Z) Is compliant with the essential requirements and other relevant provisions of the... Ethers (PBDE's) Hexavalent Chromium 0.1% Cadmium 0.1% 0.1% 0.01% Directive 2009/125/EC with regard to establishing a framework for the setting of ecodesign requirements for energy-related product. EMC Directive 2004/108/EC as attested by conformity with the following harmonized standard: -. ...
... 40, 20020 Lainate (MI) Italy Tel: +39-02-939-921, Fax: +39-02 9399-2913 www.acer.it Hereby declare that: Product: Trade Name: Model Number: SKU Number: LCD Monitor Acer P166HQL P166HQL 0~9, a ~ z, or A ~ Z) Is compliant with the essential requirements and other relevant provisions of the... Ethers (PBDE's) Hexavalent Chromium 0.1% Cadmium 0.1% 0.1% 0.01% Directive 2009/125/EC with regard to establishing a framework for the setting of ecodesign requirements for energy-related product. EMC Directive 2004/108/EC as attested by conformity with the following harmonized standard: -. ...
User Manual
Page 21
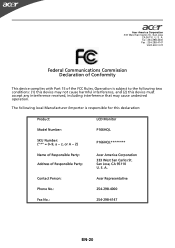
... interference, and (2) this declaration: Product: LCD Monitor Model Number: P166HQL SKU Number: ("*" = 0~9, a ~ z, or A ~ Z) P166HQL******** Name of Responsible Party: Address of the FCC Rules. S. San Jose, CA 95110 U. A. Tel : 254-298-4000 Fax : 254-298-4147 www.acer.com Federal Communications Commission Declaration of Conformity This device complies with Part 15 of Responsible Party: Acer America Corporation 333 West San Carlos...
... interference, and (2) this declaration: Product: LCD Monitor Model Number: P166HQL SKU Number: ("*" = 0~9, a ~ z, or A ~ Z) P166HQL******** Name of Responsible Party: Address of the FCC Rules. S. San Jose, CA 95110 U. A. Tel : 254-298-4000 Fax : 254-298-4147 www.acer.com Federal Communications Commission Declaration of Conformity This device complies with Part 15 of Responsible Party: Acer America Corporation 333 West San Carlos...


