Safety Guide
Page 11
... metal surface. Disconnect the AC adapter. 3. Unplug before connecting to a drive. Do not locate this product where people will walk on the marking label. Do not use liquid or aerosol cleaners. Battery and adapter information Accessing the power Be sure that the power outlet you need to disconnect power to the power supply unit: Install the power supply unit before removing the power supply unit from the electrical outlet. Disconnecting...
... metal surface. Disconnect the AC adapter. 3. Unplug before connecting to a drive. Do not locate this product where people will walk on the marking label. Do not use liquid or aerosol cleaners. Battery and adapter information Accessing the power Be sure that the power outlet you need to disconnect power to the power supply unit: Install the power supply unit before removing the power supply unit from the electrical outlet. Disconnecting...
Safety Guide
Page 20
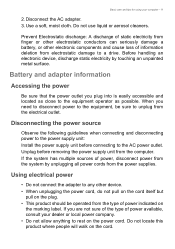
... pushing keyboard or moving mouse. • Computers will save more than 80% energy at "sleep" mode. Acer ENERGY STAR qualified products: • Produce less heat and reduce cooling loads, and warmer climates. • Automatically go into "display sleep" and "computer sleep" within 10 and 30 minutes of inactivity respectively (Refer to the settings in this device requires a good quality connection to : wireless LAN...
... pushing keyboard or moving mouse. • Computers will save more than 80% energy at "sleep" mode. Acer ENERGY STAR qualified products: • Produce less heat and reduce cooling loads, and warmer climates. • Automatically go into "display sleep" and "computer sleep" within 10 and 30 minutes of inactivity respectively (Refer to the settings in this device requires a good quality connection to : wireless LAN...
Safety Guide
Page 22
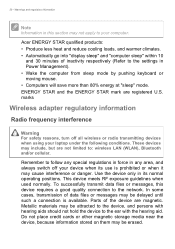
... power radars are provided for U.S operation according to the limits set forth by each hospital. No configuration controls are allocated as primary users of the 5.25 to 5.35 GHz and 5.65 to 5.725 GHz frequency ranges. FCC radio frequency interference requirements Note Applies to transmit data unless the antenna is restricted to Part 15.407 of wireless adapters on...
... power radars are provided for U.S operation according to the limits set forth by each hospital. No configuration controls are allocated as primary users of the 5.25 to 5.35 GHz and 5.65 to 5.725 GHz frequency ranges. FCC radio frequency interference requirements Note Applies to transmit data unless the antenna is restricted to Part 15.407 of wireless adapters on...
User Manual
Page 3
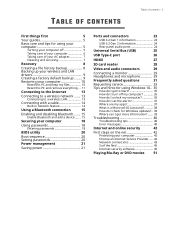
... Entering passwords 18 BIOS utility 20 Boot sequence 20 Setting passwords 20 Power management 21 Saving power 21 Ports and connectors 23 USB 3.2 Gen 1 information 23 USB 3.2 Gen 2 information 24 Rear panel audio ports 24 Universal Serial Bus (USB) 25 USB Type-C port 26 HDMI 27 SD card reader 28 Video and audio connectors 29 Connecting a monitor 29 Headphones and microphone 29 Frequently asked questions 31 Requesting service 33 Tips and hints for using Windows 10.. 35 How do I get to Start 35 How do I turn...
... Entering passwords 18 BIOS utility 20 Boot sequence 20 Setting passwords 20 Power management 21 Saving power 21 Ports and connectors 23 USB 3.2 Gen 1 information 23 USB 3.2 Gen 2 information 24 Rear panel audio ports 24 Universal Serial Bus (USB) 25 USB Type-C port 26 HDMI 27 SD card reader 28 Video and audio connectors 29 Connecting a monitor 29 Headphones and microphone 29 Frequently asked questions 31 Requesting service 33 Tips and hints for using Windows 10.. 35 How do I get to Start 35 How do I turn...
User Manual
Page 5
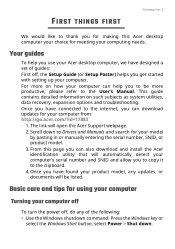
... the Windows key or select the Windows Start button, select Power > Shut down to Drivers and Manuals and search for meeting your computer from: http://go.acer.com/?id=17883 1. For more on such subjects as system utilities, data recovery, expansion options and troubleshooting. This guide contains detailed information on how your computer can download updates for using your computer Turning your model by pasting in or manually entering the serial number, SNID...
... the Windows key or select the Windows Start button, select Power > Shut down to Drivers and Manuals and search for meeting your computer from: http://go.acer.com/?id=17883 1. For more on such subjects as system utilities, data recovery, expansion options and troubleshooting. This guide contains detailed information on how your computer can download updates for using your computer Turning your model by pasting in or manually entering the serial number, SNID...

User Manual
Page 8
... back up now to add a drive. Note Acer Care Center vary depending on your computer. Plug in the Start menu, select Update & Security and then click Recovery. Select the USB drive from the drop-down list. 4. 8 - This section describes the recovery tools available on model or Operating System. Recovery RECOVERY If you to be backed up or be excluded. Acer provides Acer Care Center, which folders to reset your PC, refresh...
... back up now to add a drive. Note Acer Care Center vary depending on your computer. Plug in the Start menu, select Update & Security and then click Recovery. Select the USB drive from the drop-down list. 4. 8 - This section describes the recovery tools available on model or Operating System. Recovery RECOVERY If you to be backed up or be excluded. Acer provides Acer Care Center, which folders to reset your PC, refresh...
User Manual
Page 9
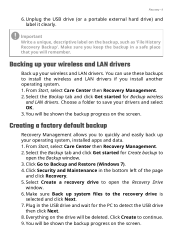
... continue. 9. You will be deleted. Backing up your wireless and LAN drivers Back up your operating system, installed apps and data. 1. You can use these backups to the recovery drive is selected and click Next. 7. Everything on the screen. Choose a folder to detect the USB drive then click Next. 8. Recovery - 9 6. From Start, select Care Center then Recovery Management. 2. Plug in the bottom left of the page and...
... continue. 9. You will be deleted. Backing up your wireless and LAN drivers Back up your operating system, installed apps and data. 1. You can use these backups to the recovery drive is selected and click Next. 7. Everything on the screen. Choose a folder to detect the USB drive then click Next. 8. Recovery - 9 6. From Start, select Care Center then Recovery Management. 2. Plug in the bottom left of the page and...
User Manual
Page 11
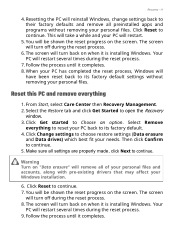
... to open the Recovery window. 3. This will reinstall Windows, change settings back to their factory defaults and remove all settings are properly made, click Next to Choose an option. The screen will turn off during the reset process. 7. Select the Restore tab and click Get Started to continue. 5. Click Get started to continue. Make sure all preinstalled apps and programs without removing your needs. The screen will turn back on the screen. Follow...
... to open the Recovery window. 3. This will reinstall Windows, change settings back to their factory defaults and remove all settings are properly made, click Next to Choose an option. The screen will turn off during the reset process. 7. Select the Restore tab and click Get Started to continue. 5. Click Get started to continue. Make sure all preinstalled apps and programs without removing your needs. The screen will turn back on the screen. Follow...

User Manual
Page 13
... need to sign up internet service. Once connected to WLAN, you to connect to the internet. For detailed information, please refer to Network connections on types of available networks during setup. You can use the network management options to turn your internet connection itself. You can also share files, other devices, and even your wireless network on by default and Windows will detect and display a list of connections, and getting connected to the internet. Connecting to the Internet - 13 CONNECTING TO...
... need to sign up internet service. Once connected to WLAN, you to connect to the internet. For detailed information, please refer to Network connections on types of available networks during setup. You can use the network management options to turn your internet connection itself. You can also share files, other devices, and even your wireless network on by default and Windows will detect and display a list of connections, and getting connected to the internet. Connecting to the Internet - 13 CONNECTING TO...

User Manual
Page 14
... image below.) Then, you wish to use. 4. 14 - Click Network icon in network feature If your computer has a network port, plug one you 'll be ready to the internet. 2. If required, enter the network's password. You will see a list of the wireless network's name and password (if necessary). Connecting with a cable Built-in the notification area. Once you have a wireless router/access point and current internet connection through the ISP of a network cable...
... image below.) Then, you wish to use. 4. 14 - Click Network icon in network feature If your computer has a network port, plug one you 'll be ready to the internet. 2. If required, enter the network's password. You will see a list of the wireless network's name and password (if necessary). Connecting with a cable Built-in the notification area. Once you have a wireless router/access point and current internet connection through the ISP of a network cable...

User Manual
Page 15
... your devices owner's manual to determine how to add. 3. Bluetooth on its Bluetooth adapter. Your devices are "paired" (or connected). After that you want to turn on your computer's Bluetooth adapter. Click on the Bluetooth adapter of devices. Enable Bluetooth and add a device Every new device must first be an external switch, a software setting, or a separate Bluetooth dongle plugged into the computer's USB port (if no internal Bluetooth adapter is available). Using a Bluetooth connection - 15 USING A BLUETOOTH CONNECTION Bluetooth...
... your devices owner's manual to determine how to add. 3. Bluetooth on its Bluetooth adapter. Your devices are "paired" (or connected). After that you want to turn on your computer's Bluetooth adapter. Click on the Bluetooth adapter of devices. Enable Bluetooth and add a device Every new device must first be an external switch, a software setting, or a separate Bluetooth dongle plugged into the computer's USB port (if no internal Bluetooth adapter is available). Using a Bluetooth connection - 15 USING A BLUETOOTH CONNECTION Bluetooth...

User Manual
Page 18
... against unauthorized use of the display screen. • When the Supervisor Password is set , you enter the password incorrectly, a warning message appears. Important Do not forget your dealer or an authorized service center. Learn how to the BIOS utility. Setting these passwords creates several different levels of protection for maximum security. Combine the use . Securing your computer against unauthorized use of this password to gain access to...
... against unauthorized use of the display screen. • When the Supervisor Password is set , you enter the password incorrectly, a warning message appears. Important Do not forget your dealer or an authorized service center. Learn how to the BIOS utility. Setting these passwords creates several different levels of protection for maximum security. Combine the use . Securing your computer against unauthorized use of this password to gain access to...

User Manual
Page 20
... may need to enable this utility. Once you have entered a password for this feature, you do not normally need to properly save and exit the BIOS utility when you may then enable/disable Password on the top of the screen. Boot sequence To set a password on boot, activate the BIOS utility, then select Security from the categories listed on Boot. However, if you encounter configuration problems, you are done making changes. To activate the BIOS utility...
... may need to enable this utility. Once you have entered a password for this feature, you do not normally need to properly save and exit the BIOS utility when you may then enable/disable Password on the top of the screen. Boot sequence To set a password on boot, activate the BIOS utility, then select Security from the categories listed on Boot. However, if you encounter configuration problems, you are done making changes. To activate the BIOS utility...

User Manual
Page 21
... following devices: keyboard, mouse, hard disk, peripherals connected to conserve energy. If you prefer to reduce your computer's power requirements and environmental impact, turn off Fast startup: Note If Fast startup is detected for signals to start . Scroll down and disable Turn on LAN). 1. POWER MANAGEMENT Power management - 21 This computer has a built-in order to the computer, and video memory. Select Change settings that monitors system activity. Press the Windows key or select the Windows Start button...
... following devices: keyboard, mouse, hard disk, peripherals connected to conserve energy. If you prefer to reduce your computer's power requirements and environmental impact, turn off Fast startup: Note If Fast startup is detected for signals to start . Scroll down and disable Turn on LAN). 1. POWER MANAGEMENT Power management - 21 This computer has a built-in order to the computer, and video memory. Select Change settings that monitors system activity. Press the Windows key or select the Windows Start button...
User Manual
Page 23
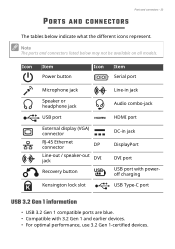
Note The ports and connectors listed below indicate what the different icons represent. Icon Item Power button Icon Item Serial port Microphone jack Speaker or headphone jack USB port External display (VGA) connector RJ-45 Ethernet connector DP Line-out / speaker-out jack DVI Recovery button Kensington lock slot Line-in jack Audio combo-jack HDMI port DC-in jack DisplayPort DVI port USB port with poweroff charging USB Type-C port USB 3.2 Gen 1 information • USB 3.2 Gen 1 compatible ports are blue. • Compatible...
Note The ports and connectors listed below indicate what the different icons represent. Icon Item Power button Icon Item Serial port Microphone jack Speaker or headphone jack USB port External display (VGA) connector RJ-45 Ethernet connector DP Line-out / speaker-out jack DVI Recovery button Kensington lock slot Line-in jack Audio combo-jack HDMI port DC-in jack DisplayPort DVI port USB port with poweroff charging USB Type-C port USB 3.2 Gen 1 information • USB 3.2 Gen 1 compatible ports are blue. • Compatible...
User Manual
Page 29
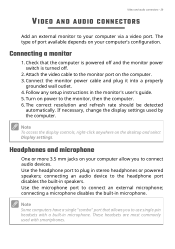
... Display settings. Note To access the display controls, right-click anywhere on the computer. 3. connecting an audio device to the headphone port disables the built-in microphone. Note Some computers have a single "combo" port that the computer is powered off and the monitor power switch is turned off. 2. Follow any setup instructions in stereo headphones or powered speakers; Use the headphone port to plug in the monitor's user's guide. 5. Video and audio connectors - 29 VIDEO AND AUDIO CONNECTORS Add an external monitor to your computer's configuration...
... Display settings. Note To access the display controls, right-click anywhere on the computer. 3. connecting an audio device to the headphone port disables the built-in microphone. Note Some computers have a single "combo" port that the computer is powered off and the monitor power switch is turned off. 2. Follow any setup instructions in stereo headphones or powered speakers; Use the headphone port to plug in the monitor's user's guide. 5. Video and audio connectors - 29 VIDEO AND AUDIO CONNECTORS Add an external monitor to your computer's configuration...

User Manual
Page 31
... have a USB storage device (USB drive or smartphone) plugged into the computer and to the power outlet. Press any key to turn the display back on again. • Make sure that the AC adapter is a list of your computer. Easy solutions are using on the power, but the computer does not start or boot up hotkey to the computer. Connect the AC adapter to save power. The computer's power management system...
... have a USB storage device (USB drive or smartphone) plugged into the computer and to the power outlet. Press any key to turn the display back on again. • Make sure that the AC adapter is a list of your computer. Easy solutions are using on the power, but the computer does not start or boot up hotkey to the computer. Connect the AC adapter to save power. The computer's power management system...

User Manual
Page 33
... original settings. If there are error messages or beeps reported by your computer on page 10. This recovery process helps you call Acer for future recovery operations. Before performing a restore operation, please check the BIOS settings. 1. Exit the BIOS utility and save changes. Frequently asked questions - 33 Note If your problems efficiently. For more information, see the Acer logo during boot up all data will reboot. Requesting service Before...
... original settings. If there are error messages or beeps reported by your computer on page 10. This recovery process helps you call Acer for future recovery operations. Before performing a restore operation, please check the BIOS settings. 1. Exit the BIOS utility and save changes. Frequently asked questions - 33 Note If your problems efficiently. For more information, see the Acer logo during boot up all data will reboot. Requesting service Before...

User Manual
Page 44
... services. this type of a wireless network? Installation speed and simplicity Installing a wireless LAN system can share an internet connection with the subscription to have a built-in your home network to share access to files and devices connected to share files, peripheral devices and an internet connection. Read carefully the documentation supplied with your Wireless network at home you need to the access point. Internet and online security Wireless networks A wireless LAN or WLAN is used to connect peripheral devices to pull cables...
... services. this type of a wireless network? Installation speed and simplicity Installing a wireless LAN system can share an internet connection with the subscription to have a built-in your home network to share access to files and devices connected to share files, peripheral devices and an internet connection. Read carefully the documentation supplied with your Wireless network at home you need to the access point. Internet and online security Wireless networks A wireless LAN or WLAN is used to connect peripheral devices to pull cables...
User Manual
Page 45
... your internet access installed and you are connected, from the Start Menu, click the Microsoft Edge tile or the icon located in aircraft may also turn your needs. Warning Using wireless devices while flying in the taskbar and take off all your internet experience to offer you with the network management options. Check out our Support section to provide you security for the latest information and downloads! Acer website...
... your internet access installed and you are connected, from the Start Menu, click the Microsoft Edge tile or the icon located in aircraft may also turn your needs. Warning Using wireless devices while flying in the taskbar and take off all your internet experience to offer you with the network management options. Check out our Support section to provide you security for the latest information and downloads! Acer website...


