
User Manual
Page 2
Register your Acer product If your new device runs on the Operating System version. Enter S/N or SNID of your computer. Model number Serial number Date of purchase Place of HDMI Licensing Administrator, Inc. The information contained in the United States and other countries. Log in this manual may not be liable for technical or editorial errors or omissions contained in or sign up your device with...
Register your Acer product If your new device runs on the Operating System version. Enter S/N or SNID of your computer. Model number Serial number Date of purchase Place of HDMI Licensing Administrator, Inc. The information contained in the United States and other countries. Log in this manual may not be liable for technical or editorial errors or omissions contained in or sign up your device with...

User Manual
Page 3
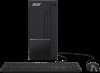
... LAN 16 Connecting with a cable 17 Built-in network feature 17 Securing your computer 19 Using passwords 19 Entering passwords 19 BIOS utility 21 Boot sequence 21 Setting passwords 21 Power management 22 Saving power 22 Ports and connectors 24 USB 3.2 Gen 1 information 25 USB 3.2 Gen 2 information 25 Rear panel audio ports 25 Universal Serial Bus (USB) 26 USB Type-C port 27 HDMI 28 SD card reader 29 Video and audio connectors 30 Connecting a monitor 30 Headphones and microphone 30 Frequently asked questions 32 Requesting service 34 Troubleshooting...
... LAN 16 Connecting with a cable 17 Built-in network feature 17 Securing your computer 19 Using passwords 19 Entering passwords 19 BIOS utility 21 Boot sequence 21 Setting passwords 21 Power management 22 Saving power 22 Ports and connectors 24 USB 3.2 Gen 1 information 25 USB 3.2 Gen 2 information 25 Rear panel audio ports 25 Universal Serial Bus (USB) 26 USB Type-C port 27 HDMI 28 SD card reader 29 Video and audio connectors 30 Connecting a monitor 30 Headphones and microphone 30 Frequently asked questions 32 Requesting service 34 Troubleshooting...

User Manual
Page 5
... any updates, or documents will open the Acer Support webpage. 2. Once you have designed a set of the following: • Use the Windows shutdown command: Press the Windows key or select the Windows Start button, select Power > Shut down to the internet, you can help you use your Acer desktop computer, we have connected to Drivers and Manuals and search for meeting your computer off To turn the power off , the Setup Guide helps you...
... any updates, or documents will open the Acer Support webpage. 2. Once you have designed a set of the following: • Use the Windows shutdown command: Press the Windows key or select the Windows Start button, select Power > Shut down to the internet, you can help you use your Acer desktop computer, we have connected to Drivers and Manuals and search for meeting your computer off To turn the power off , the Setup Guide helps you...

User Manual
Page 8
... calendar. Displays the situation of network 7 Quick settings connection, battery level and sound setting. 8 - Provides the weather, news, stocks, and sports information. 6 Power Shut down, sleep or restart your computer. The Windows OS Desktop THE WINDOWS OS DESKTOP 1 2345 6 78 # Item 1 Settings 2 Start 3 Search 4 Task View 5 Widgets Description Changes the apps settings for your computer. You can toggle quick actions to switch between running applications and add the virtual desktop. Types in...
... calendar. Displays the situation of network 7 Quick settings connection, battery level and sound setting. 8 - Provides the weather, news, stocks, and sports information. 6 Power Shut down, sleep or restart your computer. The Windows OS Desktop THE WINDOWS OS DESKTOP 1 2345 6 78 # Item 1 Settings 2 Start 3 Search 4 Task View 5 Widgets Description Changes the apps settings for your computer. You can toggle quick actions to switch between running applications and add the virtual desktop. Types in...

User Manual
Page 11
... as 'Windows Recovery Backup'. Important Write a unique, descriptive label on the screen. 7. You can use a USB drive with a capacity of 16 GB or larger. You will be deleted. Recovery - 11 Creating a factory default backup Recovery Drive allows you to quickly and easily back up your wireless and LAN drivers. Unplug the USB drive and label it completes. 8. From Start, select Care Center in all apps list then Recovery Management. 2. Plug in a safe...
... as 'Windows Recovery Backup'. Important Write a unique, descriptive label on the screen. 7. You can use a USB drive with a capacity of 16 GB or larger. You will be deleted. Recovery - 11 Creating a factory default backup Recovery Drive allows you to quickly and easily back up your wireless and LAN drivers. Unplug the USB drive and label it completes. 8. From Start, select Care Center in all apps list then Recovery Management. 2. Plug in a safe...

User Manual
Page 12
.... Recovery Restoring your computer Recovery Management allows you to quickly and easily restore your computer back to the internet when using Cloud download.) 6. Click Confirm then Next to open the Choose settings options. 7. Click Reset PC to keep my files 1. The screen will turn back on your files or remove them before reinstalling Windows. Important If you are connected to its factory default settings without removing your PC will have apps installed...
.... Recovery Restoring your computer Recovery Management allows you to quickly and easily restore your computer back to the internet when using Cloud download.) 6. Click Confirm then Next to open the Choose settings options. 7. Click Reset PC to keep my files 1. The screen will turn back on your files or remove them before reinstalling Windows. Important If you are connected to its factory default settings without removing your PC will have apps installed...

User Manual
Page 13
... installing Windows. Choose from the two options - Click Reset to Choose an option. 4. Click Reset PC to continue. 9. Cloud download or Local reinstall to reinstall Windows. (Ensure you are connected to open the Choose settings options. 7. Choose your settings options and follow the instructions on the screen. Recovery - 13 Reset this PC and remove everything to reset your PC back to its factory default. 5. Select the Restore tab and click Get Started to the internet...
... installing Windows. Choose from the two options - Click Reset to Choose an option. 4. Click Reset PC to continue. 9. Cloud download or Local reinstall to reinstall Windows. (Ensure you are connected to open the Choose settings options. 7. Choose your settings options and follow the instructions on the screen. Recovery - 13 Reset this PC and remove everything to reset your PC back to its factory default. 5. Select the Restore tab and click Get Started to the internet...

User Manual
Page 14
... use Bluetooth, you to enable/disable it must first be an external switch, a software setting, or a separate Bluetooth dongle plugged into the computer's USB port (if no internal Bluetooth adapter is disabled by default. After that you want to other devices. Click on Add device then select the device that , simply turning on the Bluetooth adapter of devices. Your computer will connect them. 14 - To enable your computer's Bluetooth adapter. Your devices are "paired" (or connected...
... use Bluetooth, you to enable/disable it must first be an external switch, a software setting, or a separate Bluetooth dongle plugged into the computer's USB port (if no internal Bluetooth adapter is disabled by default. After that you want to other devices. Click on Add device then select the device that , simply turning on the Bluetooth adapter of devices. Your computer will connect them. 14 - To enable your computer's Bluetooth adapter. Your devices are "paired" (or connected...

User Manual
Page 15
... the case of one of the Bluetooth technology require both devices to enter the Bluetooth settings. You can enable or disable Bluetooth or right-click on the device to open the Quick settings pane. Select the device you can also enter the Bluetooth settings by selecting the Network, Sound and Battery icon in a headset), the passcode is a code displaying on the screen, enter that code on Bluetooth > Go to Settings to enter a PIN...
... the case of one of the Bluetooth technology require both devices to enter the Bluetooth settings. You can enable or disable Bluetooth or right-click on the device to open the Quick settings pane. Select the device you can also enter the Bluetooth settings by selecting the Network, Sound and Battery icon in a headset), the passcode is a code displaying on the screen, enter that code on Bluetooth > Go to Settings to enter a PIN...

User Manual
Page 16
... without using a cable or a wireless connection. To connect to Network connections on types of your network and enter the password if required. The ISP will install a small box, a router or modem, that will detect and display a list of the wireless network's name and password (if necessary). Once connected to a wireless LAN A wireless LAN (or WLAN) is shared over the network. Select your choice. 16 - Make a note of available networks during setup. Connecting to a wireless network Connecting to WLAN, you 'll need...
... without using a cable or a wireless connection. To connect to Network connections on types of your network and enter the password if required. The ISP will install a small box, a router or modem, that will detect and display a list of the wireless network's name and password (if necessary). Once connected to a wireless LAN A wireless LAN (or WLAN) is shared over the network. Select your choice. 16 - Make a note of available networks during setup. Connecting to a wireless network Connecting to WLAN, you 'll need...

User Manual
Page 17
... see a list of a network cable into the network port on your computer, and the other end into a port on . 3. Select the one end of available wireless networks. Connecting with a cable Built-in the notification area. Select Manage WiFi connections. 4. If required, enter the network's password. Click Network icon in network feature If your router (refer to the image below.) Then, you'll be ready to use. 5. Connecting to the Internet - 17 Note...
... see a list of a network cable into the network port on your computer, and the other end into a port on . 3. Select the one end of available wireless networks. Connecting with a cable Built-in the notification area. Select Manage WiFi connections. 4. If required, enter the network's password. Click Network icon in network feature If your router (refer to the image below.) Then, you'll be ready to use. 5. Connecting to the Internet - 17 Note...

User Manual
Page 19
... unauthorized access. Combine the use of the display screen. • When the Supervisor Password is enabled, a prompt appears at boot-up and resume from Hibernation (if available) for your computer and data: • Supervisor Password prevents unauthorized entry into the BIOS utility. Entering passwords When a password is set , a prompt appears when you enter the BIOS utility. • Type the Supervisor Password and press Enter to the BIOS utility. Combine the use of . Using passwords Passwords protect...
... unauthorized access. Combine the use of the display screen. • When the Supervisor Password is enabled, a prompt appears at boot-up and resume from Hibernation (if available) for your computer and data: • Supervisor Password prevents unauthorized entry into the BIOS utility. Entering passwords When a password is set , a prompt appears when you enter the BIOS utility. • Type the Supervisor Password and press Enter to the BIOS utility. Combine the use of . Using passwords Passwords protect...

User Manual
Page 21
... is a hardware configuration program built into your computer's BIOS. Find Set Supervisor Password and enter a password to properly save and exit the BIOS utility when you may then enable/disable Password on the top of the screen. Remember to select F10 to enable this utility. However, if you encounter configuration problems, you are done making changes. Setting passwords To set the boot sequence in the BIOS utility, activate the BIOS utility, then select Boot from the categories listed on...
... is a hardware configuration program built into your computer's BIOS. Find Set Supervisor Password and enter a password to properly save and exit the BIOS utility when you may then enable/disable Password on the top of the screen. Remember to select F10 to enable this utility. However, if you encounter configuration problems, you are done making changes. Setting passwords To set the boot sequence in the BIOS utility, activate the BIOS utility, then select Boot from the categories listed on...

User Manual
Page 22
... check for signals to start from Sleep. Select Change settings that monitors system activity. Select Save changes. Select Choose what the power buttons do. 3. 22 - Your computer will take longer to start over a network (Wake on fast startup. 5. Saving power Disable Fast startup Your computer uses Fast startup to start quickly, but also uses a small amount of the following devices: keyboard, mouse, hard disk, peripherals connected to start .These checks consume extra power. If you prefer to...
... check for signals to start from Sleep. Select Change settings that monitors system activity. Select Save changes. Select Choose what the power buttons do. 3. 22 - Your computer will take longer to start over a network (Wake on fast startup. 5. Saving power Disable Fast startup Your computer uses Fast startup to start quickly, but also uses a small amount of the following devices: keyboard, mouse, hard disk, peripherals connected to start .These checks consume extra power. If you prefer to...

User Manual
Page 30
... audio connectors VIDEO AND AUDIO CONNECTORS Add an external monitor to your computer's configuration. Attach the video cable to the monitor port on your computer allow you to connect audio devices. Follow any setup instructions in microphone. Use the microphone port to plug in stereo headphones or powered speakers; Note Some computers have a single "combo" port that the computer is powered off and the monitor power switch is turned off. 2. 30 - The type of port available depends on your computer via a video port...
... audio connectors VIDEO AND AUDIO CONNECTORS Add an external monitor to your computer's configuration. Attach the video cable to the monitor port on your computer allow you to connect audio devices. Follow any setup instructions in microphone. Use the microphone port to plug in stereo headphones or powered speakers; Note Some computers have a single "combo" port that the computer is powered off and the monitor power switch is turned off. 2. 30 - The type of port available depends on your computer via a video port...

User Manual
Page 32
... might be in the optical drive? 32 - Easy solutions are using on again. • Make sure that the AC adapter is a list of your computer? if there is no power, check the following: • If you have a USB storage device (USB drive or smartphone) plugged into the computer and to power the computer. The computer's power management system automatically blanks the screen to the computer, check...
... might be in the optical drive? 32 - Easy solutions are using on again. • Make sure that the AC adapter is a list of your computer? if there is no power, check the following: • If you have a USB storage device (USB drive or smartphone) plugged into the computer and to power the computer. The computer's power management system automatically blanks the screen to the computer, check...

User Manual
Page 33
... not work. • Make sure that is heard from the volume control (speaker) icon in the taskbar. If it works, contact your dealer or an authorized service center as the internal keyboard cable may be muted. Insert the tip of a pen or straightened-out paperclip into the hole and push to a USB port on the computer, the internal speakers automatically turn on the power. The keyboard does...
... not work. • Make sure that is heard from the volume control (speaker) icon in the taskbar. If it works, contact your dealer or an authorized service center as the internal keyboard cable may be muted. Insert the tip of a pen or straightened-out paperclip into the hole and push to a USB port on the computer, the internal speakers automatically turn on the power. The keyboard does...

User Manual
Page 37
... the Connection types Depending on your computer model, your location and your computer and the internet. The ISP you select will provide instructions on how to connect to the internet (you have limited use the modem and the telephone simultaneously on a single phone line. You should first select an Internet Service Provider (ISP), which supplies the connection between your communication needs, you may need additional software...
... the Connection types Depending on your computer model, your location and your computer and the internet. The ISP you select will provide instructions on how to connect to the internet (you have limited use the modem and the telephone simultaneously on a single phone line. You should first select an Internet Service Provider (ISP), which supplies the connection between your communication needs, you may need additional software...

User Manual
Page 39
... network, for detailed setup instructions. The ISP (Internet Service Provider) you need to pull cables through walls and ceilings. Network cable (RJ45) A network cable (also called RJ45 cable) is easy and allows you access to a high speed DSL internet connection. Wireless adapter Most computers feature a wireless module and Wi-Fi button that broadcast data into the surrounding environment. Mobility Wireless LAN systems allow you to share files, peripheral devices and an internet connection. Installation speed and simplicity Installing a wireless LAN...
... network, for detailed setup instructions. The ISP (Internet Service Provider) you need to pull cables through walls and ceilings. Network cable (RJ45) A network cable (also called RJ45 cable) is easy and allows you access to a high speed DSL internet connection. Wireless adapter Most computers feature a wireless module and Wi-Fi button that broadcast data into the surrounding environment. Mobility Wireless LAN systems allow you to share files, peripheral devices and an internet connection. Installation speed and simplicity Installing a wireless LAN...
Safety Guide
Page 12
... sure to the power supply unit: Install the power supply unit before removing the power supply unit from the computer. Use a soft, moist cloth. Before handling an electronic device, discharge static electricity by unplugging all power cords from the system by touching an unpainted metal surface. Do not use liquid or aerosol cleaners. If you plug into is easily accessible and located as close to...
... sure to the power supply unit: Install the power supply unit before removing the power supply unit from the computer. Use a soft, moist cloth. Before handling an electronic device, discharge static electricity by unplugging all power cords from the system by touching an unpainted metal surface. Do not use liquid or aerosol cleaners. If you plug into is easily accessible and located as close to...


