User Manual
Page 3
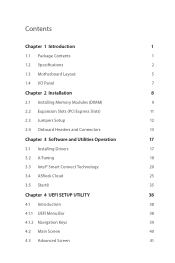
...) 9 2.2 Expansion Slots (PCI Express Slots) 11 2.3 Jumpers Setup 12 2.4 Onboard Headers and Connectors 13 Chapter 3 Software and Utilities Operation 17 3.1 Installing Drivers 17 3.2 A-Tuning 18 3.3 Intel® Smart Connect Technology 20 3.4 ASRock Cloud 25 3.5 Start8 35 Chapter 4 UEFI SETUP UTILITY 38 4.1 Introduction 38 4.1.1 UEFI Menu Bar 38 4.1.2 Navigation Keys 39 4.2 Main Screen...
...) 9 2.2 Expansion Slots (PCI Express Slots) 11 2.3 Jumpers Setup 12 2.4 Onboard Headers and Connectors 13 Chapter 3 Software and Utilities Operation 17 3.1 Installing Drivers 17 3.2 A-Tuning 18 3.3 Intel® Smart Connect Technology 20 3.4 ASRock Cloud 25 3.5 Start8 35 Chapter 4 UEFI SETUP UTILITY 38 4.1 Introduction 38 4.1.1 UEFI Menu Bar 38 4.1.2 Navigation Keys 39 4.2 Main Screen...
User Manual
Page 5
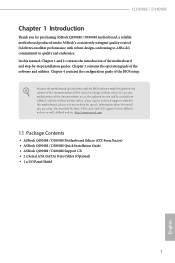
... and endurance. You may find the latest VGA cards and CPU support list on ASRock's website without notice. ASRock website http://www.asrock.com. 1.1 Package Contents • ASRock Q1900M / D1800M Motherboard (Micro ATX Form Factor) • ASRock Q1900M / D1800M Quick Installation Guide • ASRock Q1900M / D1800M Support CD • 2 x Serial ATA (SATA) Data Cables (Optional) • 1 x I/O Panel Shield 1 English Chapter...
... and endurance. You may find the latest VGA cards and CPU support list on ASRock's website without notice. ASRock website http://www.asrock.com. 1.1 Package Contents • ASRock Q1900M / D1800M Motherboard (Micro ATX Form Factor) • ASRock Q1900M / D1800M Quick Installation Guide • ASRock Q1900M / D1800M Support CD • 2 x Serial ATA (SATA) Data Cables (Optional) • 1 x I/O Panel Shield 1 English Chapter...
User Manual
Page 12
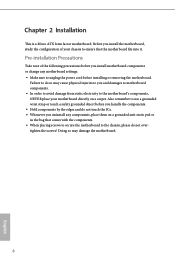
... components by the edges and do not touch the ICs. • Whenever you install the motherboard, study the configuration of the following precautions before installing or removing the motherboard. Pre-installation Precautions Take note of your motherboard directly on a grounded anti-static pad or in... the bag that the motherboard fits into it. Failure to you install motherboard components or change any components, place them on a carpet. Chapter 2 Installation This is a Micro ATX form factor motherboard. Doing so may cause physical injuries to do ...
... components by the edges and do not touch the ICs. • Whenever you install the motherboard, study the configuration of the following precautions before installing or removing the motherboard. Pre-installation Precautions Take note of your motherboard directly on a grounded anti-static pad or in... the bag that the motherboard fits into it. Failure to you install motherboard components or change any components, place them on a carpet. Chapter 2 Installation This is a Micro ATX form factor motherboard. Doing so may cause physical injuries to do ...
User Manual
Page 13
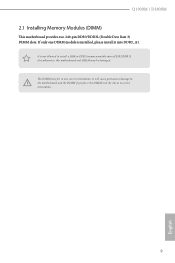
otherwise, this motherboard and DIMM may be damaged. Q1900M / D1800M 2.1 Installing Memory Modules (DIMM) This motherboard provides two 240-pin DDR3/DDR3L (Double Data Rate 3) DIMM slots. It is installed, please install it into DDR3_A1. The DIMM only fits in one DIMM module is not allowed to the motherboard and the DIMM if you force the DIMM into a DDR3/DDR3L slot; It will cause permanent damage to install a DDR or DDR2 memory module into the slot at incorrect orientation. 9 English If only one correct orientation.
otherwise, this motherboard and DIMM may be damaged. Q1900M / D1800M 2.1 Installing Memory Modules (DIMM) This motherboard provides two 240-pin DDR3/DDR3L (Double Data Rate 3) DIMM slots. It is installed, please install it into DDR3_A1. The DIMM only fits in one DIMM module is not allowed to the motherboard and the DIMM if you force the DIMM into a DDR3/DDR3L slot; It will cause permanent damage to install a DDR or DDR2 memory module into the slot at incorrect orientation. 9 English If only one correct orientation.

User Manual
Page 15
Q1900M / D1800M 2.2 Expansion Slots (PCI Express Slots) There are 3 PCI Express slots on the motherboard. Before installing an expansion card, please make necessary hardware settings for PCI Express x1 lane width cards. PCIE3 (PCIe 2.0 x1 slot) is used for PCI Express x1 ... expansion card and make sure that the power supply is switched off or the power cord is used for the card before you start the installation.
Q1900M / D1800M 2.2 Expansion Slots (PCI Express Slots) There are 3 PCI Express slots on the motherboard. Before installing an expansion card, please make necessary hardware settings for PCI Express x1 lane width cards. PCIE3 (PCIe 2.0 x1 slot) is used for PCI Express x1 ... expansion card and make sure that the power supply is switched off or the power cord is used for the card before you start the installation.

User Manual
Page 18
... p.5, No. 15) 1 GND P- Please follow the instructions in the Realtek Control panel and adjust "Recording Volume". If you use an AC'97 audio panel, please install it to install your system. 2.
... p.5, No. 15) 1 GND P- Please follow the instructions in the Realtek Control panel and adjust "Recording Volume". If you use an AC'97 audio panel, please install it to install your system. 2.
User Manual
Page 21
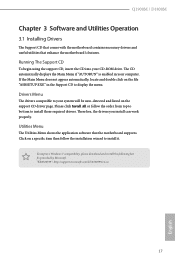
...does not appear automatically, locate and double click on the support CD driver page. To improve Windows 7 compatibility, please download and install the following hot fix provided by Microsoft. Running The Support CD To begin using the support CD, insert the CD into your computer... bottom to display the menu. "KB2720599": http://support.microsoft.com/kb/2720599/en-us 17 English Q1900M / D1800M Chapter 3 Software and Utilities Operation 3.1 Installing Drivers The Support CD that comes with the motherboard contains necessary drivers and useful utilities that the motherboard supports.
...does not appear automatically, locate and double click on the support CD driver page. To improve Windows 7 compatibility, please download and install the following hot fix provided by Microsoft. Running The Support CD To begin using the support CD, insert the CD into your computer... bottom to display the menu. "KB2720599": http://support.microsoft.com/kb/2720599/en-us 17 English Q1900M / D1800M Chapter 3 Software and Utilities Operation 3.1 Installing Drivers The Support CD that comes with the motherboard contains necessary drivers and useful utilities that the motherboard supports.

User Manual
Page 22
...operation mode for your desktop. 3.2 A-Tuning A-Tuning is ASRock's multi purpose software suite with a new interface, more new features and improved utilities, including XFast RAM and a whole lot more. 3.2.1 Installing A-Tuning When you will be auto-installed as well. Double-click the "A-Tuning" icon, A-Tuning ...main menu will pop up. 3.2.2 Using A-Tuning There are five sections in -one driver to your system from ASRock's support CD, A-Tuning will find the...
...operation mode for your desktop. 3.2 A-Tuning A-Tuning is ASRock's multi purpose software suite with a new interface, more new features and improved utilities, including XFast RAM and a whole lot more. 3.2.1 Installing A-Tuning When you will be auto-installed as well. Double-click the "A-Tuning" icon, A-Tuning ...main menu will pop up. 3.2.2 Using A-Tuning There are five sections in -one driver to your system from ASRock's support CD, A-Tuning will find the...
User Manual
Page 24
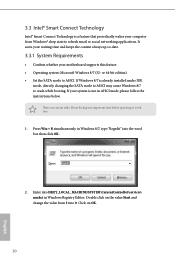
If Windows 8/7 is already installed under IDE mode, directly changing the SATA mode to AHCI may cause Windows 8/7 to AHCI. If your system is not in Windows Registry Editor. Click ...
If Windows 8/7 is already installed under IDE mode, directly changing the SATA mode to AHCI may cause Windows 8/7 to AHCI. If your system is not in Windows Registry Editor. Click ...

User Manual
Page 25
Step 2 Once installed, run ASRock Smart Connect from your desktop or go to Windows Start -> All Programs -> ASRock Utility. 21 English Q1900M / D1800M 3.3.2 Setup Guide Installing ASRock Smart Connect Utility Step 1 Install ASRock Smart Connect Utility, which is located in the folder at the following path of the Support CD: \ ASRock Utility > Smart Connect.
Step 2 Once installed, run ASRock Smart Connect from your desktop or go to Windows Start -> All Programs -> ASRock Utility. 21 English Q1900M / D1800M 3.3.2 Setup Guide Installing ASRock Smart Connect Utility Step 1 Install ASRock Smart Connect Utility, which is located in the folder at the following path of the Support CD: \ ASRock Utility > Smart Connect.

User Manual
Page 31
... / D1800M 3.4.2 Configuring and Using Orbweb.ME Professional Kloudian® Orbweb.ME Professional is a remote control software allowing you to complete the installation. Step 3 When installation completes, reboot the computer. Step 2 Follow the onscreen instructions to easily access and control the remote host installed with ... Registration Step 1 Double-click the Orbweb.ME Professional icon Step 2 on your host computer. Installing Orbweb.ME Professional on the Orbweb.ME Professional installer package file to create an Orbweb.ME account and name your desktop. On the Orbweb.ME ...
... / D1800M 3.4.2 Configuring and Using Orbweb.ME Professional Kloudian® Orbweb.ME Professional is a remote control software allowing you to complete the installation. Step 3 When installation completes, reboot the computer. Step 2 Follow the onscreen instructions to easily access and control the remote host installed with ... Registration Step 1 Double-click the Orbweb.ME Professional icon Step 2 on your host computer. Installing Orbweb.ME Professional on the Orbweb.ME Professional installer package file to create an Orbweb.ME account and name your desktop. On the Orbweb.ME ...

User Manual
Page 33
... to Orbweb.ME portal login page: http://orbweb.me Step 2 Log in with dual LAN ports, please disable one of Java is required to be installed to sleep and wake your Orbweb.ME account and password. To do so, go to Connect / Gray Online / Blue Wakable / Red 29 Step 3 Find the... host computer from a client device. Q1900M / D1800M REMOTE ACCESS FROM A CLIENT DEVICE The lastest version of the LAN ports to use the Remote Desktop and Xplorer functions. Using Remote Wake-Up Remote...
... to Orbweb.ME portal login page: http://orbweb.me Step 2 Log in with dual LAN ports, please disable one of Java is required to be installed to sleep and wake your Orbweb.ME account and password. To do so, go to Connect / Gray Online / Blue Wakable / Red 29 Step 3 Find the... host computer from a client device. Q1900M / D1800M REMOTE ACCESS FROM A CLIENT DEVICE The lastest version of the LAN ports to use the Remote Desktop and Xplorer functions. Using Remote Wake-Up Remote...

User Manual
Page 34
... Power Options icon and power options appear. Please be awaked and the power option shows wakable . For iOS or Android Mobile Devices users: Download and install "Orbweb.ME Professional" app from the options to online. When you can put your host computer to select Restart, Sleep or Shutdown.
... Power Options icon and power options appear. Please be awaked and the power option shows wakable . For iOS or Android Mobile Devices users: Download and install "Orbweb.ME Professional" app from the options to online. When you can put your host computer to select Restart, Sleep or Shutdown.

User Manual
Page 36
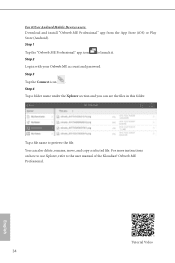
Step 4 Enter the Windows password to log in with your host computer. 32 English Step 2 Log in and you want to launch it. Step 3 Tap the host computer name that you will see the desktop of your Orbweb.ME account and password. For iOS or Android Mobile Devices users: Download and install "Orbweb.ME Professional" app from the App Store (iOS) or Play Store (Android). Step 1 Tap the "Orbweb.ME Professional" app icon to access under the Remote Desktop section.
Step 4 Enter the Windows password to log in with your host computer. 32 English Step 2 Log in and you want to launch it. Step 3 Tap the host computer name that you will see the desktop of your Orbweb.ME account and password. For iOS or Android Mobile Devices users: Download and install "Orbweb.ME Professional" app from the App Store (iOS) or Play Store (Android). Step 1 Tap the "Orbweb.ME Professional" app icon to access under the Remote Desktop section.
User Manual
Page 38
...; Orbweb.ME Professional. You can see the files in with your Orbweb.ME account and password. For iOS or Android Mobile Devices users: Download and install "Orbweb.ME Professional" app from the App Store (iOS) or Play Store (Android).
...; Orbweb.ME Professional. You can see the files in with your Orbweb.ME account and password. For iOS or Android Mobile Devices users: Download and install "Orbweb.ME Professional" app from the App Store (iOS) or Play Store (Android).
User Manual
Page 39
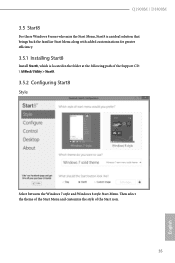
Then select the theme of the Start Menu and customize the style of the Support CD: \ ASRock Utility > Start8. 3.5.2 Configuring Start8 Style Select between the Windows 7 style and Windows 8 style Start Menu. Q1900M / D1800M 3.5 Start8 For those Windows 8 users who miss the Start Menu, Start8 is an ideal solution that brings back the familiar Start Menu along with added customizations for greater efficiency. 3.5.1 Installing Start8 Install Start8, which is located in the folder at the following path of the Start icon. 35 English
Then select the theme of the Start Menu and customize the style of the Support CD: \ ASRock Utility > Start8. 3.5.2 Configuring Start8 Style Select between the Windows 7 style and Windows 8 style Start Menu. Q1900M / D1800M 3.5 Start8 For those Windows 8 users who miss the Start Menu, Start8 is an ideal solution that brings back the familiar Start Menu along with added customizations for greater efficiency. 3.5.1 Installing Start8 Install Start8, which is located in the folder at the following path of the Start icon. 35 English
User Manual
Page 48
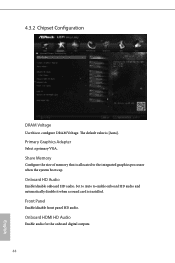
Set to Auto to enable onboard HD audio and automatically disable it when a sound card is [Auto]. Front Panel Enable/disable front panel HD audio. Onboard HDMI HD Audio Enable audio for the onboard digital outputs. 44 English The default value is installed. Share Memory Configure the size of memory that is allocated to configure DRAM Voltage. 4.3.2 Chipset Configuration DRAM Voltage Use this to the integrated graphics processor when the system boots up. Primary Graphics Adapter Select a primary VGA. Onboard HD Audio Enable/disable onboard HD audio.
Set to Auto to enable onboard HD audio and automatically disable it when a sound card is [Auto]. Front Panel Enable/disable front panel HD audio. Onboard HDMI HD Audio Enable audio for the onboard digital outputs. 44 English The default value is installed. Share Memory Configure the size of memory that is allocated to configure DRAM Voltage. 4.3.2 Chipset Configuration DRAM Voltage Use this to the integrated graphics processor when the system boots up. Primary Graphics Adapter Select a primary VGA. Onboard HD Audio Enable/disable onboard HD audio.


